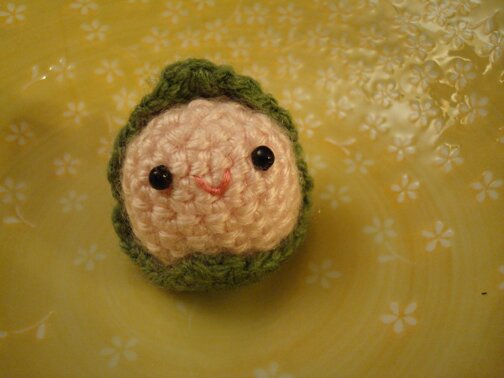
Earlier this week I mentioned that I was writing up a pattern (for the first time!) for sakura mochi – a Japanese dessert made with pink, cherry-scented rice granules, stuffed with red bean paste, and wrapped in a cherry leaf. After going to see the cherry blossoms today (pictures to come soon!) I figure I better get the pattern done before sakura season is over!
I apologize in advance if this is ridden with mistakes – please let me know if you see any. This is the first time I’m writing a pattern and I’m not sure if I ‘m doing it right… so any advice/help/comment/feedback/constructive criticism will be greatly appreciated!
Yarn: worsted or DK/Sport weight in pink and green
Hook: if using worsted – 3.5mm; DK – 3mm
Note: for the sakura mochi pictured, I used Bernat Satin (worsted) for the mochi and Mary Maxim Mellowspun (DK) for the leaf, because that’s just the colours I have in my stash. So I think if the same weight of yarn is used for both the mochi and the leaf, the leaf might look relatively bigger, but not significantly, I don’t think. In fact I would like my leaf to be bigger, so it would stand out more and look more like a sakura mochi.
You will also need: 2 round black beads for eyes (I used 4mm), pink embroidery thread, stuffing, tapestry needle, sewing needle.
Here’s the pattern:
Mochi:
6 sc into magic ring, don’t sl st to join (6 sc), pull ring closed.
Row 1: 2 sc in each of the 6 sc in ring (12 sc).
Row 2: *2 sc in each of next 2 sc, 1 sc in each of next 4 sc*, repeat from * to * once more (16 sc).
Row 3-6: 1 sc in each sc (16 sc).
Row 7: *2 sc tog twice, 1 sc in each of next 4 sc*, repeat from * to * once more (12 sc).
Stuff mochi.
Row 8: 2 sc tog six times. Leave a 5 inch tail and fasten off.
With tapestry needle, weave tail through the top of the remaining 6 sc, pull top of mochi closed and fasten off.
Note: I ended up using the bottom of my mochi (i.e. the magic ring side) as the top, because it looked better and I could hide the loose ends in the leaf.
Cherry leaf:
Row 1: ch 4, 3 dc in 4th ch from hook, turn.
Row 2: ch 3, dc in first dc, 2 dc in each of next 2 dc, 2 dc in top of turning ch, turn.
Row 3: ch 3, 2 dc in next dc, 1 dc in each of next 4 dc, 2 dc in next dc, dc in top of turning ch, turn.
Row 4-5: ch 3, dc in each dc across, dc in top of turning ch, turn.
Row 6: ch 3, 2 dc tog, dc in each of next 4 dc, 2 dc tog, dc in top of turning ch, turn.
Row 7: ch 3, 2 dc tog three times, dc in top of turning ch, turn.
Row 8: ch 3, 4 dc tog. Fasten off, weave in tail.
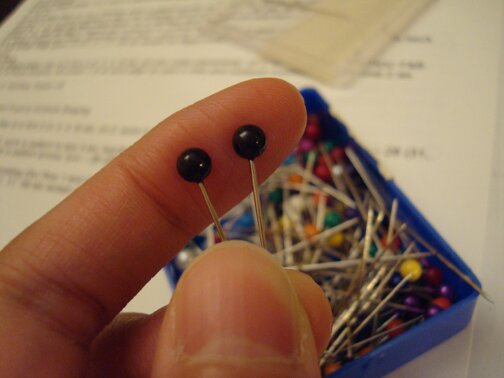
Before attaching leaf to mochi, sew on beady eyes and embroider cute smile with pink embroidery thread. If you like you can also do this before stuffing the mochi, but I find that I usually have a better idea of where to place the eyes and mouth after the amigurumi is stuffed and shaped. Plus, for this particular amigurumi I can hide the thread ends at the back in the leaf. I also like to find placement for the eyes with these pins first, as the pin head happens to be similar in size to the 4mm beads I use most often.
Finally, sew the mochi to the leaf with the some green yarn. And here you have it, a sakura mochi to celebrate the cherry blossom season!
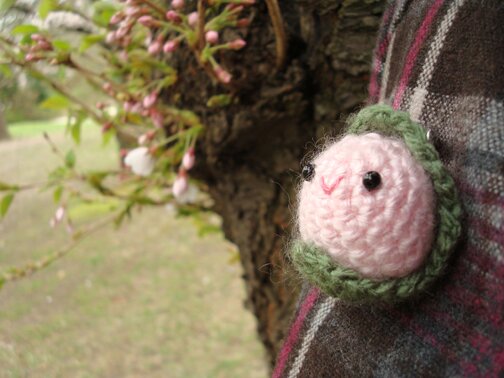
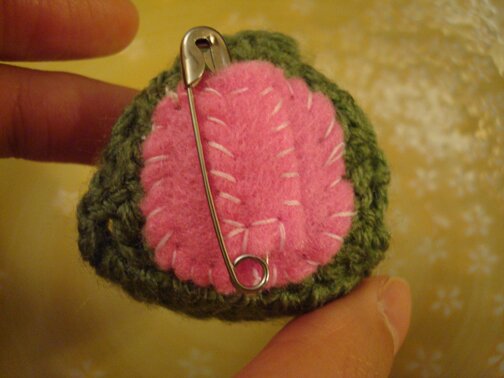
I wanted to make mine into a pin so that I can wear it to the hanami (have I mentioned that making special pins to wear on special occasions is one of my favourite things to do?). I just used a safety pin and attached it with small pieces of felt (I actually got this idea from my friend, who makes brilliant flower pins).
SO! here I am, enjoying the sakura with sakura mochi~
Don’t want to wear it as a pin? I suppose one can also attach a magnet on the back for a fridge magnet to keep all those take-out sushi menus in place? Or, if one is adventurous and has good eyes, one could make it with embroidery floss and perhaps a 2mm or smaller hook and make a cell phone charm? Or zipper pull for a backpack?
Ayhow, my crocheted sakura mochi has definitely added a touch of sweetness for me on this rather cold, rainy, grey spring day. I hope you enjoy the pattern!


I LOVE this pattern! It’s so adorable :D And so quick and easy to do. I think I’m going to make mine into a mobile phone charm :) No mistakes in the pattern that I could tell, by the way.
thank you for the feedback! I’m glad you enjoyed it!
so cute,and the walk through the park truly,breath taking.thanks