I thought after the Totoro sweater I should make a dressier cardigan for more grown-up occasions like interviews and work.
And today, I’m going to attempt to translate my scribbles and diagrams into an actual pattern! Yes, my diagram of a rectangle, a trapezoid, and several numbers on a single piece of sticky note. I did jot down these things so I can write the pattern later, and I’m sure they made perfect sense then, but how did I expect myself to make sense of it months later? Please bear with me as I try to write a pattern that makes sense, and please drop me a note if you have any questions!
Here’s the cardigan :D
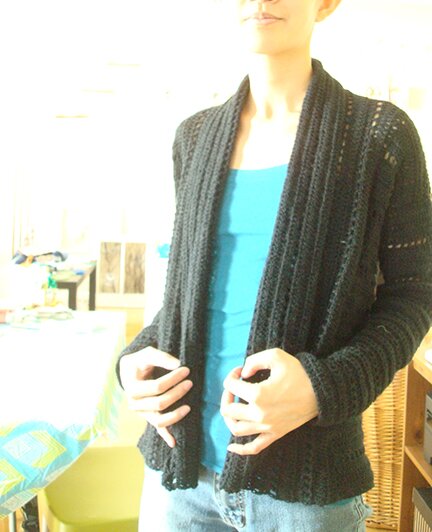
Because I made it in black (for dressiness, you see), I overexposed the photos a lot so you can see the details. I like shawl-style collars, they go well with most shirts. Except maybe collared shirts, but I don’t have many of those.
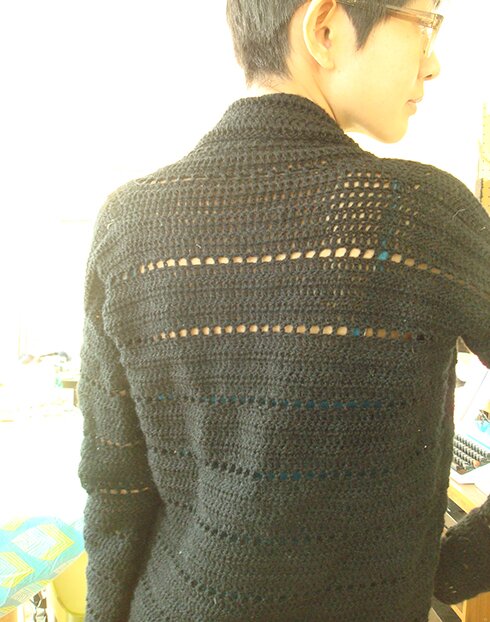
I added some simple details so it’s not just rows upon rows of double-crochet, which would be boring to look at and to make. Here’s the back…
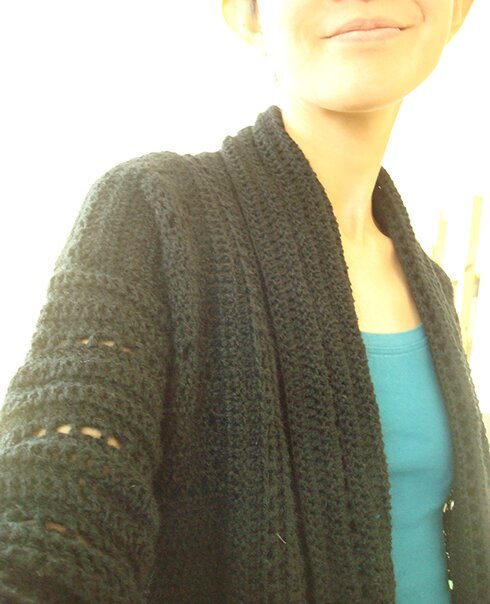
Here’s a close up of the shawl-collar…
The construction is extremely simple. There’s hardly any shaping, just a bunch of rectangular shapes sewn together, and then crocheting along the front and neck to make the collar. So I imagine it would be pretty easy to modify by adding or subtracting stitches as needed.
I got this yarn from my mom, who got it from my grandma in Hong Kong. There was never any label on it. But I compared it with my other yarn and it looks closest to fingering weight. One way to increase the size of the cardigan would be to use a heavier yarn (sport, DK, or worsted with good drape) and larger hooks (5–6.5mm).
Edit: Since I’m seeing A LOT of traffic to this post lately (thanks so much for visiting everyone! I have never had that many views before and I think the site might have crashed for a bit…), I’m reposting here my reply to a visitor’s comment below about adding stitches to the foundation ch to increase the size of the cardigan — hope this helps! As usual please feel free to drop me a note if you have any questions!
“to add width to the sweater shouldn’t be difficult, as they are just rectangles. you can add more stitches to the foundation ch. it’s approximately 10 stitches for 2 inches, and the sweater i made is 32″ around. so for example, for a size 36″ sweater I would add 20 ch to the back, and 6 ch to each of the front left and front right pieces (the eyelet row needs an odd number of stitches). so you can add ch in multiples of 10 and split them between the back, front left and front right pieces according to the size you need. the same goes for the sleeves. my sleeves are 11″ around at the widest part. you can also do more increase rows in between so the cuff wouldn’t become too wide, maybe increase every other dc row throughout after the first 6 rows. hope this helps!”
I used:
Fingering weight yarn, about 1600 yards
4 mm hook
Stitch markers (or contrasting colour scrap yarn)
Size:
Bust 32″, length 21″, sleeve length (underarm to cuff) 17″
Gauge:
6 rows of 10 dc = 2″ x 2″
Pattern:
Back
ch 83.
Row 1: dc in 4th ch from hook, dc in each ch across, turn.
Row 2: ch 3 (counts as a dc throughout), dc in each dc across, turn.
Rows 3–5: repeat row 2.
Row 6 (eyelet row): ch 4, skip first dc, dc in next dc, *ch 1, skip next dc, dc in next dc* repeat from * to * to end.
Row 7: ch 3, dc in first ch 1 sp, dc in next dc, *dc in ch 1 sp, dc in next dc* repeat from * to * to end.
For the rest of back:
Work in pattern so that there are 5 dc rows between eyelet rows, until there are 8 eyelet rows altogether, then work 5 more dc rows. There will be 53 rows altogether. Fasten off.
Right and left fronts (make 2)
ch 25.
Work in same pattern for back until there are 53 rows altogether. Fasten off.
Sleeves (make 2)
ch 41.
Work in rows 1–7 of back.
Row 8 (increase row): ch 3, 2 dc in next dc, dc in each dc until last dc, 2 dc in last dc, turn.
Rows 9–11: dc rows.
Row 12: eyelet row.
Row 13: dc row.
Repeat rows 8–13 four (4) more times. Basically, every second row after the eyelet row is an increase row.
Next: work 1 dc row, one increase row, one dc row, one eyelet row.
Next: *work 1 dc row, one increase row, one dc row, one increase row, one dc row*, one eyelet row. (Basically, every second and fourth rows after the eyelet row is an increase row.)
Next: repeat from * to *. Fasten off.
Assembly
With right sides facing each other (wrong side facing you), sew shoulders together.
With right side facing itself, fold sleeve in half lengthwise, mark the center at the top edge of sleeve. With right sides facing each other, pin the center of top edge of sleeve to shoulder seam. Pin the rest of the top edge of sleeve along the front and back pieces. Sew sleeve to front and back. Repeat for the other sleeve.
Sew side and underarm/sleeve seams together.
Turn cardigan right side out.
Collar
With right side facing, attach yarn to lower left corner of cardigan front. ch 3.
Row 1: Evenly crochet a row of dc up the left front, 2 dc tog in the last stitch of the left front and the first stitch of the back, place marker, dc along the top edge of the back, 2 dc tog in the last stitch of the back and first stitch of the right front, place marker, and dc down the right front, turn.
(What seems to work for me to evenly crochet a row along the edges: up and down the front pieces, crocheting into the side of a the rows — dc into the middle of the dc, then dc into the joint between 2 rows. It’s not exactly 2 dc in each row, it’s fewer stitches than that. When working across the back pieces, just dc into each dc.)
Row 2: ch 3, *dc in each dc until the stitch before marker, 2 dc tog, move marker up a row*, repeat from * to * once more, dc in each dc to end, turn.
Row 3: repeat row 2. Remove all markers.
Row 4: eyelet row.
Rows 5–7: dc rows.
Row 8: eyelet row.
Repeat rows 5–8 three (3) more times. Work 3 more dc rows. Fasten off. Weave in ends.
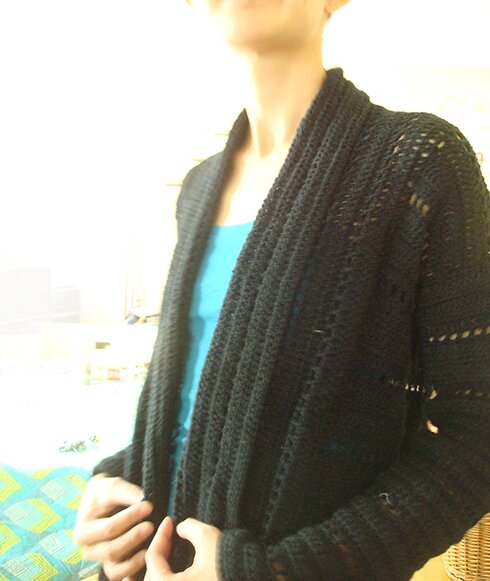
And here we have it, a grown-up-looking cardigan :)
Happy new year everyone! :D
I love it, thanks for sharing.
I wish I can make one someday =)
Have a lovely new year.
thanks Edith! hope you have a wonderful new year too!
This is a very lovely and simple sweater, Trish. Thank you for providing the recipe to crochet it.
I stumbled across this pattern on ravelry. I have a bunch of dark blue fingering weight yarn that I also received as a gift, and was looking for a pattern, and this one looks great! I do need to modify your pattern to be larger. I don’t think adjusting length of the cardigan or the sleeves will be difficult, but I never know how to adjust for larger bust. I’m hoping this won’t be too difficult since the front and back basically seem to be rectangles. I have a few other projects I need to finish first, but thanks so much for sharing this pattern!
thank you for visiting, Patricia!
hi Gina! thank you for visiting! to add width to the sweater shouldn’t be difficult, as they are just rectangles as you said :D you can add more stitches to the foundation ch. it’s approximately 10 stitches for 2 inches, and the sweater i made is 32″ around. so for example, for a size 36″ sweater I would add 20 ch to the back, and 6 ch to each of the front left and front right pieces (the eyelet row needs an odd number of stitches). so you can add ch in multiples of 10 and split them between the back, front left and front right pieces according to the size you need. the same goes for the sleeves. my sleeves are 11″ at the widest part. you can also do more increase rows in between so the cuff wouldn’t become too wide, maybe increase every other dc row throughout after the first 6 rows. hope this helps!
I would so love to do this in crochet thread for summer but it would have to be a larger size and I have no idea how to begin to figure that one out! Beautiful sweater!!
Hi Trish
I love this cardigan and think I’ll give it a go. I’ll have to enlarge it, so took note of your reply to Gina. May take me a while, but think it will be worthwhile. Thank you so much for sharing the pattern.
thank you for visiting Karen! i’ve made some suggestions in reply to Gina (above) on how to increase the size of the cardigan. it should be pretty simple as the cardigan is made up of rectangles, just make sure that all the pieces start with an odd number of ch. if you’re using crochet thread, i would also suggest using #3 crochet thread, or this really lovely cotton by Patton named Grace. happy crocheting!
thank you for trying out the pattern Margaret! please feel free to drop me a note if you have any questions!
Thank you so much for the share
you’re welcome Nadine!
hi,i am thinking of making this lovely pattern,but could you let me know the uk equivalent in yarn eg;4ply double knitting and the amount in grams thank you
hi Lynette, thanks for visiting! the yarn i used is 3 ply. and i found this handy conversion chart to convert yards to grams: http://www.mockingbirdknits.com/2014/05/05/yarn-weight-and-length-converting-yards-to-grams/
hope this helps!
hi! just a perfect day to find this one! it starts to cloudy in seconds so i often wear light-warm suits to my office but i don’t have much of it and i started wandering about making a cardi and here u come ^^ thank you for sharing, gonna give it a try real soon! and btw, your cardi really looks gorgeous!
Thanks so much Ursula! i’m glad this cardigan comes in handy for you, hope you enjoy crocheting it! :D
Beautiful sweater! I wonder what the the size difference would be if I used worsted weight yarn.
Thanks Anna! I’m not sure what the size difference would be, the only way to tell is to make a gauge swatch :)