Winter seems to be dragging on in my corner of the world, but that doesn’t stop us from getting ready for sandal weather and looking forward to blooming trees :)
Last year I tried crocheting shoes because I hate shoe shopping. I made some shoes and sandals with jute soles, I was quite happy with how the pattern turned out, but the jute sole turned out to be a bit bumpy and uncomfortable after walking in them for a while. Several friends have sent me this crocheted shoes pattern by Make & Do Crew, so I thought I’d try using flip flop soles this time.
And I think they turned out not so bad! :D
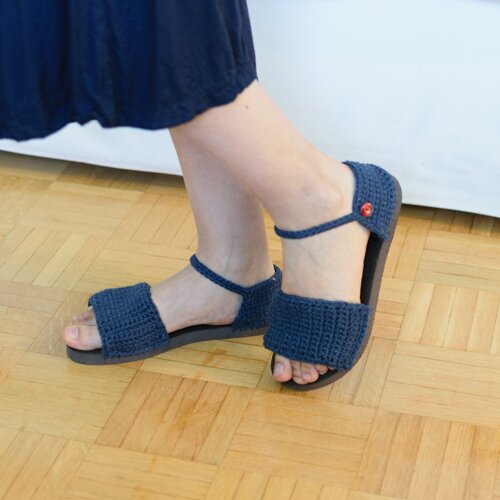
I thought I’d share how I made them here. As much as I’m sharing it with you, I’m also recording it so I can remember what to do when these wear out, because they’re really quite comfortable! If you try to make them I hope you’d like them too :) It took me just two evenings to make them and I was taking process photos and such, so it’s a fairly quick project. And apologies in advance about the poorly lit process photos! The weather has been so drab lately and the lighting in our apartment is bad :S but hopefully the what the photos are trying to show is clear! If not, drop me a note!
I used:
One pair of flip flops (I bought mine from Old Navy for about $5 CAD, in size 5)
One skein of Bernat Handicrafter Cotton (80 yrds, mine in Indigo)
3.5 mm hook, and a smaller hook (i.e. 2.5 mm) to weave in ends
Sewing needle
Sewing thread that matches the colour of yarn
2 half-inch buttons
A long sharp tool (I used an awl for bookbinding, but I know that’s not really an everyday handy tool, so I did a quick search for awl alternatives, and the results that came up were metal skewers and long crewel needles)
Masking tape or painter’s tape
Sharpie marker
Tape measure
Kitchen scissors
What I did:
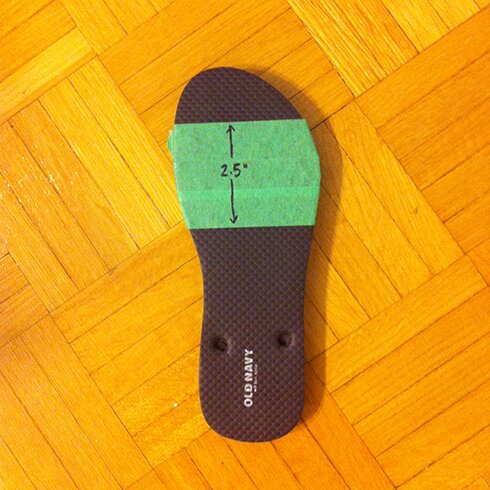
First, I cut off the straps on the sandals with kitchen scissors. I left the bits of plastic in the holes where the straps were attached though, because I plan on wearing these outdoor and I don’t want holes in the soles of my shoes.
I then put painter’s across the soles and wrapped around the sides, the top piece of tape positioned just a bit above where the straps were attached at the top of the sole. On mine it’s about 1.5″ from the very top of the sole, but that would probably be different if you have a different size shoe. It doesn’t really matter, as long as the tapes on both shoes are positioned the same way. I put a couple more pieces of tape across so that the taped area is 2.5″ in length. Again you can make it longer or shorter, as long as both shoes are the same.
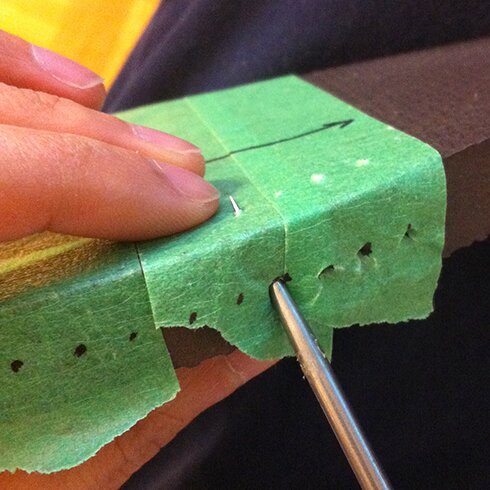
I then marked one side of the sole on the painter’s tape with a tape measure and marker, with a marking every quarter-inch apart, at about the midpoint of the thickness of the sole, starting at one edge of the taped area and ending at the other edge of the tape.
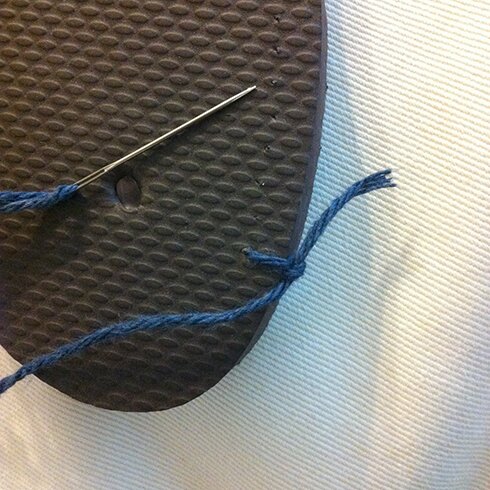
I then poked holes at the markings and going through diagonally from the side to the top of the sole, coming out about quarter-inch away from the edge at the top of the sole, like so…
Repeat marking and poking holes on the other side of the sole. Remove all the tapes.
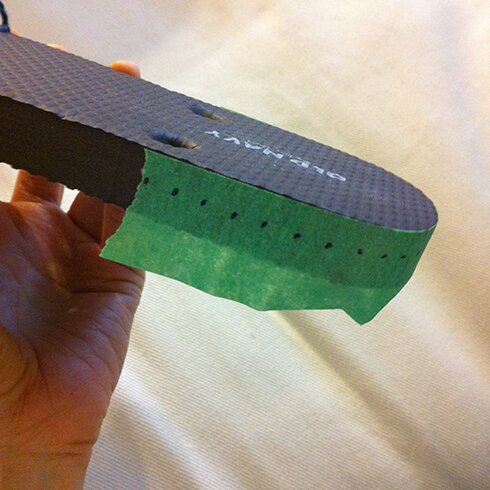
I put painter’s tape around the heel, starting and ending where the original sandal straps were attached at the bottom of the sole, and marked and poked holes in the same way I did one the sides of the sole. Remove the tapes when done.
Repeat for the other shoe. Make sure both shoes have the same number of holes!
With top of the sole facing, and a length of yarn and sewing needle, attach yarn to the first hole at the top on one side of the sole, like so…
Sew through the holes made with blanket stitch.

When you get to the last hole, reinsert the needle down from the top of the sole to the side of the sole, then tie off securely.
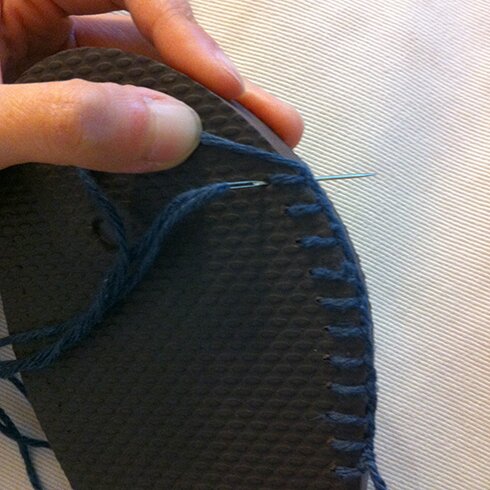
Don’t worry about all the loose ends, you can weave them in when you crochet the top and heel :)
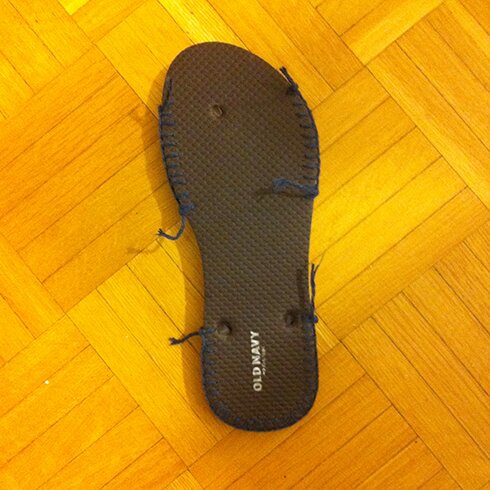
Repeat the blanket stitch on the other side of the sole and the heel, then repeat on the other sole. It will look like this.
Now we’re ready to crochet! :D
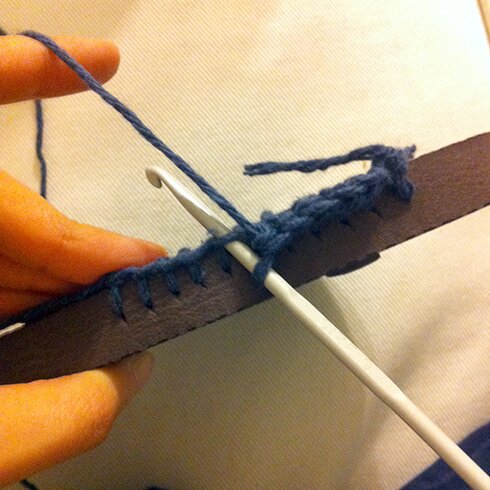
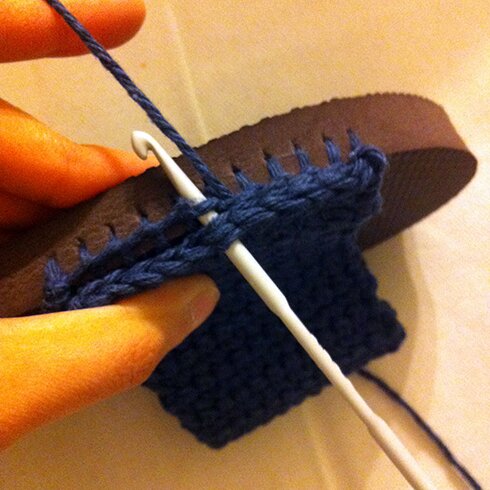
Left Sandal Top:
With a blanket stitch, you would have a vertical thread and horizontal thread in each stitch. Attach yarn to the vertical thread on the top right of the sole, work 1 sc around this thread, then work 1 sc around the horizontal thread right next to it, then work 1 sc in every horizontal thread to the end of the row, and placing last sc around the last vertical thread of the row.
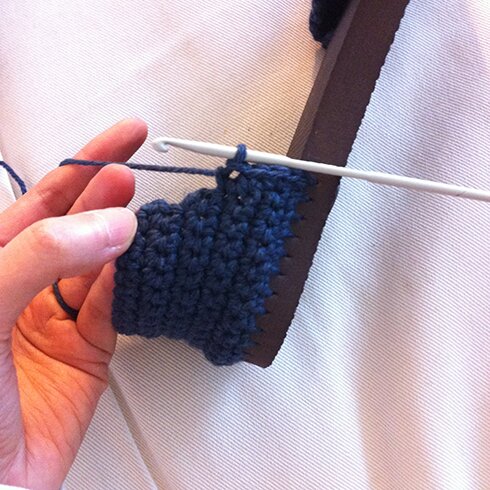
Second row and every row thereafter: ch 1 (does not count as a stitch), sc in each sc, turn.
You can put your foot on the sole and see how wide you need to make the top as you go. It’s good to make it a bit snug, I imagine it will stretch a bit as you wear it. There were 26 rows in mine. End with a wrong side row.
Attach row: sl st in top left vertical thread of the blanket stitch on the sole, then sl st together next sc on the sandal top and next horizontal thread of blanket stitch on the sole, continue with sl st in next sc and next horizontal thread till end, end with sl st in vertical thread of last blanket stitch on the sole, fasten off.
Edging: Attach yarn to the vertical thread of the blanket stitch on the top right side of the sole, ch 1, sc evenly across top edge of sandal top. I find that repeating [1 sc in each of the next 3 end of sc row, skip 1 end of row] seems to work well. Ending with sl st in vertical thread of blanket stitch on the top left side sole, fasten off.

Repeat edging on the bottom edge of the sandal top. Weave in ends.
Left Sandal Heel:
Attach yarn to first vertical thread on the right side of the sole, work 1 sc around this thread, then work 1 sc in the horizontal thread right next to it, then work 1 sc in every horizontal thread to the end of the row, and placing last sc around the last vertical thread of the row.
Row 2–3: ch 1 (does not count as a stitch), sc in each sc, turn.
Row 4 (decrease row): ch 1, skip first sc, sc in next sc and each sc till there are 2 sc left, 2 sc tog, turn.
Repeat rows 2–4 twice more. Fasten off.
Edging: Attach yarn to the first vertical thread on the right side of the sole (same stitch where the heel started). ch 1, sc evenly up the side of the heel. I find that repeating [1 sc in each of the next 3 end of row, skip 1 end of row] seems to work well.
When you reach the top of the right side of the heel piece, ch 30, sc in the 6th ch from hook, sc in every ch (strap made), then sc in each sc across the top of the heel, then sc evenly down the other side of the heel, end with sl st in last vertical thread of the last blanket stitch on the heel, fasten off. Weave in ends.
Attach button with matching thread to the top left corner of the heel piece.
Right Sandal Top:
Make as left sandal top, except start by attaching yarn to the bottom left vertical thread on the sole.
Right Sandal Heel:
Make as left sandal heel, except when crocheting edging, work sc evenly up the right side of the heel piece, then sc in each sc across the top of the heel piece, then ch 30, sc in 6th ch from hook, sc in each ch, then work sc evenly down the left side of the heel piece.
Finishing:
Sew button on each heel piece opposite of the strap.
Ready to roll :D
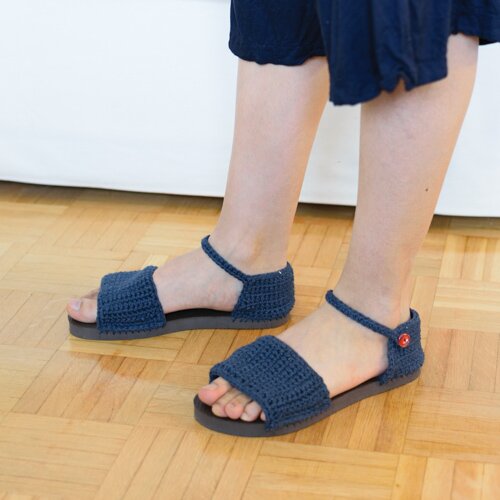
These are fairly plain-looking, but they’re my first try, and I do like simple designs. But maybe one day I’ll try to incorporate fancier stitch pattern or a closed toe version! As always if you have any questions please feel free to leave a comment below :)
Hope everyone is having a good weekend!
is there anything that you don’t create? Once again, I am so impressed with this project:::
haha thanks Patricia! :D
Wow great idea! Thanks for sharing!
Thanks so much Emilee! :D
Thanks for sharing!! You just jogged my crochet creativity, think I’ll see what kind of sandals I can come up with.
thanks so much for visiting Conie! i’m glad you like the pattern. Happy crocheting!