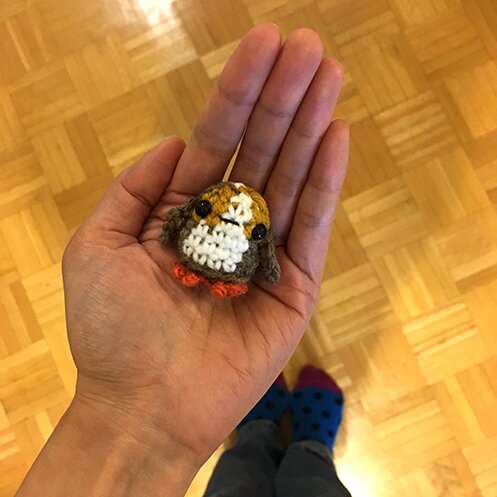
I made a tiny porg!
Fan opinions about them seem to polarize. I happen to love them like I love all fuzzy round-shaped creatures. Its shape is so amigurumi-ready, and it reminded me of my penguin tots. I couldn’t help but had to make one.
If you’ve made the penguin tots before, the porg is not different structurally but a bit more complicated with the colour changes.
It’s very carry-able and rides well in pocket, so it can always be with you :)
The upturned mouth of the actual porg makes my tiny version look sad, so I opted for a regular mouth instead.
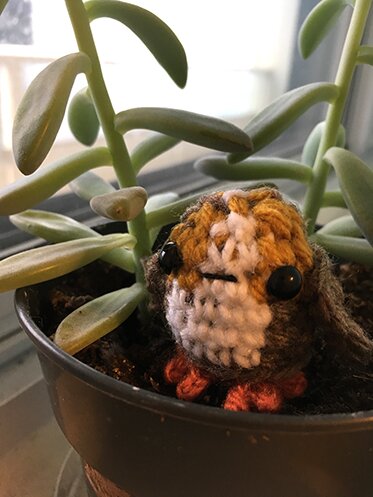
Here it is contemplating life, or deciding what to eat for lunch, by the jade plant.
To make your own tiny porg, you’ll need:
Small amount of mustard, white, brown and orange yarn in worsted weight
3.5 mm hook
2.5 mm hook (for feet and weaving in ends)
2 black safety eyes (3mm), or round black beads
Black thread and sewing needle
Yarn needle
Yarn ends (for stuffing), or polyester stuffing
Pattern:
Body:
Note: beginning ch 1 does not count as a stitch throughout.
Round 1: With brown, ch 4, 2 sc in 2nd ch from hook, sc in next ch, 3 sc in last ch, sc in the remaining loop of the next ch (the ch that has only 1 sc in it), sc in the next ch (the ch with the beginning 2 sc in it), sl st in first sc of round.
Round 2: ch 1, 2 sc in first sc, sc in next 3 sc, 3 sc in next sc, sc in next 3 sc, sc in next sc (the sc with the beginning 2 sc in it), sl st in first sc of round.
In the next round we begin to incorporate other colours. Here’s a tutorial on how to change colours seamlessly, in case it’s helpful.
Round 3: ch 1, in back loop only, sc in next 7 sc. When completing the 7th sc, attach and change to white. Carrying the brown yarn (i.e. wrap it in your stitch) as you crochet with white, sc in the next 4 sc. When completing the 4th sc, change back to brown, sc in last sc, sl st in first sc.
Round 4: With brown, ch 1, sc in next 7 sc, change to white, carrying the brown as you go, sc in next 4 sc, change to brown, sc in last sc, sl st in first sc.
Round 5: Repeat round 4.
Round 6: With brown, ch 1, sc in next 6 sc. Change to yellow and carrying brown as you go, sc in next 2 sc, change to white and carry the brown and yellow as you go, sc in next 2 sc, change to yellow and carry the brown as you go, sc in next 2 sc, change to brown, sl st in first sc.
Round 7: Repeat around 6.
After round 7, install safety eyes (or sew on beads for eyes) in between the 2 yellow stitches between rounds 6 and 7. Sew on mouth. Stuff with yarn ends or stuffing.
Round 8: With brown, ch 1, 2 sc tog three times, change to yellow and fasten off brown, 2 sc tog with yellow, change to white and carry the yellow as you go, 2 sc tog with white, change to yellow and fasten off white, 2 sc tog with yellow, sl st in first sc of round, fasten off, leave a long tail. Weave the tail in the remaining stitches around and cinch the opening close, secure and fasten off, weave in ends.
Wings (make 2): With brown, ch 2, 5 sc in 2nd ch from hook, ch 2, sl st in 2nd ch from hook (forming a point), sc in ch with the 5 sc in it, sl st in first sc of round, leave a tail for sewing, fasten off. (I only leave a tail for sewing on one wing, not both.
Sew on wings: Position the wing with the yarn tail for sewing on the side of the body, thread the yarn needle in the yarn tail, insert needle where you want the first wing, pull the needle through the body so the needle comes out on the other side where you want the other wing to be. Thread the other wing through the needle, and sew back and forth through the body to secure both wings at the same time. Fasten off, weave in ends.
Feet:
Feet are made linked together with a few ch in between.
With orange, *ch 3, sl st in 2nd ch from hook, sl st in next ch, ch 2, sl st in 2nd ch from hook, sl st in very first ch made, ch 3, sl st in 2nd ch from hook, sl st in next ch, sl st in very first ch made*, ch 2 (link between feet), then repeat from * to * once more. Fasten off and leave a long tail for sewing.
Position feet under body and sew on with yarn tail, fasten off and weave in ends.
The porg is ready for adventures!
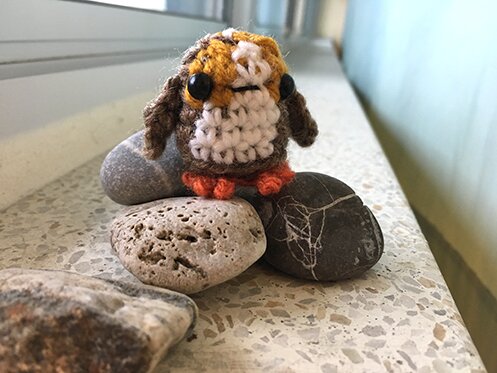
Tiny porg wishes everyone an awesome week!
Adorable, ravissant et attendrissant! Je ne suis pas sûre de le réussir mais j’ai bien envie d’essayer, il est trop mignon!
thanks Claudine! i hope you’d give it a try — it’s not too difficult :) happy crocheting!