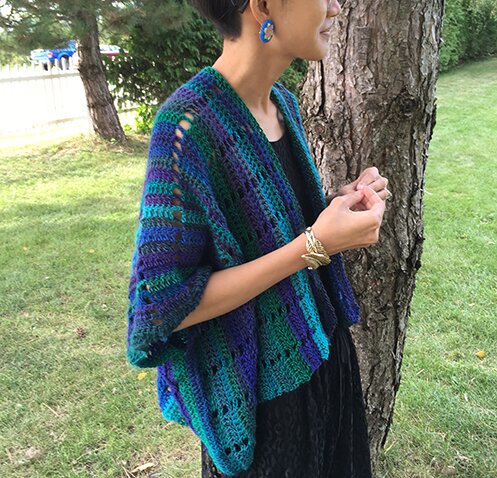
A quick kimono style cardigan/shrug I pulled together to wear to my cousin’s wedding this weekend :) Can’t come up with a more poetic name, but thought it looks pretty fab (if I do say so myself), so fab kimono it is :D
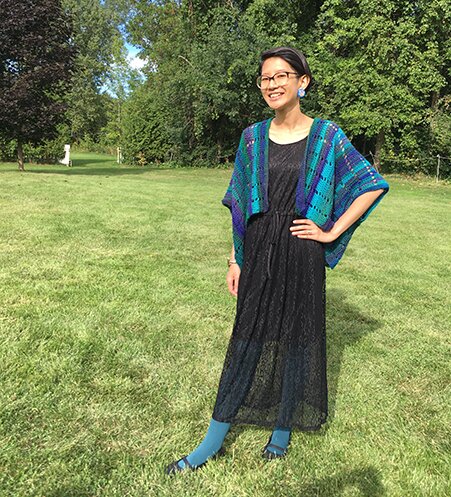
I had quite a bit of leftover Red Heart Unforgettable after making a scarf as a gift, so I bought another skein to make this. It’s cropped length because I was going to wear this long black dress and wanted some contrasts in style. But it’s easy to make longer if you’d like.
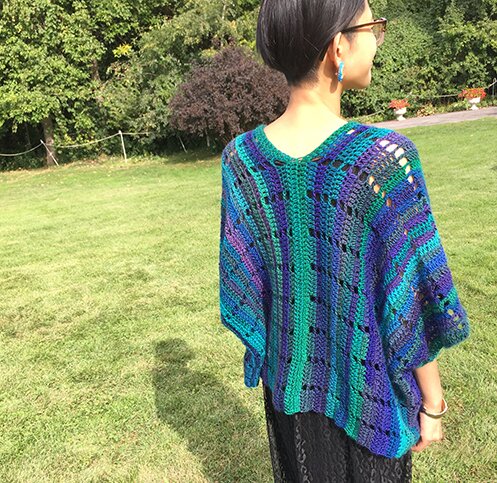
It’s crocheted from side to side, making both front and back pieces at the same time (so there’s no seaming in the middle!). It is then folded in half with just 2 short sides to seam at the end.
With autumn in the air I think this is a good layering piece for wearing with summer dress, t‑shirt, long sleeve shirt, or even buttoned up collared shirt.
Size:
Length (shoulder to lower edge) — 17″
Around — 60″
Gauge:
16 st = 4.5″
I used:
3 skeins of Red Heart Unforgettable in Dragonfly
6.5 mm hook
Tapestry needle
Smaller hook to weave in ends with
Pattern:
Left front/back:
Row 1: fdc 126 (see instruction for foundation double crochet or fdc here)
To increase length, add 16 fdc for every 4.5″.
Row 2: ch 3 (counts as 1 dc), dc in next 5 dc, ch 2, sk 2 dc, *dc in next 6 dc, ch 2, sk 2 dc* repeat from * to * to end, dc in last 6 dc.
Repeat row 2 until piece measures 15″ (approx. 26 rows).
Next row: dc in every dc and 2 dc in every 2 ch sp.
Split right front:
Next row: ch 3, dc in next 62 dc, fdc 63 and leave the remaining dc from previous row unworked.
Repeat row 2 of left front/back until piece measures 15″ from split.
Last row: dc in every dc and 2 dc in every 2 ch sp. Fasten off.
Assembly:
Fold piece in half so that the split is perpendicular to the fold line. The fold line will be the shoulders.
Sew side seam together by attaching yarn at the lower edge, matching stitches on front and back pieces, sew together the next 30 dc. Fasten off. Repeat on the other side seam. Weave in ends.
Wear and be fabulous!
It’s beautiful and I think the name fits it because I think it is FAB too. Thanks for sharing it with us.
Thanks so much Janice! :D
Très, très joli châle, la couleur est superbe et vous êtes resplendissante sur ces photos§
thank you so much Claudine! :D
Very nice you can even wear it with a pair of jeans got to go and look for yarn, Thank you for sharing the pattern.
I’m very excited to add this to my Ravelry queue. It looks to be a great pattern for Christmas gifts and also for me! Thanks so much .
glad you like it! :D
thank you! :D happy crocheting!
I am having a a hard time figuring out how to fold this! Can you help me, maybe?
hi Veronica, thank you for giving this pattern a try! when folding it, just make sure that the split is in the middle and it’s perpendicular to the fold line. so the split becomes the front of the cardigan. i hope this makes sense? happy crafting!
Lovely kimono. I have a problem after the split. I turned the left front/back and continued with “next row” instructions. However the garment comes out uneven and longer on one side. Did I make the wrong turn?
Hi Linda, thank you for giving the pattern a try. It doesn’t sound like you made a wrong turn, but perhaps there’s a miscount in the fdc in the “next row” instruction, causing the one side to be longer than the other? I can’t be sure without seeing the garment, so I hope this helps.