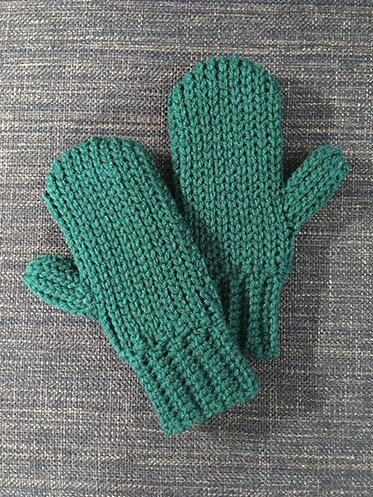
Really enjoying working with slip stitch after making the lunar new year bamboo. I like the slower pace of working up the fabric with this stitch. And I figured it would be a dense enough stitch to make a warm pair of mittens.
I used:
Worsted weight yarn
5.5 mm hook, and a smaller hook for weaving in ends
Tapestry needle
The mitten is crocheted flat in one piece, folded in half at the thumb, and seamed together from the tip of the thumb to the cuff edge. The photos that follow will help make sense of the construction.
All sl st worked through back loop only (BLO).
Mitten measures 9″ long, 4″ across palm, 3″ across wrist, 2″ length of thumb. I have relatively small hands. The mittens can be made larger with additional ch in the beginning and beginning ch of thumb, and additional rows between rows 7 and 15Â
Pattern:
Row 1: ch 23, sl st in second ch from hook, sl st in every ch to end, ch 2 (these two extra ch increase the length by 1 st).Â
Row 2: sl st in 2nd ch from hook, sl st in every st BLO (back loop only) to end.
Row 3: ch 1 (does not count as a stitch), sl st in every st to end, ch 2.
Row 4: repeat row 2.
Row 5: repeat row 3.
Row 6: repeat row 2 (25 st altogether).
Row 7–15: ch 1, sl st in ever st BLO to end. Â
Row 16: ch 1, sk first st, sl st in next st and every st to end (skipping the first st decreases 1 st).
Row 17: ch 1, sl st in every st to end.
Row 18: repeat row 16.
Row 19: repeat row 17.
Row 20: repeat row 16.
Row 21: repeat row 17 (22 st altogether).Â
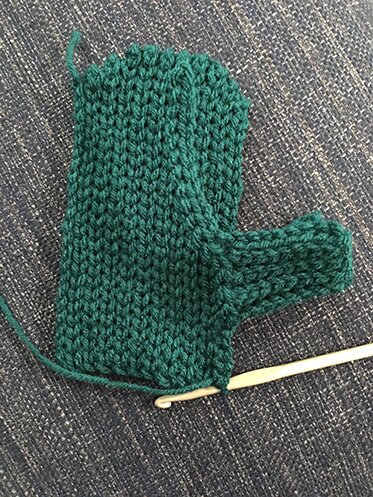
Row 22 (thumb begins): ch 1, sl st in the first 12 st, ch 7, sl st in second ch from hook, sl st in every ch BLO, sl st in next st on the side of mitten.
Thumb row 1: ch 1, sl st in every st on thumb to end (8 st on thumb)
Thumb row 2: ch 1, sl st in every st on thumb, sl st in next st on the side of mitten.
Repeat thumb rows 1 and 2 three more times.Â
Continue working 10 rows on thumb, without attaching the end of the row to the side of the mitten.

Don’t fasten off. ch 13, sl st in second ch on hook, sl st in every ch, work 5 sl st across the base of the 10 rows of them that are not attached to the body of the mitten, work 5 sl st into the remaining 5 st in the side of the mitten. It will end up looking like this with the thumb folded in half.
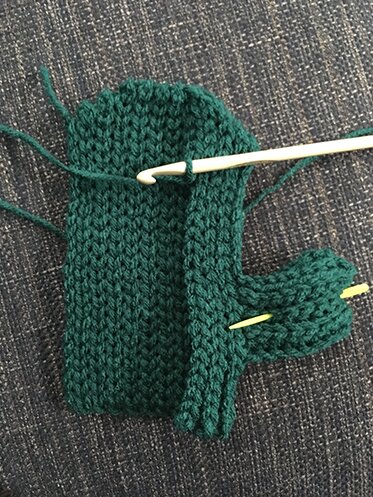
Repeat rows 2 to 21 of mitten. I found that it was easier to fold the thumb in half and pin it together as I worked along so I don’t get confused about which direction I was going.
Fasten off.Â
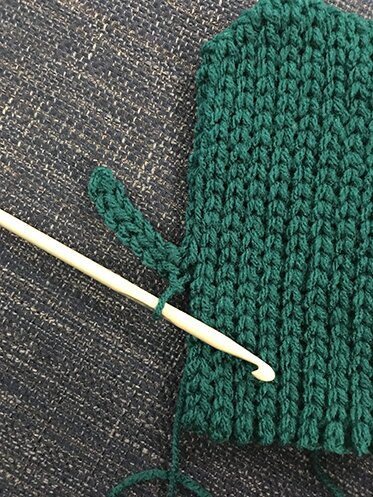
Cuff: Attach yarn to edge of cuff (directly opposite of where last row ended), ch 11, sc in second ch from hook to end of ch, sl st in next stitch in the mitten that looks like a “v”, sl st in next st that looks like a “v”, sc BLO in every sc to end. The mitten here is pictured upside down with the first cuff row started.Â
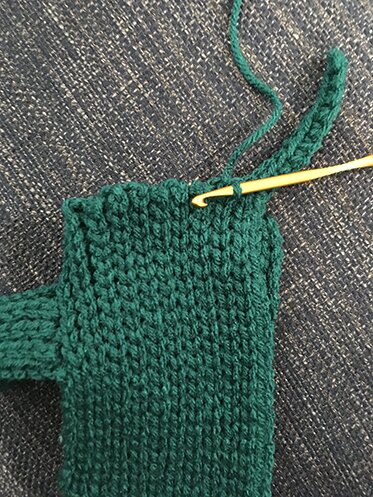
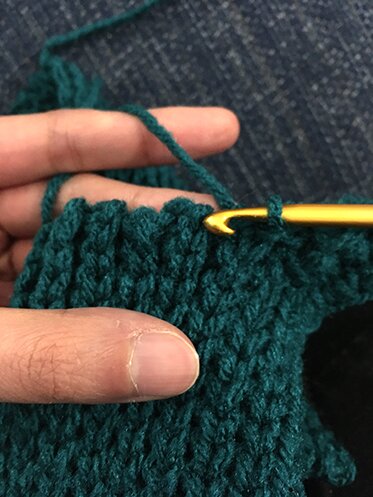
Continue across the edge of the cuff. Here is a close up of the hook pointing at the middle of the stitch that looks like a “v”.
Attach yarn at the top of thumb. Weave yarn through all the stitches in top of thumb, cinch and tie off. Continue seaming down the thumb and around the mitten to edge of cuff. Fasten off and weave in ends.Â
The mittens are actually fairly quick to work up. If you’re in/near Toronto, consider joining us in the annual Warming Toronto event on Sunday, February 9. We spend an afternoon at at a pub downtown, knit, crochet, loom, have a pint, share snacks, chatter, and make hats, mitts, scarfs, cowls, etc. for distribution at emergency shelters over the winter months. If one mitten is finished at home first, one can definitely finish the pair while hanging out for a few hours at the event. Â
Stay warm! ❄