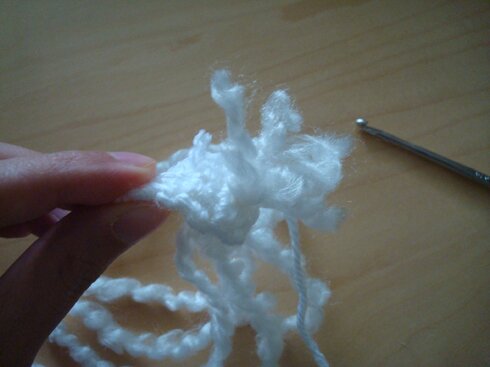
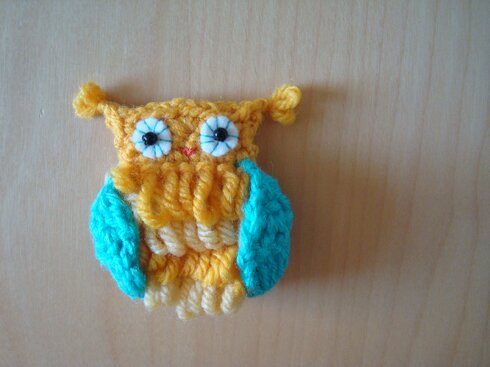
hoot!


owl

Took a while to fig­ure this one out. I ini­tial­ly just want­ed to make a flat owl shape, but thought it would be nice to give it some tex­ture. I tried incor­po­rat­ing the v‑stitch but it did­n’t look quite right… so I thought I’d try the loop stitch again and I think it looks rather fluffy and cute! It looks like the loop stitch is becom­ing one of my favourites (I’ll have to show you a larg­er scale project that I just fin­ished, involv­ing hun­dreds of loop stitch­es). Hope you like it as much as I do!

By the way, I found a slight­ly dif­fer­ent way of mak­ing the loop stitch on We are Knit­ters, which seems a bit more secure. The video tuto­r­i­al can be viewed here (nice music too!).

So! The pattern!

I used:

Worsted weight yarn in 2 shades of yel­low and blue

3.5 mm hook

Nee­dles for sewing and embroidering

Blue and orange thread for embroi­der­ing beak and eyes

A bit of white felt for eyes

Two black round beads for eyes and black thread for sewing on eyes

Body front:

Notes: it’s worked from top to bot­tom to accom­mo­date the direc­tion of the loops, then reat­tach yarn to cro­chet the head. For the 2 dif­fer­ent shades in the body, MC is main colour and CC is con­trast­ing colour. Car­ry the colour that is not in use up the rows when switch­ing colours.

With MC, ch 8

Row 1: sc in 2nd ch from hook, sc in each ch across, turn.

Row 2: ch 1 (turn­ing ch 1 does not count as a st), lp st (loop stitch) in each sc across, turn.

Row 3: change to CC, ch 1, 2 sc in first st, sc in each st across until sec­ond last st, 2 sc in last sc, turn.

Row 4: ch 1, lp st in each sc across, turn.

Row 5: change to MC, ch 1, 1 sc in each st across, turn.

Row 6: ch 1, lp st in each sc across, turn.

Row 7: change to CC, ch 1, 2 sc tog over first 2 st, 1 sc in each st across until last 2 st, 2 sc tog over next 2 st, turn.

Row 8: ch 1, lp st in each sc across, turn.

Row 9: change to MC, ch 1, 2 sc tog over first 2 sc, 1 sc in each st across until last 2 st, 2 sc tog over next 2 sc, turn.

Row 10: ch 1, 1 sc in each sc across, fas­ten off.

Now we make the head.

With MC and wrong side fac­ing you, attach yarn to the first row of body.

Row 1: ch 1, 1 sc in each st across, turn.

Row 2: ch 2, sl st in 2nd ch from hook, 1 sc in each of the next 3 sc across, 3 sc in next sc, 1 sc in each of the next 3 sc across, ch 2, sl st in 2nd ch from hook, sl st in the bot­tom of last sc just made (i.e. in the first sc of pre­vi­ous row), fas­ten off.

Back:

Note: back is worked from bot­tom to top in one piece and with MC only.

ch 7

Row 1: ch 1, 1 sc in each ch across, turn.

Row 2: ch 1, 2 sc in first sc, 1 sc in each sc across until sec­ond last sc, 2 sc in last sc, turn.

Row 3: ch 1, 1 sc in each sc across, turn.

Row 4: Repeat row 2.

Row 5–7: Repeat row 3 (i.e. work even).

Row 8: ch 1, 2 sc tog over first 2 sc, 1 sc in each sc across until last 2 sc, 2 sc tog over last 2 sc, turn.

Row 9: ch 1, 1 sc in each sc across, turn.

Row 10: work even.

Row 11–12: Repeat rows 1–2 of head. Fas­ten off, leave long tail for sewing.

Wings (make 2):

Leave 3–4 inch­es of tail for sewing, ch 4

Row 1: 2 dc in 4th ch from hook, turn.

Row 2: ch 3 (turn­ing ch 3 counts as a stitch), 2 dc in next dc, dc in top of begin­ning ch 3, turn.

Row 3: ch 3, 3 dc tog over next 2 dc and top of turn­ing ch 3. Fas­ten off, leave 3–4″ of tail for sewing.

Assem­bly:

Cut 2 cir­cles for eyes. I cut mine about 1/2″ wide, but you can make them small­er or larg­er if you like. Owl plush­es with giant eyes are very cool-look­ing too.

Sew eyes on the head of owl with blue embroi­der thread, if you like that look.

Embroi­der beak.

Sew on black beads to com­plete eyes.

Sew front and back togeth­er. I made two small loops at each ear while sewing but that’s option­al. If you’re mak­ing an orna­ment you may also want to make a loop with a rib­bon and sand­wich it between the front and back and sew it all together.

Attach the wings by tying the yarn tail at the top of wings to the top cor­ners of the first row of loop stitch, and the bot­tom of the wing to the bot­tom cor­ners of the last row of body. This sounds more com­pli­cat­ed than it is — you will eas­i­ly get it by look­ing at the picture :)

And we’re done!

Here’s the owl and me with an owl shirt on :D

Photo 2014-09-23, 10 18 31 PM

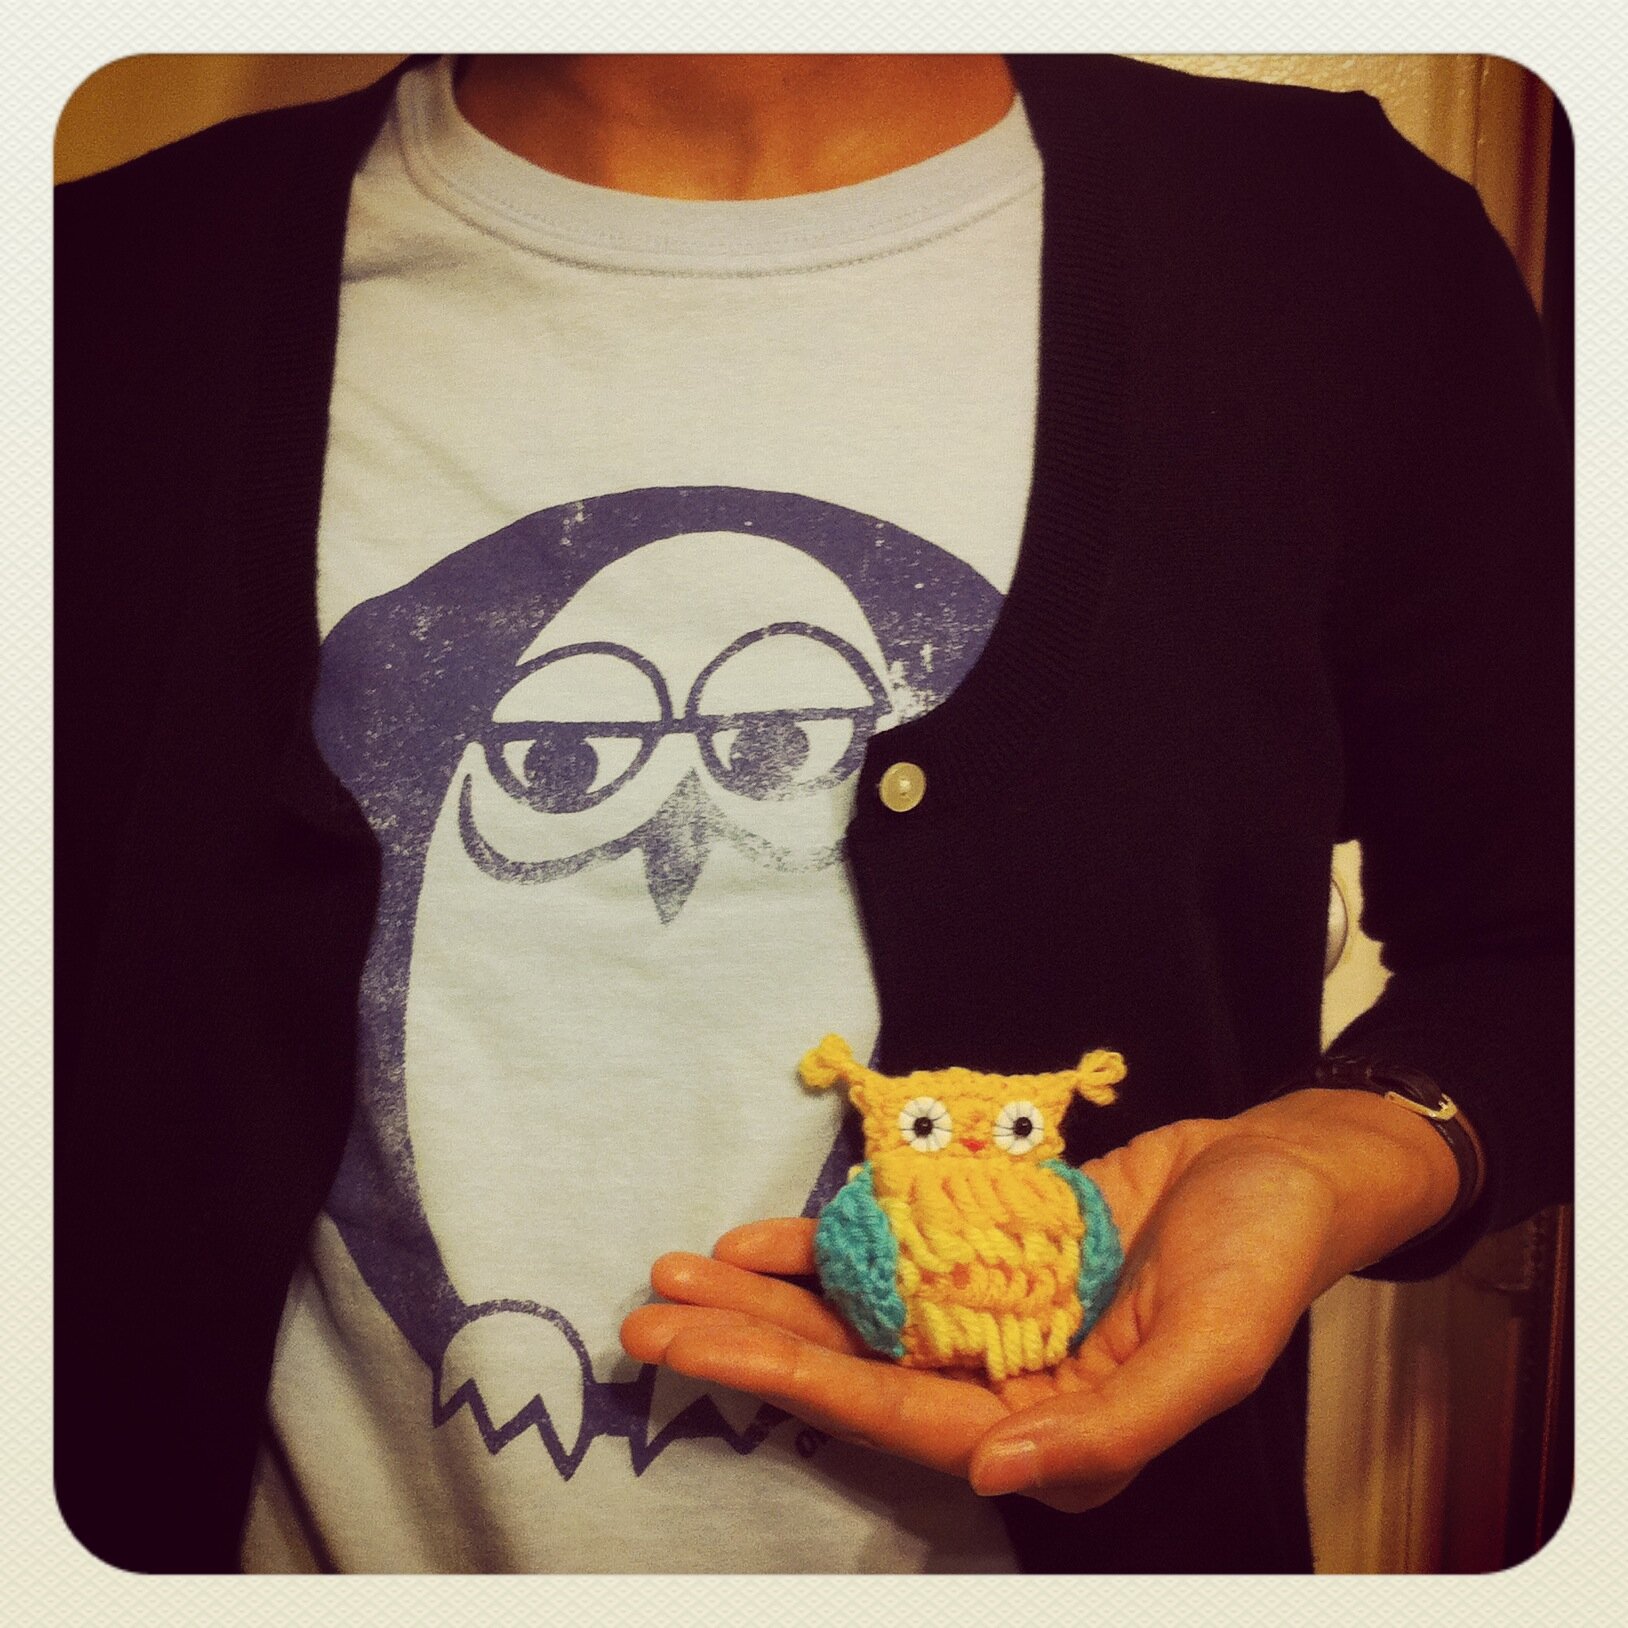
I love how fluffy he is :D

Would be fun to make it with dif­fer­ent colour com­bi­na­tions. And if I were to make anoth­er, I would prob­a­bly try to make the loops a bit smaller.

It would be so excit­ing to see the dif­fer­ent owls every­one makes!

Until next time — hap­py crafting!


mighty acorn

acorn 5

“Today’s mighty oak is just yes­ter­day’s nut that held its ground.” ― David Icke

(and yikes, I have real­ly dry hands…)


3rd pat­tern in the 12 Days of Wood­land Crea­tures (and Their Favourite Things)! Today we have the squir­rels’ favourite things — Acorns!

The mighty acorn would make a mighty oak, or a mighty good snack for the wood­land crea­tures. Either way it’s going to do good :D

An extra small acorn makes a won­der­ful neck­lace. Sim­ply attach a jump ring at the top and put a chain through ‑ voila!

acorn 1


Fun~ So I thought I would write the pat­tern for both the mini acorn and the reg­u­lar acorn. They’re very sim­i­lar, just slight­ly dif­fer­ent stitch counts.

For the acorns I want­ed to use a sock weight yarn in my stash that has very rich shades of brown, so I’ve used small­er hooks. But if you’re using worsted weight yarn you can just use the 3.5 mm hook as usu­al, and you would end up with a slight­ly larg­er acorn.

I used:

Sock weight yarn in brown and green

2.25 mm hook

Scrap yarn for stuffing

Red embroi­dery thread (option­al)

Nee­dle for sewing and embroidering

Pat­tern:

Note: instruc­tions are for mini acorn [reg­u­lar acorn in square brackets]

Cap:

Round 1: ch 4, sl st in 2nd ch from hook, sl st in next ch (you’ve just made the stem), ch 1, 8 [10] sc in next ch, sl st in first sc to join.

We’re basi­cal­ly cro­chet­ing a cir­cle with the stem in the cen­tre, so when join­ing you will have to go behind/around the stem, like so…

acorn 3


Round 2: ch 2, dc in same sc as start­ing ch, *dc in next sc, 2 dc in next sc*, repeat from * to * to end, sl st in top of turn­ing ch 2 to join. Fas­ten off and leave a long tail for sewing.

Nut:

6 sc in mag­ic ring, do not join.

sc in first sc, *2 sc in next sc, sc in next sc*, repeat from * to * 2 [5] more times.

sc in each sc until piece is 3/4″ tall. Fas­ten off, weave in end.

Assem­bly:

If you’d like, embroi­der a heart on the acorn by mak­ing two lazy daisy stitch (here’s a great tuto­r­i­al for it). But the acorn would be just as awe­some if you leave it plain.

Stuff the acorn with scrap yarn. Sew the cap on the nut using the long tail left on the cap. Because it’s so small I just sew right through the acorn in a cross-man­ner all around, sewing through the bot­tom edge of the cap and top edge of the nut, being care­ful not to pull too tight so the acorn would keep its plump shape.

And here we are! I made dif­fer­ent colours :D

acorn 4


They would make great pins with mini pin backs attached on the back. I think they would also make great hang­ing orna­ments on the tree or by the win­dow. You can also skip stuff­ing the acorn nut, squash the cap and acorn flat, then sew them togeth­er to make an applique.

Hope you enjoy the acorn pat­tern! Hap­py Mon­day! :D


saturday is white squirrel day!

white squirrel

Well, at least on this blog anyway ;)

Here comes the sec­ond pat­tern for the 12 Days of Wood­land Crea­tures (and Their Favourite Things)! To the awe­some vis­i­tors who have com­ment­ed on my last post — thanks SO much for join­ing me in the cro­chet-along! And to every­one — it is nev­er too late to join in the fun (details here)! You can make all or a few or just one of the 12 crea­tures you like. It would be real­ly great to see what every­one has cre­at­ed at the end!

AND! I’ve cre­at­ed a Rav­el­ry group! I thought maybe it will make it eas­i­er to share pic­tures. Please feel free to join if you use Rav­el­ry! I’ve nev­er made a Rav group before, bare­ly par­tic­i­pat­ed in one and not so sure about how they run… so we’ll see how it goes! :D

So, any­hoo, the elu­sive white squir­rels are leg­endary crea­tures in Toron­to’s Trin­i­ty Bell­woods Park (though I’m very sad :’( to find out that we just lost one recent­ly). There is a street and a cof­fee shop in the neigh­bour­hood named after the white squir­rel. I have yet to encounter a real one, so I just keep mak­ing cro­cheted ones. Appar­ent­ly there are also white squir­rels in Exeter, Ontario, which are not albi­no with red eyes, like the Trin­i­ty Bell­woods squir­rels, but just have white fur instead of the more com­mon grey or black fur. So I sup­pose the white squir­rel we’re mak­ing here today can be a vari­ety of the Exeter squir­rels. Actu­al­ly, I chose to give the squir­rel the reg­u­lar black eyes because I’m mak­ing it for a baby mobile, and the thought of tiny red eyes star­ing down at the baby is just… a bit strange.

I think the white squir­rel also makes a nice tree orna­ment! :D

The con­struc­tion of this squir­rel is rather sim­ple. It’s made out of 4 pieces: 2 head pieces and 2 body pieces. Oh and a fluffy tail.

I used, as usual:

Worsted weight white yarn

3.5 mm hook

Black beads for eyes

Nee­dle and thread for sewing and embroidering

A bit of pink yarn for embroi­der­ing the nose

A bit of fluffy white yarn for tail (like Bernat Boucle or Lion Brand Home­spun)

Pat­tern:

Head (make 2) — cro­cheted in rounds

Round 1: 6 sc in mag­ic ring, sl st in first sc to join.

Round 2: ch 1 (does not count as a stitch), 2 sc in each sc around, sl st in first sc to join.

Round 3: 1 sc in each of first 3 sc, sc in next sc, ch 3 (this is an ear), sc in same sc, 1 sc in each of next 3 sc, sc in next sc, ch 3 (this is anoth­er ear), sc in same sc, 1 sc in each of next 2 sc, 2 sc in next sc, 2 dc tog over next 2 sc (this is the nose), ch 2, sc in the same st as first sc of the round, sl st in next sc, fas­ten off, weave in ends.

*When fin­ish­ing the 2nd head shape, leave a long tail for sewing.

Body (make 2) — cro­cheted in rows

ch 4

Row 1: sc in 2nd st from hook, 1 sc in each of next 2 sc, turn (3 sc).

Row 2: ch 1 (does not count as a stitch), sc in each sc across, turn (3 sc).

Row 3: repeat row 2.

Row 4: ch 1, sc in first sc, 2 sc in next sc, sc in last sc, turn (4 sc).

Row 5: ch 1, sc in each sc across, turn (4 sc).

Row 6: ch 1, sc in each of next 2 sc, 2 sc in next sc, sc in last sc, turn (5 sc).

Row 7: ch 1, sc in each of next 3 sc, 2 sc in next sc, sc in last sc, turn (6 sc).

Row 8: ch 1, 2 sc tog 3 times, fas­ten off, weave in ends.

*When fin­ish­ing the 2nd body shape, leave a long tail for sewing.

Attach­ing tail:

1. Cut 6 pieces of the fluffy white yarn, each about 5–6 inch­es long.

2. Find a gap between stitch­es in the low­er cen­tre of the squir­rel body.

3. With cro­chet hook, pull each piece of the fluffy white yarn, one by one, through the same gap, leav­ing the long tails on one side of the body piece and short ends on the oth­er side, like so… (I hope you can see it alright… white yarn is a bit dif­fi­cult to photograph…)

DSC03670


4. Tie the short ends togeth­er by pair­ing them up and tying each pair in dou­ble knots.

Assem­bling body and head:

1. With all the short ends of the tail inside, sew the 2 pieces of body together.

2. Sew eyes and embroi­der nose on one head piece (I made a giant french knot with pink yarn for the nose).

3. Posi­tion the head pieces so that they sand­wich the body, with the nose cov­er­ing the top row (neck) of the body. Sew head togeth­er, and sewing through all head and body lay­ers when you get to the neck/nose area.

(If you’re mak­ing an orna­ment, you can make a loop with a piece of rib­bon and sand­wich it between the 2 head pieces at the top of the head before sewing the head together).

Posi­tion­ing the tail:

Curl the tail up in a posi­tion that you like on the side of the body. Take one piece of yarn from the tail and pull it through a stitch on the edge of the body through the front, where the head and body meet, then take the same piece of yarn and wrap it loose­ly but secure­ly around the entire tail once, then pull it through the same stitch on the body through the front again, and tie a knot at the stitch on the back to secure.

Trim tail to the length you like.

And the squir­rel is done! :D


Hap­py week­end, everyone!


12 days of woodland creatures

Intro­duc­ing!! 12 Days of Wood­land Crea­tures (and Their Favourite Things)!

Hedgehog

You’re invit­ed to a cro­chet-along! :D

I’ve been plan­ning this for a while now. Every year I try to do a “dai­ly prac­tice” kind of project, where I make some­thing every­day, as a way of keep­ing cre­ativ­i­ty flow­ing, like the square-a-day project. This year I was asked by a good friend to make a for­est-themed mobile for the newest mem­ber of her fam­i­ly (excit­ing!!). So, to hon­our my friend’s gen­er­ous spir­it I thought I would share how I make each crea­ture with every­one on this blog :D

And then I thought this would be a per­fect oppor­tu­ni­ty for a cro­chet-along! The crea­tures don’t only belong on a mobile, they can be used for a lot of dif­fer­ent things…

Brooches?

Applique?

Orna­ments? Maybe for an advent cal­en­der like this? Or, by the end of the project you would have a set of wood­land orna­ments for the Christ­mas tree, just in time for the hol­i­day season!

Char­ac­ters for felt sto­ry­boards, with vel­cro on the back?

Car­ry-along plush toys?

Pock­et pets?

Pos­si­bil­i­ties are endless :)


So! This is how it works: 

Every 2–3 days I will post a pat­tern for a cro­chet wood­land crea­ture (or its favourite things). And I won’t be pre-announc­ing what the crea­tures are, so it will be a sur­prise every time! At the end there will be 12 pat­terns. You can cro­chet along for all of the pat­terns, or just one, or pick the ones you like. And if you send me pic­tures or blog posts about what you have cre­at­ed, I will share it here, like our craft-along gallery a cou­ple of years ago (that was lots of fun! :D), then we can see all the dif­fer­ent and fun and cre­ative ways that every­one has used for the creatures!

I’d love to know if you’d like to join in the fun, please make a com­ment below! :D

AND!! Today we have our first crea­ture — yup, you guessed it. The hedge­hog!

hedgehog fuzzy

Love the fuzzy yarn on this one :)

I also learned the loop stitch in the mak­ing of the hedge­hog. There’s a great pho­to tuto­r­i­al of it if you haven’t made it before.

I used:

Worsted weight yarn — one colour for the body and a con­trast­ing colour for the head.

4 mm hook

2 small black beads for eyes (just one if you’re mak­ing a brooch)

Nee­dle and thread for sewing

Pink embroi­dery thread and brown yarn for embroi­der­ing rosy cheeks and nose


Note: the turn­ing ch 1 in this pat­tern does not count as a stitch. The pat­tern alter­nates between loop stitch (lp st) rows and sin­gle cro­chet (sc) rows, with the increas­es and decreas­es made in the sc rows and work­ing even in the lp st rows)

Pat­tern:

With body colour, ch 5

Row 1: sc in 2nd ch from hook, sc in each ch across, turn.

Row 2: ch 1, loop stitch (lp st) in each sc across (4 lp st), turn.

Row 3: ch 1, 1 sc in each of the next 2 lp st, 2 sc in each of the next 2 lp st, turn.

Row 4: ch 1, lp st in each sc across (6 lp st), turn.

Row 5: ch 1, 1 sc in each of the next 4 lp st, 2 sc in each of the remain­ing 2 lp st, turn.

Row 6: ch 1, lp st in each sc across (8 lp st), turn.

Row 7: ch 1, 1 sc in each lp st across, turn.

Row 8: ch 1, lp st in each sc across (8 lp st), turn.

Row 9 & 10: repeat rows 7 & 8 (8 lp st).

Row 11: ch 1, 1 sc in each of the next 2 lp st, *2 sc tog over next 2 lp st*, repeat from * to * twice, turn.

Row 12: ch 1, lp st in each sc across (5 lp st), turn.

Change to head colour, fas­ten off body colour.

Row 13: ch 1, sc in each lp st, turn.

Row 14: ch 1, 2 sc tog over first 2 sc, 1 sc in each remain­ing sc across, turn.

Row 15: ch 1, 1 sc in each of the next 2 sc, 2 sc tog over the remain­ing 2 sc, turn.

Row 16: 3 sc tog, fas­ten off.

If you’re mak­ing a dou­ble-sided hedge­hog:

Make a mir­ror image of the above hedge­hog shape by revers­ing the increas­es and decrease in the pat­tern, i.e. if the row ends with increase/decrease stitch­es in the pat­tern, start with increase/decrease stitch­es when mak­ing a mir­ror image, and vice ver­sa. Leave a long tail for sewing when fas­ten­ing off both the body colour and the head colour. Sew on eyes, embroi­der nose and rosy cheeks, then sew the two hedge­hog shapes togeth­er, using the long tail of head colour when sewing the head sec­tion and the long tail of body colour when sewing the body section.

If you’re mak­ing a sin­gle-sided hedge­hog, like a brooch:

Make a back piece for the hedge­hog using head colour fol­low­ing the pat­tern above, replac­ing all lp st rows with sc rows. Sew pin back to the back piece, sew on eye, nose and rosy cheek, then sew the back piece to the hedgehog.

And that’s it! You have a new hedge­hog friend :D

Hope you like the pat­tern, and please drop me a note if you want to join me in cro­chet­ing along!