I don’t usually wear nail polish. I actually don’t own any nail polish before this. I don’t really like how it feels on my fingernails, if that makes sense… Though I do like seeing it on other people’s nails.
And it’s sparkly, and comes with built-in brushes! It’s the best craft material ever.
So! I had an idea to turn some humble buttons into sparkly earrings with nail polish. And it worked!
Festive and sparkly but not too flashy, and VERY simple to make. Makes a nice last minute gift too :) It will take more than a minute though, the drying in between takes a bit of time. So I would do other things in between, like sleep, go to work, eat, watch TV, work on other crafts, etc. Do refrain from sitting there and watching it dry, like I did when I made the first pairs, because I just couldn’t wait to see how it would turn out! Nothing wrong with that. Except for the headache that the nail polish fumes gave me :S
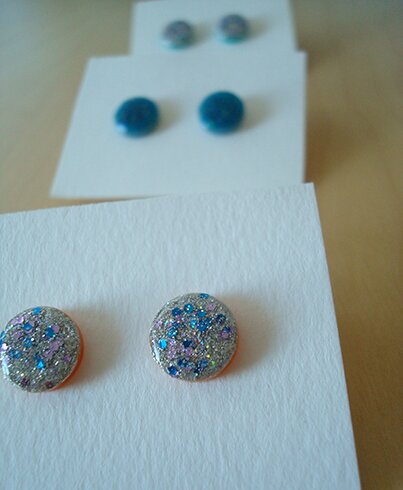
I made a couple of pairs for the physical shop and some as gifts :)
I used:
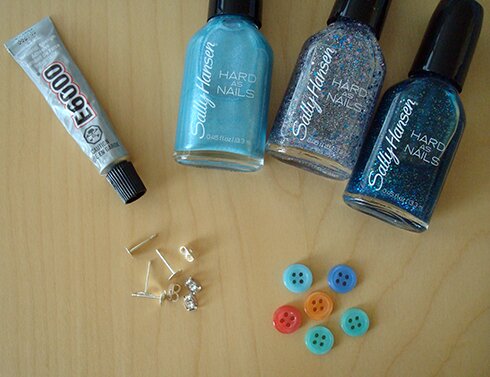
Nail polish — a metallic opaque colour and some glittery varieties (I got these from the dollar store for $2 each)
Ordinary round buttons
Earring posts and backings
E6000 glue (or GOOP works well too, from my experience)
Gloss acrylic varnish (not pictured, because I don’t think you need it, I just have it on hand. It can be bought at art supplies stores and craft stores. I got mine at Michaels)
What I did:
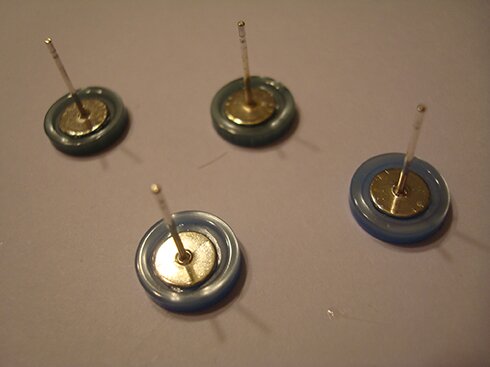
Glue earring posts on buttons with E6000. Let it dry/cure overnight.
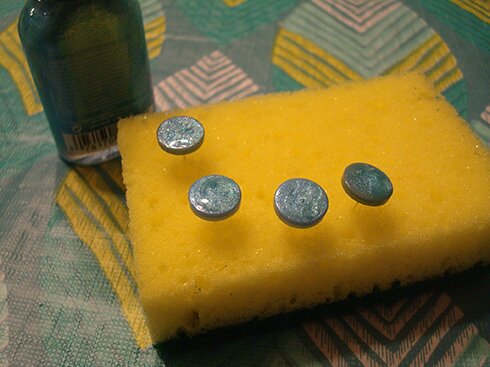
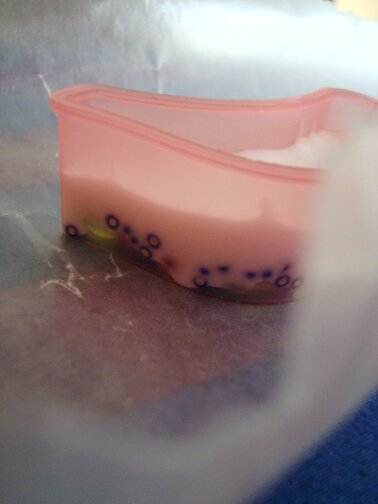
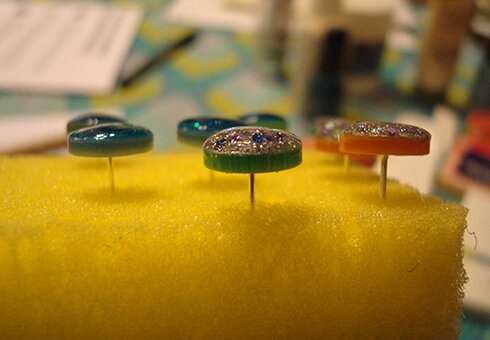
Stick the earrings on a piece of foam (I used a new kitchen sponge). Paint on first coat with opaque colour. Carefully put on a good, thick layer without it spilling over the edge. The nail polish will sink into the button holes and dents will appear, so just put on more thick coats after the each coat is dry to the touch (about half an hour), until the dents disappear.
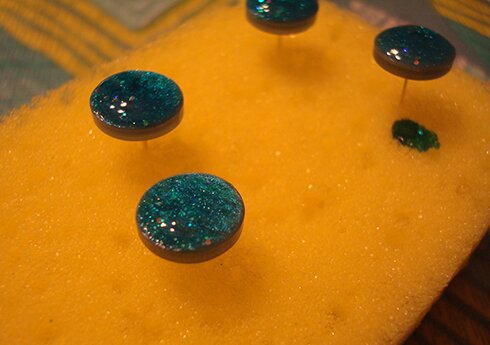
And now put on thick coats of the sparkly colours. I did 3–4 coats, waiting about half an hour between each coat, building up a bit of a dome shape, like so…
I finished off by painting a thin coat of gloss acrylic varnish around the sides of the buttons and a little over the top, just in case the nail polish peels off the buttons, like it would on fingernails… but I don’t actually think it would peel off with such thick layers of polish. But just in case.
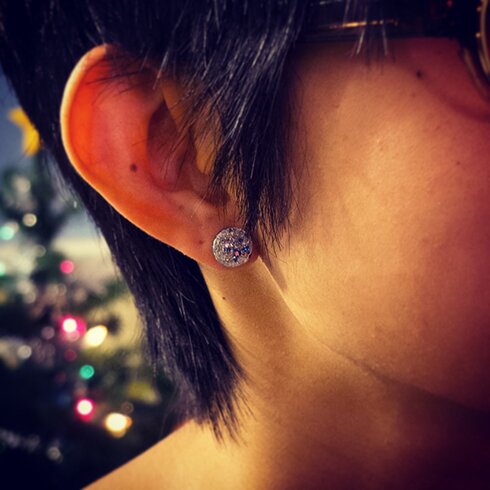
And ta-da!

Simple, right? And wouldn’t it look awesome with different shapes buttons, and different colours of glittery nail polish? I’ve seen some that comes with star-shaped glitters! If you do give it a try, I would love to hear how it goes!
Wishing you a very happy weekend!