March break fun with tater tots

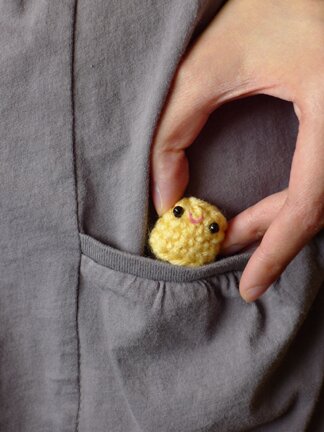
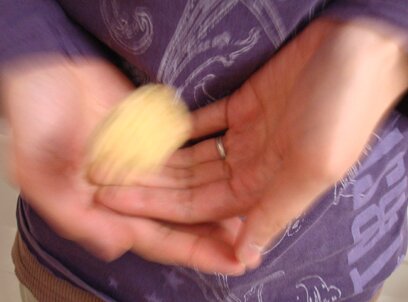
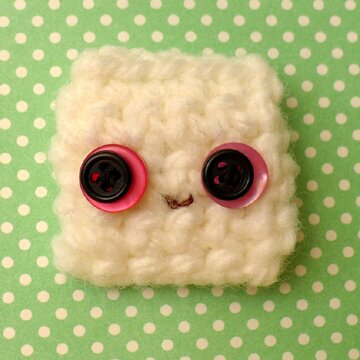
It’s March Break! Time for car­toons in the AM, all-day craft exper­i­ments, and lun­cheons with hot dogs and tater tots! Actu­al­ly, my mom nev­er bought us tater tots, and I don’t real­ly eat them a lot as an adult. But I think there’s just some­thing real­ly cute and fun­ny about tater tots. Well, the fact that they’re called tater tots. And they’re short and round. And who can for­get their 2 min­utes of fame in Napoleon Dyna­mite? Unfor­tu­nate­ly, many tots had per­ished in the mak­ing of the film. So! I thought I’d make a tot that one can safe­ly car­ry in one’s pock­et :D

It’s designed with a flat bot­tom too, so it does­n’t always need to be car­ried around — it can stand on its own like an inde­pen­dent lit­tle tot, on a desk or coun­ter­top or whatever.

If you, too, would like to make a tot to car­ry around in your pock­et, here’s what I did.

I used:
A bit of worsted weight yarn in yel­low
3.5mm cro­chet hook
Stuff­ing (I used yarn ends)
Two small black beads for eyes
Embroi­dery thread and nee­dle for mouth 

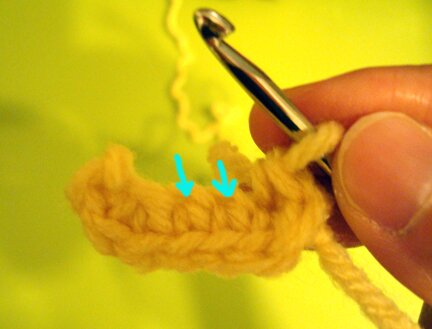
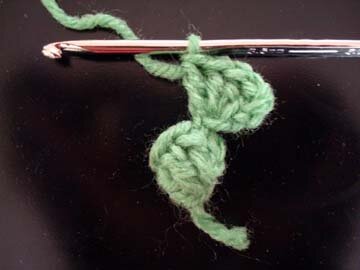
Edit 08/29/11: Row 1 is to achieve an oval base by work­ing sc’s into both sides of the begin­ning ch. Apolo­gies for not being very clear before, I added new process pho­tos after a few inquiries specif­i­cal­ly regard­ing this step, hope it helps!

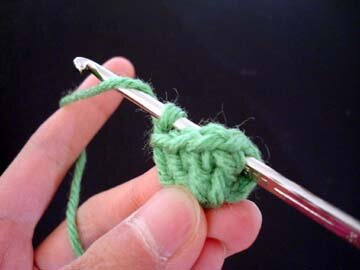
Row 1: ch 5, 3 sc in 2nd ch from hook, 1 sc in each of next [2 ch], 3 sc in next ch, 1 sc in the remain­ing loop of each of the next 2 ch (the under­side of the same [2 ch], indi­cat­ed by the arrows in the pic­ture below).

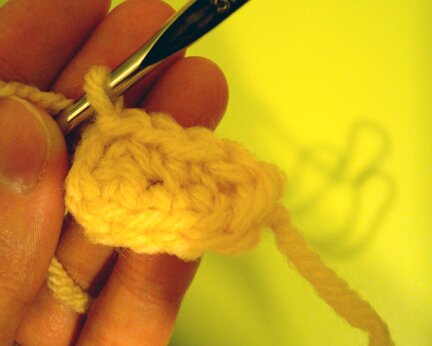
Com­plete row with sl st in the first sc of round.

Com­plet­ed row 1 (an oval base):

Row 2: ch 1, in back loop only, sc in 1st sc, sc in each sc around, sl st in begin­ning sc. (10 sc)

Row 3: ch 1, sc in each sc around, sl st in begin­ning sc. (10 sc)

Row 4 — 5: Repeat row 3 (add or omit rows here to make taller or short­er tots)

Sew on eyes and mouth. Stuff with stuffing.

Row 6: ch 1, 2 sc tog 5 times, sl st in begin­ning sc, leav­ing a 6″ tail, tie off.

Weave tail around each sc in the open­ing, pull tight and tie off. Weave in end.

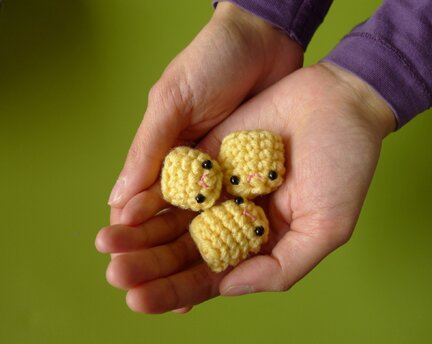
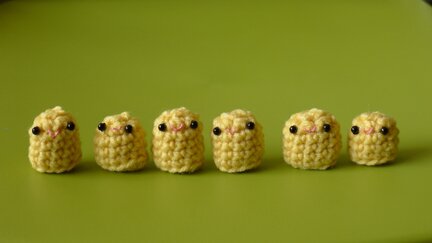
And here we have it, a tater tot! Almost as quick and easy as mak­ing the edi­ble kind. And of course, I had to make more than one…

All lined up!


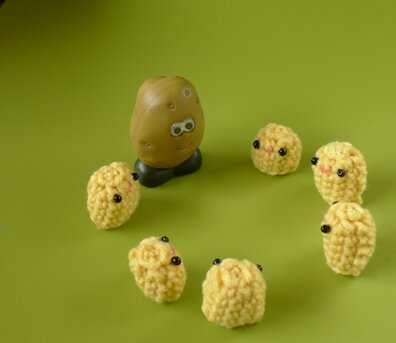
Cir­cle time with Mrs. Clip (who also works part-time as a chip clip around here).


So what else can we do with the tots, except car­ry­ing them around in our pockets?

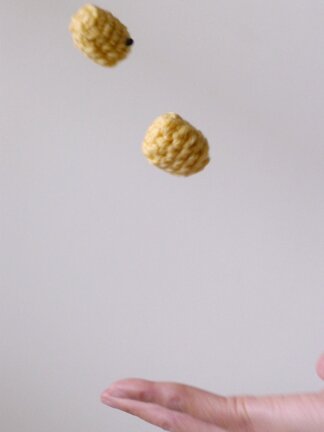
Well, one could prac­tice juggling…


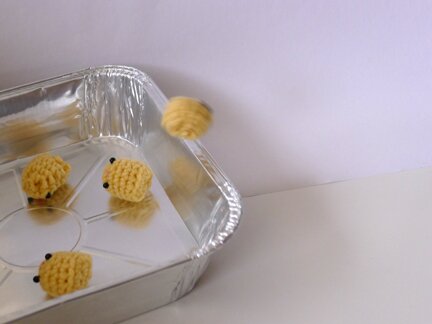
Or play tater-tot-toss (and say that ten times fast!)…


Or play hot taters with a friend or two…


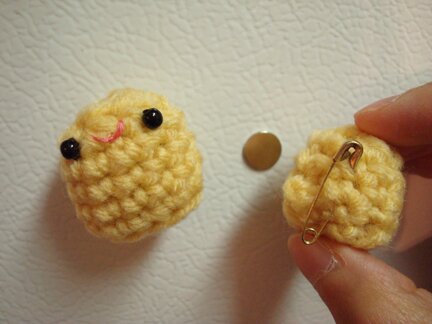
And when you’re busy with oth­er things, they can hang out on the fridge (on the frozen sec­tion, of course). Just put a safe­ty pin on it and stick it on a magnet.


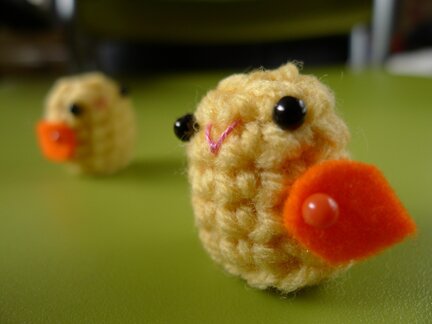
And they nev­er go stale! So in a mon­th’s time just add some wings and they can dou­ble as chicks for an East­er display.


What am I going to do with all the tots? Well, I’m afraid I have more plush than I have room for them. So if you like the tots but don’t know how to cro­chet or don’t have time to cro­chet, I’ve put three in the shop, they’d love for you to visit!

And I would like to thank Mike for spend­ing the whole after­noon help­ing me with the pho­to­shoot and putting up with my sil­ly deter­mi­na­tion to take the per­fect toss­ing pic­tures. Love you!

And I’d like to thank you for drop­ping by! I real­ize that many of us don’t have the lux­u­ry of March Break but I hope you enjoyed tak­ing a break and vis­it­ing with the tater tots here!
happy groundhog day!

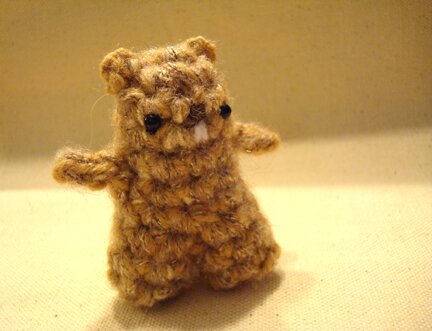
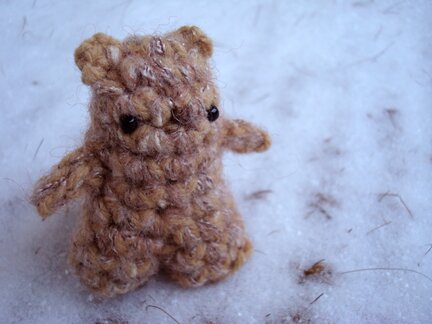
Today is Ground­hog Day and we have a snow­storm, just like in the movie. And because of the snow­storm I got to stay home all day. Since I have all that free time I thought I should cel­e­brate the day by mak­ing a ground­hog. But I could­n’t find any free pat­tern, so I decid­ed to make my own.

For this ground­hog I used some tan acrylic yarn and some fuzzy brown wool, the 2 strands of yarn held togeth­er. Both appear to be sport weight, but I can’t be sure because they were giv­en to me with­out labels. I used a 5mm hook. I think 1 strand of bulky weight yarn with 5mm hook would also work.

I also used 2 4mm beads for eyes, some white felt for teeth, and some nee­dles and thread for sewing.

Ground­hog is about 3 inch­es tall. Not very big and does­n’t take long to make.

Head and Body:

Row 1: ch 3, 5 sc in 3rd ch from hook, sl st. in top of begin­ning 2 ch.

Row 2: ch 2, [2sc in next sc, sc in next sc] 3 times, sc in top of begin­ning ch.

Row 3 and on: sc around until desired height (mine’s about 2 inch­es), end with last st in cen­tre front (I just eye­balled it, but one could count the stitch­es to make sure it’s cen­tered if desired). Take hook off stitch, keep loop on mark­er and don’t fas­ten off.

At this point it would be a good time to sew on eyes, embroi­der nose and mouth, and attach ears.

To make ears:

I made the ears with one strand of the acrylic yarn with a 3mm hook. One could prob­a­bly use a thin­ner yarn in a sim­i­lar shade and small­er hook, or if using 1 strand of bulky yarn con­tin­ue to use same yarn but use a 4mm hook.

With a sep­a­rate ball of yarn attach yarn at top of head where you’d like to posi­tion ear, ch 1, sc in st where yarn is attached, ch 1, sl st in st where yarn is attached. Fas­ten off, weave in ends. Repeat for the oth­er ear.

Legs:

Place hook back in loop at the end of body, ch 2, bring the ch across the open­ing of the body and sc in a st in cen­tre back (I just eye­balled it, but one could count the stitch­es to make sure it’s cen­tered if desired), like so…

Then, sc in each sc until the ch 2 in the mid­dle, sc in each ch, then sc in each sc for 2 more rounds, sl st. in each of next 2 sc, fas­ten off.

For the oth­er leg, attach yarn to the same st in cen­tre front at the base of the oth­er leg, ch 1, sc in next sc, sc in each sc until the st in cen­tre back at the base of the oth­er leg, sc in the st in cen­tre back, sc in each ch of the ch 2 in the mid­dle (one would have to cro­chet in the back loops of the chain), sc in the begin­ning ch 1 of this leg, sc in each sc for 2 more rounds, sl st in each of next 2 sc, fas­ten off.

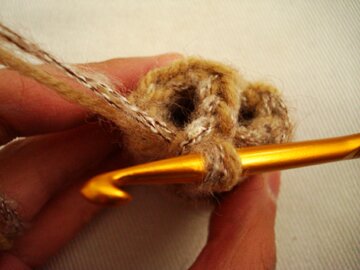
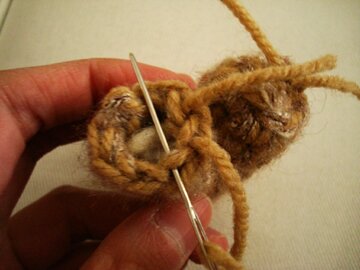
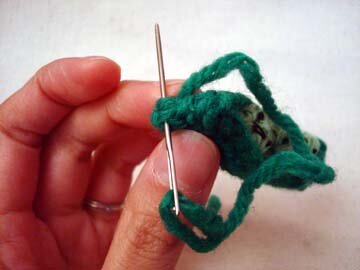
Now would be a good time to stuff the ground­hog through the open­ings at the bot­tom of the legs. After stuff­ing, close the bot­tom of the legs by weav­ing through the inner loops of the open­ing with yarn and nee­dle, like so…

Pull tight, tie off, and weave in ends.

Arms:

Attach yarn to where you’d like to posi­tion the arm, ch 3, sl st in 2nd ch from hook, sl st in next ch, sl st in st where yarn is attached, fas­ten off, weave in ends. Repeat for the oth­er arm.

Tail:

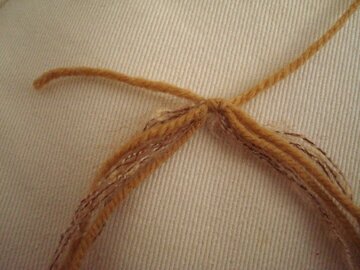
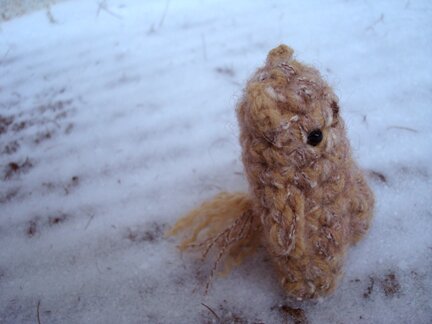
Cut mul­ti­ple lengths of yarn (I used around 8) about 4 inch­es long each. Thread a sep­a­rate piece of yarn and use it to tie the lengths of yarn togeth­er in the mid­dle, like so…


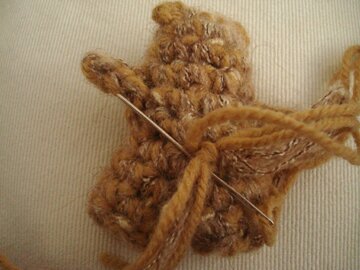
Then sew the tied strands of yarn to the back of the ground­hog, like so…

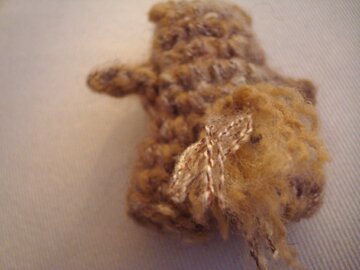
Trim tail to desired length, and unrav­el the indi­vid­ual strands, so it’s all fuzzy.

And we’re done! We took some pho­tos on the bal­cony, which was cov­ered in snow…

“No shad­ow in sight. An ear­ly spring this year, I pre­dict. Now, must we linger in the cold outdoors?”

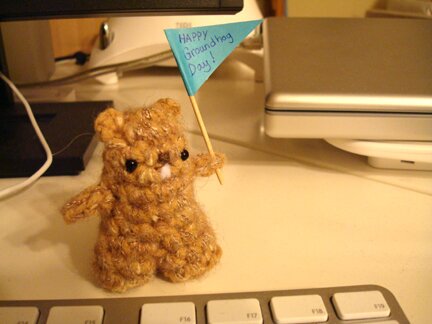
When we came back inside I thought he might look good with some buck­teeth, so I sewed on some white felt for teeth. Now he’s patient­ly wait­ing at Mike’s desk for him to come home, because Mike is an enthu­si­as­tic cel­e­bra­tor of Ground­hog Day but he does­n’t get to stay home for snow day today.

Hap­py Ground­hog Day everyone!


p.s. I real­ize that the leg part of the pat­tern may be a bit con­fus­ing — please leave a com­ment if you need any clar­i­fi­ca­tion or if you spot any mis­take and I will get back to you as soon as I can.

Alphafood!


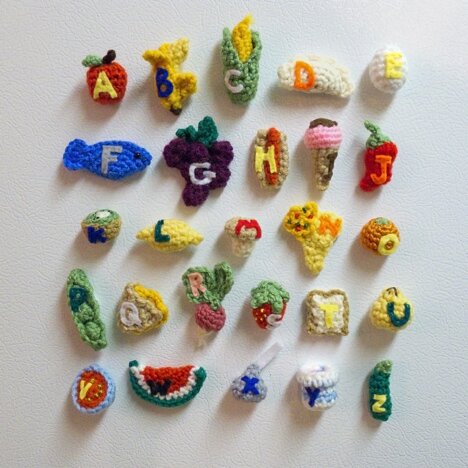
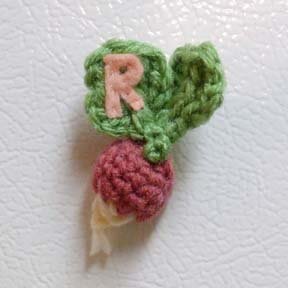
So! The cus­tom order I have been work­ing on ear­li­er this month has gone to its new home, so I can final­ly show you what they are! :D I’ll share some of our favourites here, but you can also see the full set on flickr.
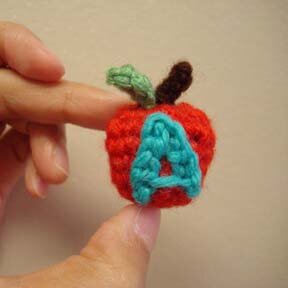
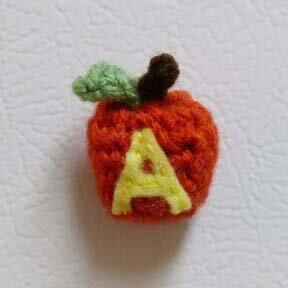
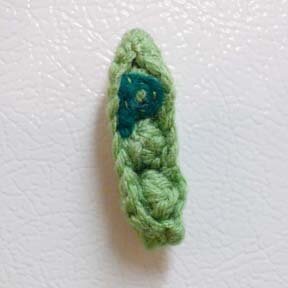
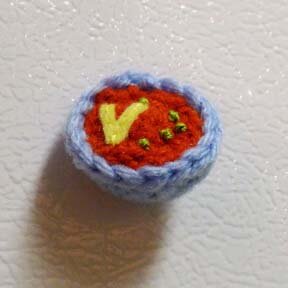
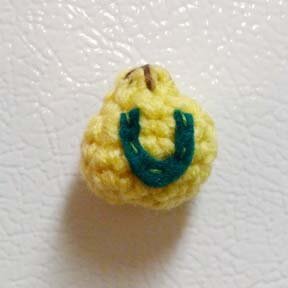
Yes, it’s a full set of alpha­bet fridge mag­nets with cro­chet food items. Each mag­net stands 1 — 1.5 inch­es tall (the bunch o’grapes is the only one who is too tall for its kind, but the rest accept­ed him anyway). Mike came up with the catchy team name “alphafood” :D

Try­ing to fig­ure out how to incor­po­rate the let­ters took a bit of exper­i­ment­ing. At first I tried to cro­chet the let­ters, which looked alright…

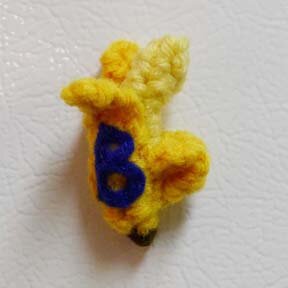
But then when I got to “B” I had a hard time stop­ping it from mor­ph­ing into an “8”. So I tried cut­ting the let­ters out from felt. I did­n’t think it would work so well because none of my small scis­sors are super sharp, but between my one pair of large but sharp fab­ric scis­sors and my small dull scis­sors it actu­al­ly worked out real­ly well with all the let­ters. And then I just tacked them on with fab­ric glue and secured them with some stitches.

See? Much bet­ter :D

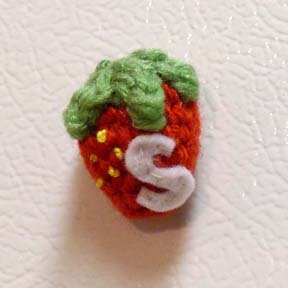
There’s some­thing about cut­ting let­ters out by hand that I find real­ly sooth­ing. I do that a lot with paper, and I’m hap­py to know that it works with felt too. Some of my favourites are the banana…

… and the strawberry.

The radish is Mike’s favourite.

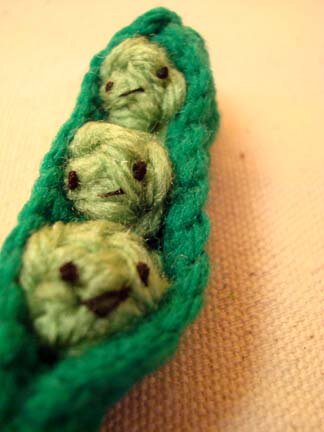
And this is where the give peas a chance pat­tern comes from.

It was fun to come up with food items that are not too obscure and would trans­late well in cro­chet at the same time. While work­ing on them we had some friends over and they seemed real­ly excit­ed about guess­ing what some food items were. I did­n’t expect it could turn into such a fun guess­ing game…

Every­one took a while to fig­ure out this one.

V is for veg­etable soup!

One per­son got this one right away, I was pret­ty impressed!

U is for ugli fruit!

I thought peo­ple would have trou­ble with this one, but they guessed it right away.

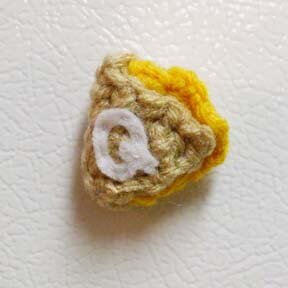
Q is for que­sadil­la! (topped with a Q‑shaped dol­lop of sour cream! :D)

Anoth­er proud mem­ber of the Mex­i­can cui­sine that peo­ple took a while to guess. (It did­n’t help when I tried to give a hint by telling the rid­dle: “what do you call cheese that does­n’t belong to you?”)

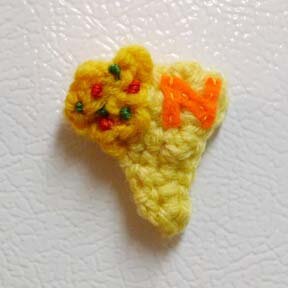
N is for nacho! (a tri­an­gu­lar nacho chip, dipped in bits of sal­sa and nacho cheese! :D)
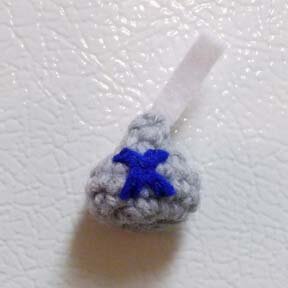
Besides Xigua, which is Chi­nese for water­mel­on, I could­n’t find a food that starts with the let­ter “X”, and water­mel­on has already signed up to rep­re­sent let­ter “W”. I found a forum where peo­ple were dis­cussing food items that start with spe­cif­ic let­ters for writ­ing a chil­dren’s alpha­bet book, and some­one sug­gest­ed the Her­shey’s Kiss for “X”. I thought it was a fine idea.


I hope the alphafoods will make it fun to learn the alpha­bets for the lit­tle boy who’s get­ting them! :D
Meet every­one on the alphafood team on Flickr! :D

Feel free to drop me a note through my Etsy shop or send me an email at genuinemudpie[at]gmail[dot]com if you want to chat about cus­tom orders!

Have a sweet week­end everyone!

all we are saying…


I was work­ing on a cus­tom order (which I will share with you very soon! :D) and it involves mak­ing a set of peas in a pod. It was a small part of a rather exten­sive project and I still had a lot more to do besides the peas, so I did­n’t real­ly want to make the indi­vid­ual peas and stuff them. So I thought of using the pop­corn stitch, and here’s what I did…

(Here’s a great video about how to make the cro­chet pop­corn stitch just in case you want to get an idea of what it’s like.)

I used:
A bit of worsted weight yarn in two dif­fer­ent shades of green
3.5mm cro­chet hook
Black sewing thread
Sewing needle
Yarn needle

For the peas:

The first pea: ch 4, 4 dc in 4th st from hook.
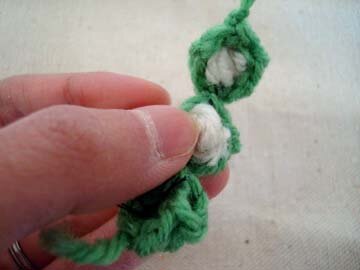
Then I did what I like to call the pop­corn maneu­ver:  drop loop from hook, insert hook from front to back between the begin­ning ch and first dc, rein­sert hook into dropped loop, yo, pull through loop and space between begin­ning ch and first dc, ch 1.


yo and pull through loop on hook and space between beg. ch and first dc to make pop­corn stitch.

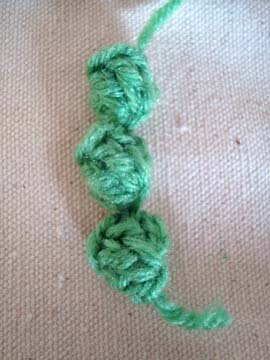
The sec­ond pea: Repeat instruc­tion for the first pea.


sec­ond pea before the pop­corn maneuver!

You can make as many peas as you wish, repeat­ing the instruc­tion for the first pea, and fas­ten­ing off after the last pea. I made three.


Next, I embroi­dered faces onto the peas with dou­bled black sewing thread, and then stuffed them slight­ly with some yarn-ends.

For the pod:

(The stitch count is for a pod with 3 peas. If there are more peas I would just eye-ball it and add more stitch­es to the begin­ning ch to fit.)

Row 1: ch 16, sc in 2nd st from hook, sc in each ch across.

Row 2: ch 1, 1 sc in each st across.

Rows 3–7: repeat Row 2.

Leave a 12″ tail, fas­ten off.

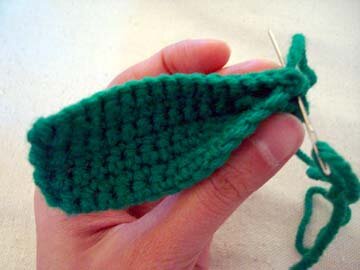
Fold pod in half length-wise. Using the 12″ tail and yarn nee­dle, sew one end togeth­er, like so…

Then, place the string of peas inside the pod, and sew through the sides of the pod and the peas, zig-zag­ging across the length of the pod to the oth­er end, like so…

ouch! >_<

Final­ly, sew the oth­er end togeth­er, like so…

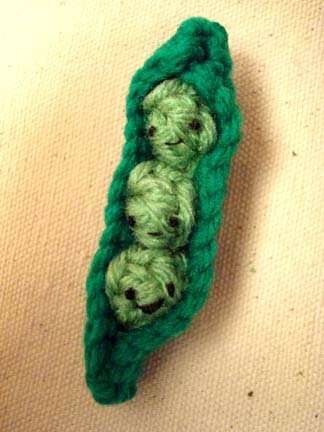
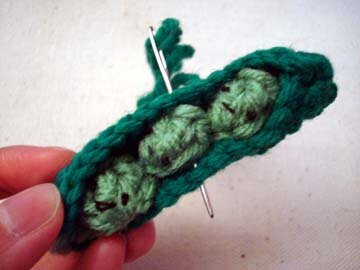
And here you have it, peas in a pod! :D

These peas think that they’ll make a great fridge mag­net, or a pin, or an orna­ment, or a zip­per pull, or a cell­phone charm, remind­ing you to give peace a chance in this brand new year.

But if you need some ideas about how you can give peas a chance, here’s a fab­u­lous mushy peas recipe — it’s my favourite way to eat peas! :D

Have a love­ly evening and a won­der­ful Friday!


filbert!

Also known as hazel­nut. But I pre­fer to call it fil­bert. It’s one of my favourite words. And if I have a cat I would name him/her Filbert.

Any­way, we had lots of fil­berts around at Christ­mas time…


And I was giv­en this real­ly nice felt­ing wool as a Christ­mas gift, in beau­ti­ful autumn tones, from this store called Heav­en is Hand­made (it’s true!). It’s so very soft… I also received anoth­er bun­dle of wool in blue/white tones. I have a plan for it; I’ll show you later :)

Work­ing with felt­ing wool is a lux­u­ry for me because wool tends to be more expen­sive, and I try to keep a tight bud­get for my craft­ing habits, so I’m rather thank­ful for the gift!


So while we wait­ed for the count­down on new year’s eve I thought I would try nee­dle-felt­ing with this wool, and I thought the brown tones would make a good fil­bert. And so Fil­bert mate­ri­al­ized in the midst of fire­works and glass­es of gin­ger ale. Today he’s hav­ing some down time on the win­dowsill, enjoy­ing a bit of sun. He’s about the same size as a typ­i­cal filbert.


I think I’m going to try mak­ing some ani­mals next. More specif­i­cal­ly, a cat. A cat named Filbert.

I once took out this book from the library and it has such love­ly pho­tog­ra­phy and excel­lent instruc­tions for mak­ing real­is­tic-look­ing felt­ed pets. So a trip to the library is in order!


Hap­py Tues­day! :D

A last-minute shop update

Made a few more things for the shop, but they will only be around for a cou­ple of days before I close the shop for 3 weeks on Sun­day! (I’ll be trav­el­ling to Hong Kong) Since the shop will be closed for most of Novem­ber, I made these with “hol­i­day cheers” in mind, in case any­one wants to make ear­ly orders for Christmas…

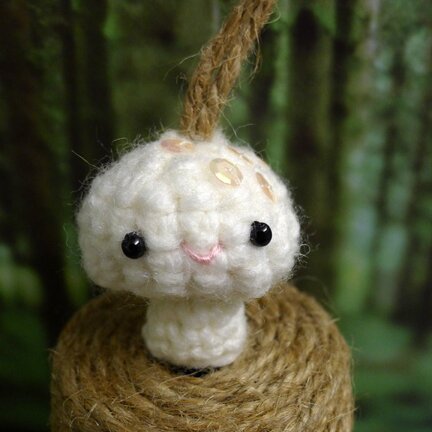
Meet Snow Mush­room! :D

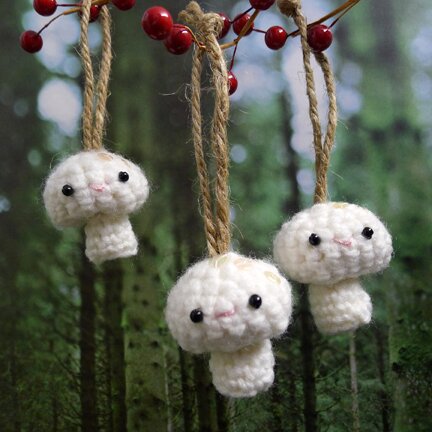
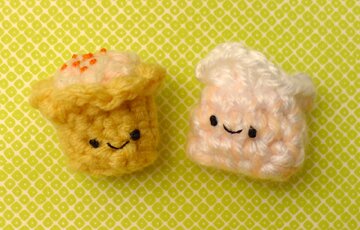
So, when I make some­thing there’s often a sto­ry run­ning in the back of my head. It’s total­ly imag­i­nary, but the Snow Mush­rooms are called the Snow Mush­rooms because they’re sup­posed to be wood­land crea­tures that appear on snow days to spread hol­i­day cheers with their spark­ly caps. Yes. Snow mush­rooms also like to hang out in a group of 3…

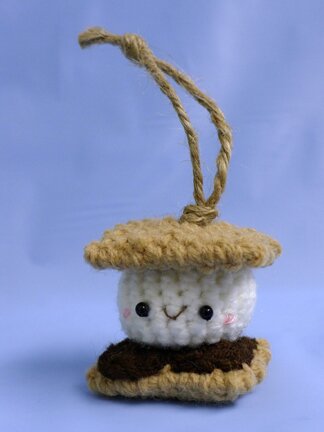
Along with a delight­ful s’more, with rosy cheeks! :D S’more does­n’t real­ly have a sto­ry to tell. He thinks just being cute is enough. Period.

Feel free to vis­it them at the shop before they tem­porar­i­ly retire on Sun­day Octo­ber 31! But don’t wor­ry, they’ll be back on Mon­day Novem­ber 29.

Cheers!

Announcing… genuine mudpie, the Etsy shop! :D


I usu­al­ly don’t write 2 posts in one day but this is excit­ing — I final­ly set up my very own Etsy shop!!! :D :D :D

I have been want­i­ng to set up a shop since I first saw it in 2006! My friends have also been urg­ing me when­ev­er they request Christ­mas orders of cro­cheted mag­nets and pins (and by “they,” I mean Kit­ty. Would­n’t have been able to do this with­out your long-time sup­port and encour­age­ment, friend!).

And so that’s why I changed the head­er! Just want­ed it to reflect more of what I do and so it would match the shop ban­ner. I real­ly do like water­colour but I think I like cro­chet­ing plush­es more :P

Set­ting up the shop actu­al­ly took much longer than I thought — lots to think about in terms of poli­cies and ship­ping and stuff. I’m kind of ner­vous about it… will test it out to see how it goes!

So! I put up some Mon­ster­mal­low pins. The one above is one of them. I was so tempt­ed to keep one for myself… but I guess I’ll just make anoth­er one lat­er, so the shop is well-stocked!

And here are the oth­er plush­es in the shop! They’re ideas that I’ve been wait­ing to test out, like the All-Day Dim Sum.

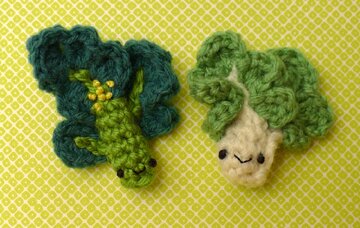
I thought I must make the most pop­u­lar item from my pre­vi­ous designs (and by most pop­u­lar I mean my friend Kit­ty’s ordered it two years in a row) — the bok choy! For the shop I’ve made it into a set with anoth­er leafy Chi­nese veg­etable, the choy sum.


Mike is again a great help in set­ting up the shop. He set up the pho­to-shoot and took all the awe­some-look­ing pho­tos with his super camera!

I hope you’ll pay the shop a vis­it! :D

melancholy

Melan­choly is a win­ter mel­on. Here he is, in his cor­ner, moping.

What is a win­ter mel­on? Well, it looks like this.

It might sound real­ly mean, but I had a lot of fun try­ing to make him look as melan­cholic as pos­si­ble. The weath­er’s been real­ly grey these days, I can’t help but feel a bit blah. Mak­ing this char­ac­ter takes a bit of the melan­choly out of me.

Win­ter mel­ons are actu­al­ly quite deli­cious, espe­cial­ly in soup. I actu­al­ly thought of mak­ing a water­mel­on first, but thought a mel­on that’s called “win­ter” might con­vey melan­choly a bit more effectively.

… look how sad…

Don’t wor­ry folks, as sad as he is, he’s being well tak­en care of and has a place to live up in the type case. Maybe he’ll bright­en up when the sun peeks its head out of the clouds tomor­row, it’s sup­posed to be a nicer day.

Take care, everyone!

中秋節快樂! :D

(Hap­py Mid-Autumn Fes­ti­val! :D)

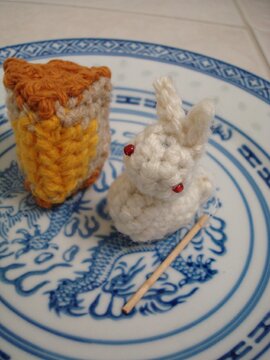
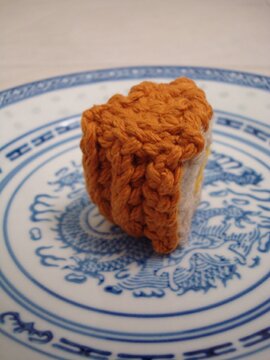
Yup! With the absence of real moon­cake and rab­bit lantern today, I’ve made cro­cheted ver­sions of them to celebrate!

For ref­er­ence, here’s the edi­ble kind of moon­cake. It has a pas­try shell, with lotus seed paste (the grey-ish part) and egg yolk (the yel­low part) inside. I’m look­ing for­ward to shar­ing these with my fam­i­ly this week­end! :D

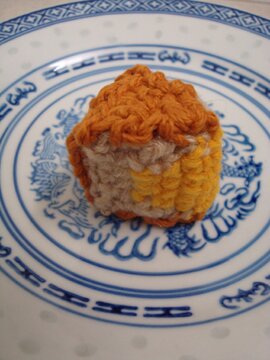
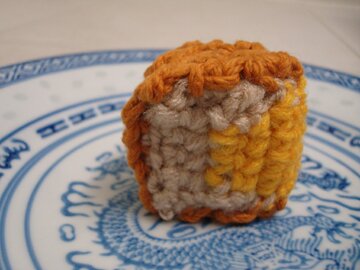
But for now, here’s a cro­cheted slice o’moon­cake! :D

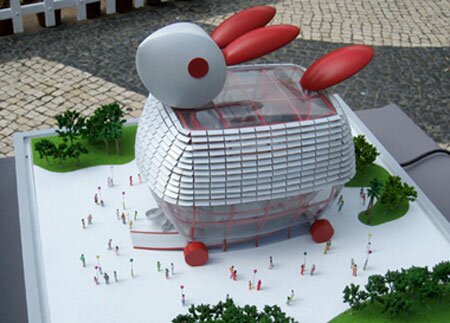
When I was a child my par­ents used to buy me lanterns to cel­e­brate Mid-Autumn Fes­ti­val, and the rab­bit lantern is a clas­sic one, prob­a­bly has to do with the leg­end of the Moon Rab­bit. I can’t find a pic­ture of a clas­sic rab­bit lantern, the Macau pavil­ion in the World Expo was the clos­est thing I could find.

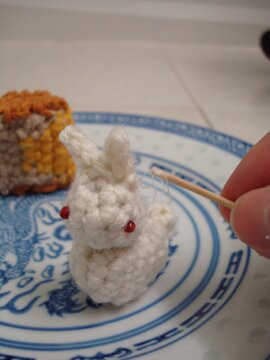
And here’s the cro­cheted rab­bit lantern, com­plete with strings and a stick!

While the rab­bit lantern was more of a free-form exper­i­ment, I did jot down the pat­tern for the slice o’moon­cake :D

So, the ingredients!

Worsted weight yarn in brown, tan, and yellow

3.5mm cro­chet hook

Tapes­try needle

Stuff­ing

Top/Bottom of pas­try shell (make 2):

With brown.

Row 1: ch 2, 2 sc in sec­ond ch from hook, ch 1, turn.

Row 2: sc in first sc, 2 sc in next sc, ch 1, turn.

Row 3: sc in first sc, 2 sc in next sc, sc in next sc, ch 1, turn.

Row 4: sc in first sc, 2 sc in next sc, 1 sc in each of next 2 sc, leave a 12″ tail for sewing, fas­ten off.

Back of pas­try shell (make 1):

With brown.

Row 1: ch 6, sc in sec­ond ch from hook, sc in each of next 4 sc, ch 1, turn.

Row 2–4: sc in each sc across in back loop only, ch 1, turn.

Row 5: sc in each sc across in back loop only, leav­ing a 12″ tail for sewing, fas­ten off.

the back, with the ridges! 

Lotus seed paste and egg yolk (make 2):

With tan.

Row 1: ch 6, sc in sec­ond ch from hook, sc in each of next 4 sc, ch 1, turn.

Row 2: sc in each sc across, ch 1, turn.

Row 3: sc in first sc, switch to yel­low yarn, sc in each of next 3 sc, switch to tan, sc in last sc, switch to yel­low, ch 1, turn.

Row 4: con­tin­ue with yel­low, 1 sc in each of next 4 sc, switch to tan, sc in last sc, switch to yel­low, ch 1, turn.

Row 5: con­tin­ue with yel­low, 1 sc in each sc across, leave a 12″ tail for sewing, fas­ten off.

yolk in the centre!

Assem­bly:

Sew top and bot­tom of the pas­try shell to the back pas­try shell, then sew the lotus seed paste and yolk pieces to the pas­try shell, leav­ing front (yolk/yellow) edges open, stuff, then sew front (yolk/yellow) seam close. Weave in ends.

Enjoy! :D

post no.100 and Saturday make-a-long!

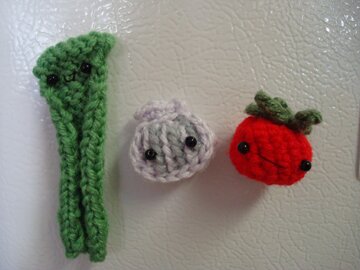
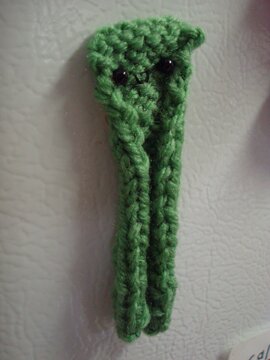
Clam­a­to and spe­cial guest knit­ted Cel­ery Stalk are here to cel­e­brate gen­uine mud­pie’s 100th post! :D

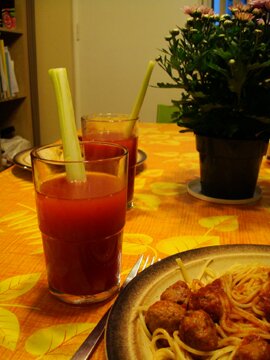
Why clam­a­to, you ask? Mike and I actu­al­ly came up with the idea one evening walk­ing home from the gro­cery store, hav­ing bought a jug of clam­a­to juice. I was won­der­ing what to make after Piña Cola­da, and Mike thought Clam­a­to would be anoth­er excel­lent cock­tail to crochet!

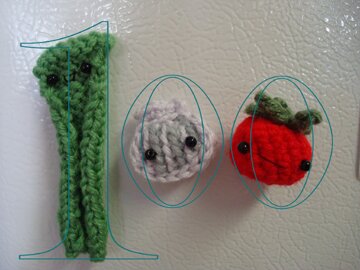
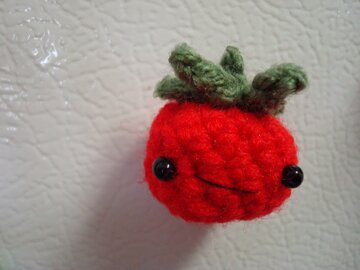
So, I have been want­i­ng to cro­chet Clam­a­to for a while… and for the 100th post I thought adding cel­ery would form the num­ber “100”, with Cel­ery being 1 and Clam­a­to being the two 0’s. They tried, but num­bers aren’t their best suit, so they request­ed some Pho­to­shop help.

how do we look now? more like 100?

(I did­n’t make a vod­ka char­ac­ter, so they’re just a clam­a­to, not a caesar.)

I made them yes­ter­day while par­tic­i­pat­ing in the Make-a-Long host­ed by Leethal. I par­tic­i­pat­ed in the first Make-a-Long back in spring, about the time when I first start­ed gen­uine mud­pie, so I thought par­tic­i­pat­ing in it again would be the per­fect way to cel­e­brate post no.100!

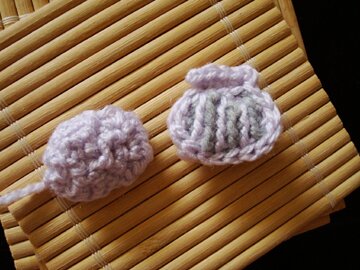
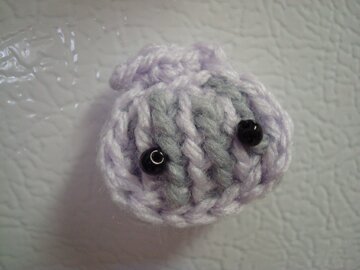
So! The morn­ing of the Make-a-Long was pret­ty much spent try­ing to fig­ure out how to make Clam. Clam is not as sim­ple as he looks. Or maybe I just don’t know how to do this in an eas­i­er way. I found a love­ly lilac and a grey that seemed per­fect for a clam shell, and I want­ed to make ridges on his shell with slip stitch­es, all going in one direc­tion. That means all the rows had to be worked on the right side. It took a few tries to fig­ure this out, but it all worked at the end :D So, at around 11am-ish, I had the top and the bot­tom of Clam finished.

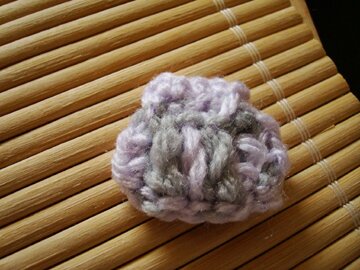
This is the back­side of the top shell. I had to car­ry the yarn across the piece a lot so it’s all thick with strands of yarn over­lap­ping (good thing Clam is only about an inch wide). It actu­al­ly kind of looks like the flesh inside a clam :P

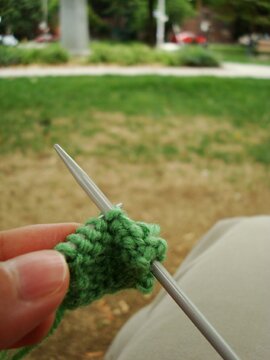
I then quick­ly fin­ished Toma­to. After lunch Mike had a meet­ing so I decid­ed to go with him and knit in a near­by park, because I don’t go out much these days and change of scenery is refreshing.

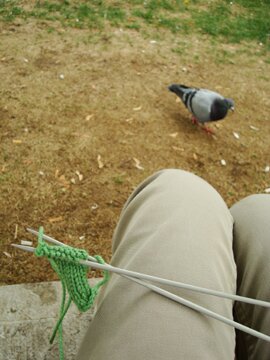
I decid­ed to knit instead of cro­chet Cel­ery Stalk because I real­ized that the edges of knit­ted pieces (stock­inette stitch) tend to roll inward, and that’s just what  a cel­ery stalk looks like! :D

Vis­it­ed by one of many pigeons.

Then we went gro­cery shop­ping and bought clam­a­to juice :D along with oth­er gro­cery items. Mike kind of made-a-long by cook­ing meat­balls a la Jamie Oliv­er.

cheers!

And then I attached the mag­nets on Clam­a­to and Cel­ery, and here they are on the fridge!

Young Toma­to and his sig­na­ture lop­sided smile.

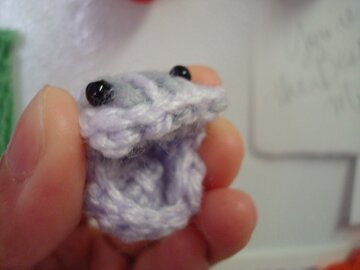
Clam may seem like a cute and qui­et creature…

… until you squeeze his cheeks and he lets out a scary laugh!

mua­ha­ha­HA­HA­HA…

And our spe­cial guest, Cel­ery in stock­inette! He’s here to remind me that knit­ting is not as scary as I thought. Well, at least sim­ple knit­ting anyway…

And then in the evening I worked on some fies­ta granny hexa­gons for anoth­er project. I love the colour combination!

All in all I had a won­der­ful crafty day. I’m thank­ful for the Make-a-Long, and a big thank you for vis­it­ing me on gen­uine mud­pie! Hope­ful­ly there will be hun­dreds more posts to come!

Have a great week everyone!