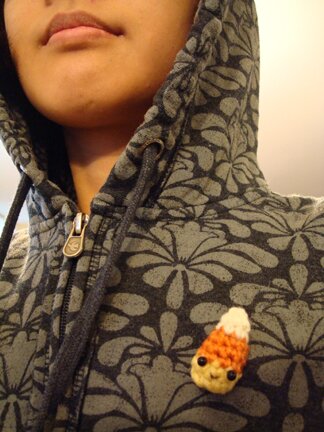
The making of a candy corn

Hel­lo!

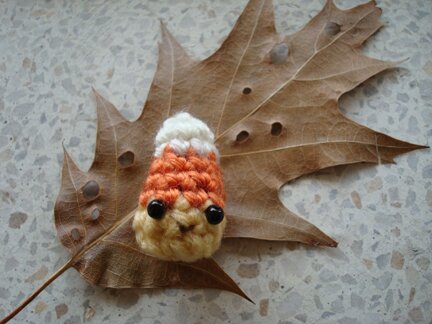
The tem­per­a­ture out­side is get­ting cold­er and the leaves are swirling in the wind… per­fect time to make a can­dy corn to cel­e­brate the glo­ri­ous fall weath­er! (Fall is my favourite sea­son, fol­lowed by spring.)

A quick search on Rav­el­ry yield­ed numer­ous cro­chet pat­terns for can­dy corn, but I could­n’t find a tiny one. So I thought I’d make one up and add my pat­tern to the can­dy bowl too! :D

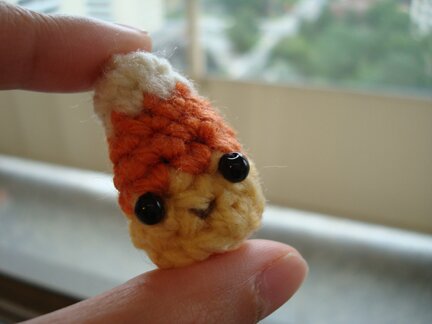
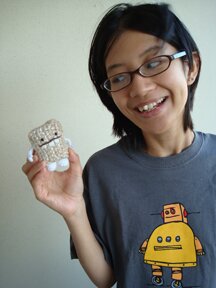
Per­haps a pic­ture with my thumb and fin­ger would give you an idea about the size of this can­dy corn…

Any­hoo, here’s what I did…

I used:
a bit of worsted weight yel­low, white, and orange yarn
3.5mm hook
a bit of brown embroi­dery thread for mouth
two black 4mm beads for eyes
sewing needle
stuffing

First, with yel­low yarn…

Row 1: ch 4, sc in 2nd ch from hook, [sc in next ch], 3 sc in next ch, sc in the oppo­site side of pre­vi­ous stitch in square brack­et (the piece will be turned upside down), 1 sc in the same ch as the first sc, sl st in first sc. (8 st around, begin­ning ch 1 counts as a stitch)

Row 2: ch 1, sc in each st around, sl st in beg ch 1. (8 st around)

Row 3: ch 1, sc in each st around, sl st in beg ch 1. (8 st around)

Then, change to orange yarn…

Row 4: ch 1, sc in each st around, sl st in beg ch 1. (8 st around)

Row 5: ch 1, sc in each st around, sl st in beg ch 1. (8 st around)

Row 6: ch 1, sc tog over next 2 st, 1 sc in each of next 2 st, sc tog over next 2 st, sc in next sc, sl st in begin­ning ch 1.

Final­ly, change to white yarn…

Row 7: ch 1, sc in each st around, sl st in beg ch 1. (6 st around)

Row 8: ch 1, sc in each st around, sl st in beg ch 1. (6 st around) Leav­ing a 6″ tail, fas­ten off.

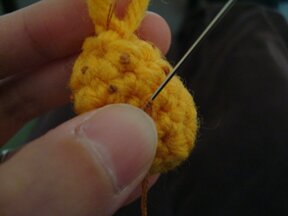
Stuff can­dy corn. Weav­ing tail through stitch­es at open­ing, pull tight and tie off. Weave in ends.

When I sewed on the eyes and embroi­dered the mouth, I left the knots and tail ends at the back, because I was going to attach a pin onto the back and it would hide all the tail ends.

Pinned!

Ready to take over the world! One can­dy corn at a time! Yarrrrrn.

Um. Any­way. Please let me know if you do try mak­ing this, and feel free to drop me a note if you see any mis­take or need clarification!

Have a sweet week­end every­one! :D

The making of a motivational mini-wheat

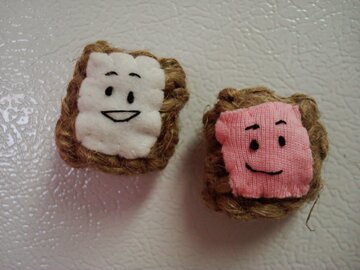
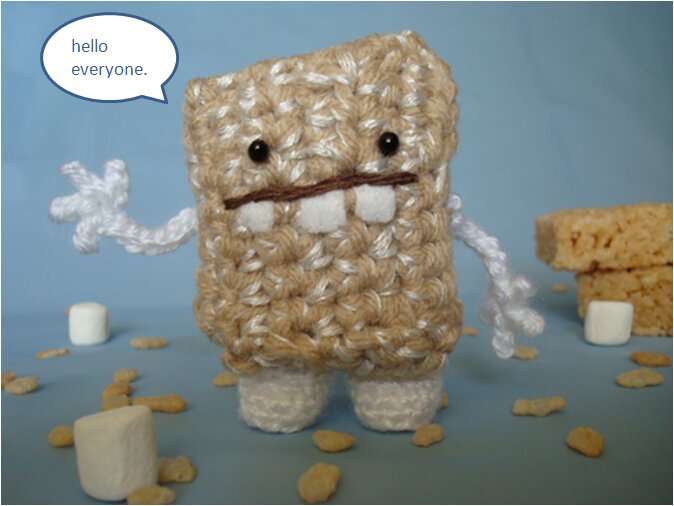
Accord­ing to our Hoops and Yoyo cal­en­dar, Sep­tem­ber is break­fast month! It is also back-to-school / end-of-vaca­tion month! So! Mr. Mini-Wheat is here to help stick moti­va­tion­al mes­sages on the fridge.

It is, as you might be able to tell, inspired by the talk­ing frost­ed Mini-Wheats. I’m not a big fan of Mini-Wheat myself (a bit too fibery for me), but I’m extra fond of these talk­ing Mini-Wheats because they remind me of the com­ic strips Mike used to draw.

I made a reg­u­lar sug­ary one and a straw­ber­ry one :D It would be fun to also make the brown sug­ar one and the new blue­ber­ry muf­fin flavour.

Here’s what I used:

Heavy duty jute twine (I would like to use a thin­ner twine, but that was all I could find at the dol­lar store).

6mm and 5mm hooks.

A small square of white felt, and dou­ble lay­er of a bit of pink fab­ric cut from a retired t‑shirt (because I did­n’t have pink felt).

Sewing thread in black, white, and pink.

Sewing nee­dles.

Two mag­nets.

And here’s what I did:

Twine is very stiff and knots can become undone eas­i­ly, leav­ing a longish tail in the begin­ning pre­vents the piece from com­ing apart. Also, I cro­cheted rather loose­ly through­out because the stitch­es are more tight when doing rows of slip stitch­es and, on top of that, twine does­n’t stretch.

Leav­ing a tail about 4″ long, ch 6.

Row 1: ch 1, sl st in each ch across through back loops only, ch 1, turn.

Row 2–4: sl st in each sl st across through back loops only, ch 1, turn.

Row 5: sl st in each sl st across through back loops only. Leav­ing a tail about 12″ long for sewing, fas­ten off.

Now I have a rec­tan­gle. It will be fold­ed in half and the short sides sewn together.

cro­chet complete!

Then I cut out small pieces of the white and pink fab­ric and embroi­dered faces on them with black thread.

hel­lo, world!

I then sewed the frost­ing faces onto the cro­cheted pieces before fold­ing the pieces in half and sewing the side edges together.

fibery wheat…

I actu­al­ly did­n’t quite “sew” the edges togeth­er. Because I did­n’t have a nee­dle with a big enough eye, I used the small­er cro­chet hook to thread the tail through the loops down the edges.

I only “sewed” one side togeth­er, leav­ing the top and bot­tom seams open. I weaved all the loose ends into the top and bot­tom openings.

And then I attached a mag­net on the back. And here they are, on the fridge! (They’re about 1″ tall.)

And a moti­va­tion­al mes­sage wait­ing to be found…

Hap­py Sep­tem­ber, everyone!

Chuck and Robin

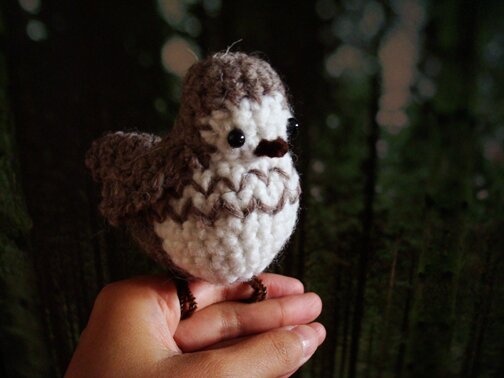
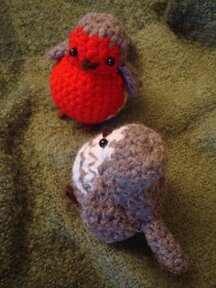
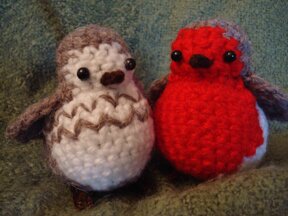
Meet Chuck. He’s a sparrow.

He’s called Chuck because of the pat­tern on his chest, you see.

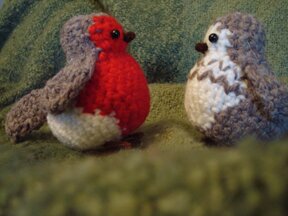
And now, let me intro­duce Robin.

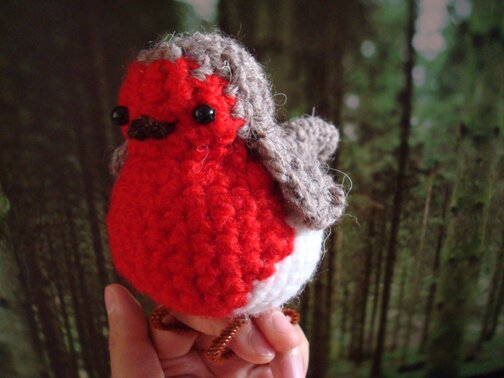
Robin is a very friend­ly robin.

One day, Chuck and Robin ran into each oth­er on their evening walk. (Here’s a wor­m’s eye view of their encounter…)

And they got into a long con­ver­sa­tion about the best berry bush­es in the neigh­bour­hood. (Here’s a bird’s eye view of their conversation…)

They dis­cov­ered that they have so much in com­mon, they became BBF! (Best Bird Friends)

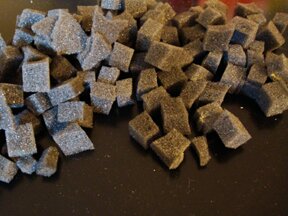
One LKF (Lit­tle known fact) about Chuck and Robin, is that they’re stuffed with this syn­thet­ic sponge mate­r­i­al that I har­vest­ed from the pack­ag­ing for a watch. The sponge mate­r­i­al was made into a box shape orig­i­nal­ly, which I cut into bits.

I’m try­ing to avoid buy­ing Poly­ester stuff­ing as much as pos­si­ble, as I real­ize that there are lots of things around the house that can poten­tial­ly be used as stuff­ing. I’ve been using the cot­ton balls that my par­ents used to sell in their con­ve­nient store over 10 years ago. What else could you use 10+ year-old cot­ton balls in an unsealed plas­tic bag for? They’re the per­fect size for my small fridge mag­nets. And also the t‑shirts that are too old and rat­ty for donat­ing. I also plan to shred those and stuff plush­es with them.

Last but not least, I made Chuck and Robin fol­low­ing this pat­tern on Roman Sock. Check out all the cute crit­ters on the blog! Espe­cial­ly the Ulti­mate Squir­rel. I’d love to make an Ulti­mate Squir­rel one day…

Have a hap­py Tuesday!

Thank you Mr. Postman!

Guess what Marshie got in the mail yesterday?

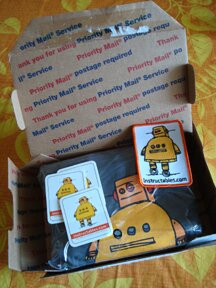
An Instructa­bles gift pack for win­ning the Crit­ter Con­test! :D

There were stick­ers, a batch, and a t‑shirt!

The t‑shirt did­n’t fit Marshie. So he gave it to me.

“Way to go, Marshie!” says me.

“Thank you! What a won­der­ful sur­prise,” says Marshie.

At the end I decid­ed to give the t‑shirt to Mike because he likes fun­ny t‑shirts and it fits him bet­ter, and because he’s nev­er stopped encour­ag­ing me and sup­port­ing me to make things and write just for the love of it. With­out him Marshie would­n’t have exist­ed. None of my crafts would’ve exist­ed. I would prob­a­bly still be feel­ing drained and unmotivated.

“So, thank you, Mike!” says me.

Piña! Colada!

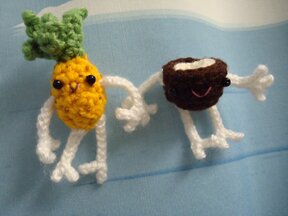
Final­ly get­ting around to post the pat­tern for Piña Cola­da :D They’re about 3 inch­es tall, and I’ve attached mag­nets on the back for mine.

This is not a com­pli­cat­ed pat­tern, but it has many parts to it, and I apol­o­gize in advance if there’s any mis­take — please let me know if you see any! Your feed­back is great­ly appreciated :)

To make Piña Cola­da, you’ll need:

  • Small amount of worsted weight yel­low, green, brown and white yarn
  • Small amount of DK weight white yarn
  • 3.5mm and 3mm cro­chet hooks
  • Embroi­dery floss in pink, brown, and black
  • black round beads for eyes (I used 4mm)
  • sewing nee­dles
  • Stuff­ing

Pineap­ple: with yel­low and 3.5mm hook

Row 1: ch 3, 4 sc in 3rd ch from hook, sl st in top of begin­ning ch.

Row 2: ch 2, hdc in same st, 2 hdc in each of next 5 st, sl st in top of begin­ning ch.

Row 3–6: 1 sc in each sc around. Fill with stuffing.

(You may also want to sew on eyes and mouth before stuff­ing it, but I usu­al­ly like to decide on the place­ments of eyes and mouth after the amigu­ru­mi has been stuffed and filled, and then I hide the loose ends of the threads under the mag­net or pin that I’m going to attach on the back.)

Row 7: 2 sc tog five times, sl st into next st, leav­ing a long tail, fas­ten off.

Weave tail through each of the 5 st at the open­ing, pull tight and tie off. Weave in ends.

At this point, I also added the “eyes” of the pineap­ple by stitch­ing french knots all around, like so:

Pineap­ple top: with green and 3.5mm hook

Row 1: Leav­ing a long tail, ch 6, sl st into 2nd ch from hook, 1 sc in each of remain­ing ch’s, ch 1, turn.

Row 2: sc in 1st sc, sc in next sc, ch 4, sl st in 2nd st from hook, (cro­chet­ing back towards the begin­ning of row 1 at this point) sc in each of remain­ing ch’s and sc’s, ch 1, turn.

Row 3: repeat row 2.

Row 4: sc in 1st sc, sc in next sc, ch 5, sl st in 2nd st from hook, 1 sc in each of remain­ing ch’s and sc’s, ch 1, turn.

Row 5: repeat row 4, except omit ch 1 at the end. Fas­ten off.

Then, start­ing from the end that has just been fas­tened off, I rolled it up, like so:

Then I stitched it togeth­er, through all the lay­ers in the stitch­es below the “spikes”, using the tail I left in the beginning.

Sew pineap­ple top to pineap­ple. I had enough yarn left after sewing the pineap­ple top togeth­er, so I did­n’t tie off and just con­tin­ued using the same yarn tail to do the attach­ing of the two parts.

Then I attached the eyes with black embroi­dery floss and embroi­dered the mouth (I used brown embroi­dery floss). I like to use straight pins with black bead pin heads to try out posi­tions for eyes.

Now it’s time to make arms and legs, but they’re option­al. I made them for this pair because they’re wed­ding gifts and I like that they’re able to hold hands :)

Arm/hand (make 2): with DK weight white and 3mm hook

ch 8, sl st in 2nd ch from hook, sl st in next ch, ch 3, sl st in 2nd ch from hook, sl st in next ch, ch 3, sl st in 2nd ch from hook, sl st in next ch, sl st in 5th ch from the begin­ning ch, sl st in each of remain­ing ch’s. Leav­ing a long tail, fas­ten off.

Leg/foot (make 2): with DK weight white and 3mm hook

ch 8, sl st in 2nd ch from hook, sl st in next ch, ch 3, sl st in 2nd ch from hook, sl st in next ch, sl st in 5th ch from the begin­ning ch, sl st in each of remain­ing ch’s. Leav­ing a long tail, fas­ten off.

Then I stitched the arms and legs to the pineap­ple using the long tails I left, and weaved in all ends.

Now, on to the coconut!

Coconut — shell: with brown and 3.5mm hook

Row 1: ch 3, 4 sc in 3rd st from hook, sl st into the top of begin­ning ch.

Row 2: ch 2, sc in same st, 2 sc in each sc around, sl st into top of begin­ning ch.

Row 3: ch 2, sc in next sc, * 2 sc in next sc, 1 sc into each of next 2 sc*, repeat from * to * around, sl st in top of begin­ning ch.

Row 4: ch 2, 1 sc in each sc around.

Row 5: repeat row 4. Fas­ten off, weave in ends.

I sewed on the eyes and embroi­dered the mouth (I used pink embroi­dery floss) at this point.

Coconut — flesh: with worsted weight white and 3mm hook

Row 1: ch 3, 4 sc in 3rd st from hook, sl st into the top of begin­ning ch.

Row 2: ch 2, sc in same st, 2 sc in each sc around, sl st into top of begin­ning ch.

Row 3: ch 2, 1 sc in each sc around. Leav­ing a long tail, fas­ten off.

Put coconut flesh into coconut shell, so it looks like this:
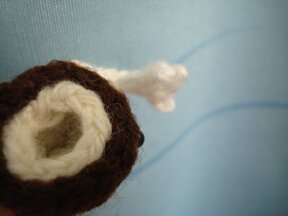
Using the tail left from the white part, I sewed the shell and flesh togeth­er by mak­ing a few stitch­es around, being care­ful that the white yarn is not show­ing through the brown shell, i.e. sewing through the stitch­es that are on the inside of the shell. I sup­pose one could also attach the shell and flesh togeth­er with a blob hot glue at the bot­tom, that might be more straightforward.

Last­ly, make arms and legs and attach to coconut.

So here we have it -

“Piña!”
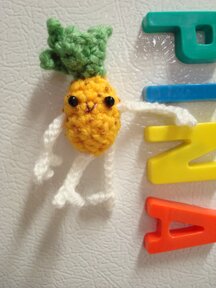
“Coladaaah!”
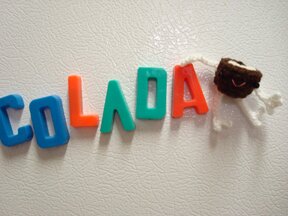
I real­ized that coconut in Span­ish isn’t “cola­da”, like I’ve always thought. I found out that “Cola­da” actu­al­ly means “strained”. But coconut need­ed some mag­net­ic alpha­bets to pose with. Hence the picture.

Again, I hope the pat­tern is clear. If you come across any prob­lem or need clar­i­fi­ca­tion please drop me a note!
Happy Together :D

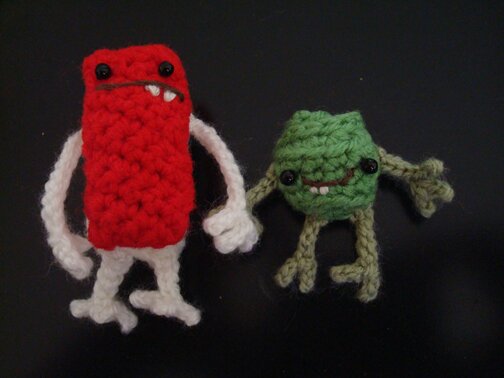
Meet Nigiri and Wasabi…

… and Piña Colada!

Hap­py Togeth­er :D

They were wed­ding presents I made for friends this spring. I can now final­ly post pic­tures of them after they have been giv­en away. They’re all fridge mag­nets. I’ve jot­ted down the pat­tern for Piña Cola­da, and will post that soon!

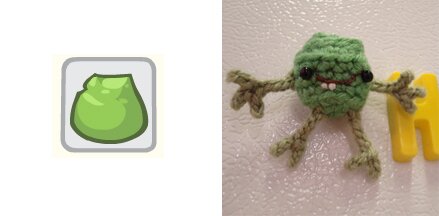
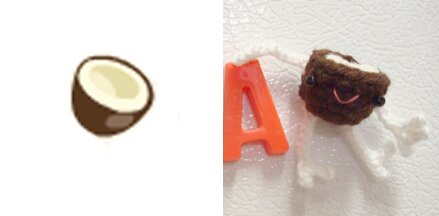
Wasabi and coconut were actu­al­ly inspired by Restau­rant City. It’s a Play­fish game, and I think it’s got the cutest graph­ics, espe­cial­ly the food items!

So here’s the wasabi ingre­di­ent on RC and Wasabi…

… and here’s the coconut ingre­di­ent on RC and Coconu!

By the way, I always thought coconut in Span­ish is “cola­da”, as in “Piña Cola­da”, you know? But it’s not! Coconut in Span­ish, accord­ing to Google Trans­la­tor, is “coconu”! “Cola­da” actu­al­ly means “strained”. Sil­ly me.

And on a side note, despite hav­ing a busier-than-usu­al week I’ve actu­al­ly kept to my blog­ging sched­ule, and also fin­ished a craft for myself! I’m pret­ty hap­py about that. I’ll write and post pic­tures about it lat­er, but for now I’ll show you the mess I made…

Hap­py Friday!

Guess what!? Guess what!? Marshie WON!!!!

Jump­ing for joy! XD

I can’t believe it, Marshie WON!! He won!!! AHHHHHH!!!

I’ve nev­er won any­thing before… this is real­ly kind of hard to believe… I think I need to like… make myself a cup of hot tea and sit down for a bit… I real­ly was­n’t expect­ing this… so grate­ful for the kind peo­ple over at Instructa­bles… sniff…

MARSHIE WON!!!

The making of a chestnut

Pat­tern for a chest­nut! Pret­ty sim­ple and straight­for­ward. I sup­pose the fin­ished size is about the same size as a typ­i­cal chest­nut. I jot­ted down this pat­tern while I was mak­ing it, and I’m new to this pat­tern-writ­ing thing, so I apol­o­gize for mis­takes if there is any, and please let me know if you spot them. Your feedback/comments are much appreciated!

So, any­ways…

To make a chest­nut you’ll need:

  • Worsted weight yarn in tan and brown (I used Red Heart Super Saver)
  • 2 beady eyes (I used 4mm)
  • Pink embroi­dery floss
  • 3.5 mm cro­chet hook
  • Tapes­try nee­dle, sewing needle
  • Stuff­ing

Note: the chest­nut pic­tured is turned inside out, i.e. wrong side is fac­ing out, because I liked the shape of the wrong side bet­ter than the right for the chest­nut. It’s dif­fer­ent for dif­fer­ent yarn and dif­fer­ent amigu­ru­mi, I think.

Pat­tern:

Row 1: with tan, ch 3, 4 sc in 3rd st from hook, sl st in top of begin­ning ch

Row 2: ch 2, sc in same sc, 2 sc in next sc, sc in next sc, 2 sc in each of next two sc, sc in next sc, sl st in top of begin­ning ch 2.

Row 3: ch 2, sc in same sc, 2 sc in next sc, 1 sc in each of next 3 sc, 2 sc in each of next 2 sc, 1 sc in each of next 3 sc, insert hook in top of begin­ning ch 2, drop tan yarn and pick up brown yarn, yo and pull through loop to com­plete sl st. Fas­ten off tan yarn.

Row 4 — 5: ch 2, 1 sc in each sc around, sl st in top of begin­ning ch 2.

Row 6: ch 2, 2 sc tog 3 times, 1 sc in each of next 2 sc, 2 sc tog 3 times, 1 sc in each of next 2 sc, sl st in begin­ning ch 2.

Stuff chest­nut. You might also want to sew on the eyes and mouth at this point (before stuff­ing it), but I pre­fer decid­ing the place­ment for eyes and mouth after the amigu­ru­mi is stuffed and shaped. I usu­al­ly make mag­nets or pin, so I hide the thread ends at the back where I would attach mag­nets or pin.

Row 7: ch 2, 4 sc tog twice, 2 sc tog over last sc and top of begin­ning ch 2. Fas­ten off, weave in end.

Sew on eyes and mouth if you haven’t already.

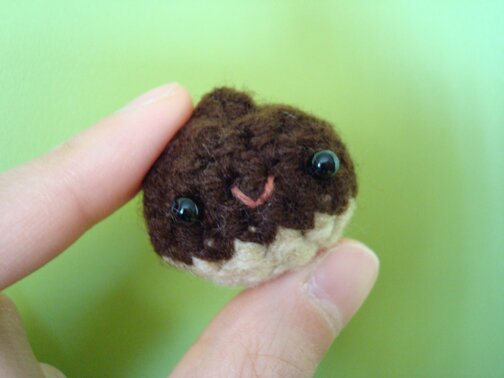
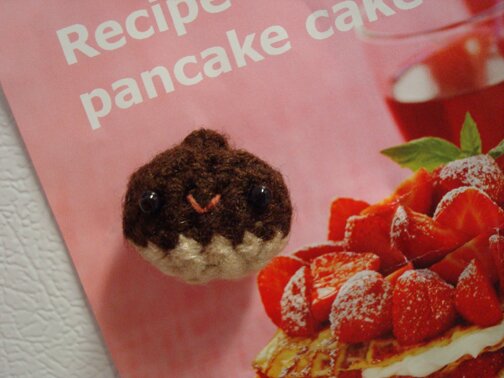
And there you have it, a chest­nut! I made mine into a fridge mag­net by attach­ing mag­nets to the back…

… and it makes sure I don’t lose the recipes I’d like to try but haven’t got­ten around to make (like this pan­cake cake I picked up at Ikea!)…

I used those very strong mag­nets that look like watch bat­ter­ies, and by putting an extra mag­net behind the fab­ric I can wear it as a pin! Here it is “pinned” on my show­er curtain…

Oooh, or it can be made into a key chain or cell­phone charm… strung togeth­er with cro­cheted fall leaves per­haps? Here’s a love­ly free pat­tern of fall leaves on Craft­Styl­ish)

Or it might just sit on your desk and smile at you while you work…

Any­ways, hap­py crocheting!

The story of napa cabbage and chestnut

For my mom’s birth­day and moth­er’s day this year I made her fridge mag­nets, of a napa cab­bage and a chest­nut. She had told me that she want­ed some fridge mag­net friends ever since I start­ed mak­ing them two years ago, and after mak­ing batch­es of them for com­mis­sions and shows and stores I’ve final­ly got­ten around to mak­ing her two, which I’m feel­ing rather guilty about…

But any­ways, I made a napa cab­bage and a chest­nut because they are nick­names that my sis­ter and I gave our­selves when we were kids. My sis­ter was napa cab­bage and I was chest­nut. Actu­al­ly, we still call each oth­er by those names. Not exact­ly “napa cab­bage” and “chest­nut” (although that would be fun too), but napa cab­bage and chest­nut in Chi­nese, which sound like “Cil” and “Lud” respec­tive­ly (hence the pic­ture with the alpha­bet mag­nets :D). Napa cab­bage is one of my sis­ter’s favourite foods (prefer­ably cooked in a stew with chick­en) and chest­nut was one of my favourite things to eat (prefer­ably cooked in a stew, with chick­en). So I guess that’s where the nick­names came from.

Napa cab­bage was a bit of a free-form cro­chet project so I don’t have a pat­tern for it…

Chest­nut, on the oth­er hand, is a bit like saku­ra mochi, so I was able to jot down the pat­tern as I went and I will post it soon, maybe tomor­row! :D

The nick­name chest­nut may have also come from the time when my sis­ter and I were play­ing teacher and stu­dent, and I was call­ing myself “teacher chest­nut”, because there was a “teacher chest­nut” in Dr. Slump, which was a pop­u­lar Japan­ese car­toon when I was going up. This “teacher chest­nut” had a large head that looked like a — you guessed it! — chest­nut. I remem­ber the door to his home is even shaped like a chest­nut in the top part to accom­mo­date his head.

Appar­ent­ly, he dri­ves a tank (?). I don’t remem­ber that. And obvi­ous­ly I did­n’t look like “teacher chest­nut” here but I guess I just thought the whole idea of a chest­nut-head teacher is fun­ny so I kept call­ing myself that.

So I was real­ly excit­ed when San‑X put out Amagurichan, a chest­nut char­ac­ter. I even got the plush key chain from Hong Kong (I went to Hong Kong for oth­er rea­sons, of course. Yes, real­ly, I went for rea­sons oth­er than the plush key chain. But I did spend a lot of time look­ing for Amagurichan prod­ucts while I was there…). It had an out­er shell around its head with a Vel­cro clo­sure so it can be removed. Extreme­ly adorable. Bad deci­sion to chain it onto my back­pack and go to school with it, because it got stolen soon after :’( Will have to find anoth­er one if I ever go to Pacif­ic Mall, or, bet­ter yet, Hong Kong :)

So, any­way, a bit of fun mem­o­ries from my child­hood. Here’s wish­ing my mom a very hap­py birth­day and a sweet year ahead, filled with bless­ings, joy, and good health. And have a sweet Mon­day everyone!

Go Marshie!! :D

The Instructa­bles Robot told me today that Marshie is also fea­tured in the cro­chet sec­tion!!! :D

*tears*

I had a par­tic­u­lar­ly stress­ful, emo­tion­al­ly drain­ing day, so I’m real­ly thank­ful for this encour­ag­ing news. I don’t know what I’d do with myself if I don’t know how to cro­chet. I’m espe­cial­ly thank­ful for my mom who taught me this life skill when I was 8. (I made a coin purse. I think I lost it.)

Any­ways, hap­py Thurs­day everyone!