Tomorrow is the first day of December! Thought I’d share a super cozy last minute gift to make :D
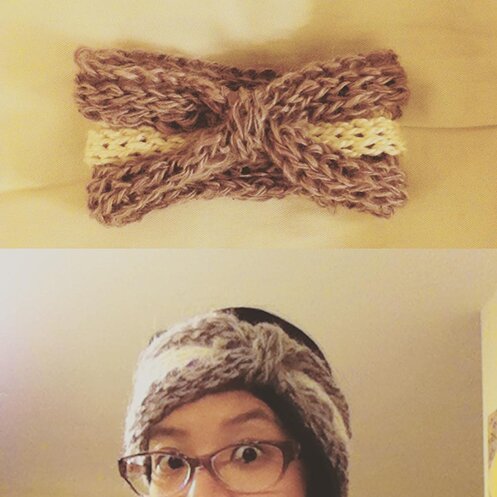
I’ve mentioned this ear-warmer in a post before, and finally got around to taking all the pictures to make a how-to :D It works best with bulky weight yarn, to keep the fabric soft. I think super bulky would turn out too stiff. Because of the way the knitted fabric curl with finger-knitting, the ear-warmer/headband will also turn out double-thick! So it’s super warm :)
I used:
Bulky weight wool. I used the scrap yarn I have, but one ball of this will be enough to make one headband of solid colour. 2 balls if you want to make one with a contrasting colour.
No need for needles and hooks, just fingers :) but you do need a tapestry needle for sewing the headband together.
Notes:
I learned finger-knitting and joining method from Knitting Without Needles by Anne Weil. She also has a photo tutorial on how to finger-knit here. But to save everyone the trouble of going back and forth between different sites, I’m showing the basics of finger-knitting in the how-to below as well.
The bind-off method is inspired by this finger-knitted blanket video by Good Knit Kisses. The author of the video uses a different finger-knitting method than the one I’m used to, so I just took the basic idea and made up a bind-off method that works for me.
Basically, finger-knitting produces a long strip of knitting. For the headband, we’re going to make 6 strips of knitting and join them together lengthwise as we knit.
It might take longer to make the headband if you’re learning finger-knitting for the first time. But with some practice, the headband took me a couple of hours in front of the TV to finish :)
Ready? Let’s knit! :D
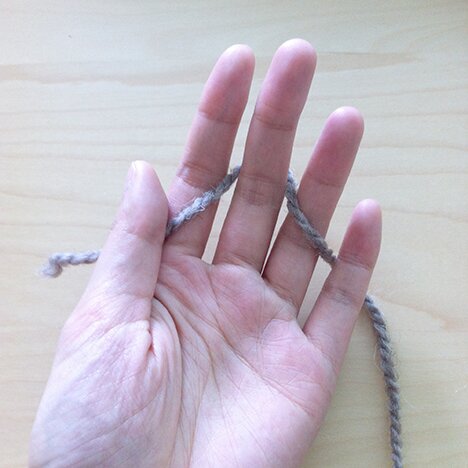
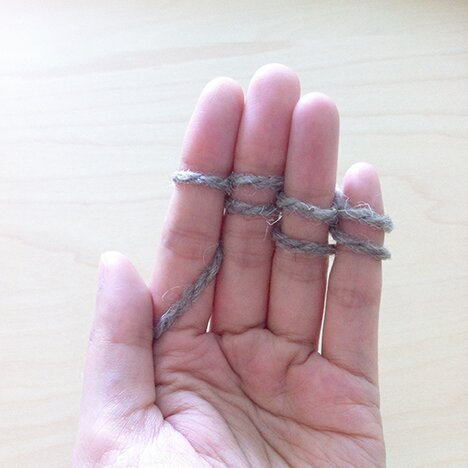
We first make a setup row. Take your left hand, take the yarn end and hold it between your thumb and hand, then take the yarn behind your middle finger, in front of your fourth finger, and behind your pinky.
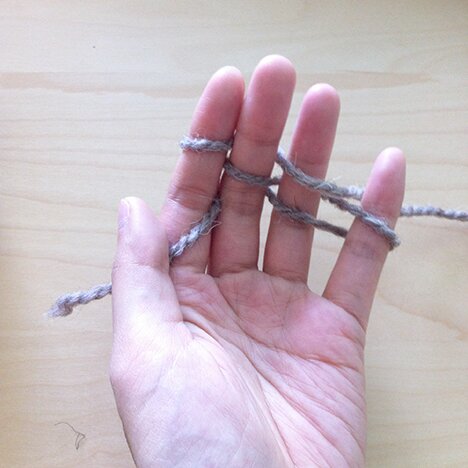
Wrap the yarn around your pinky, take it behind your fourth finger, in front of your middle finger, and behind your index finger.

Wrap the yarn around your index finger, then take it behind your middle finger, in front of your fourth finger, and behind your pinky again.
Wrap the yarn around your pinky, take it behind your fourth finger, and in front of your middle finger, than hold the yarn between your index finger and middle finger.
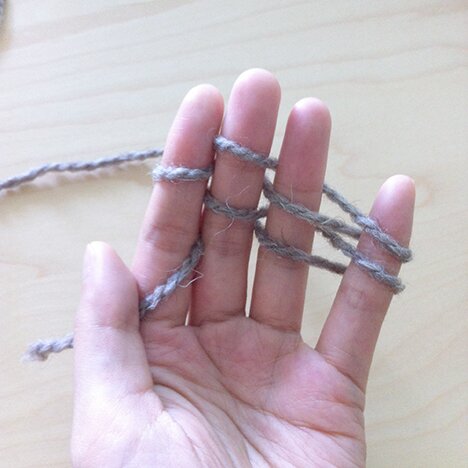
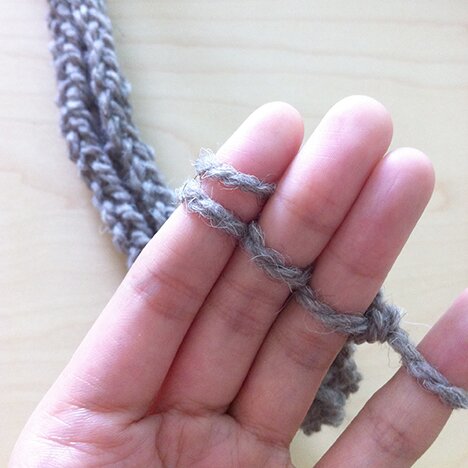
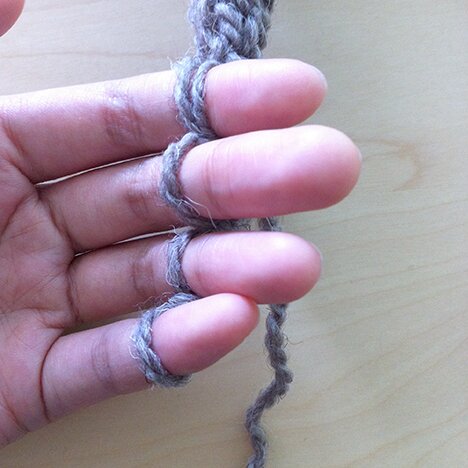
Straighten out the wrapping a bit, it will look something like the picture below, with the yarn end still held between your thumb and your hand, and the working yarn tail between your index finger and middle finger.
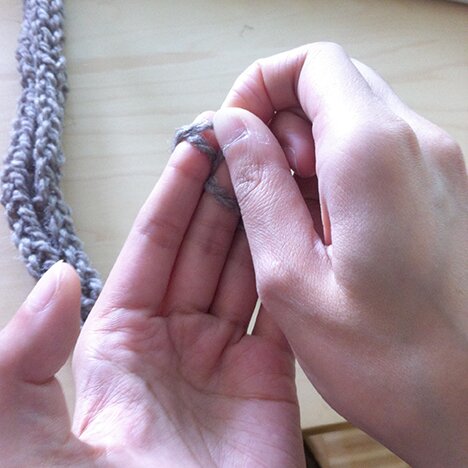
Now, starting from your pinky, take the lower loop of yarn, and pull it over the upper loop of yarn and over your finger, so that you would have only one loop of yarn left on your finger. Repeat on your fourth finger and middle finger.
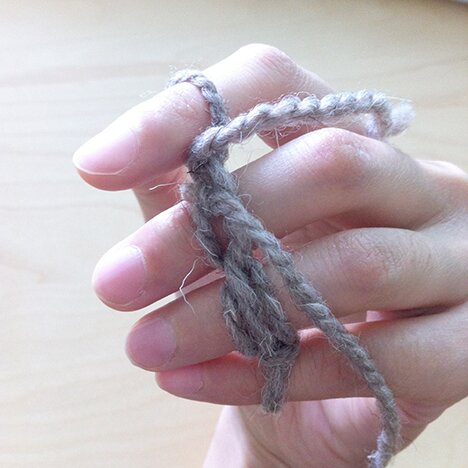
Then take the yarn end between your thumb and hand, and swing it to the back of your hand between your index finger and middle finger, like so. We’ve now completed the set up row.
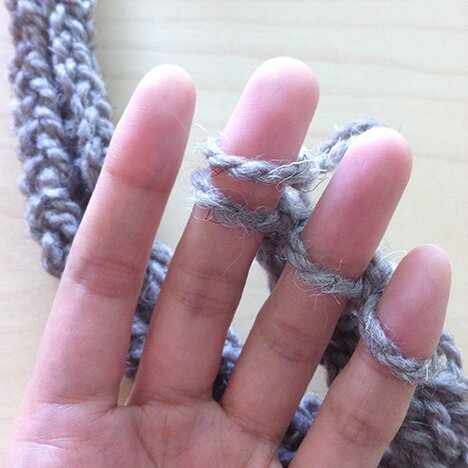
We now begin our first row. Wrap the working yarn around your index finger, from left to right, take it behind your middle finger, in front of your fourth finger, and behind your pinky.
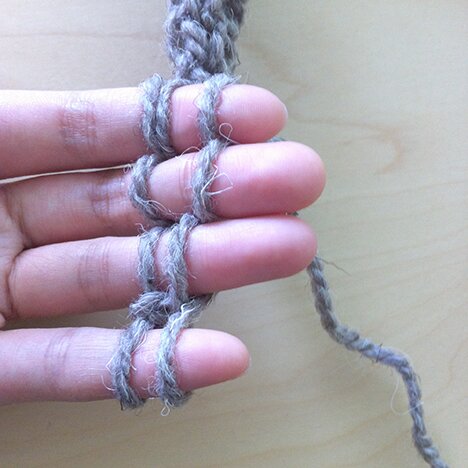
Wrap the working yarn around your pinky, take it behind your fourth finger, in front of your middle finger, and hold it between your index finger and middle finger. The working yarn tail will always rest between your middle finger and index finger after each row.
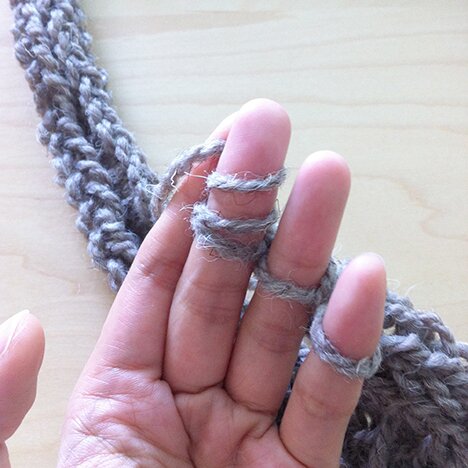
Starting with your pinky, pull the lower loop on your finger over the upper loop and over your finger. Repeat with your fourth finger, middle finger, and index finger. We’ve completed a row!
Repeat the steps from “we now begin our first row” to “we’ve completed a row” 39 more times. So that altogether we will have 40 rows.
Note on size: 40 rows fits me fine, since headbands are supposed to be a bit snug to stay on the head, and because of the loose gauge of finger-knitting the headband will stretch. But the length of your knitted strip may also vary according to the kind of yarn you use or the tension of your knitting. You can wrap the knitted strip around your head after 40 rows, and see if the ends will meet with a bit of stretching, and if you need to add or take out a row or two. Or if you’re making it for somebody else, make the knitted strip a couple of inches shorter than the person’s estimate head circumference. I think an average adult head is 22″ around.
As you knit, the right side of the work will be facing the back of your hand, the wrong side of the work will be facing up.
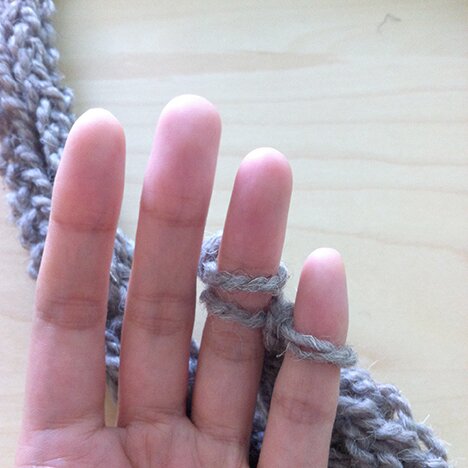
After the 40th row is complete, we now begin to bind off the strip. Wrap the working yarn around your index finger from left to right. Hold the yarn between your index finger and middle finger.
Pull the lower loop over the upper loop and over your index finger.
Place the remaining loop on your index finger onto your middle finger.
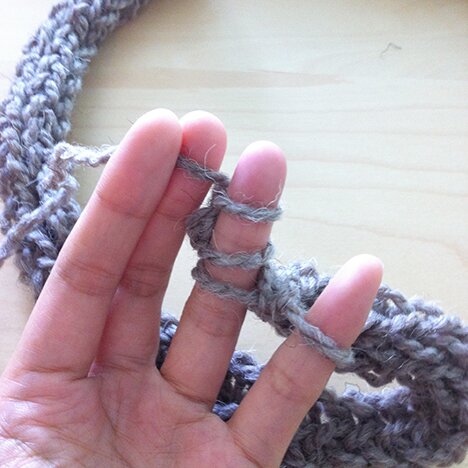
Take the working yarn and wrap it around your middle finger, from left to right. Pull taut (but not too tight) the working yarn by holding it between your index and middle fingers. Pull the two lower loops on your middle finger over the upper loop (working yarn loop) and over your middle finger.
Transfer the remaining loop on your middle finger onto your fourth finger.
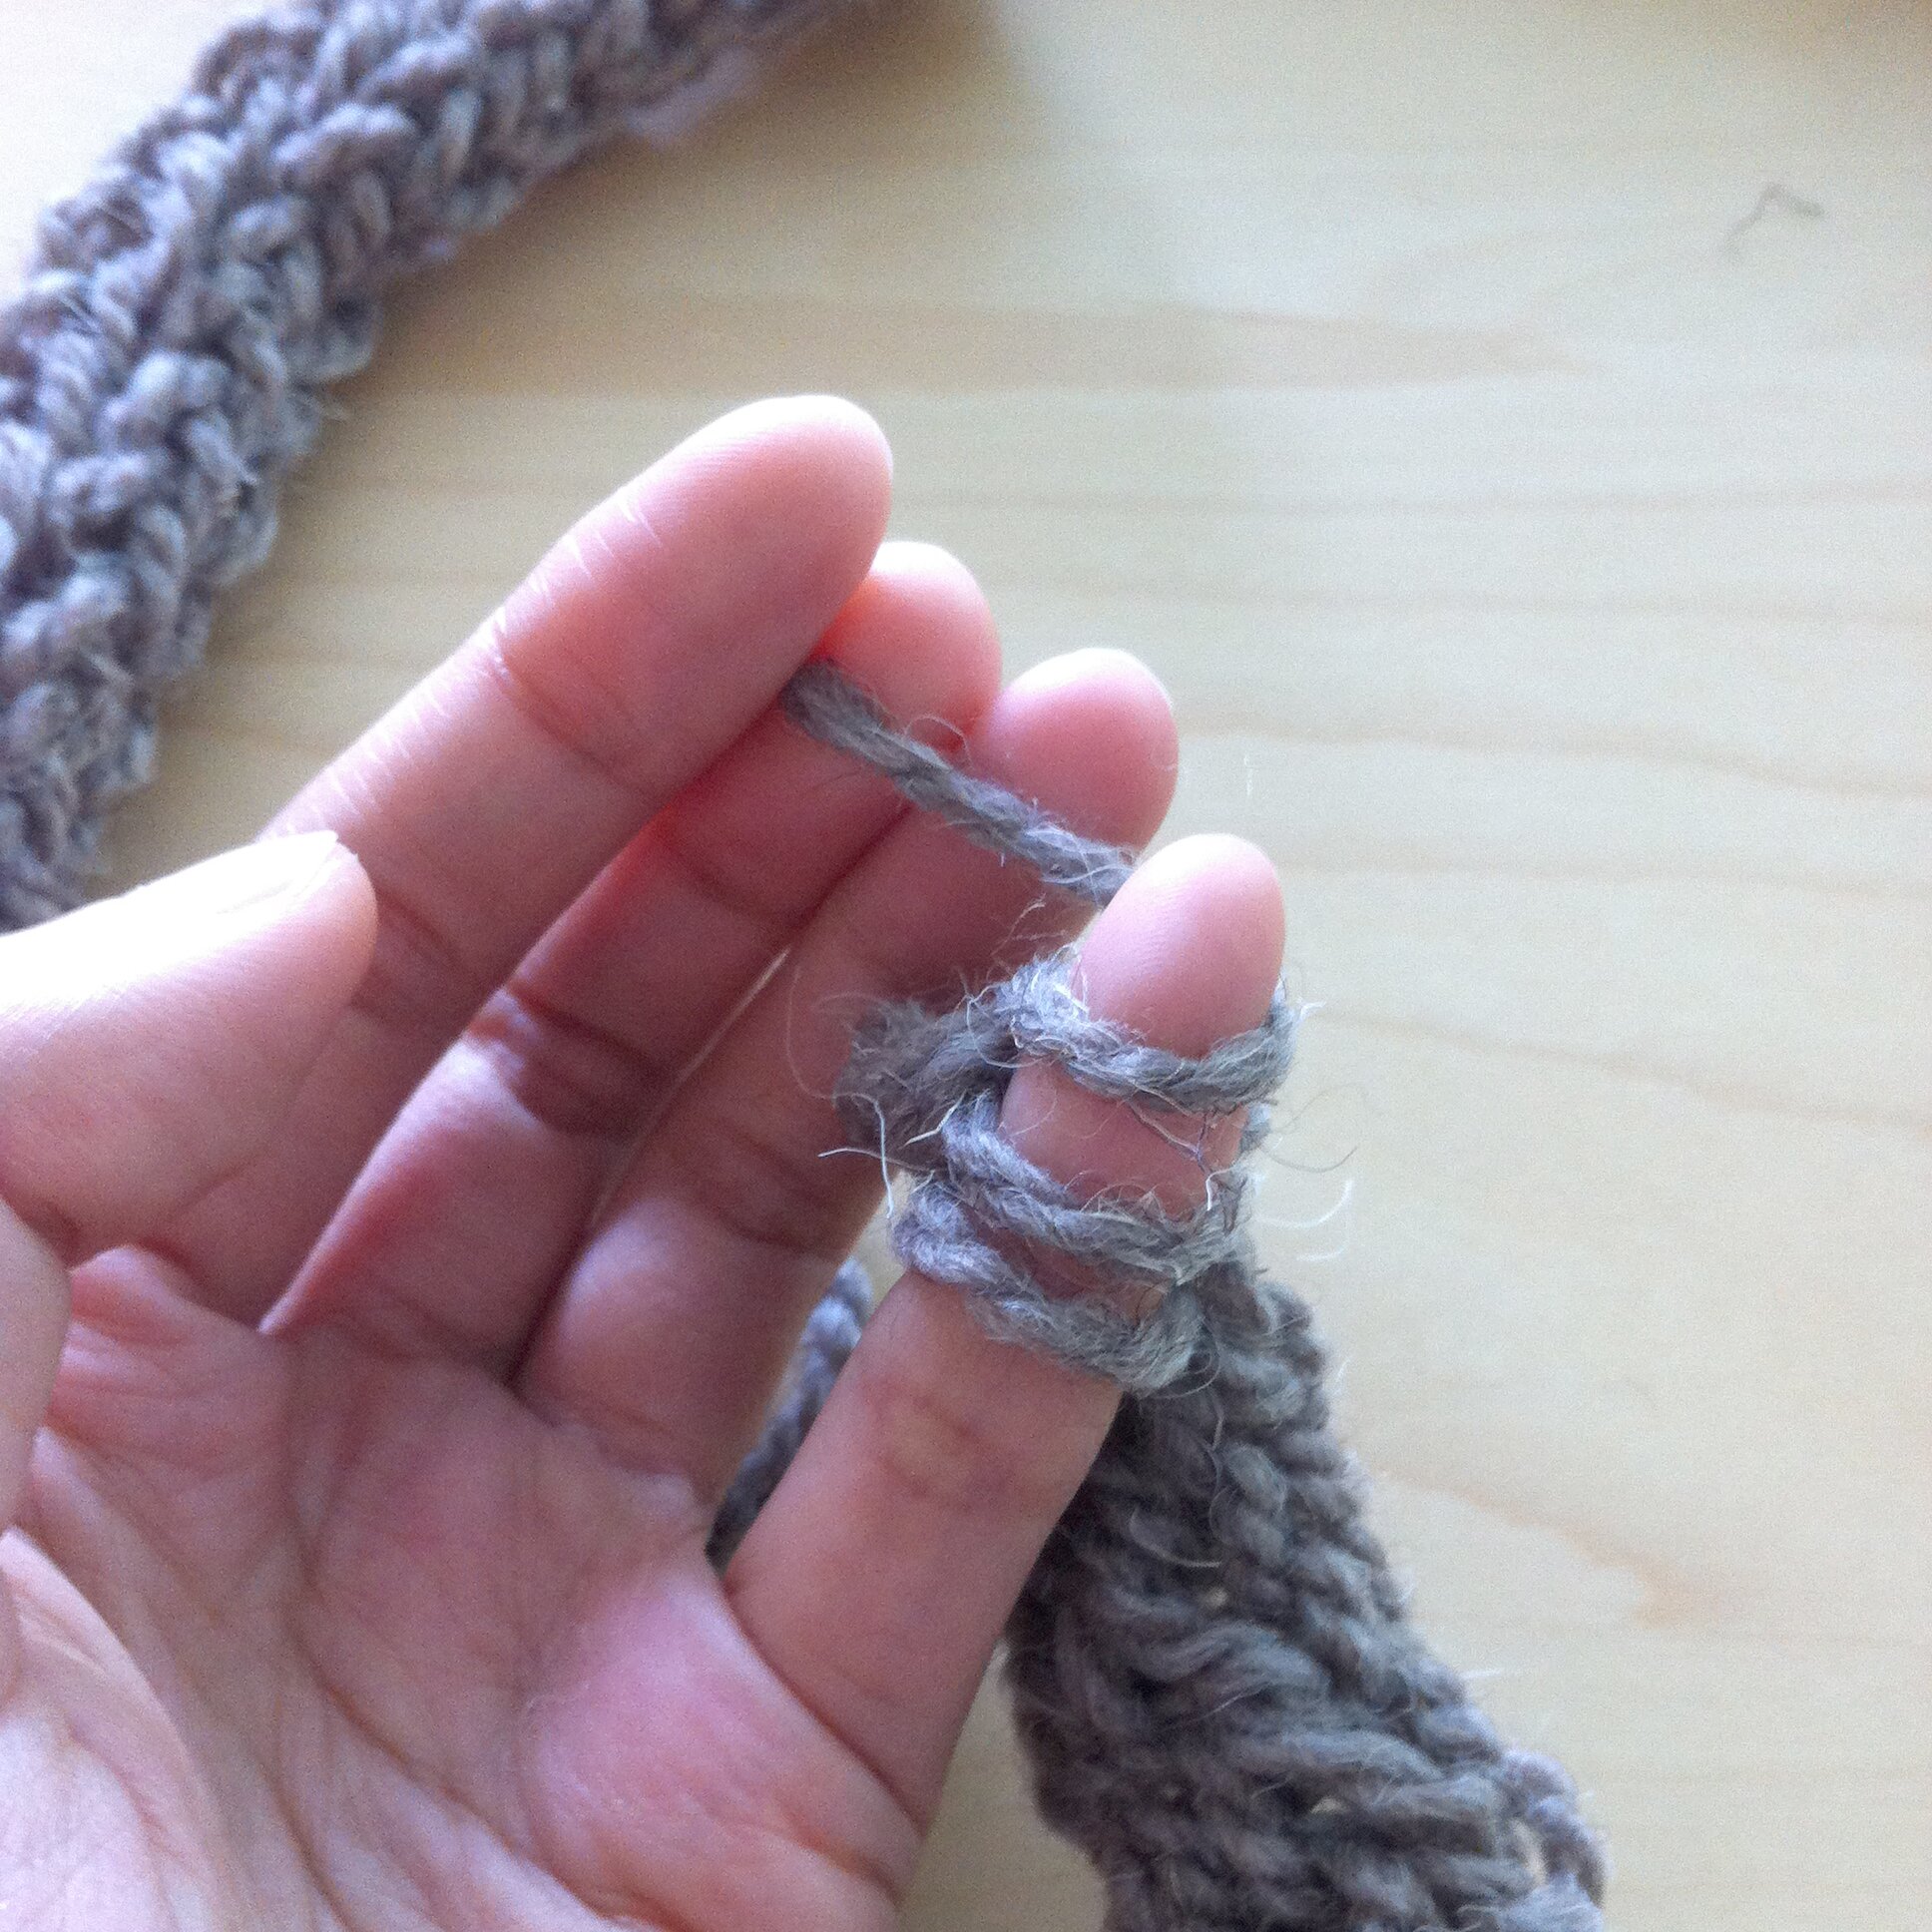
Wrap the working yarn around your fourth finger, from left to right. Pull taut the working yarn tail by gripping it between your index and middle fingers. Pull the two lower loops on your fourth finger over the upper loop and over your fourth finger.
Transfer the remaining loop on your fourth finger to your pinky. Wrap the working yarn around your pinky, from left to right. Pull taut the working yarn tail by gripping it with your index and middle fingers. Pull the two lower loops on your pinky over the upper loop and your pinky.
You will have one remaining loop left on your pinky.
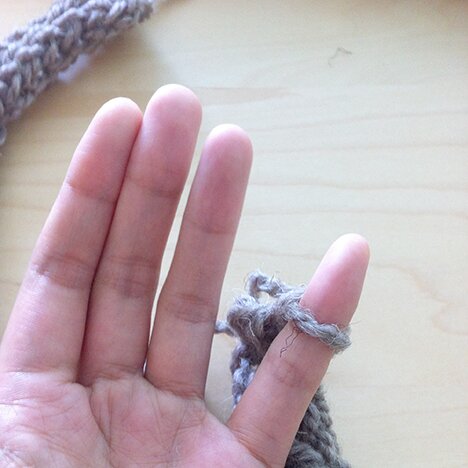
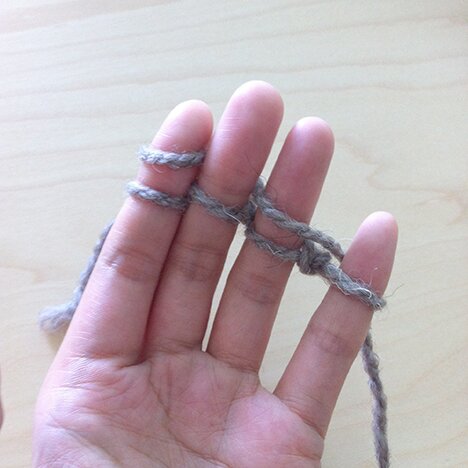
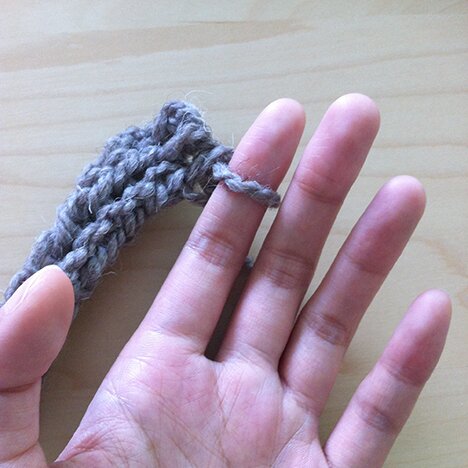
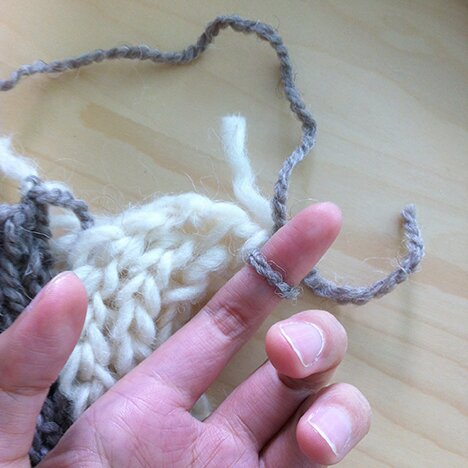
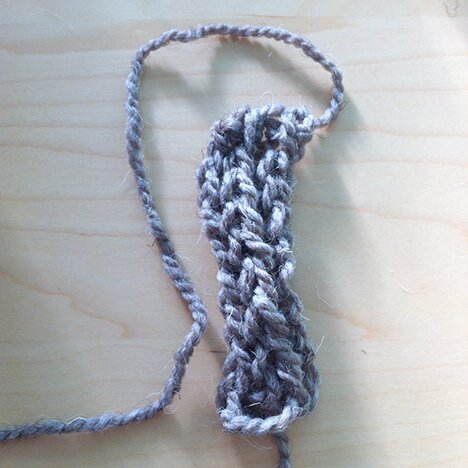
Without turning the knitted piece, transfer the loop on your pinky to your index finger, with the right side of the work facing you, positioned like the picture below.
We are now knitting the second strip, and joining it to the first strip as we knit. Wrap the working yarn around your fingers as usual to knit one row.
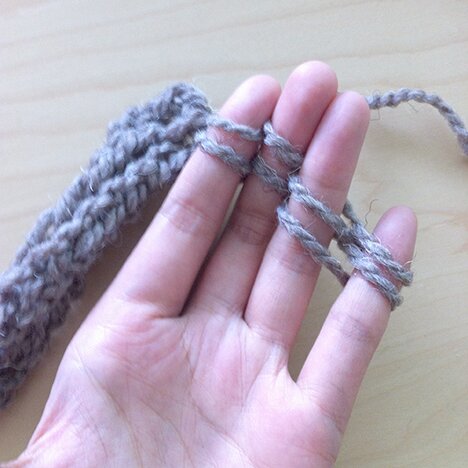
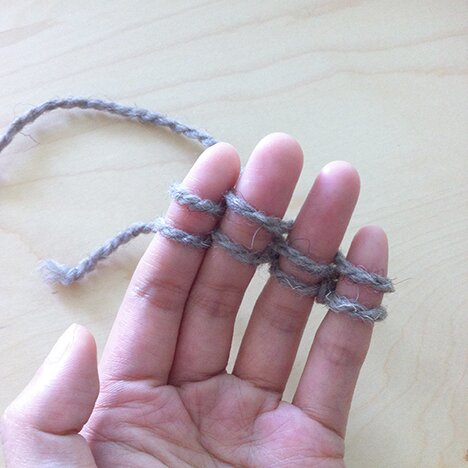
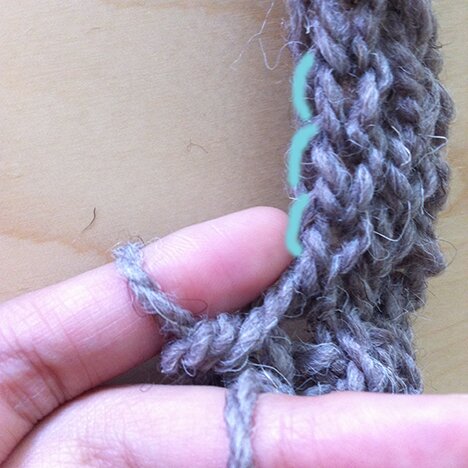
Then, position the knitted strip and your hand like the picture below. Note that the right side of the knitted piece is still facing up.
Insert your index finger from under the loop into the outermost loop of the second row from your hand — the highlighted loop in the picture below.
You will now have two loops on your index finger.
Then wrap the working yarn around your fingers as usual to knit the row. When you get to your index finger, pull the two lower loops over the upper loop.
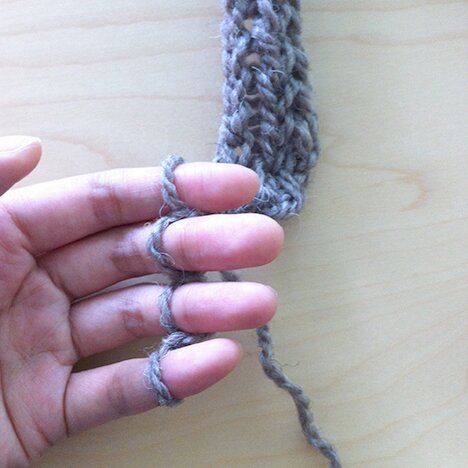
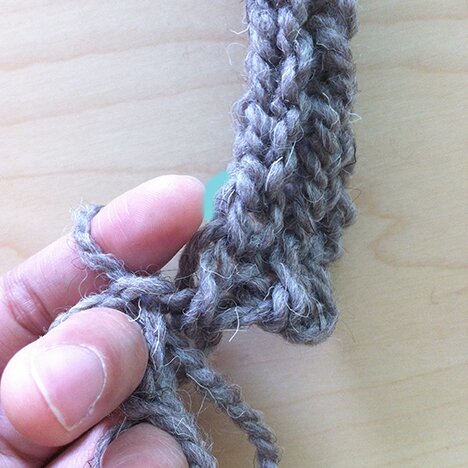
And in every row hereafter, before wrapping the working yarn around your fingers to knit the row, insert your index finger into the outermost loop of the knitted strip — the highlighted loops in the picture below.
When the second strip is complete, bind off as shown before, with one loop remaining.
If you’re making a solid colour headband, you can continue knitting until you have 6 knitted strips altogether. If you’d like a contrasting colour, change colour after knitting the first 2 strips, as follows.
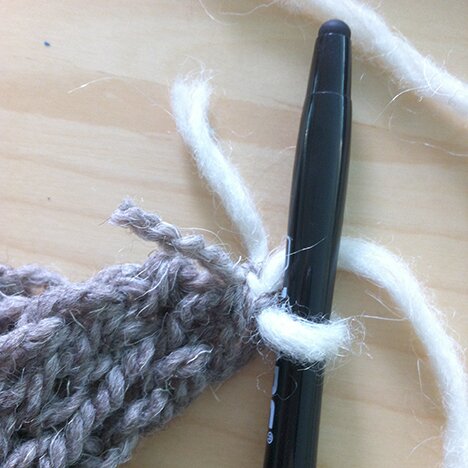
Make a loop with new colour and place loop in the working loop, like so.
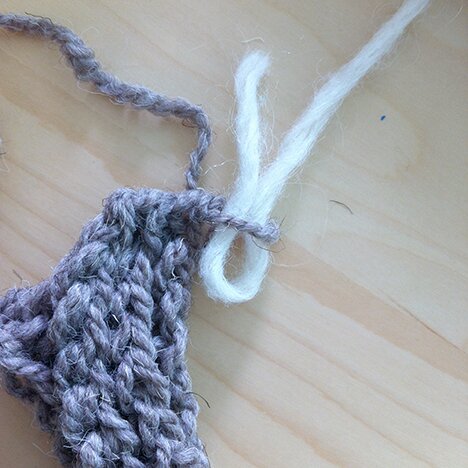
Tie the yarn end of the new yarn to the working yarn tail of the previous colour. You might want to put a pen into the new yarn loop to stabilize it when tying. Cut off the previous colour.
Then knit with new yarn and join it to the previously knitted strip, as shown before. Knit two strips with the new yarn. Then change to previous colour, and knit two strips.
After binding off the 6th strip, leave a long tail for sewing, and cut off yarn. Pull the yarn end through the working loop to fasten off.
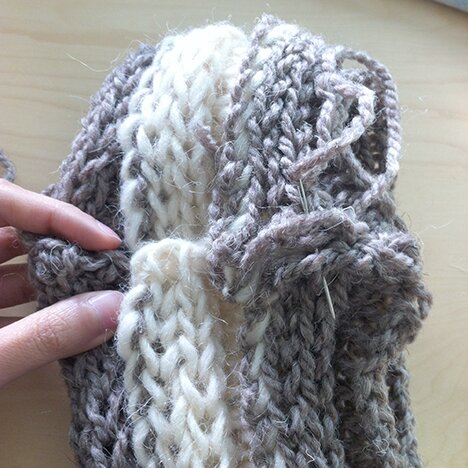
Now we sew the headband together. With wrong side facing, sew the two short ends of the headband together using a loose mattress stitch. Because of the loose gauge of finger-knitting, some stitches are going to be quite loose. Ensure that your needle is passing through two strands of yarn on each side in each stitch.
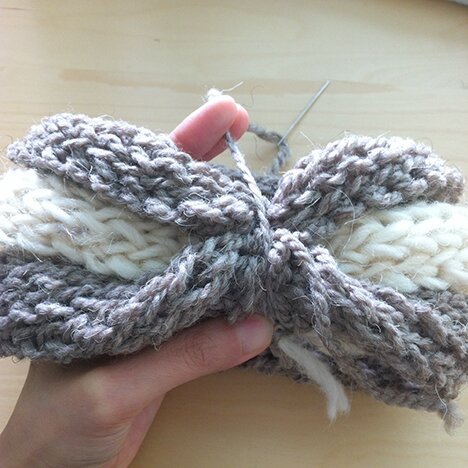
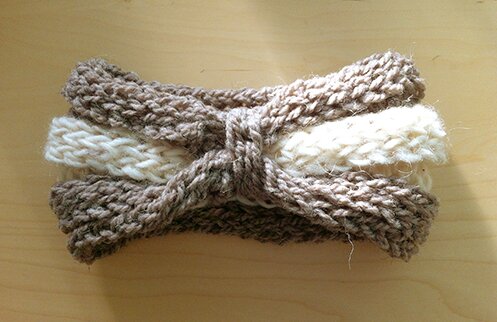
After sewing the seam together, don’t fasten off. Pull the sewing yarn tight to cinch the seam. Turn piece right side out. Wrap the sewing yarn firmly around the middle a couple of times, with the top and bottom edges of the headband folding into the centre, like so.
Fasten off the sewing yarn by tying it to the beginning yarn end. Weave in ends.
Now we make the small strip in the middle of the cinch. Finger-knit a piece that is 6 rows long, and bind off, leaving a long tail for sewing.
Wrap the piece around the cinched middle of the headband, sew the ends of the small piece together, then sew through all layers of the headband a couple of times through the middle. Fasten off by tying the sewing yarn tail to the beginning yarn end of the small knitted piece in the middle.

And we’ve done it! A double-thick, super warm, (literally) handmade ear-warmer! :D
I hope my photos are clear. But if you have any questions, please feel free to leave a comment below and I will try my best to explain, and other visitors will benefit from your questions too, so don’t be shy :)
Wishing you a happy week!
I would love to see a video tutorial! It would be easy to work along with
you that way! Any plans to record the process?
Thanks for visiting Joanna! That’s a good idea especially for the finger knitting projects. Videos do take a lot of time and setup to make, so I haven’t been able to do that. Maybe in the future!
This is going to be my first project,for some Xmas gifts. Wish me luck!
thank you for visiting Michele! happy knitting :D
Hi there I know this is a really old post, but it’s my first try with finger knitting, I was having great success, but then had to go do something else, do how do I take the loops off my fingers and save it so I can go back to it later? I ended up having to throw away all my work because I couldn’t find how to put the loops back on.
Hi Karen, thank you for visiting! I usually put the loops on a large (15mm) crochet hook if I need to pause and come back to it later. I mark the front and back of my work (I just tie a piece of yarn to one of the stitches on the side that’s touching the back of my hand) so that I know how to put the loops back on. Hope this helps!