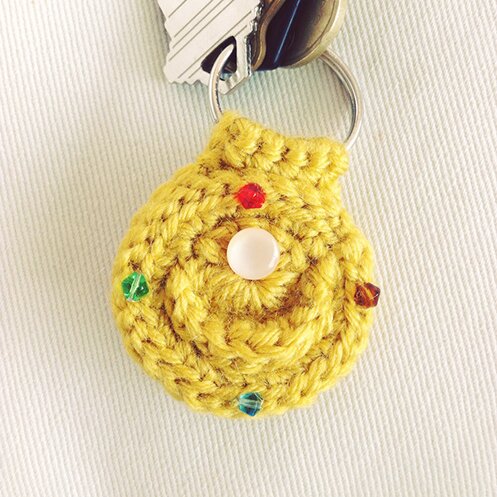
Was feeling nostalgic the other day, and was in need of a new keychain, so I decided to make a Sailor Moon transformation brooch. Luna (the cat) gave this to Usagi in the first anime series, so that she could transform into Sailor Moon. (pic from Pinterest)

She wears it on her bow. (pic from Sailor Moon News)

Sailor Moon was hugely, HUGELY popular when I was a kid in Hong Kong, so I had a plastic transformation brooch that came with a box of cookies. It had since been lost :’(
So anyway, I crocheted one for my keys, and because it took me a couple of tries, I ended up writing down what I did, in case I want to remake it for friends who are also Sailor Moon fans, or maybe there are blog readers who want to make one too :)
I used:
Small amount of worsted weight yarn in yellow
3 mm hook
Tapestry needle
Pink plastic pearlized shank button about 3/8″ to 1/2″ in diameter (mine’s 3/8″, I think it’s a bit small, but it’s what I have)
Small translucent round or crystal shaped beads in red, green, yellow and blue
(If you don’t have the button and beads, you could also try using yarn and embroidery for a completely textile look, which I think would be quite nice also, and might end up swapping the beads for embroidery if they start coming off after the keychain and keys get tossed around in my bag for a while…)
Pattern:
Pattern is worked in continuous rounds, all with right side facing, no need to fasten off at any point. I’ve divided the instruction in sections.
Centre circle: In magic ring (how perfect!), ch 3, dc 11, sl st in top of beginning ch 3.
Moon section: Working in back loop only, sl st in next dc, sl st and sc in next dc, 2 sc in next dc, 2 hdc in next dc, 2 sc in next dc, sc and sl st in next dc, sl st in next dc, working in both loop sl st in next dc.
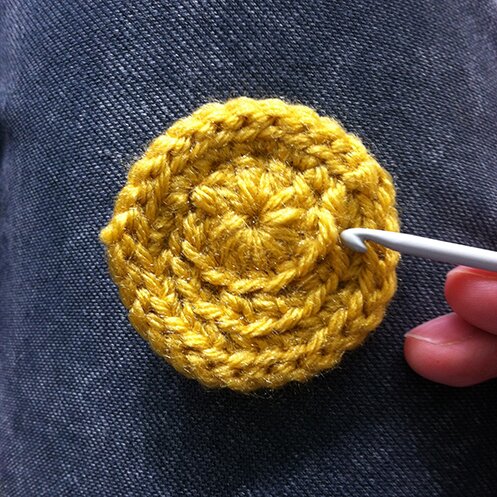
Outside ring: ch 1, continue working in both loops, sc in same dc as last sl st worked, 2 sc in each of next 3 dc, now work in back loop only, 2 sc in next sl st, continue working in back loop only, [sc in next st, 2 sc in next sc] until you reach the first sc of this section, sl st into first sc of section.
Edging: turn, working in front loop only, sl st in next st and each st around, use invisible join to complete round, fasten off.
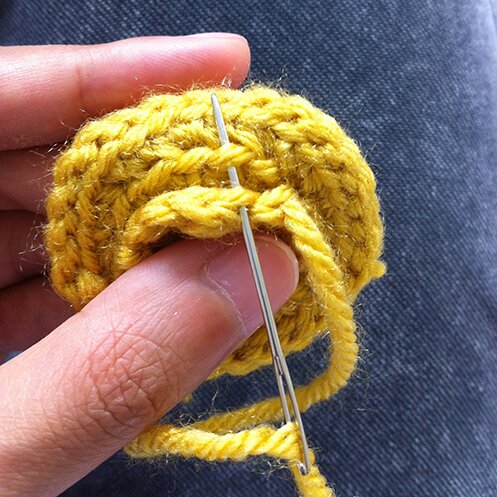
Perhaps this picture will give you a better idea of the different sections (this was before the last round of edging)… see the outline of the crescent moon?
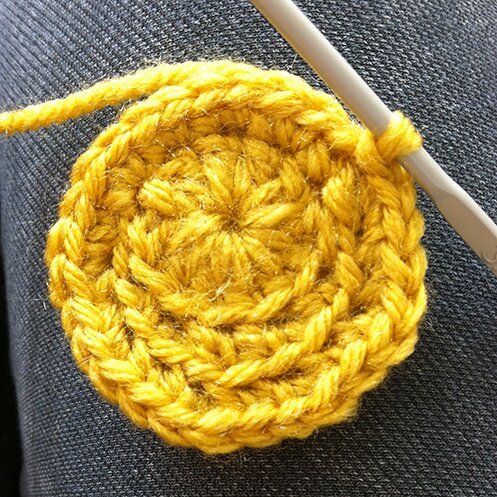
We will now attach yarn to this stitch on the outline of the crescent moon, made by the front loops of the stitches, where the crochet hook is pointing.
Join by making a slip knot on the hook, insert hook under the stitch where you’re joining, pull up a loop through the stitch and pull through the loop on the hook.
Then, working in the front loops that make up the top outline of the moon, sc in next st, sc and hdc in next st, hdc and sc in next st, sc in next st, sl st in next st, fasten off, leaving a 6″ tail.
Using a tapestry needle, pull the yarn through the piece at the top left corner of the moon, like so…
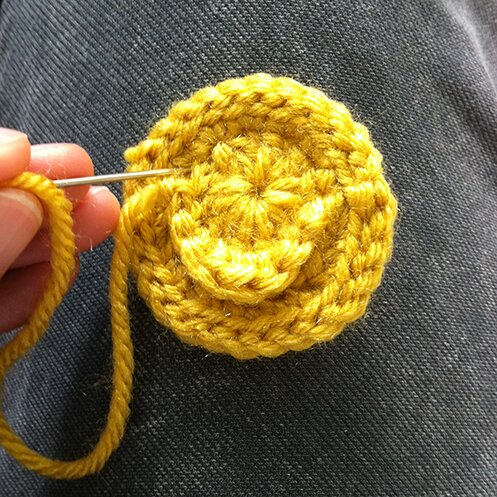
Then pull the needle and yarn back to the front and sew the part just made to the front loops that make up the bottom outline of the moon, like so…
Fasten off and weave in ends, and we’re done the crocheting part! It’s really much easier than it looks, it will all make sense when you start making it, but if you need any clarifications please feel free to drop me a note!
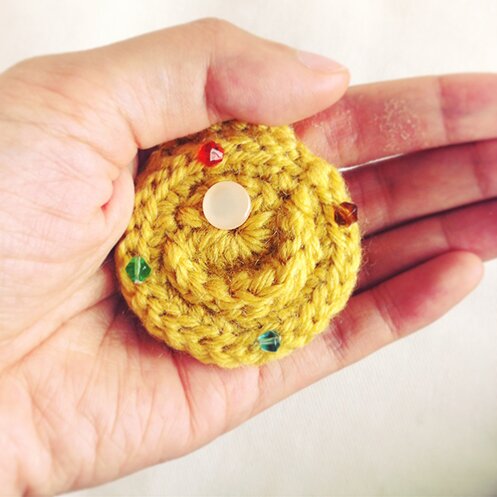
Then we finish the transformation brooch by sewing on the button and beads…

And we make a back piece:
In magic ring, ch 3, 11 dc, sl st in top of beginning ch 3.
ch 3, dc in same dc, 2 dc in each dc around, sl st in top of beginning ch 3.
If you’re not making a keychain, you can just fasten off with a long tail, then sew the front and back pieces together, and maybe sew a pin back on and wear it as a brooch!
If you’re making a keychain, then don’t fasten off at the end of round 2 in the back piece, and continue like so…
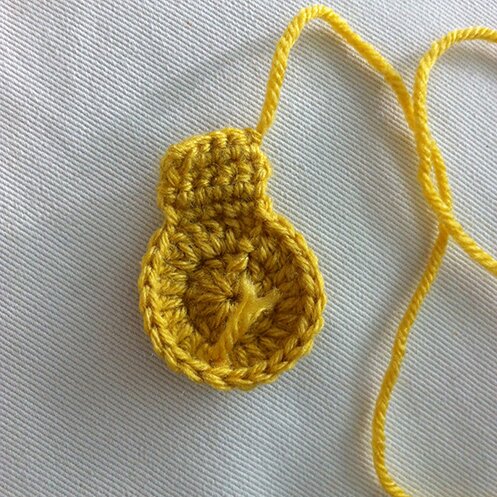
[ch 1, sc in same st, sc in each of the next 4 st, turn] repeat 5 times, fasten off and leave a long tail for sewing. So that you end up with this…
Wrap the rectangular part around a key ring (preferably not with the keys on it, much easier that way, but I was too lazy to take mine off), and sew the edge to the top of the circle, like so…
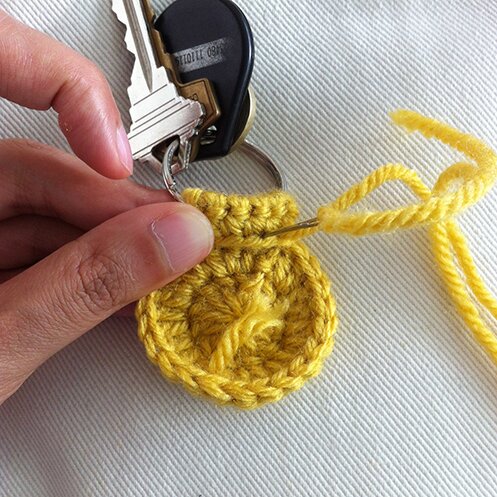
Then put the front and back piece together and sew all the way around. Fasten off and weave in ends.
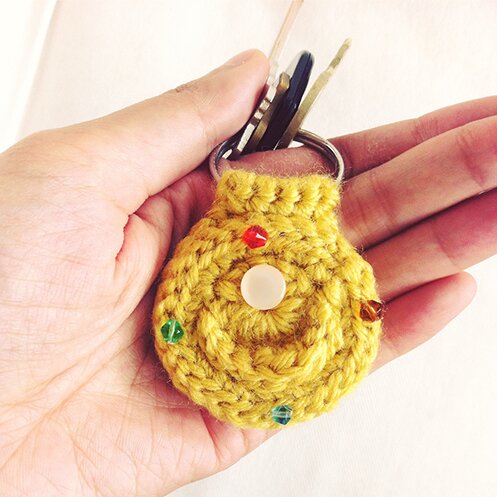
Carry around and be magical.
(I realized that I sewed the front piece on a bit off, that was bugging me a bit, but it’s too much work to undo it so I left it. Being magical does not mean being perfect.)
Have a happy day! :D