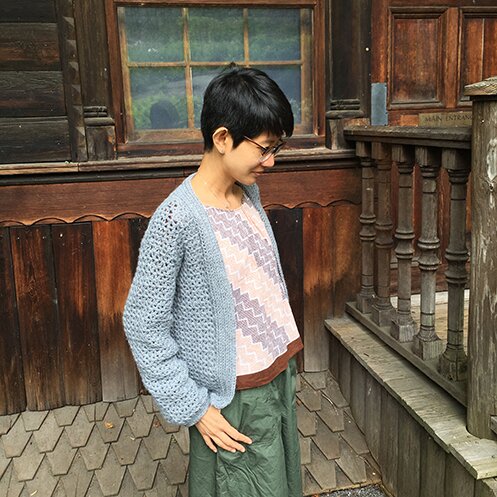
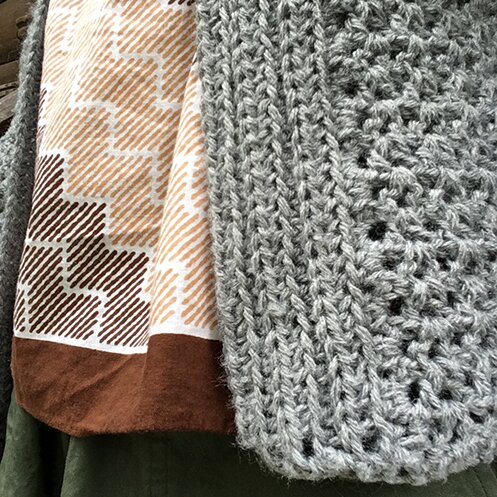
Made with simple V‑stitch, the resulting texture reminds me of wicker furniture.
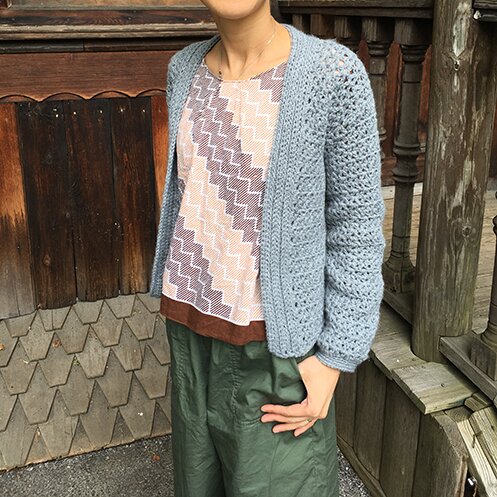
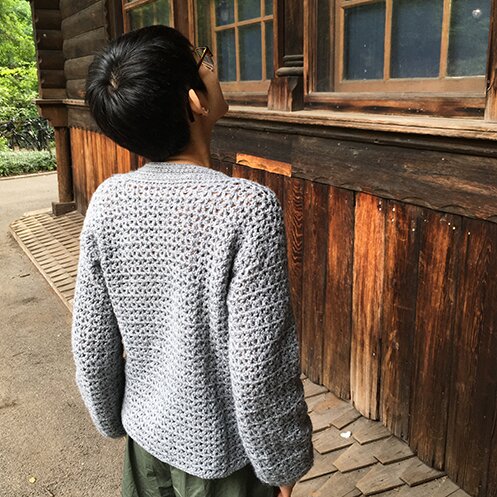
It’s an open front, light cardigan with a seamless construction. That’s right — no sewing, no sewing at all :)
Simple stitch pattern means easy to customize. The size I made is 34″. I’ve added suggestions for increasing size in italics.
I used one ball of Lion Brand Pound of Love and a 5.5 mm hook.
The cardigan is made top down.
Stitch pattern:
v‑stitch (v‑st): dc in stitch indicated, ch 1, dc in same stitch
Back
ch 66
Add 6 ch to the beginning ch for every inch you’d like to increase.
Row 1: v‑st in 6th ch from hook, [sk 2 ch, v‑st in next ch] till last 3 ch, dc in last ch, turn.
Row 2: ch 3 (counts as a dc throughout), [v‑st in ch 1 sp] to end, dc in top of turning ch.
Repeat row 2 eleven (11) more times. Fasten off. 13 rows altogether.
For larger size, work 2 more rows for every 6 ch added to the beginning ch.
Right front
Turn piece upside down, so that the beginning ch is at the top. Attach yarn to top right corner of piece.
Row 1: ch 3, v‑st in the base of the v‑st from row 1 of back (it would be upside down), continue to work one v‑st in the base of each of the next five v‑st from row 1 of back, dc in the base of next v‑st.
For larger size, work 1 more v‑st for every 6 ch added to the beginning ch.
Row 2: ch 3, [v‑st in ch 1 sp] to end, dc in top of turning ch, turn.
Repeat row 2 eleven (11) more times. Fasten off. 13 rows altogether.
Left front
Re-position the piece so that the unworked side of the shoulder is at top right. Attach yarn to top right corner.
Repeat rows 1–13 of left front. Don’t fasten off.
Join front and back
Join row: ch 3, v‑st in every ch 1 sp across left front, dc in last dc of left front, dc in first dc of back, v‑st in every ch 1 sp across back, dc in last dc of back, dc in first dc of right front, v‑st in every ch 1 sp across right front, dc in last dc of right front, turn.
Body
Row 1 after joining: ch 3, v‑st in every ch 1 sp until under arm, v‑st in between the last dc of front and first dc of back, mark v‑st just made, v‑st in every ch 1 sp until under arm, v‑st in between last dc of back and first dc of front, mark v‑st just made, v‑st in every ch 1 sp, dc in last dc, turn.
Row 2: ch 3, [v‑st in ch 1 sp] to end, dc in top of turning ch, turn.
Repeat row 2 until piece is 19″ from shoulder, or desired length. Fasten off.
Sleeve
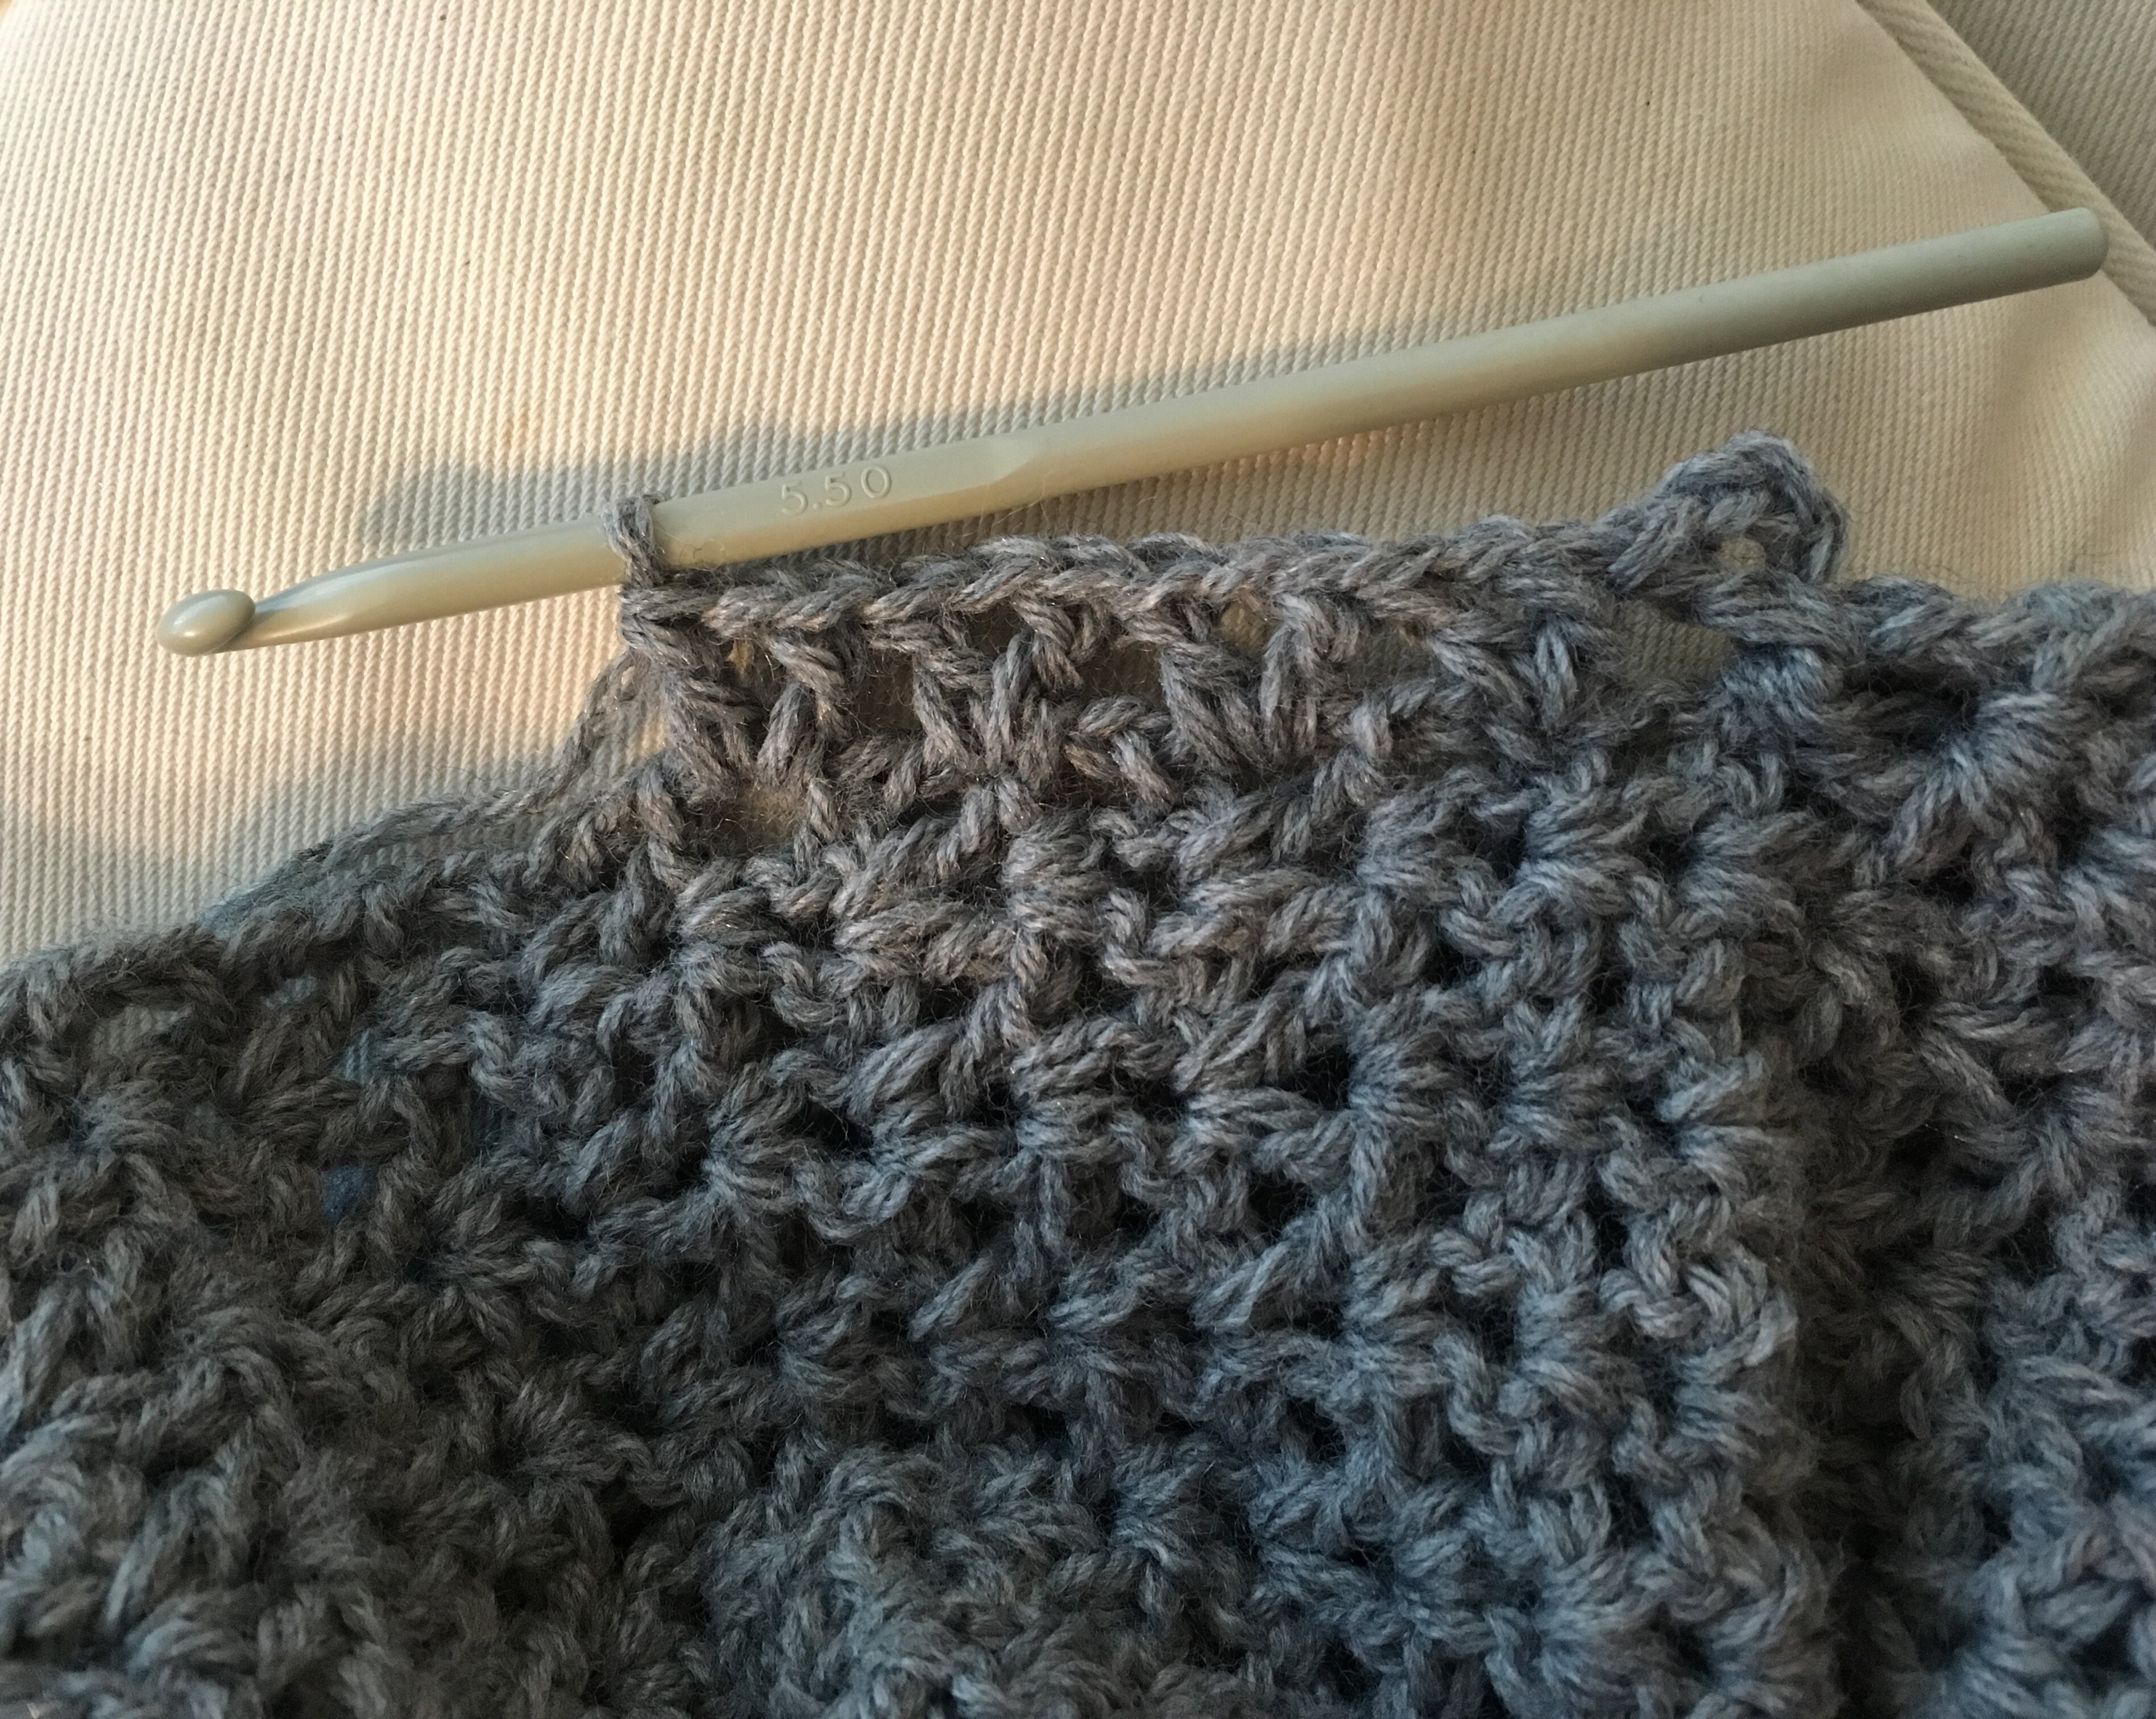
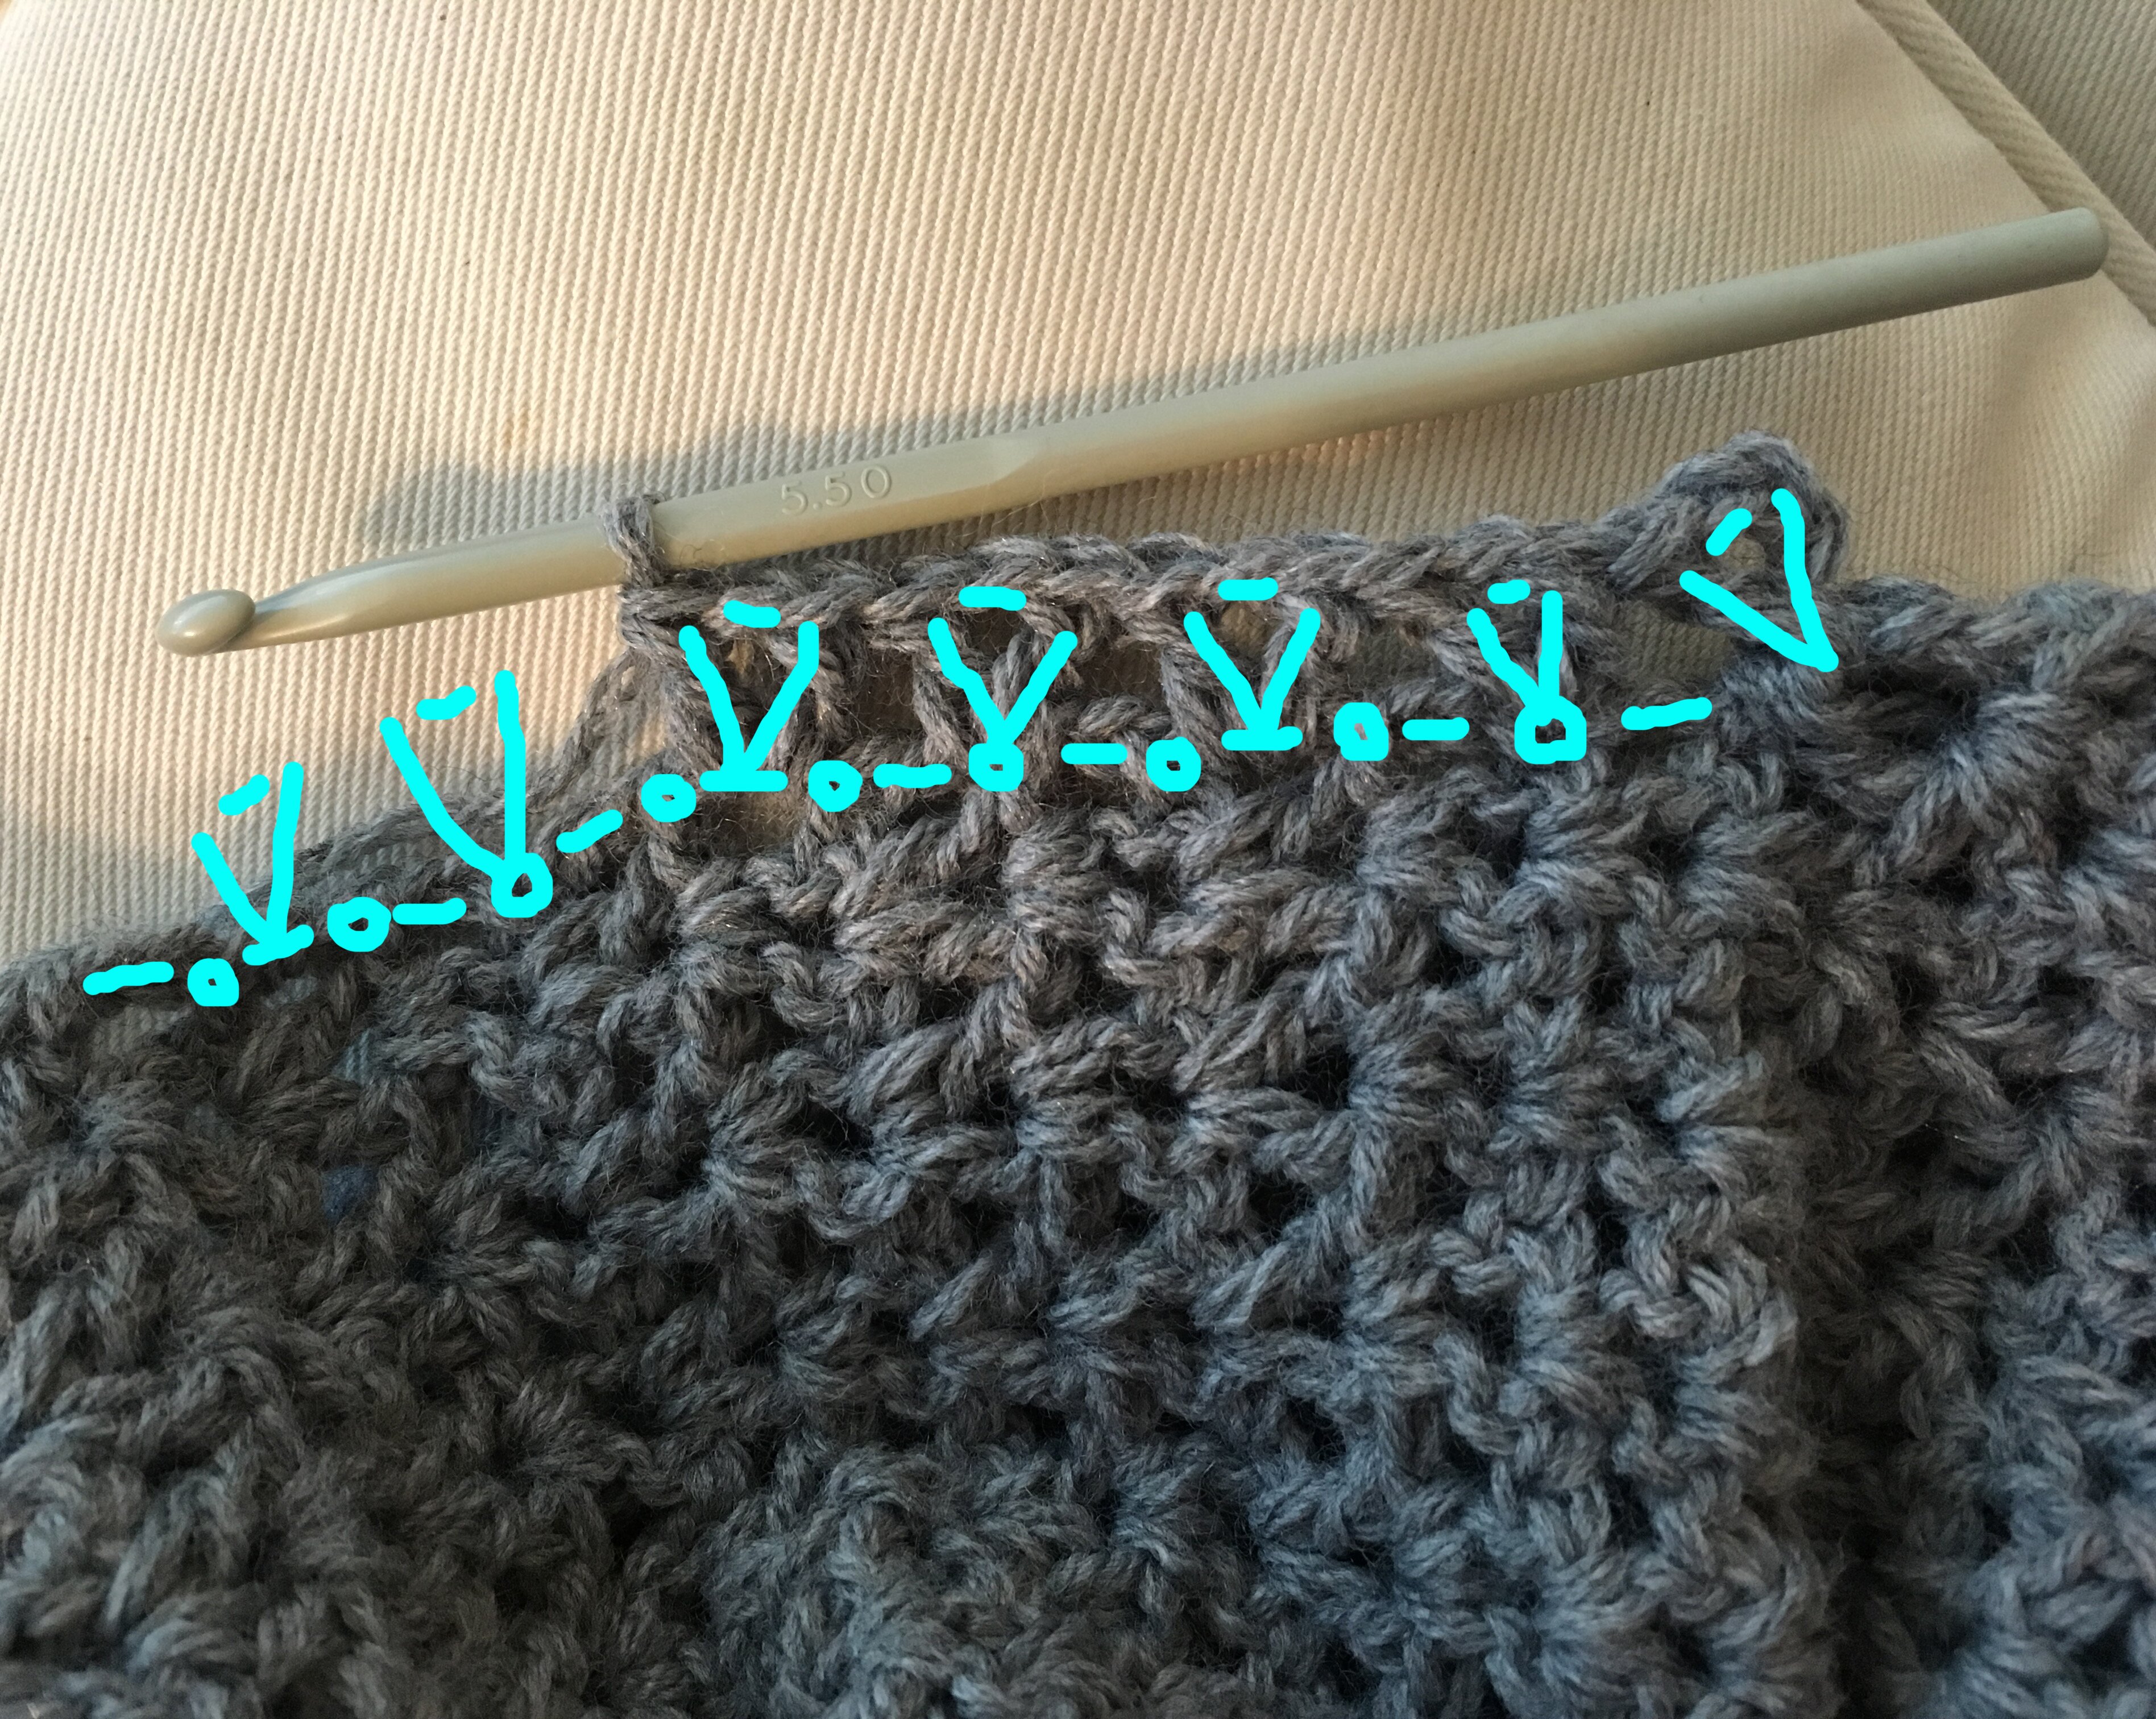
Sleeve is made in the round, turning at the end of every row. You will now be working along the side or ends of the rows in the front and back pieces. You will be making v‑st around the dc (which I will call the horizontal bar below) and in the joining point between rows (which I will call joining point below — it is either the top of a dc or turning ch, so you can just make a v‑st into it like you would usually do into a dc or ch).
Row 1: Attach yarn to the base of marked v‑st in underarm, ch 4, dc in same place. sk the first horizontal bar, [v‑st in next joining point, sk the next horizontal bar and the next joining point, v‑st in next horizontal bar, sk the next joining point and horizontal bar] to end of round, sl st in 3rd ch of turning ch, turn.
This might help illustrate where I’m putting the stitches. The circles are the joining points, and the dashes are the horizontal bars. The v’s are the v‑st.
Row 2: ch 3, [v‑st in ch 1 sp] around, sl st in top of beginning ch, turn.
Repeat row 2 until sleeve is 17.5″ long, or desired length. End on a wrong side row so next row begin with right side facing. Don’t fasten off.
Cuff
Row 1: ch 1 (does not count as sc), [sc in next ch 1 sp, sc in between two v‑st] around, sl st in first sc, don’t turn.
Row 2: ch 1, in the back loop only, sc in every sc around, sl st in first sc, don’t turn.
Repeat row 2 two (2) more times. Fasten off. Weave in ends.
Repeat for the other sleeve and cuff.
Front border / collar
Row 1 (RS): Attach yarn to bottom corner of right front, ch 2 (counts as hdc), 2 hdc around every horizontal row end (horizontal bar as described above in sleeve) up along front, across back of neck, and down front again, turn.
Row 2 (WS): ch 2, in front loop only, hdc in every hdc to end, turn.
Row 3 (RS): ch 2, in back loop only, hdc in every hdc to end, turn.
Repeat rows 2–3 once more (or until desired width), then work row 2 again once. Don’t fasten off.
Bottom edge
Row 1 (WS): ch 1, 1 sc in every row-end of the hdc rows in border, 1 sc in every st across body of cardigan, then 1 sc in every row-end of border, turn.
Row 2 (RS): ch 1, in back loop only 1 sc in every sc. Fasten off, weave in ends.
All finished. No sewing, as promised :)
Please feel free to leave a comment below if you have any questions! Happy crocheting :)
This is such a lovely sweater, which looks so good on you. I may even attempt it, once I get the garden all planted and the chickens and their house better organized…it may have to wait until winter, sigh!
Que ce gilet est élégant et comme il vous va bien! Je voudrais vous remercier de tout coeur pour la gentillesse avec laquelle vous partagez vos modéles, pour le temps que vous passez à faire des tutos très clairs, c’est très généreux. J’ai aussi beaucoup apprécié votre petit reportage sur votre visite à New York, illustré par de bien belles photos.Recevez mes plus amicales pensées de France.
I love this sweater so much! I am going to make this one. Thank you for sharing .
How many stitches would need to make a 46 or48 thank you
Hi Margie, thank you for visiting! For a cardigan that fits 48″ around, the back piece would need to measure 24″. (for reference, my cardigan fits 34″ around and the back piece measures 17″.) So you would need to add 7″ to the back piece. The gauge is 6 st for every inch. So you would need to add 42 ch to the beginning ch of the back piece, therefore beginning with ch 108. When you get to the front pieces, just follow the italicized part of the instruction. Hope this helps! Happy crocheting!
Love it.
Thank you so much for visiting, Kathy! :D
I love this pattern but I’m stuck! I’ve finished the back and both front pieces. I’m confused about how to join them together; once I’ve finished the row of V stitches across the left front piece, the pattern says to then place a dc in the first stitch of the back…I just can’t figure out what that means. This is my very first sweater, so maybe this should be obvious, but alas, it’s not to me! :)
Thanks for such a lovely pattern and for any help you might be able to give me.
Hi Rachel, thanks for giving the pattern a try and sorry about the delay in reply!
When you’re joining the front and back pieces, after finish the row of v‑st across the left front, you’ll be working a dc into the dc on the top right corner of the back piece. It would be on the last row you worked on the back piece. It might help if you lay the garment flat facing you, with the working row at the top. You’re just creating an armhole. Hope this helps! Please feel free to write again if you need more info! Happy crocheting!
Thank you so much for writing back! I finally figured it out! It took me a bit, and I think it being my first sweater had a lot to do with it, but I’m on a roll now. I’m almost done with the body, and I’m really excited to finish it up. I’ll have pics on Ravelry once it’s done. Thanks again for making the pattern (and tech support!) available. :)
I’m glad it’s working out Rachel! Would love to see pictures! Thank you again for trying out the pattern!
Love it so much! I just bought the yarn so now I need to wait till arrive… This would be my first crochet wearable :)… I just really hope I finish it, because I get bored really fast…I put it aside and jump again to make amigurumis :P
Thank you so much for all your patterns!!! <3
Thanks so much Paula! This is a pretty quick make, so I hope you have fun with the pattern. Happy crocheting! :D
That make me want to do it even more!!! I will try to show you the result :). Thank you again Trish…
Could you please tell me how big the back and fronts should be before joining them all? I have done the 13 rows plus 6 extra because I’m doing a bigger size and the length is only 7”. I don’t think that is big enough for the armholes.
Hi Pauline, thank you for giving the pattern a try! I have 6.5″ from shoulder to underarm with 13 rows, where one row is about half an inch. If you have done 19 rows and reach 7″, could it be possible that you’re using a lighter yarn or smaller hook? But you can always just keep going until you reach the length you need, and just follow same the instructions for the sleeves, the pattern is written to be adaptable :) Hope this helps! Happy crocheting!
Thank you for your quick reply. I will add a few more rows and hope for the best
In Row 1 of the right front does the six more v stitches go in the same stitch or in the next 6 stitches???
Thanks, Pam
Hi Pam, it would be 6 v‑stitches in the next 6 stitches. thanks for giving the pattern at try!