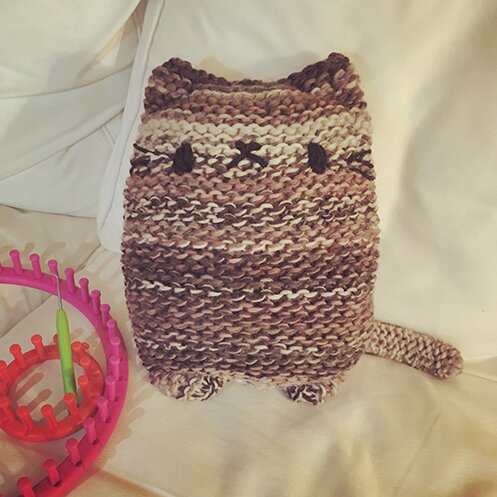
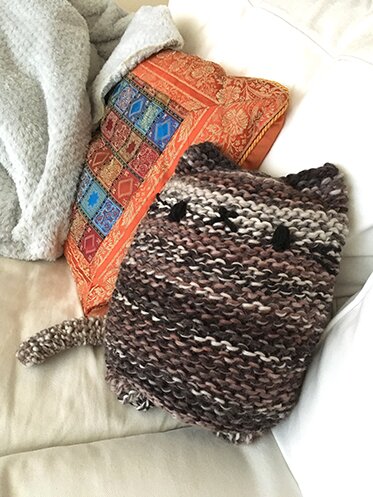
I bought some very chunky, very fluffy wool in Cape Breton a few years ago. It knits up in variegated stripes and I thought it would make a wonderful cat pillow. And the yarn weight is great for the large gauge of loom knitting.
I named the cat Tchotchke, because I like the sound of the word :D and because I have a lot of cat tchotchkes.
It’s basically a tube shape without any shaping, it’s the sewing together that makes the feet nubby feet and the ears. It’s a very beginner-friendly project :)
Regular knitting: Alternatively, if one isn’t into loom knitting, I imagine that this cat pillow can also easily be made with a 10 mm circular needle and super chunky yarn. Just cast on 41 stitches, then knit one round and purl one round (garter stitch) until it’s 14 inches in length, then proceed with the sewing instructions. (I haven’t tried it though, so I don’t know if it might knit up smaller using regular needles, and one would therefore make the cat shorter.)
I used:
41-peg loom, from this Loops & Threads set
12-peg loom (optional, just easier when making the tail)
Loom knitting pick
Super chunky weight yarn about 200 m / 150 g (I suggest using the chunkiest fluffiest yarn you can find so less stuffing show through)
Polyester stuffing
Tapestry needle
Black yarn (I used worsted weight doubled up)
Body:
With drawstring cast-on (instruction video here), cast on all the pegs of the 41-peg loom using the super chunky yarn.
Knit one row (knit stitch instruction video here, ignore the cast-on part in the beginning).
Purl one row (purl stitch instruction video here, again ignore the cast-on part).
Repeat the previous two rows (thus working the garter stitch) until the piece is about 14 inches in length.
Bind off (bind off instruction video here).
Tail:
Cast on 7 pegs on the smaller loom or the same loom.
Knit one row and purl one row. Repeat these two rows until the piece is 12 inches long.
Leaving a very long yarn tail, weave the tail through the stitches on the pegs, then remove the stitches from the pegs and cinch to gather the stitches. Fold the tail in half length-wise and sew together using mattress stitch. Stop sewing and tie off 2 inches away from the end.
New we sew it together and make a cat shape!
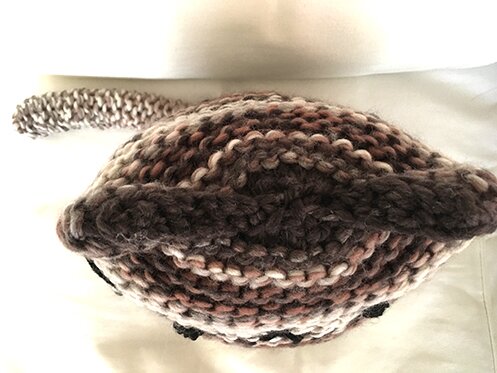
With the drawstring cast-on on the body, pull on the yarn tail and cinch it close, but not too tightly. It will form a sort of curve. Tie off, then sew the opening close by sewing through both layers of fabric using whip stitch. (picture below)
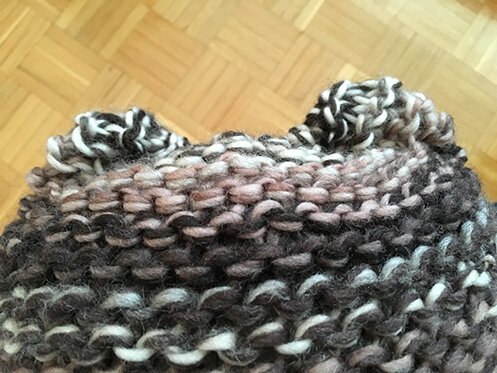
With the other end of the tube (the ears and head), using whip stitch again, and sewing both layers of fabric together, sew from the edge in about 2 inches toward the centre. Repeat from the other edge. It will leave an opening in the centre of the head.
Stuff with stuffing, but not too firmly.
Weave a piece of yarn around each stitch in the centre opening, cinch it tightly closed, and tie off securely. (picture below shows what the top of the head looks like after it’s all sewn together.)
With the tail, spread open the end of the tail and sew around its edges while attaching it to the body using whip stitch. It will look like this:
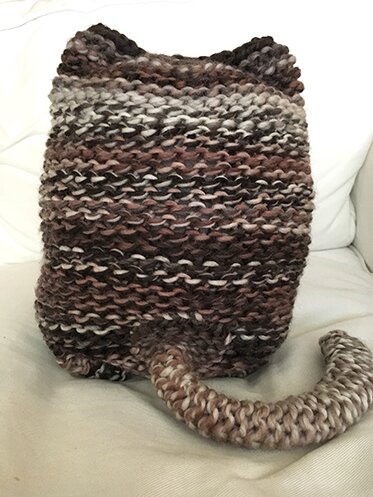
Finally, sew on eyes, nose/mouth and whiskers with the black yarn.
A new friend to watch TV and hang out with! :D
Have a good week everyone!