make a young kraken!


Hap­py birth­day to Mike! :D

The young krak­en was one of Mike’s birth­day presents this year. I thought I would share the pat­tern, spread the joy! :D


I used:

a bit of grey worsted weight yarn

3.5mm and 3 mm hooks

stuff­ing

beads for eyes

nee­dle and thread to sew on eyes


Note: Young krak­en is cro­cheted in con­tin­u­ous rounds, not join­ing in the begin­ning of rounds. You can place a mark­er in the begin­ning of the rounds. I just eye­ball it. I fig­ure young krak­en can’t tell that I’m not exact. And even if he can, he won’t mind, because he has big­ger things to think about. Anyway. The instruc­tions are list­ed in steps, not in rounds. It’s kind of free-formed, check­ing its shape and size as we go. The mea­sure­ments in the pat­tern are sug­ges­tions, cer­tain­ly make mod­i­fi­ca­tions as you see fit. If you need any clar­i­fi­ca­tion please feel free to send me a mes­sage :D

inc. (increase) = cro­chet 2 sc in 1 st

dec. (decrease) = cro­chet 1 sc over 2 st


1. Using 3.5 mm hook, 6 sc in mag­ic ring

2. 1 sc in each sc for 2 con­tin­u­ous rounds

3. inc. in every 3rd st until piece mea­sures approx. 0.75 inch

4. 1 sc in each sc in con­tin­u­ous rounds until piece mea­sures approx. 1.25 inches

5. inc. in every 5th st until piece mea­sures approx. 1.75 inches

6. 1 sc in each sc in con­tin­u­ous rounds until piece mea­sures approx. 2.25 inches

7. *dec., 1 sc*, repeat from * to * for 1 round

8.  dec. in each sc until there are 8 st left in the opening

9. sc in each sc 8 times

10. stuff, but don’t fas­ten off 

11. Now we make the ten­ta­cles. Con­tin­u­ing from step 9, ch 20, sc in 2nd st from hook, sc in each ch, sc in next st in the opening.

Repeat step 11 sev­en more times. I var­ied the length of the ten­ta­cles from 20–25 ch. 

After the last ten­ta­cle is made, sl st into the open­ing, fas­ten off, leav­ing a long tail for sewing.

Using tail, weave in stitch­es to close the open­ing. Pull so the stuff­ing won’t come out, but not too tight. Fas­ten off, weave in ends.

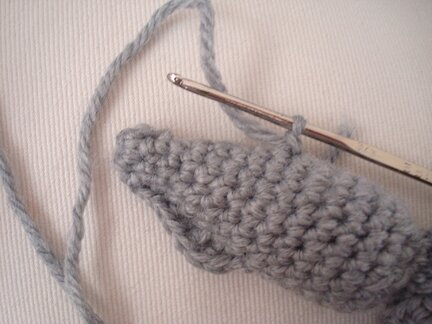
12. Now we make the fins. The first fin is cro­cheted ver­ti­cal­ly down the rounds (see pho­to below).

Using 3mm hook, attach yarn at the 2nd round from the top. ch 1, sc in each of the next 3 st, hdc in each of next 2 st, dc in next st, dc and hdc in next st, sl st in next st, fas­ten off.

Now, the oth­er fin. Attach yarn at the oppo­site side of the bot­tom of the first fin, and cro­chet­ing up the rounds, like so…

ch 1, hdc and dc in next st, dc in next st, hdc in each of the next 2 st, sc in each of the next 3 st, sl st in next st, fas­ten off. Weave in ends.

And we’re done the cro­chet­ing part :D

For the eyes I found 2 saucer-shaped ruby red faceted beads that I thought would be per­fect for a young but fierce krak­en. To make it extra spe­cial (because it’s Mike’s birth­day), I made two rings with wire to kind of set the eyes (jump rings would work per­fect­ly, I just did­n’t have the right size at the moment) I sewed both on with thread.


Young krak­en, lurk­ing in the deep sea…


I’m quite proud of it, I must say :D


He now sits regal­ly on Mike’s desk, star­ing at me as I type this…

 Cheers! :D


celebrating summer solstice

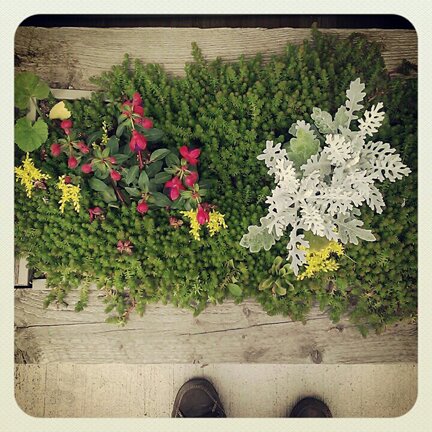
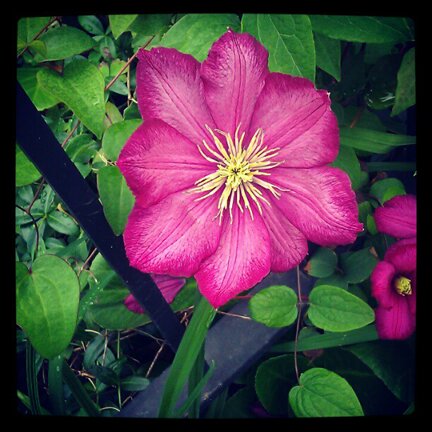
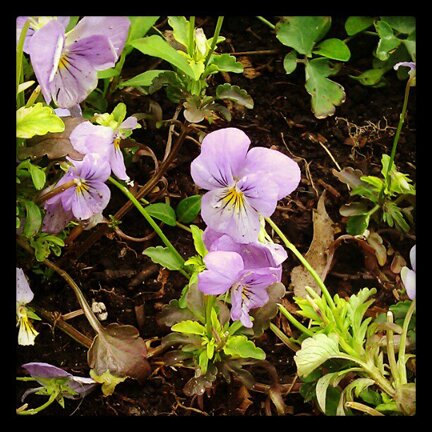
… with sum­mer flower pho­tos! :D

(sum­mer sol­stice was tech­ni­cal­ly yes­ter­day, I’m a lit­tle late, but it’s nev­er too late for a bit of haiku-writ­ing :D)


Ode to Sum­mer Blooms


Flow­ers of summer


Ros­es, their petals falling


over my sandals.


Rain­storms, sun showers


here today, gone tomorrow


new blooms, a new day.


 Turn a street corner


out­side doorsteps and small shops

blos­soms line sidewalks.


Not great haikus, but it’s fun count­ing syl­la­bles and find­ing words that fit :D Although I’m actu­al­ly rather pleased with the mid­dle one about rain­storms and sun showers.

(Some peo­ple don’t write them this way, but I under­stand haiku’s as three-line poems with 5 syl­la­bles in the first line, 7 in the sec­ond, and 5 in the third. So there are actu­al­ly three haiku’s above weav­ing between the photos.)


For our cor­ner of the world, the first days of sum­mer came with a heat­wave. So if it’s hot where you are, enjoy the sun and sum­mer blooms, but stay cool!


p.s. On a slight­ly relat­ed note, if you like poet­ry, check out my sis­ter-in-law’s blog! :D She writes on many dif­fer­ent top­ics, from reflec­tive and insight­ful to hilar­i­ous — great reads!


weekend quick sew


Hel­lo, friends! :D

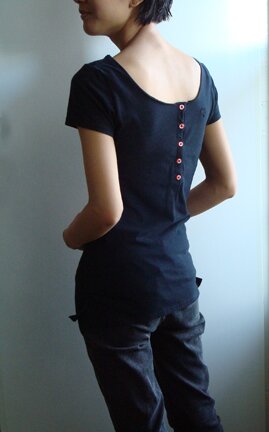
Made this quick­ly one after­noon out of the back piece of an old, over­sized sleep shirt.


The mate­r­i­al is very light and soft and com­fort­able. I avoid­ed using the front of the shirt, which has a spark­ly sheep print­ed on it, but the back piece was not quite long enough so I had to sal­vage the bot­tom part of the front piece. And I sewed the pieces togeth­er with the seam allowance fac­ing out, makes it more inter­est­ing. It’s so great that knit mate­r­i­al does­n’t fray.


Have a hap­py Sunday!


this week’s awesome finds


Beau­ti­ful cro­chet edg­ing. Works for t‑shirt neck­lines too, you think? From the Purl Bee.


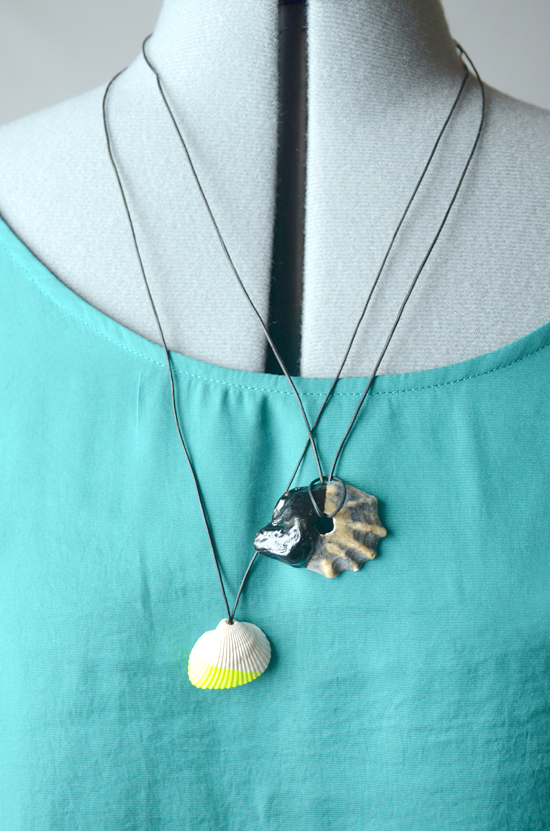
Sim­ply bril­liant. Have to dig into my seashell col­lec­tion! From I Still Love You.


Very well-writ­ten, easy to under­stand tuto­r­i­al from It’s Always Autumn. A trip to thrift store is in order!


Washi tape flow­ers. Makes a nice pin! From Just Some­thing I made. 


Very sophis­ti­cat­ed men shirt refash­ion, with pleats! From Leafy Tree­top Spot.


Also spot­ted on Leafy Tree­top Spot was a tuto­r­i­al for adding Peter Pan col­lar on a t‑shirt. Not sure how I would look in it, but I think it’s a nice way to use pret­ty fab­ric scraps.


Enlight­en­ing! Why did­n’t I think of this before? From 13 Life Chang­ing Ways to Eat Food. The toast­er grilled cheese is pret­ty awe­some too.


Fun, bold, sim­ple, and oooh — what if the baubles were cro­cheted? :D Love­ly inspi­ra­tion from The Beau­ti­ful Mess.


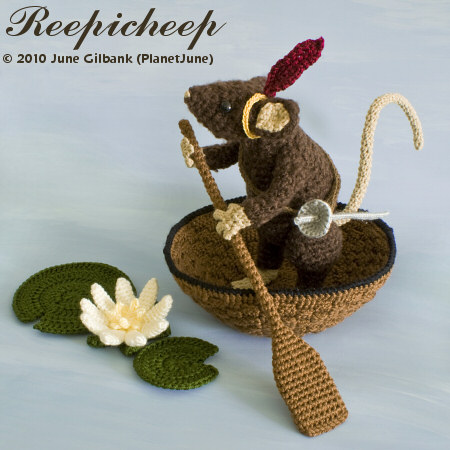
Look! It’s Reepicheep! Pad­dling to Aslan’s Coun­try, fear­less and valiant… *sniff*
Not a pat­tern, but we can sim­ply appre­ci­ate its awe­some­ness. By cro­chet mas­ter June Gilbank. 


Have an awe­some day, everyone!


graduation dress


I was brows­ing on Pin­ter­est the oth­er day and saw some­one pinned a “grad­u­a­tion dress”. I thought it was such a great idea, to make a spe­cial dress for one’s grad­u­a­tion. I had a grad­u­a­tion com­ing up and a nice piece of fab­ric lying around, enough to make a dress. So I start­ed search­ing for “easy dress­ing sewing pat­tern” and came upon this pat­tern from Bur­da Style.


Hey, that looks like some­thing I could make with­out a pat­tern. Because it looks just like an extend­ed square blouse. 

So, it’s not as neat, but here’s my ver­sion of it :D


Look! I was even wear­ing black tights and a red glass bead neck­lace. That pho­to from Bur­da Style real­ly inspired this outfit.

I did tweak my usu­al square blouse pat­tern a bit. The shoul­ders are tilt­ed a bit down­ward toward the arms, the waist is tak­en in to give it more shape.

And I did wear it to my grad­u­a­tion :D

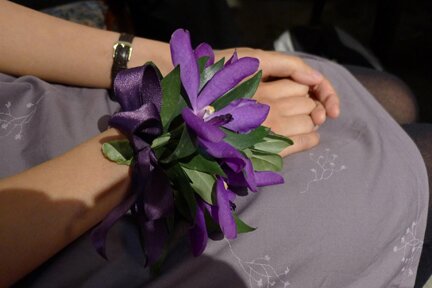
The direc­tor was very thought­ful and had cor­sages for all the grad­u­ates. And you can see the faint flo­ral pat­tern on my dress a bit bet­ter in this photo.


Mike was wear­ing a match­ing tie! :D In fact, I made him that skin­ny tie fol­low­ing this tuto­r­i­al.

The grad­u­a­tion was for the art ther­a­py diplo­ma that I tech­ni­cal­ly com­plet­ed two years ago. But because it’s such a small school and small pro­gram, it takes a while to get a large enough group of grad­u­ates to have a grad­u­a­tion ceremony.

But it’s still a real­ly excit­ing time! :D

So hap­py that my sis­ter is back from her stud­ies in Hong Kong so she could come to the grad­u­a­tion :D


It was in a build­ing cov­ered in vines (not our school build­ing. The school rent­ed a space in this build­ing for the ceremony).


Works as a casu­al dress on a dif­fer­ent day. Found this awe­some tree in a near­by park with a nice strong branch that makes a nat­ur­al seat.


And this whole grad­u­a­tion expe­ri­ence just made me think about how impor­tant it is to know that oth­er peo­ple believe in me, to hear peo­ple say to me that “I know you can do it”, even though I don’t believe that I can at times. More impor­tant­ly, it makes me think about how impor­tant it is for me to say to oth­ers that I believe in them. To have faith that they are able to do the things that they want to do, over­come the chal­lenges they face, reach new heights in their life jour­neys. And to inter­act with peo­ple in a way that express this faith. 

I for­get some­times, but some­thing I’m try­ing to be more con­scious of.


Have an awe­some Tuesday!


bucket of sun


Or, the trav­el­ing hat of Rati­cus, part 2.

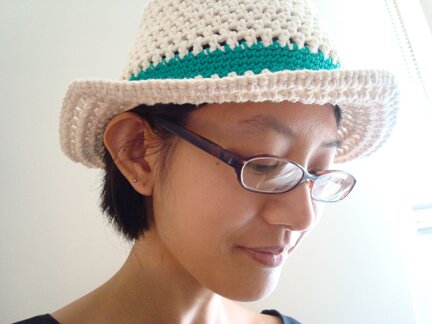
I’ve been want­i­ng to make myself a sun hat. And so, after it was made I was real­ly proud of it and was wear­ing it in the apart­ment all after­noon. Mike was busy sort­ing his own clos­et or what­ev­er and he sud­den­ly turned and looked at me and laughed,

“HA! You know who you remind me of?”

I was hop­ing for a char­ac­ter in a Miyaza­ki movie.

“Rati­cus!” He said.

It’s true. Take a look.


I made a hat for a plas­tic rat that lives in Mike’s office almost two years ago. Com­plete­ly for­got about the colours of yarn I used of course. And then two years lat­er I’ve made a sim­i­lar hat with the same green stripe for myself. I must real­ly like green stripes. And I must vis­it Rati­cus at his office one day and take a pic­ture with our hats. Hat twins! XD

I decid­ed to also write down the pat­tern, since it’s been a while since I’ve shared a pat­tern. I opt­ed for a hdc-ch 1 pat­tern repeat because it kind of looks woven.

And the band of con­trast­ing colour is made with a lighter yarn to cre­ate a bit of vari­a­tion in texture.


To cro­chet this buck­et hat, you’ll need:

2 skeins of Bernat Hand­i­crafter Cot­ton (or the like), 50g/80 yd per skein

Small amount of light worsted cot­ton yarn in con­trast­ing colour (about 1/2 of a 50g skein)

4mm hook


Mea­sure­ment: 21″ in diam­e­ter, 3.5″ tall from top edge to brim, with guide­lines to make dif­fer­ent sizes in pat­tern. (Though these guide­lines are not test­ed, it’s best to try it on as you go)


Hat is cro­cheted in the round. Each round starts with a begin­ning ch and ends with join­ing at the beg ch.

The begin­ning ch 3 of each round counts as [hdc, ch 1]

inc. (increase) = [hdc, ch 1, hdc] in ch 1 sp.

Crown

Rd 1: in mag­ic ring, ch 2, 11 hdc, sl st in top of beg ch to join.

Rd 2: ch 3, *inc. in next st, ch 1, hdc in next st, ch 1* repeat from * to * around, end with inc. in the last st, ch 1, sl st in 2nd ch of beg ch to join.

Rd 3: sl st into first ch 1 sp, ch 3, hdc in next ch 1 sp, ch 1, inc. in next ch 1 sp, ch 1, *[hdc, ch 1] in next 2 ch 1 sp, inc., ch 1* repeat from * to * around, sl st in 2nd ch of beg ch to join.

Rd 4: sl st into first ch 1 sp, ch 3, [hdc, ch 1] in next 2 ch 1 sp, inc., ch 1, *[hdc, ch1] in next 3 ch 1 sp, inc., ch 1* repeat from * to * around, sl st in 2nd ch of beg ch to join.

Rd 5: sl st into first ch 1 sp, ch 3, [hdc, ch 1] in next 3 ch 1 sp, inc., ch 1, *[hdc, ch1] in next 4 ch 1 sp, inc., ch 1* repeat from * to * around, sl st in 2nd ch of beg ch to join.

Rd 6: sl st into first ch 1 sp, ch 3, [hdc, ch 1] in next 4 ch 1 sp, inc., ch 1, *[hdc, ch1] in next 5 ch 1 sp, inc., ch 1* repeat from * to * around, sl st in 2nd ch of beg ch to join.

Rd 7: sl st into first ch 1 sp, ch 3, [hdc, ch 1] in each ch 1 sp around, sl st in 2nd ch of beg ch to join.

Rd 8: sl st into first ch 1 sp, ch 3, [hdc, ch 1] in next 5 ch 1 sp, inc., ch 1, *[hdc, ch1] in next 6 ch 1 sp, inc., ch 1* repeat from * to * around, sl st in 2nd ch of beg ch to join.

*For a small­er hat, omit Rd 8. For a larg­er hat, cro­chet an addi­tion­al round after Rd 8 as fol­lows:
sl st into first ch 1 sp, ch 3, [hdc, ch 1] in next 6 ch 1 sp, inc., ch 1, *[hdc, ch1] in next 7 ch 1 sp, inc., ch 1* repeat from * to * around, sl st in 2nd ch of beg ch to join. 

*Omit­ting or adding a round should sub­tract or add 1″ to hat diameter.

Sides shap­ing

For Rd 9 only, cro­chet into the ch 1 itself, instead of in the ch 1 space. This will cre­ate a sharp down­ward fold­ing edge at the crown of the hat and give the hat its buck­et shape.

Rd 9: sl st into first ch 1, ch 3, [hdc, ch 1] into each ch 1 around, sl st in 2nd ch of beg ch to join. 

Rd 10 ‑12: sl st into first ch 1 sp, ch 3, [hdc, ch 1] in each ch 1 sp around, sl st in 2nd ch of beg ch to join. 

Rd 13: sl st into first ch 1 sp, ch 3, [hdc, ch 1] in next 10 ch 1 sp, inc., ch 1, *[hdc, ch1] in next 11 ch 1 sp, inc., ch 1* repeat from * to * around, sl st in 2nd ch of beg ch to join.

*If rounds were omit­ted or added at the crown, just even­ly place 4 increas­es around. You can count the total num­ber of ch 1 spaces (includ­ing the beg ch) and divide it by 4, or just eye­ball it.

Rd 14–17: sl st into first ch 1 sp, ch 3, [hdc, ch 1] in each ch 1 sp around, sl st in 2nd ch of beg ch to join. 

*If you want to make the hat taller and wider, add anoth­er round with 4 even­ly placed increas­es around some­where between Rds 14 and 17.

Band

Join con­trast­ing colour yarn, but don’t fas­ten off main colour yarn. Car­ry main colour yarn up at the begin­ning of each round with the con­trast­ing colour.

sc into each of the ch 1 sp and hdc.

Begin­ning ch 1 does not count as sc in this section.

Rd 18: ch 1, sc in same st, sc in next 11 st, 2 sc in next st, *sc in next 12 st, 2 sc in next st* around, sl st in first sc.

*if you’ve sub­tract­ed or added rounds pre­vi­ous­ly, your stitch count may not match with mine. But that’s okay, the idea of Rd 18 is just to make an increase every 12 stitch­es or so to com­pen­sate for the thin­ner con­trast­ing colour yarn.

Rd 19–21: ch 1, sc in same st, sc in each st around, sl st in first sc.

Fas­ten off con­trast­ing colour, place main colour back on hook.

Rd 22: ch 1, sc in same st, ch 1, [skip next st, sc in next st, ch 1] 11 times, skip 2 sts, sc in next st, ch 1, *[skip next st, sc in next st, ch 1] 12 times, skip 2 st, sc in next st, ch 1* repeat from * to * around until there are 12 stitch­es left, [skip next st, sc in next st, ch 1] in remain­ing sts, sl st in first sc. 

*if you’ve sub­tract­ed or added rounds pre­vi­ous­ly your stitch count in Rd 22 may not match mine. But that should be okay. The decreas­es in Rd 22 is just to make a decrease every 12 sc’s or so to com­pen­sate for the dif­fer­ences in yarn weight when switch­ing back to the thick­er main colour yarn.

Rd 23: ch 1, sc in same st, ch 1, [skip next st, sc in next st, ch 1] around, sl st in first sc.

Brim

For Rd 24 only, hdc into the ch 1 around the front loop of the chain only. This will make the fab­ric fold outward.

Rd 24: sl st into first ch 1 around the front loop only, ch 3, hdc into next ch 1 around the front loop only, ch 1, inc. in next ch 1 around the front loop only, ch 1, *[hdc, ch 1] in next ch 1 around the front loop only, inc., ch 1* around, sl st in 2nd ch of beg ch.

Rd 25: sl st in first ch 1 sp, ch 3, [hdc, ch 1] in each ch 1 sp around, sl st in 2nd ch of beg ch.

Rd 26: sl st in first ch 1 sp, ch 3, [hdc, ch 1] in next 16 ch 1 sp, inc., ch 1, *[hdc, ch 1] in next 17 ch 1 sp, inc., ch 1* around, sl st in 2nd ch of beg ch.

*Again, if you’ve added or sub­tract­ed rows/stitches pre­vi­ous­ly your stitch count will not match mine. But just make an increase every 17 hdc’s or so.

Rd 27: sl st in first ch 1 sp, ch 3, *[hdc, ch 1] in each ch 1 sp until inc. st in pre­vi­ous round, inc. in inc. st in pre­vi­ous round, ch 1* repeat from * to * around, sl st in 2nd ch of beg ch.

Rd 28: ch 1, sc in same st, sc in each of the hdc and ch 1 sp around, sl st in beg sc, fas­ten off. Weave in ends.


And we’re fin­ished! :D


First time writ­ing pat­tern for a hat, hope it all makes sense! As usu­al, if you spot any mis­take please let me know!


Enjoy the sun!


polo refashion


Look what I did with my old Star­bucks work clothes! :D
I was just about to toss these black polo shirts out, because I don’t real­ly like polo shirts. They were already in the dona­tion bag. But then I saw this refash­ion tuto­r­i­al from C&C.

Wear the shirt back­wards and swap out the plain black but­tons for colour­ful ones! It’s brilliant.

Mine was­n’t a men’s shirt like the one used in the tuto­r­i­al, so I did­n’t have to take the sides in. Just cut off the col­lar and hemmed the neck­line, and added red buttons. There was anoth­er one I that refash­ioned in the same way; I did­n’t even swap out the but­tons because I liked the white iri­des­cen­t ones that came with the shirt.

Very sim­ple. And I’ve got two new shirts to wear! :D


May your week be filled with sim­ple joys.


lessons from air-bending


I start­ed going to a tai chi class once a week dur­ing my month off in April.

It came out of a rec­om­men­da­tion from a super­vi­sor at the agency where I intern. We were talk­ing about the fear and anx­i­ety that I encounter in work and inter­per­son­al con­texts. She strong­ly sug­gest­ed find­ing a body-based prac­tice that can trans­late into some help­ful prac­tice phi­los­o­phy for work situations. 

Then she gave me a gift cer­tifi­cate that she had won for 4 tai chi lessons. “I take way more class­es than that, so I don’t need it,” she told me.

So I went. Just to see what it’s like. And I know that I’m bad­ly out of shape sit­ting in front of the com­put­er or cro­chet­ing all the time.

After the first class, I decid­ed to call it “air-bend­ing”, because of the slow, sub­tle move­ments that the body makes, as if flow­ing with air. Also, because it reminds me of my sis­ter, who’s a big fan of Avatar: The Last Air­ben­der.

I was­n’t real­ly “get­ting it” for the first three class­es. I was think­ing that maybe it’s not for me. I’m just too unco­or­di­nat­ed. I want­ed my body to move in the way that was demon­strat­ed by the instruc­tor, but I don’t know how to get it to move in that pre­cise way.

The instruc­tor was very nice. She came over to give me indi­vid­ual help every class. And in my third class, while doing this “ward off” move­ment, where the body kind of leans for­ward and the arms cross to press against an invis­i­ble intrud­er made of air, like so…

… the instruc­tor observed how I was doing it and said,

“You’re lean­ing too much for­ward. Don’t lean too much, know where your cen­tre is.”

What she said touched some­thing that was real­ly impor­tant for me. I knew it was impor­tant because my mind blanked out for a moment and was only able to repeat those words.

Don’t lean too much, know where your cen­tre is.

Isn’t that what I do every time I feel afraid? I lean into it. Com­plete­ly into it. And I work myself up to become even more anx­ious, and I tell myself that I can’t fin­ish the task. I can’t han­dle the sit­u­a­tion. I can’t do it. I’m too anxious.

But what if I don’t lean into that fear, and I try to find this core place where I can believe that I can face chal­lenges and oth­er scary things with steadi­ness, know­ing that I have some skills, some knowl­edge that will help me.

The fear makes me for­get that I have skills.

I real­ize that I’m sick of telling myself that I can’t. I can’t because I get too anx­ious. I can’t because I don’t han­dle stress very well. I can’t because it’s too much work and it’s going to stress me out and increase my anx­i­ety lev­el and com­pro­mise my men­tal health. I can’t. I can’t. I can’t.

But I can. Because I’ve done it. Every time a goal is reached, every time a dead­line is met, every time a dream is ful­filled. And, hav­ing been in school for quite a few years, I’ve had many goals and dead­lines. And because of school, some of my biggest dreams have also been fulfilled.

My super­vi­sor spoke with me about not let­ting neg­a­tiv­i­ties live rent-free in my head. 

“You have to evict them, and you have to grow that place that can­not be wound­ed. Can you find that place inside you that can­not be wounded?”

The place that can­not be wound­ed, for me, is the spir­it that God has cre­at­ed in me, and that, I think, is my cen­tre, the core place that has the strength to pull me back from lean­ing too much into fear and self-doubt.


Ah, heavy top­ic on a Fri­day. But some­thing that I felt I need­ed to sort out by writ­ing it down.

Have a good weekend!