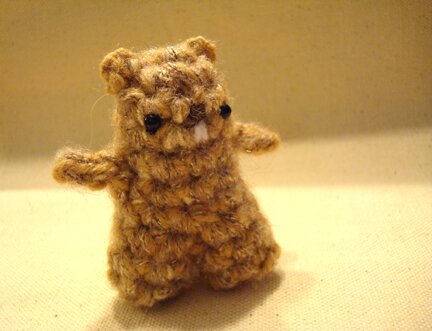
Today is Groundhog Day and we have a snowstorm, just like in the movie. And because of the snowstorm I got to stay home all day. Since I have all that free time I thought I should celebrate the day by making a groundhog. But I couldn’t find any free pattern, so I decided to make my own.
For this groundhog I used some tan acrylic yarn and some fuzzy brown wool, the 2 strands of yarn held together. Both appear to be sport weight, but I can’t be sure because they were given to me without labels. I used a 5mm hook. I think 1 strand of bulky weight yarn with 5mm hook would also work.
I also used 2 4mm beads for eyes, some white felt for teeth, and some needles and thread for sewing.
Groundhog is about 3 inches tall. Not very big and doesn’t take long to make.
Head and Body:
Row 1: ch 3, 5 sc in 3rd ch from hook, sl st. in top of beginning 2 ch.
Row 2: ch 2, [2sc in next sc, sc in next sc] 3 times, sc in top of beginning ch.
Row 3 and on: sc around until desired height (mine’s about 2 inches), end with last st in centre front (I just eyeballed it, but one could count the stitches to make sure it’s centered if desired). Take hook off stitch, keep loop on marker and don’t fasten off.
At this point it would be a good time to sew on eyes, embroider nose and mouth, and attach ears.
To make ears:
I made the ears with one strand of the acrylic yarn with a 3mm hook. One could probably use a thinner yarn in a similar shade and smaller hook, or if using 1 strand of bulky yarn continue to use same yarn but use a 4mm hook.
With a separate ball of yarn attach yarn at top of head where you’d like to position ear, ch 1, sc in st where yarn is attached, ch 1, sl st in st where yarn is attached. Fasten off, weave in ends. Repeat for the other ear.
Legs:
Place hook back in loop at the end of body, ch 2, bring the ch across the opening of the body and sc in a st in centre back (I just eyeballed it, but one could count the stitches to make sure it’s centered if desired), like so…
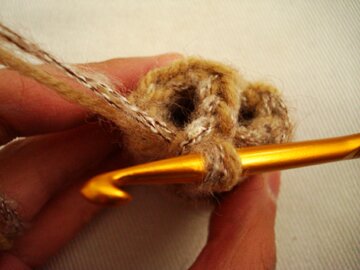
Then, sc in each sc until the ch 2 in the middle, sc in each ch, then sc in each sc for 2 more rounds, sl st. in each of next 2 sc, fasten off.
For the other leg, attach yarn to the same st in centre front at the base of the other leg, ch 1, sc in next sc, sc in each sc until the st in centre back at the base of the other leg, sc in the st in centre back, sc in each ch of the ch 2 in the middle (one would have to crochet in the back loops of the chain), sc in the beginning ch 1 of this leg, sc in each sc for 2 more rounds, sl st in each of next 2 sc, fasten off.
Now would be a good time to stuff the groundhog through the openings at the bottom of the legs. After stuffing, close the bottom of the legs by weaving through the inner loops of the opening with yarn and needle, like so…
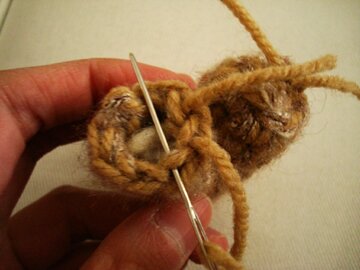
Pull tight, tie off, and weave in ends.
Arms:
Attach yarn to where you’d like to position the arm, ch 3, sl st in 2nd ch from hook, sl st in next ch, sl st in st where yarn is attached, fasten off, weave in ends. Repeat for the other arm.
Tail:
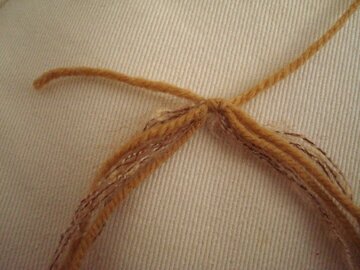
Cut multiple lengths of yarn (I used around 8) about 4 inches long each. Thread a separate piece of yarn and use it to tie the lengths of yarn together in the middle, like so…
Then sew the tied strands of yarn to the back of the groundhog, like so…
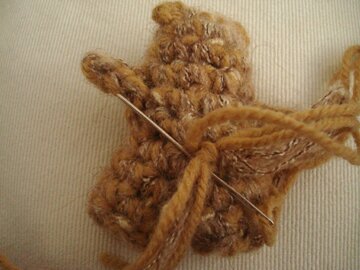
Trim tail to desired length, and unravel the individual strands, so it’s all fuzzy.
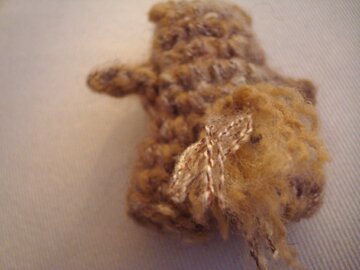
And we’re done! We took some photos on the balcony, which was covered in snow…
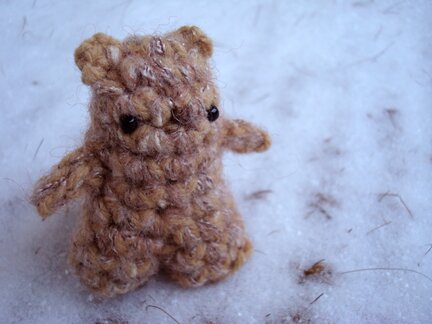
“No shadow in sight. An early spring this year, I predict. Now, must we linger in the cold outdoors?”
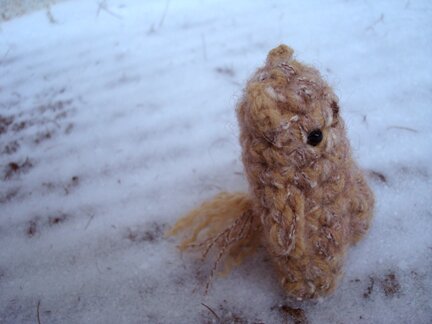
When we came back inside I thought he might look good with some buckteeth, so I sewed on some white felt for teeth. Now he’s patiently waiting at Mike’s desk for him to come home, because Mike is an enthusiastic celebrator of Groundhog Day but he doesn’t get to stay home for snow day today.

Happy Groundhog Day everyone!
p.s. I realize that the leg part of the pattern may be a bit confusing — please leave a comment if you need any clarification or if you spot any mistake and I will get back to you as soon as I can.

