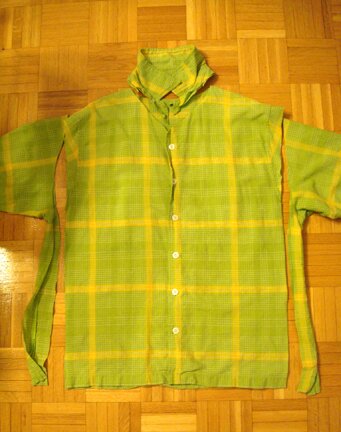
I’ve been seeing a lot of tutorials on refashioning men’s shirt lately. They look pretty simple so I thought I’d give it a try. Here’s one shirt that Mike doesn’t wear anymore and donated to me. I basically just cut off the collar and made two straight cuts down the sides…
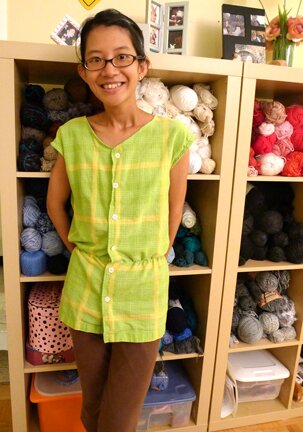
Ta-da! Not too shabby, as Mike himself would say! I just hemmed the neckline by folding the edge over twice and stitching it. The sides and arm holes I sewed together like I did for the pillowcase dress, to make fray-free seams. And for the elastic waist, I measured and cut a piece of 1/4″ elastic by wrapping it around my waist without stretching it, then sewed it directly to the mid-section of the tunic by stretching it slightly as I sewed. There must be a better way of doing that though, because it was really hard to get it even all around… but it looked alright in the end.
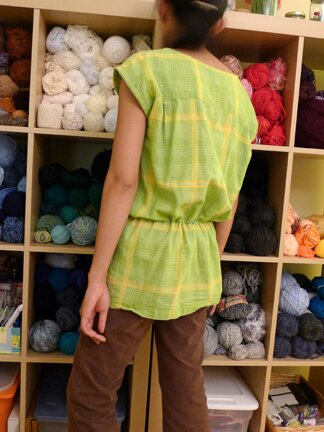
And the back…
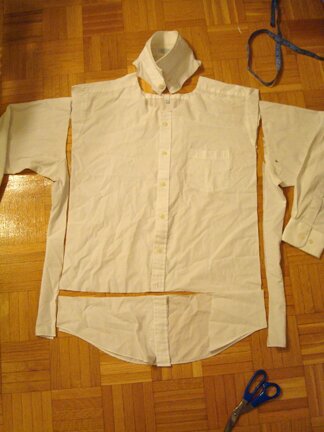
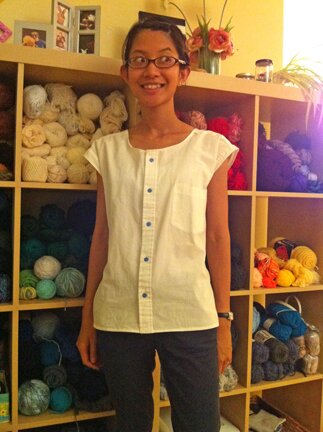
Here’s another refashion with Mike’s white dress shirt, inspired by this shirt refashion tutorial. Again, cutting off the collar and the sides…
I had to cut off so much of the bottom as well because for reasons I don’t remember I’ve cut of a rectangle of fabric from the hem of the shirt a while ago…
And I didn’t roll up the sleeve cuff like it is in the tutorial, because of my fray-free seams construction, but I think it looks alright :D
Oh yes and I swapped the white buttons for blue ones :D
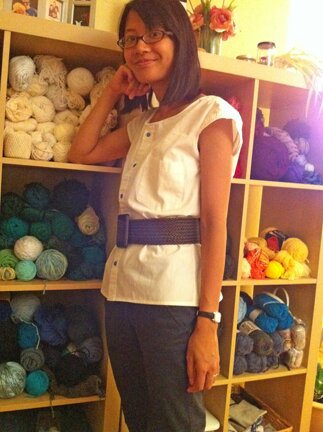
Also looks alright with a wide belt.
And as you can see, I’m still very much in love with the wall of yarn, even though I haven’t yet worked on a better solution to contain the yarn — it makes a fun background for photos!
Speaking of solutions for containing the yarn — thank you so much for all your wonderful suggestions! I have a pretty good idea that I want to try and it really came out of reading all of the comments left on the wall of yarn post. Thank you so much for sharing your great ideas and knowledge with me!
Have a lovely evening, or morning, or afternoon — wherever you may be! :D
Those are awesome! :)
Trish, I love these, especially the second one with the blue buttons. True recycling, and impossible to tell what their origins are. Your wardrobe is expanding by leaps and bounds!
I still love the wall of yarn too ^^
Amazing job refashioning the shirts! They are so cute :)
thanks Amy! :D
yes i’m quite proud of the one with blue buttons too! :D
thanks Kristi! we’re going to see lots of pictures with yarn background from now on… :D
I absolutely love all of your latest refashions! They’re great. I’ve been trying to figure out how to make some of my wimpy looking old shirts become something much cooler, but no ideas yet. :/ So I love seeing everything that you’ve done with yours!
thank you, Noel! some fun places where look for inspirations (and you may already know about them) are http://www.newdressaday.com/ and http://www.nikkishell.typepad.com/wardroberefashion/
happy crafting! :D
Thanks so much for the links, Trish! I hadn’t yet stumbled across these blogs. I’m going to spend hours clicking through them, I can tell. :D
How simple and how inspiring! I wish I had saved my dad’s shirts after he passed so I could have made something like this and had a bit of him around me. (I gave all his clothes to the Diabetes people.) Do you have any ideas for repurposing a pair of men’s tartan wool slacks?
thank you so much for visiting Diane! it’s really kind of you to donate the clothes, but I can see that refashioning the clothes can be a good way for memory keeping as well. I think pants can be made into skirts! there are quite a few tutorials if you google “refashion pants into skirts” or similar phrases. take care!
Wow, these are so cute! Well done. I love your yarn all organized like that. I’m envious of your skills of design and your willingness to tackle something new like this.
thank you so much!