sky scarf

Now I can post this, because my sis­ter has received it :D

Sky neck warmer :D


Based on Leaf­cut­ter Design’s sky scarf knit­ting project, I cro­cheted two rows every day based on the colour of the sky that day from end of August to mid Octo­ber. I thought this would make a great Christ­mas present for my sis­ter because she loves cloud-watch­ing. I know that there isn’t enough time to make a long enough stretch of fab­ric for a scarf, so I decid­ed to make a neck warmer instead. I start­ed on the day my sis­ter left for Hong Kong to attend grad­u­ate school. It was a grey, rainy day :(

But it seems she’s real­ly adjust­ed to liv­ing in Hong Kong, made friends, done well in her first semes­ter and enjoyed explor­ing dif­fer­ent parts of the city. So I’m hap­py about that :D

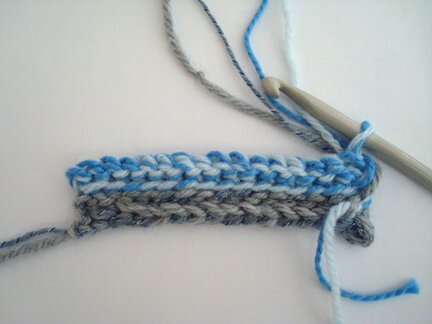
I used six dif­fer­ent shades of blue, grey, and white, cro­chet­ing each row with two strands of yarn held togeth­er. (The pic­ture below was tak­en at the begin­ning rows before I incor­po­rat­ed the fluffy-cloud white and fall-blue-sky)


And if you’re inter­est­ed, I cro­cheted every row with slip stitch in back loop only, with a 6mm hook. In hind­sight I’d prob­a­bly use a larg­er hook because the neck warmer turned out a but stiff. I car­ried all the strands of yarn up in the begin­ning of each row, you can tell by look­ing at the right side of the scarf below. And I made a but­ton hole when the neck warmer was near­ly long enough.


It’s a real­ly enjoy­able project in itself. Makes me take time to look at the sky and cro­chet a bit every day despite hav­ing lots of school work and oth­er work. I might start anoth­er one soon.

Hap­py Mon­day, everyone!


’tis the season for great poems!

Check out my sis­ter-in-law Beth’s new web­site, Tosh Poems, for cus­tomized poems!

Not a great writer myself, but I can imag­ine incor­po­rat­ing cus­tomized poems in art­works, col­lages, embroi­dery and such — would make such a mean­ing­ful, mem­o­rable, absolute­ly one-of-a-kind gift!

Oooh, maybe some­thing that looks like this, with a cus­tom poem?

 (Effer Dares) 


Take a tour of Beth’s web­site and see how she does cus­tomized poet­ry! Maybe it will inspire some excit­ing gift ideas :D

Have a hap­py week­end, everyone!


super quick penguin tots!

Inspired by a dear friend of mine who loves pen­guins :D

Remem­ber the tater tot pat­tern? It’s just adding a few things to the tots to make them look like penguins.

Super quick to make and hard­ly uses any yarn!


You’ll need:

A bit of yarn in pen­guin colours (blue, black, teal?)

A bit of felt in pen­guin colours

A bit of felt in white

A 3.5 or 3.75mm hook

Small round black beads for eyes

Sewing / embroi­dery needles

White, black, and pen­guin colour sewing thread

Orange embroi­der floss

Stuff­ing (I use yarn ends)

Jin­gle bells (option­al)


Sor­ry for some of the blur­ry pho­tos due to low light con­di­tions. It’s been dif­fi­cult try­ing to take pho­tos in full day light since day­light sav­ing time with the sun going down at 4pm :( If you need clar­i­fi­ca­tion please feel free to leave a com­ment or send me a message!


First, fol­low pat­tern for tater tots up to row 5 (before decreas­ing). Remove hook but don’t fas­ten off.

With white felt, cut a small round­ed trape­zoid-like shape for bel­ly and sew it onto the pen­guin body. Then sew on the eyes with the black beads and embroi­der the beak with orange embroi­dery floss. (Now that I look at it, it might look even cuter with some rosy cheeks with pink embroi­dery floss!)


After all sewing/embroidering is done stuff the pen­guin. I also threw in a jin­gle bell. The jin­gling is muf­fled by the stuff­ing but it still makes a fun noise.


Con­tin­ue onto row 6 and the rest of the tater tot pat­tern. 

Then, using the pen­guin colour felt, cut out two small teardrop shapes for wings, and sew them onto the sides of the penguin.


And guess what? Now you have a pen­guin! *jin­gle jin­gle jingle*

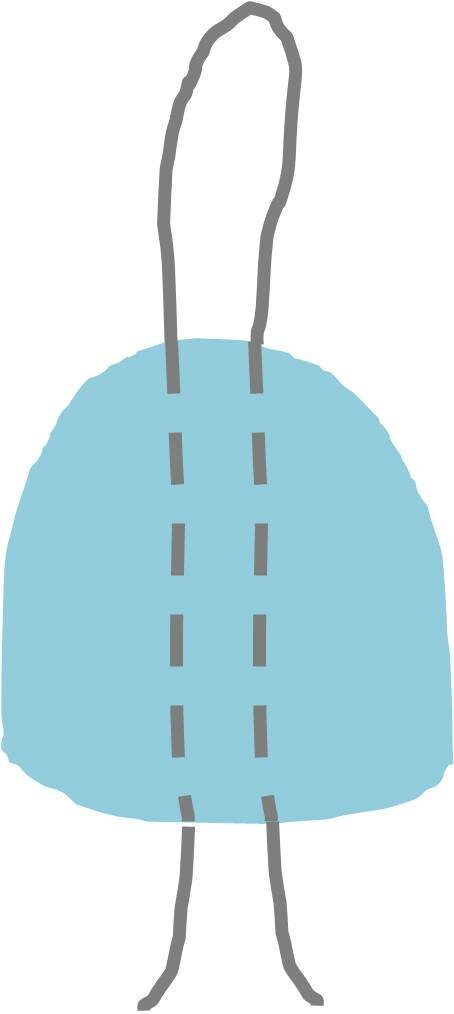
To make it into an orna­ment, I did­n’t want to just attach the yarn to the top of the pen­guin because it might pull it out of shape. So instead I hooked a piece of sil­very yarn right through the length of the body. This might be a bit tricky with the jin­gle bell in it, but it’s pos­si­ble to maneu­ver through.


Pull the piece of yarn from the bot­tom of the pen­guin and out through the top. Then pull the one end back down through a dif­fer­ent stitch from the top and out through a dif­fer­ent stitch at the bot­tom. This dia­gram here may make it eas­i­er to understand…


Through dif­fer­ent stitch­es at the top…

Through dif­fer­ent stitch­es at the bottom…


Now make a knot at the top…


And tie the two ends togeth­er at the bottom…


Then weave the ends into the body.

And our pen­guin is ready to dangle!

Cheers! 


Â