“Today’s mighty oak is just yesterday’s nut that held its ground.†― David Icke
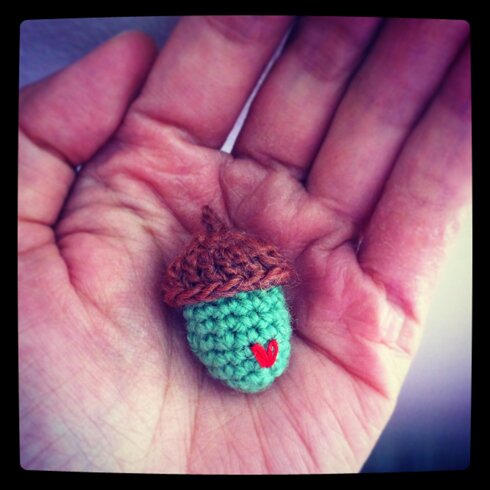
(and yikes, I have really dry hands…)
3rd pattern in the 12 Days of Woodland Creatures (and Their Favourite Things)! Today we have the squirrels’ favourite things — Acorns!
The mighty acorn would make a mighty oak, or a mighty good snack for the woodland creatures. Either way it’s going to do good :D
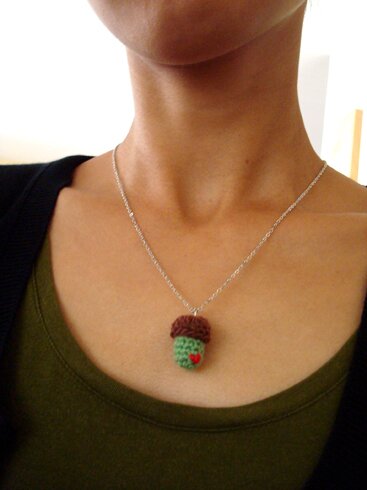
An extra small acorn makes a wonderful necklace. Simply attach a jump ring at the top and put a chain through ‑Â voila!
Fun~ So I thought I would write the pattern for both the mini acorn and the regular acorn. They’re very similar, just slightly different stitch counts.
For the acorns I wanted to use a sock weight yarn in my stash that has very rich shades of brown, so I’ve used smaller hooks. But if you’re using worsted weight yarn you can just use the 3.5 mm hook as usual, and you would end up with a slightly larger acorn.
I used:
Sock weight yarn in brown and green
2.25 mm hook
Scrap yarn for stuffing
Red embroidery thread (optional)
Needle for sewing and embroidering
Pattern:
Note: instructions are for mini acorn [regular acorn in square brackets]
Cap:
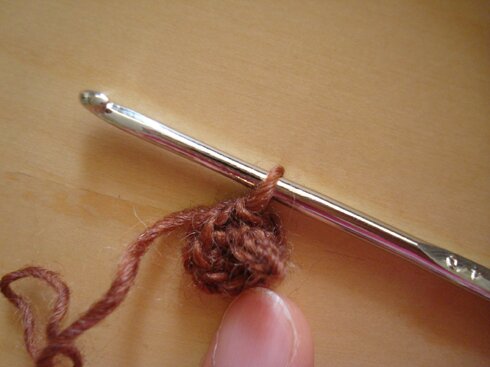
Round 1: ch 4, sl st in 2nd ch from hook, sl st in next ch (you’ve just made the stem), ch 1, 8 [10] sc in next ch, sl st in first sc to join.
We’re basically crocheting a circle with the stem in the centre, so when joining you will have to go behind/around the stem, like so…
Round 2: ch 2, dc in same sc as starting ch, *dc in next sc, 2 dc in next sc*, repeat from * to * to end, sl st in top of turning ch 2 to join. Fasten off and leave a long tail for sewing.
Nut:
6 sc in magic ring, do not join.
sc in first sc, *2 sc in next sc, sc in next sc*, repeat from * to * 2 [5] more times.
sc in each sc until piece is 3/4″ tall. Fasten off, weave in end.
Assembly:
If you’d like, embroider a heart on the acorn by making two lazy daisy stitch (here’s a great tutorial for it). But the acorn would be just as awesome if you leave it plain.
Stuff the acorn with scrap yarn. Sew the cap on the nut using the long tail left on the cap. Because it’s so small I just sew right through the acorn in a cross-manner all around, sewing through the bottom edge of the cap and top edge of the nut, being careful not to pull too tight so the acorn would keep its plump shape.
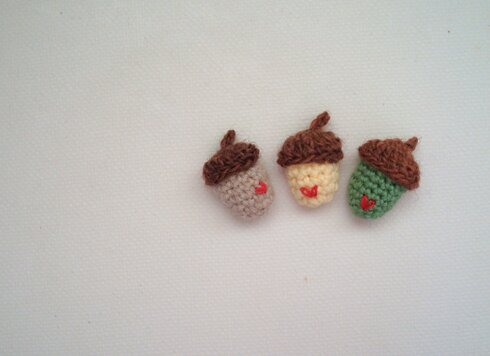
And here we are! I made different colours :D
They would make great pins with mini pin backs attached on the back. I think they would also make great hanging ornaments on the tree or by the window. You can also skip stuffing the acorn nut, squash the cap and acorn flat, then sew them together to make an applique.
Hope you enjoy the acorn pattern! Happy Monday! :D


Would you be interested in making and selling me 35 of these acorns? If so what would you charge?
Kind Regards
Melissa
Hi Melissa, thank you for visiting my blog. I can certainly make the acorns. Can you email me at so we can discuss further? Take care.