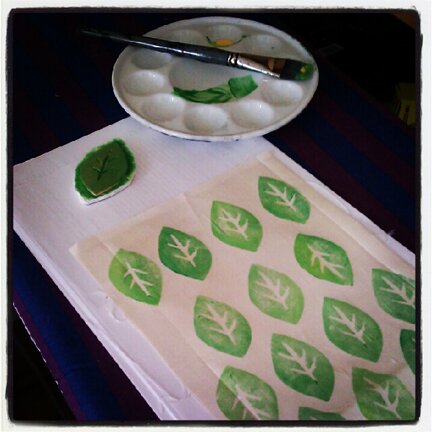
It was one of those experiments that went very smoothly and turned out amazingly well, which doesn’t happen too often for me but when it does, it’s super exciting!
Printing fabric with stamp made from craft foam (or, as advertised on the package, “fun foam”)!
It’s REALLY easy. Everything about this project is encapsulated in this photo.
I used:
Craft foam (it looks like this) that I bought from the dollar store (12 sheets for $1)
A piece of foam core that I found at work (it had an event poster mounted on it and they were throwing it out. But I’ve also seen foam core at the dollar store)
Acrylic paint and paint brush (from the dollar store, of course)
Glue stick (I found this amazing Elmer glue at the dollar store! A bit of a theme going on here…)
A piece of fabric that was the remnant of a curtain that I was sewing for a friend. It feels like linen. Fabric with smooth texture works best.
What I did:
1. Cut design out of craft foam. Exacto knife works extremely well with this stuff.
2. With Exacto knife, Cut out a piece of foam core the same shape as the craft foam design but about 1/4″ larger all around.
3. With glue stick, apply a liberal amount of glue on the foam core. Press craft foam design firmly onto where the glue is applied. Stamp is made! :D
Here’s a closeup of my leaf stamp, after it’s made a few prints…
4. Set stamp aside for a minute or two for the glue to dry. In the meanwhile, mix a fun colour with acrylic paint, set out some scrap paper (paint will seep through fabric onto your work surface), and lay fabric on it.
5. Apply a thin layer of paint onto foam stamp with paint brush (not too much paint, but the stamp has to be wet). Test print on scrap paper.
6. Stamp away! The great thing about applying paint with a brush is that you can have streaks of different colours in one print! :D
7. If the finer details of the stamp starts to get gunked up with paint, use the corner of the brush bristles to clean it out before making the next print.
8. Set fabric aside for a couple of hours to dry. Place a towel on it, then iron at low heat to fix the colour.
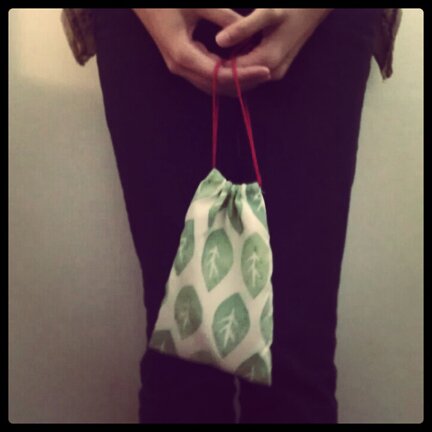
And now we have a lovely piece of printed fabric to do whatever our hearts desire :D I sewed mine into a simple drawstring bag. (there are lots of nice drawstring bag tutorials out there, like these ones, so I won’t repeat what I did here)
Placemats, shirts, skirts, eyeglasses case… the possibilities are endless!Â
Have a great start to the week, everyone!


Cool! Love the clean, graphic leaf + red drawstring!
Super cute, and wonderful little tutorial!! I love the bag and think the red drawstring is just PERFECT!
In the past when I’ve stamped acrylic paint onto fabric, I found that the paint made the fabric kind of stiff (maybe I used to much paint). But I recently discovered fabric medium that you mix in with your acrylic paint which solves that problem; I love it!
Have a great week,
Kate :}
thank you! :D
thank you! acrylic does make the fabric kind of stiff… perhaps fabric paint would work better. also, i read somewhere that fabric paint is just acrylic paint mixed with fabric softener (!!) not sure if that’s true or not… i should maybe give it a try :D
Hi Trish,
When checking my postbox today, I got a lovely surprise…a letter from Canada. Your ‘squares’ are really great and I am going to get a frame in Ikea, next time I am there, and mount the three together. I am thrilled to have them and once again thank you.
I don’t get to Ikea very often, but when I have them framed I will send you a photo.
Keep up your great creations.
Best wishes from Dublin. Sheila x
Hi Trish, if you decide to do some more stamp-making, linoleum carvers work fantastic. I’ve used them on erasers to make stamps. Wonder if they would work with the material you used. Love those leaf stamps, by the way :-). Beautiful! Your work is always so inspiring.
happy to hear that it got there so quickly! :D and i’m glad you like them!
oooh! i’ve used those cutting tools on lino blocks before, but never used them on erasers! i was hoping to make some smaller stamps with erasers to make business cards! :D will have to get myself better ones — i got some really cheap one and the tip came off while i was cutting! :S