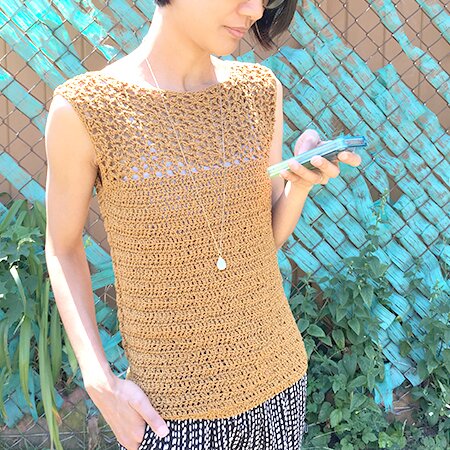
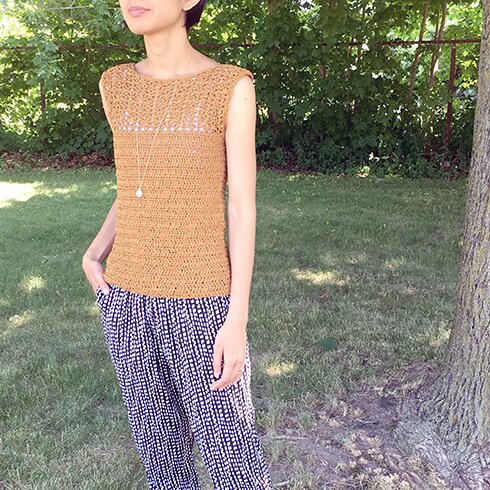
So named because I tried working with this yarn on a project while staying in Hongdae, Seoul, and because this hipster mustard yellow seems to go well with the neighbourhood that is known for its urban arts and many indie cafes.
I ended up frogging the project that I was working on while in Hongdae. In the meanwhile, the Ginkgo pattern has been getting a lot of traffic lately and I’ve been thinking about doing a crochet-only remake for those who are not really into sewing. So I thought I’d use this yarn for a new pattern.
As with all of my patterns, I made the garment to fit me, but it doesn’t involve much shaping at all and I think it’d be pretty easy to adjust size.
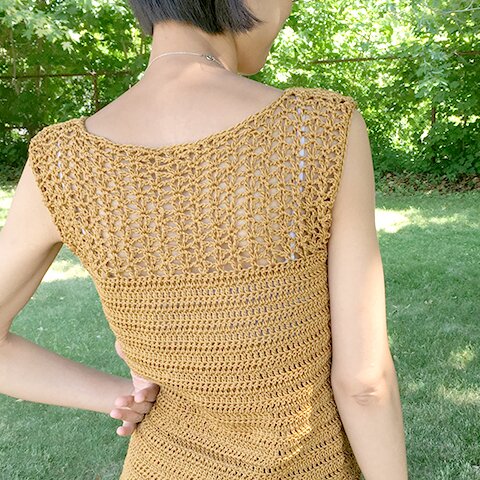
Closer up of the lace pattern :D
I used:
Mirasol Illaris — DK weight 100% cotton, 5 skeins, 580 yards (you’d need more yarn if you were making a larger size)
4.5 mm hook
Tapestry needle
Finished measurements:
Bust 30″
Length 20.5″
Length — shoulder to underarm 7″
collar width 9″
Gauge: 6 dc = approx. 1″
To adjust size, add or decrease multiples of 6 ch in foundation ch.
One could also make it wider for a cap-sleeve boxy-top look.
Pattern:
Front:
ch 63
Row 1 (RS): dc in 4th ch from hook, dc in every ch across, turn (61 dc).
Row 2–33: ch 3 (counts as 1 dc throughout), dc in every dc across, turn.
Start lace pattern:
Row 1: ch 1 (does not count as a st), sc in first dc, *ch 2, sk 2 dc, dc in next dc, ch 2, dc in same dc, ch 2, sk 2 dc, sc in next dc* repeat from * to * till end of row, turn.
Row 2: ch 5 (counts as dc and ch 2), dc in first sc, ch 2, sc in ch 2 sp, *ch 2, dc in next sc, ch 2, dc in same sc, ch 2, sk next ch 2 sp, sc in next ch 2 sp*, repeat from * to * till last sc of row, ch 2, dc in last sc, ch 2, dc in same sc, turn.
Row 3: ch 1, sc in first dc, *ch 2, dc in next sc, ch 2, dc in same sc, ch 2, sk next ch 2 sp, sc in next ch 2 sp*, repeat from * to *, ending with sc in 3rd ch of turning ch, turn.
Rows 4–12: Repeat rows 2–3 four more times, then row 2 once more.
Left shoulder:
Row 1: ch 1, sc in first dc, *ch 2, dc in next sc, ch 2, dc in same sc, ch 2, sc in next ch 2 sp*, repeat from * to * two more times, turn.
Row 2: ch 2, sk first ch 2 sp, sc in next ch 2 sp, *ch 2, dc in next sc, ch 2, dc in same sc, ch 2, sc in next ch 2 sp*, repeat from * to * once more, ch 2, dc in last sc, ch 2, dc in same sc, turn.
Row 3: ch 1, sc in first dc, *ch 2, dc in next sc, ch 2, dc in same sc, ch 2, sc in next ch 2 sp*, repeat from * to * once more, turn.
Row 4: ch 1, sc in first sc, [sc in ch 2 sp, sc in dc] twice, sc in ch 2 sp, 2 sc in sc, [sc in ch 2 sp, sc in dc] twice, sc in ch 2 sp, sc in last sc. Fasten off.
Right shoulder:
Attach yarn to the beginning of row 12 of lace pattern at the 3rd ch of turning ch. Work the same as left shoulder.
Back:
Work the same as front until shoulders. Repeat lace pattern row 3, then row 2.
Left shoulder: Work rows 3–4 of shoulder for front.
Right shoulder: Attach yarn to the beginning of row 14 of lace pattern at the 3rd ch of turning ch. Work the same as left shoulder.
Assembly:
With wrong sides together, sew shoulder seams together.
With wrong sides together, sew side seams together, starting at the base of the 2nd dc row below the start of the lace pattern, and sewing to the bottom edge of the garment.
Turn garment right side out. Work one row of sc evenly around the collar, basically working 1 sc in each dc, sc, and ch 2 sp. Then work one row of sc evenly around each of the armholes. I find that it turns out pretty even when I work 1 sc in each row-end, and 1 sc in a space between 2 rows.
Weave in all ends. And we’re finished :)
As always if you spot any mistakes or have any questions please feel free to drop me a note, and I will correct or try my best to assist!
Happy first week of summer!


Encore un très joli petit pull qui vous sied à merveille. Compliments vous faites vraiment de belles choses.
thanks so much Claudine!
So cute! That yarn is really pretty!
Kate :}
thanks Kate! :D
Thank you for sharing this awesome pattern with the ready to follow instructions. Just finished making mine.
Thanks so much for giving the pattern a try! :D
I’ve been searching for a pattern for this style of top in such a long time! Thank you!!!
Btw, do you think it would work if I used two threads of a crochet thread size 8 with this?
Hi Ella, glad you like the pattern! I think with 2 strands of #8 crochet thread together it would be lighter than the DK weight I use, and the garment may turn out a bit smaller. But you can increase the number of ch in the foundation chain to compensate for that. Hope this helps!
Hi Trish, thanks for sharing your pattern!
I’ve made this top once before and am making another one, but I have a few questions. (Taken from my notes on Ravelry)
For the lace portion:
Would it be better to say ‘sc into the ch 2 space between the dc of the previous row’ or something along those lines instead of ‘sc into the ch 2 space’? Because there are ch‑2 spaces before and after the ‘dc v stitch’ and sc that aren’t worked into.
For the back portion (Left & Right Shoulder):
Does this mean to only do rows 3 & 4 of the shoulder?
I tried working it the same as the front shoulders but when it was time to repeat rows 3&4, the sts wouldn’t have been worked correctly. (rpt of row 3 after doing row 4 would have no dc’s to be worked into)
Thanks in advance
Hi Shanese, thanks for giving the pattern a try!
I agree with you that it would be better to say “sc into the ch2 sp between dc of the previous row”, or I could have said sk next ch 2 sp, and sc into the next… I can make that change. Thanks for the feedback!
For the back shoulders, yes you would only work rows 3 and 4 of shoulder. That means skip rows 1 and 2 of shoulders, just work rows 3 and 4. You wouldn’t need to repeat row 3 after working row 4, you would only work rows 3 and 4 once. Maybe I should take out the word “repeat” in the back shoulder instruction as well to avoid confusion.
Hope this helps!
Awesome. Thank you!
Yes, it helped a lot. I finished the top and it’s on my Ravelry if you want to check it out. http://ravel.me/n3se/h5
Have a happy new year!
Hello,
Is there a way to make the pattern in a larger size?
Hello Margaret, thank you for visiting! You can make the top larger by adding multiples of 6 stitches to the foundation chain (6 st = 1 inch), then just following the pattern as is. If you’re increasing the pattern significantly, say more than 12 stitches at foundation chain for each of the front and back piece, then you may need to adjust the neck/collar shaping, and I haven’t tried that out yet so unfortunately I can’t say exactly how it will look like at this time. Alternatively, however, you can use a larger hook and heavier yarn, i.e. worsted weight with 5.5 or 6 mm hook, so that you can just increase moderately i.e. add 6 stitches for each front / back piece, and result in a larger size. It will likely take some experimenting and measuring as you go. Hope this helps! Happy crocheting!
I really love this and I think it will be my next make. I’m considerably bigger than you so I’ll let ya know how it goes :)
Glad you like the pattern! Would love to hear how it goes and hope the tips on changing size in the post is helpful! If you have any questions please feel free to let me know, I’ll try my best to help! Happy crocheting :D