March break fun with tater tots

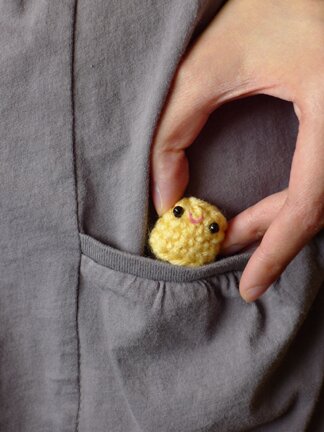
It’s March Break! Time for car­toons in the AM, all-day craft exper­i­ments, and lun­cheons with hot dogs and tater tots! Actu­al­ly, my mom nev­er bought us tater tots, and I don’t real­ly eat them a lot as an adult. But I think there’s just some­thing real­ly cute and fun­ny about tater tots. Well, the fact that they’re called tater tots. And they’re short and round. And who can for­get their 2 min­utes of fame in Napoleon Dyna­mite? Unfor­tu­nate­ly, many tots had per­ished in the mak­ing of the film. So! I thought I’d make a tot that one can safe­ly car­ry in one’s pock­et :D

It’s designed with a flat bot­tom too, so it does­n’t always need to be car­ried around — it can stand on its own like an inde­pen­dent lit­tle tot, on a desk or coun­ter­top or whatever.

If you, too, would like to make a tot to car­ry around in your pock­et, here’s what I did.

I used:
A bit of worsted weight yarn in yel­low
3.5mm cro­chet hook
Stuff­ing (I used yarn ends)
Two small black beads for eyes
Embroi­dery thread and nee­dle for mouth 

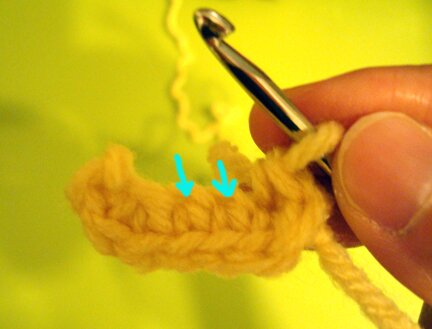
Edit 08/29/11: Row 1 is to achieve an oval base by work­ing sc’s into both sides of the begin­ning ch. Apolo­gies for not being very clear before, I added new process pho­tos after a few inquiries specif­i­cal­ly regard­ing this step, hope it helps!

Row 1: ch 5, 3 sc in 2nd ch from hook, 1 sc in each of next [2 ch], 3 sc in next ch, 1 sc in the remain­ing loop of each of the next 2 ch (the under­side of the same [2 ch], indi­cat­ed by the arrows in the pic­ture below).

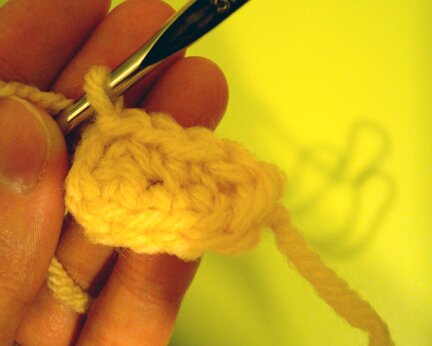
Com­plete row with sl st in the first sc of round.

Com­plet­ed row 1 (an oval base):

Row 2: ch 1, in back loop only, sc in 1st sc, sc in each sc around, sl st in begin­ning sc. (10 sc)

Row 3: ch 1, sc in each sc around, sl st in begin­ning sc. (10 sc)

Row 4 — 5: Repeat row 3 (add or omit rows here to make taller or short­er tots)

Sew on eyes and mouth. Stuff with stuffing.

Row 6: ch 1, 2 sc tog 5 times, sl st in begin­ning sc, leav­ing a 6″ tail, tie off.

Weave tail around each sc in the open­ing, pull tight and tie off. Weave in end.

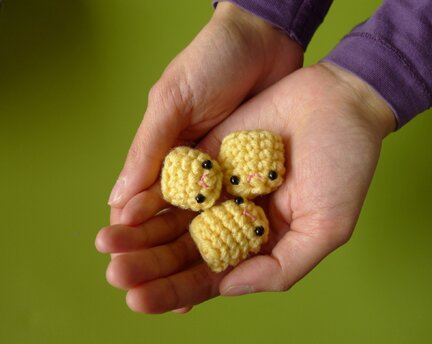
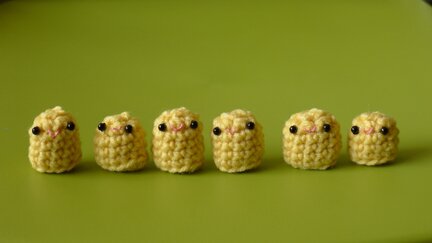
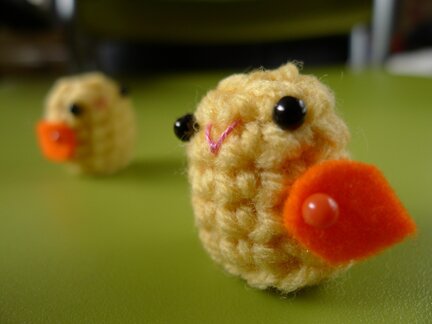
And here we have it, a tater tot! Almost as quick and easy as mak­ing the edi­ble kind. And of course, I had to make more than one…

All lined up!


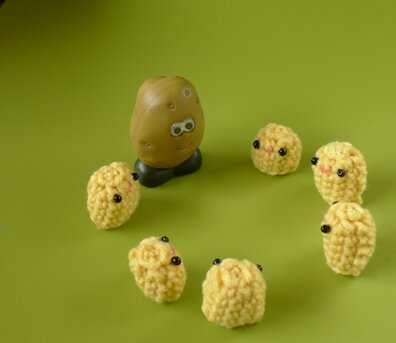
Cir­cle time with Mrs. Clip (who also works part-time as a chip clip around here).


So what else can we do with the tots, except car­ry­ing them around in our pockets?

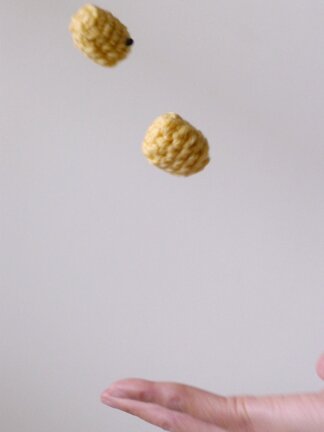
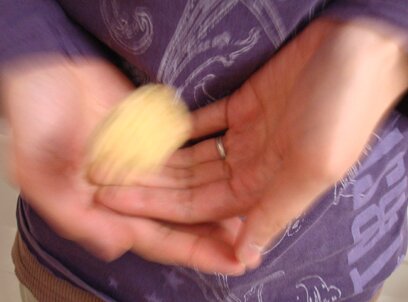
Well, one could prac­tice juggling…


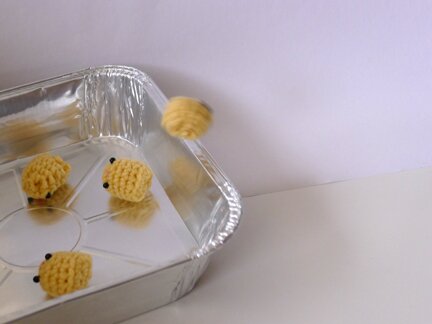
Or play tater-tot-toss (and say that ten times fast!)…


Or play hot taters with a friend or two…


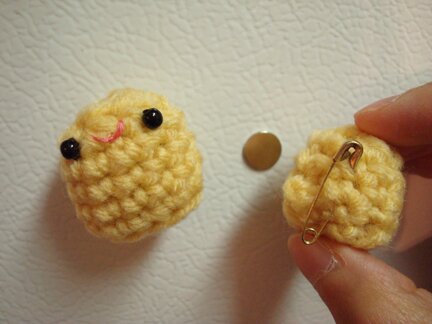
And when you’re busy with oth­er things, they can hang out on the fridge (on the frozen sec­tion, of course). Just put a safe­ty pin on it and stick it on a magnet.


And they nev­er go stale! So in a mon­th’s time just add some wings and they can dou­ble as chicks for an East­er display.


What am I going to do with all the tots? Well, I’m afraid I have more plush than I have room for them. So if you like the tots but don’t know how to cro­chet or don’t have time to cro­chet, I’ve put three in the shop, they’d love for you to visit!

And I would like to thank Mike for spend­ing the whole after­noon help­ing me with the pho­to­shoot and putting up with my sil­ly deter­mi­na­tion to take the per­fect toss­ing pic­tures. Love you!

And I’d like to thank you for drop­ping by! I real­ize that many of us don’t have the lux­u­ry of March Break but I hope you enjoyed tak­ing a break and vis­it­ing with the tater tots here!
wallflower


Every once in a while I test myself to see if I’m still able to fold the paper rose. A friend showed me how to fold one back in high school. There was no dia­gram, just visu­al learn­ing and mus­cle mem­o­ry. Per­haps that was how Japan­ese chil­dren learn origa­mi in the past.

And I’m always sur­prised to see that, after all these years, my fin­gers still remem­ber order and posi­tion of every crease and fold. After all, it’s a rather com­plex mod­el, involv­ing a long series of pre-creas­es and three-dimen­sion­al shap­ing. I’ve nev­er timed myself but I know that mak­ing a small bou­quet takes more than half a day.

For all the work that goes into it, I’m struck by how much it also resem­bles a crum­pled ball of paper when looked at from far away. In fact, I can eas­i­ly oblit­er­ate all the care­ful­ly cal­cu­lat­ed folds and metic­u­lous artistry with one squash of a fin­ger, reduc­ing it to noth­ing but a crum­pled bit of scrap paper. And how much, I thought, that resem­bles our human existence.

And yet our lives are so rich. We build rela­tion­ships. We share laugh­ters and sor­rows. We love. We may be here today and gone tomor­row, but the echo of our love is endless.

Ini­tial­ly I took the pho­to only for the post, but then I thought it would also make a nice wall­pa­per on my desk­top, so while I was cre­at­ing that I made sev­er­al dif­fer­ent sizes to share with you :)

Down­load wall­pa­per with origa­mi rose:
1920 x 1200
1280 x 1024
iPhone

Please refer to Con­tent Shar­ing for use of images from this blog.

If you’d like to fold your own paper rose here’s one instruc­tion.

Take care, friends.


If time is mon­ey, then I’ll spend it all for you
I will buy you flow­ers with the min­utes we outgrew
I’ll turn hours into gar­dens, plant­ed just for us to take
I’ll be reck­less with my days, build­ing cas­tles in your name

– Sleep­ing At Last, Next to Me

creature comforts

I walked home from the gro­cery store today in a whirl­wind of snow mixed with ice pel­lets. Spring is nowhere in sight at the moment. But these look cozy.

Per­fect for a win­ter road trip, you think? :D

Free cro­chet pup­pet scarf pat­tern by Red Heart Yarn.


I did­n’t real­ize that this was sup­posed to be a tooth pil­low. At first glance I thought it was a full-size pil­low that hides mon­ey, so that oth­ers (or the hider him­self, once he’s for­got­ten about the hid­ing) would find the mon­ey and be pleas­ant­ly sur­prised. I don’t know how I could miss that, when one of the pic­tures on the post clear­ly says “feed me teeth,” and instead my mind makes up its own weird sto­ries like that… But any­way, I still think it would look awe­some on the couch as a large, cud­dly pil­low (that hides mon­ey, or love notes :D).


Instruc­tion on The Long Thread.


I would very much like one of these heat­ed cud­dle bud­dies today, with a hot cup of tea. It’s like one of those heat packs filled with grains and herbs, except cuter.


Instruc­tion by Eccen­tri­cat on Instructa­bles.


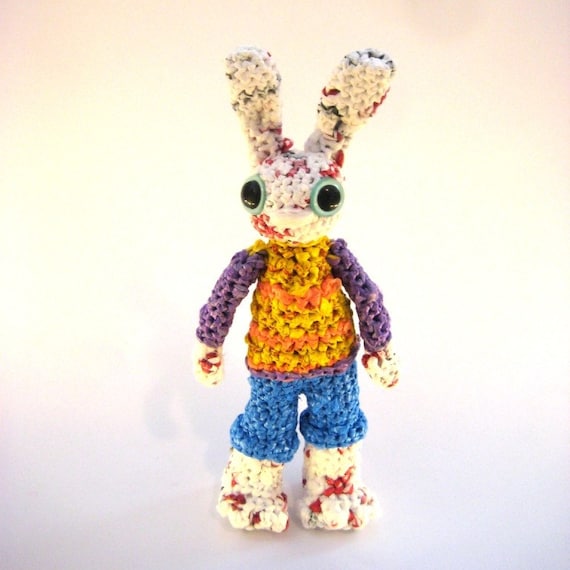
I recent­ly stum­bled upon the idea of plarn (plas­tic bag yarn) and I’m so intrigued! I’ve cro­cheted with cut-up plas­tic bags before, I made snowflakes with the clear ones in the pro­duce aisle. It tore ter­ri­bly in the process and I nev­er tried it again. But I saw a bet­ter way to make plarn, and I think I may give it a try. We don’t get free plas­tic bags any­more in Toron­to (except those flim­sy ones in the pro­duce aisle), they’re 5 cents each, so we try to remem­ber to bring reusable bags when we go shop­ping. When we do buy plas­tic bags we reuse the them to line the trash cans. So I actu­al­ly don’t have a lot of plas­tic bags lying around in the house, and I’m prob­a­bly going to try mak­ing some small crea­tures that don’t require a lot of plarn. The Eco Bun­ny Boy here is both amaz­ing and inspiring.


Eco Bun­ny Boy by out­ofthe­frame on Etsy.


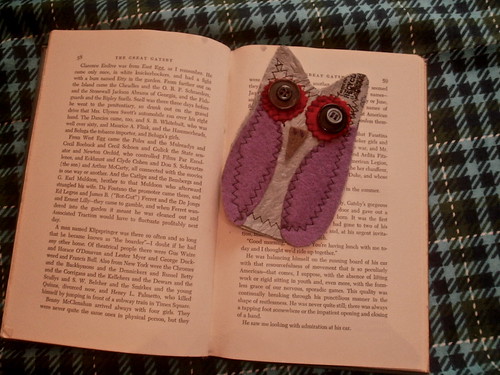
And I love this charm­ing owl book­mark, made with fused plas­tic bags (how-to here) and felt.

Found here.


Have a love­ly evening, everyone!

weekend montage

Mike had to work at a food con­ven­tion on the week­end, and he said it would be OK if I tagged along. We had our fair share (and gen­er­ous help­ings!) of food sam­ples, includ­ing (but not lim­it­ed to) an art­ful cap­puc­ci­no, and waf­fles with var­i­ous deli­cious top­pings. I even got a com­pli­men­ta­ry cow key chain while wan­der­ing past the Seal­test booth. There were also lots of amaz­ing things to feast our eyes on, like the cake dec­o­rat­ing demon­stra­tion and inter­est­ing vari­eties of mush­rooms. And cook­ing demon­stra­tions by celebri­ty chefs! For some odd rea­sons I was sur­prised to see that they looked exact­ly the same as they do on TV. Some­how I thought they’d look dif­fer­ent in person.

We did have to look after our booth so we did­n’t spend near­ly as much time sam­pling from oth­er exhibitors as we would like. So after­wards we went to Smoke’s for some real Cana­di­an del­i­ca­cies :P

Hope your week­end was re-energizing!

paper clips and rubber bands


I start­ed on a new knit­ting project. It’s a top-down round-yoke cardi­gan, and it required stitch mark­ers. I don’t have stitch mark­ers, but I dis­cov­ered that paper clips worked just fine :D I also wrapped a rub­ber band on the end of each nee­dle, so stop the grow­ing cardi­gan from run­ning off the dou­ble-point­ed needles.

My par­ents taught me to be resourceful :)

On a side note, the oth­er sweater that I was work­ing on, which is also grey, is giv­ing me a bit of a headache at the moment. I com­plet­ed it (yay!), but it turned out a bit big on me, so I threw it into the wash­er and dry­er and hope that it would felt and shrink slight­ly (it’s made of an acrylic/wool blend, I’ve nev­er felt­ed any­thing in the machine before, so maybe it was a stu­pid thing to do). But then, after it came out from the dry­er I was hor­ri­fied to find that not only did it not shrink, it was also cov­ered, and I mean cov­ered, in white fuzz balls!

ARRRGH!

I’m going to have to run the sweater shaver all over it to get rid of all the fuzz, and then sew on the but­tons. I’ll keep you posted!

Hope your week­end is fabulous!


P.S. The paper clip stitch mark­er isn’t my idea, I saw it used for cro­chet­ing over on Futur­girl Craft Blog, and I thought it might work for knit­ting too!

March Forth


And as we let our own light shine, we uncon­scious­ly give oth­er peo­ple per­mis­sion to do the same. As we are lib­er­at­ed from our fear, our pres­ence auto­mat­i­cal­ly lib­er­ates others.

– Mar­i­anne Williamson


blooming

Today I went to my favourite bead store to find flow­er cabo­chons. I was look­ing for a turquoise dahlia flower for a ring and a cou­ple of small pink ros­es for ear­rings. They were hav­ing a buy-one-get-one-free sale on resin flow­ers, so I got the ros­es for free! :D

And because the cabo­chons looked so sweet, I decid­ed to take some pic­tures of them with the Zumi.


The ros­es were actu­al­ly more of a coral pink. Maybe the colour will show up bet­ter against my skin, when I wear them as ear­rings! :D Right now I’m wait­ing for the E6000 to dry. Yes, today I splurged on a tube of indus­tri­al-strength super-glue, because the thought of los­ing part of an ear­ring in the show­er or on the street is too dev­as­tat­ing. So I think it will be worth the $8 I spent on it. It’s sup­posed to take 48 hours to set, so… I have about 40 hours left to wait :/ And now I have enough glue to make hun­dreds more pairs of ear­rings, or hun­dreds of rings, or pen­dants, or what­ev­er I will need indus­tri­al-strength glue for. Hmm. Does glue expire?

While Zumi was out I also took some pic­tures of my African vio­let. It stopped flow­er­ing for a year, and then after I trimmed it a cou­ple of weeks ago it began bloom­ing hap­pi­ly (and rapid­ly) again :D I was sur­prised how painter­ly these pic­tures looked.


More buds!


Have a hap­py Thursday!

think spring!

Today is the first day of March, and it’s a beau­ti­ful sun­ny day in my neigh­bour­hood :D It is not offi­cial­ly spring yet, but I thought I’d share with you a few things that remind me of spring.

I’d like to do all my home­work on these.

FurniBloom, by Ice­landic design­er Dag­ný Bjar­nadót­tir. (via Design*Sponge)

While it may be dif­fi­cult to get these bloom­ing chairs and tables from Ice­land, grow­ing an indoor lawn on our desks can be easy — by plant­i­ng recy­cled t‑shirts! How awe­some is that?

Desk lawn, tuto­r­i­al on EASY.

And now that we have an indoor lawn, we may need a gar­den gnome.

Turns any child into the cutest gnome. Pat­tern from Lorajean’s Mag­a­zine.

These indoor mush­room gar­dens are sim­ply gor­geous. Made with the edi­ble vari­eties bought from the mar­ket. They make love­ly table cen­ter­pieces, I think.

Instruc­tion on Design*Sponge.

But if you’re look­ing for mush­rooms that won’t ever wilt and dry out, here are the true dis­play variety.

Origa­mi dia­gram on Origa­mi Club (via How About Orange).

And here we have the excep­tion­al­ly sweet species — the meringue mush­rooms. I find them so very intrigu­ing. They even look like the real but­ton mush­rooms. Have you seen Martha’s mush­room cake? Mag­i­cal, right? See­ing that I did­n’t have a cake at my wed­ding, I think I must get one of these mush­room cakes for the upcom­ing anniversary.

There are lots of meringue mush­rooms recipes on the world wide web but I like this one from Cor­ner Cafe, because it shows how they’re piped. I’ve nev­er piped any­thing before, so it will help if I ever try to make them.


Have a won­der­ful first day of March, everyone!