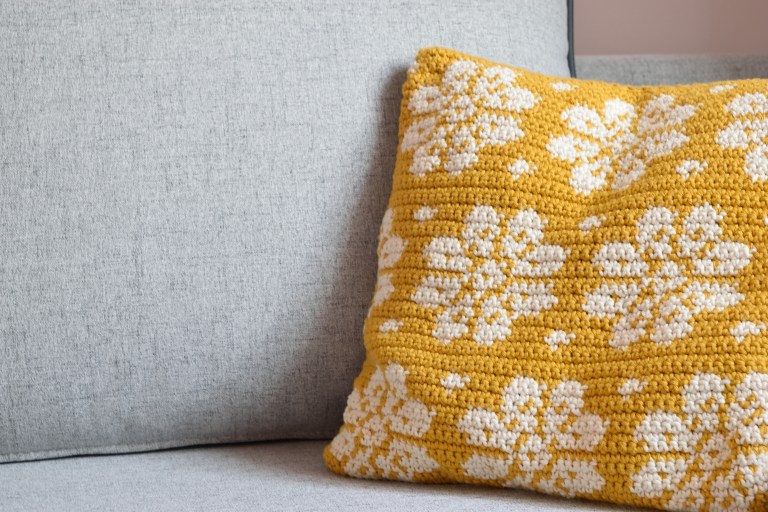
keep calm and smell the lavender

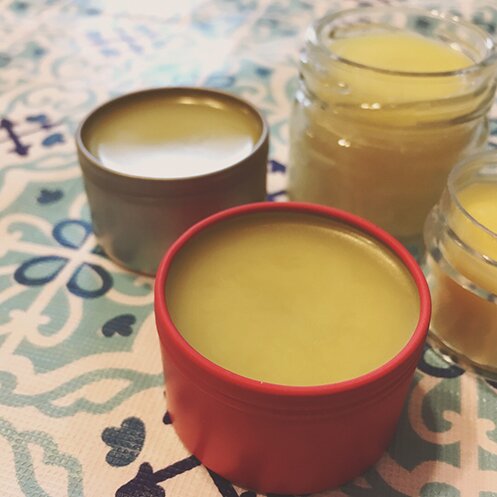
I was mak­ing some sleep and relax­ation balms and salves as gifts. Part­ly also because I want­ed to start mak­ing my own lip balm because the EOS stuff I’m using seems to make my lips peel…? Very annoying. 

Any­way, after doing much research and com­par­ing recipes, because I also don’t want to invest in a lot of mate­r­i­al to start (and essen­tial oils tend to be a bit cost­ly), I bought some basic mate­r­i­al and made some sol­id per­fume kind of balm, and a salve for heels as well. 

For the sol­id per­fume, I used one part beeswax and one part extra vir­gin olive oil. The olive oil we just always have for cook­ing, and the beeswax I got it from the Bee Shop, from local bee keepers. 

For the first batch I used:

  • 2 tbsp of beeswax
  • 2 tbsp of olive oil
  • Melt­ed the beeswax and oil in a dou­ble boil­er (which is a mason jar in a pot of sim­mer­ing water over medi­um heat)
  • After it all melt­ed I mixed in 15 drops of laven­der oil and 10 drops of cedar­wood oil
  • Dis­trib­uted in clean small con­tain­ers (tiny jam sam­ple jars and David’s Tea tins!) — I filled 2.5 con­tain­ers, and then made a bit more fol­low­ing the same beeswax to olive oil ratio to make 4 containers.

This sleep balm proves to real­ly work for sleep, applied to the tem­ples and soles of feet before bed. My friend and I both tried it and it worked! So If you have trou­ble sleep­ing I’d sug­gest giv­ing it a try! I tried it as a lip balm but it did­n’t go on very well.

I then made some salves for heels, because I was giv­ing it to some­one who does­n’t like strong scents. It has less laven­der, and has coconut oil. I used:

  • 3 tbsp coconut oil
  • 3 tbsp extra vir­gin olive oil
  • 1 tbsp beeswax
  • Melt­ed the oils and beeswax togeth­er in dou­ble boiler
  • Once all melt­ed, added 10 drops of laven­der oil and 5 drops of cedar­wood oil
  • Dis­trib­uted in 4 small containers

So I did some exper­i­men­ta­tion on myself with this salve. It works well on the heels, but not so great on the lips or face, as it is quite greasy-feel­ing. I think it’s also great for dry hands and it smells great. I think maybe this is why a lot of lip balm recipes call for shea but­ter or cocoa but­ter. I’ll give that a try when I have a chance to go to the health food store. 

Also, I only bought a 175g block of beeswax and I still have more than half left! It goes a long way.

Hap­py weekend!
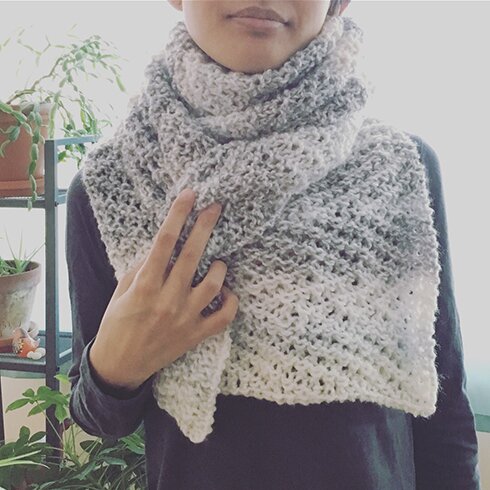
 

scarves galore and more

I worked with the best team of peo­ple in the world. And over the past few years I prob­a­bly spent more time with them than with my fam­i­ly. Which was part­ly why I was leav­ing (not the peo­ple, just the type of work), but also makes it hard to leave.

The only way I know how to mark a tran­si­tion in rela­tion­ships (because it’s not good­bye, it’s just… we won’t see each oth­er every­day and won’t share the same things when we do see each oth­er again), and to say how much I love them, is to make peo­ple things. I observe what peo­ple like to wear and I make the things that I think they’ll like.

So, I made all these scarves and read­ing socks in about a month. All loom knitted :) 

I fol­lowed a YouTube tuto­r­i­al for this one, the pat­tern is called Drag­on Tail, and I used Red Heart Unfor­get­table in Drag­on­fly, with two strands held togeth­er, and the 41-peg loom. 

I used Loops & Threads Barcelona for all the oth­er scarves. It was on huge sale at Michaels, it’s got great colour vari­a­tions and the weight works with the gauge of my looms. This one I fol­lowed the tuto­r­i­al for a tri­an­gu­lar scarf, but when­ev­er there is a colour change I work an eye­let row. If I were to give this scarf a name, I would name it “going with the flow”. It was fun to make. 

For this one I worked [2 eye­let rows, a few garter rows, a 2 pop­corn rows, a few garter rows, and 2 eye­let rows] with a few inch­es apart. 

And fun read­ing socks! It was made with Caron Chunky Cakes (toes, heels and cuffs), two strands of worsted yarn held togeth­er (green part) and a super bulky pink yarn for a fun con­trast. I fol­lowed a toe-up socks tuto­r­i­al.

And in the midst of this mak­ing fren­zy for my cowork­ers, I was invit­ed to a baby show­er of a good friend from high school. So I thought, of course I can fin­ish a baby blan­ket in a week! (I did­n’t, I was one pan­el shy of fin­ish­ing it the night of the show­er, so I’ll have to wait to give it to the baby when he’s born.)

I fol­lowed the ten-stitch blan­ket tuto­r­i­al and used the reg­u­lar Caron Cakes, with a 24-peg loom. It’s amaz­ing how it works! And I real­ly like how the colours turned out, very mod­ern-look­ing, I think.

And here it is finished :)


I find loom knit­ting very med­i­ta­tive. Per­haps over the sum­mer I’ll make anoth­er blan­ket with var­ie­gat­ed yarn. 

Have a good start to the week, everyone!


new chapter

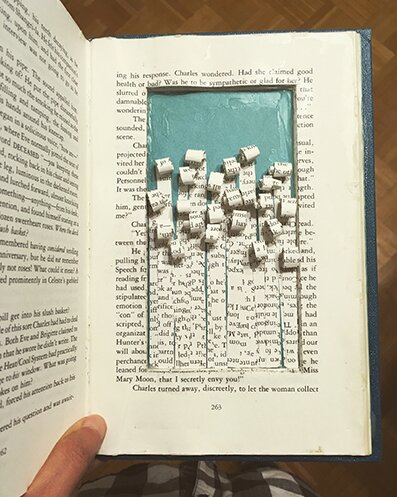
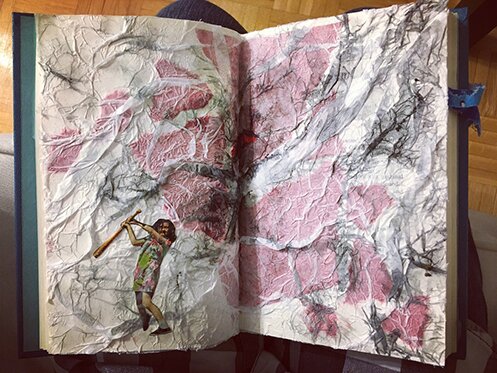
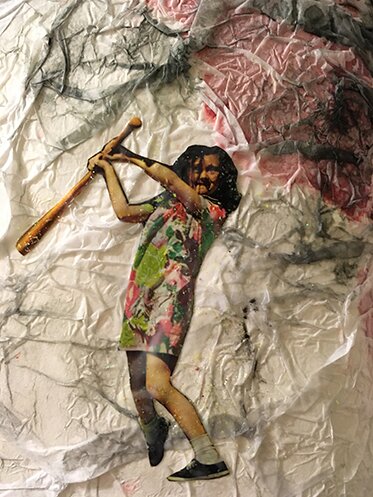
I was invit­ed to an altered book work­shop a while ago. It’s a great way to jour­nal. I altered a few more pages after I went to the workshop.

The above is a sec­tion that I man­aged to fin­ish in the work­shop, done by glu­ing many pages togeth­er in the end of the book, then cut­ting a win­dow through all the lay­ers, then glu­ing it down to the back cover.

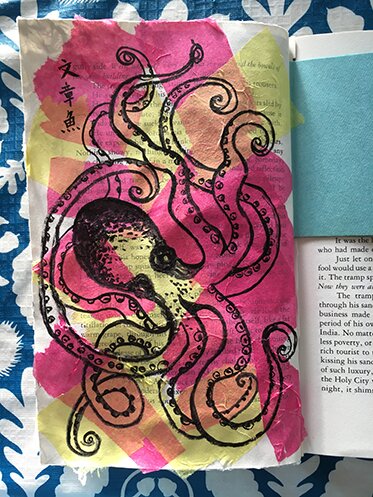
I then tried to exper­i­ment with this tis­sue paper paint­ing method, but I think one needs to use spe­cial tis­sue paper that “bleeds”, which are not the ones from the dol­lar store. So any­way, I thought I’d paint an octo­pus instead. The Chi­nese char­ac­ters say “octo­pus of prose”.

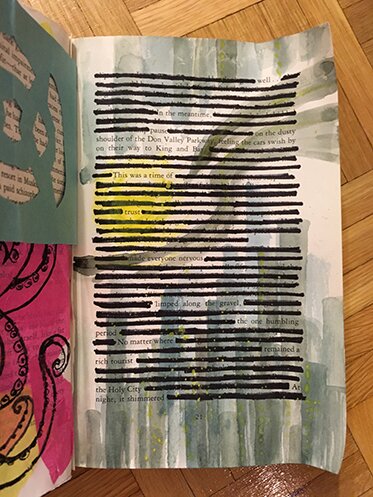
So then on the next page I tried mak­ing a found poet­ry, and this was when I real­ized that this book (which I picked up many years ago from a “FREE!” bin at work because the cov­er was a very nice teal colour but I actu­al­ly have no idea what the book is about) is actu­al­ly set in Toron­to! It’s a bit hard to read in the pho­to so here’s the poem:

well…

In the meantime,

pause

on the dusty shoul­der of the Don Val­ley Park­way, feel­ing the cars swish by on their way to King and Bay.

This was a time of

trust

made every­one nervous

limped along the gravel,

the one hum­bling period

No mat­ter where

remained a rich tourist

the Holy City

At night, it shimmered.

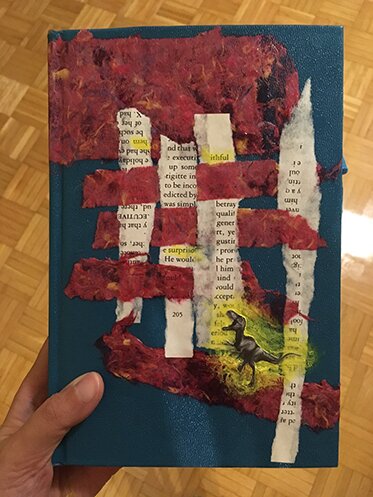
Then I worked on the cov­er. Weav­ing words and hand­made paper and the roars of an Alber­tosaurus (she’s from my Tyrrell Muse­um ticket).

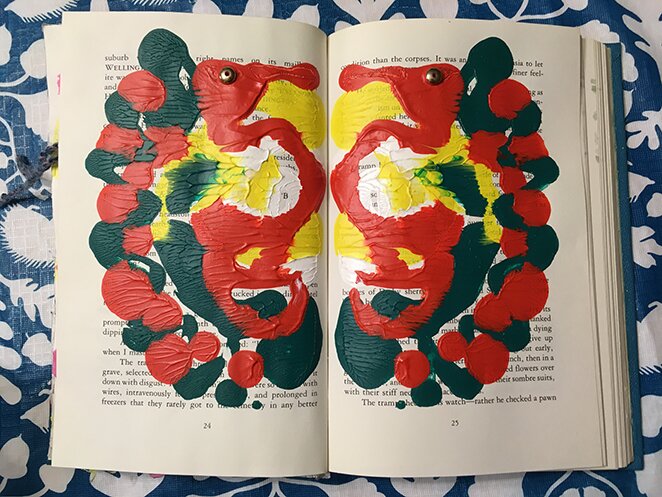
The book form lends itself nat­u­ral­ly to mir­ror image print­ing. I thought this looked like a sea drag­on rising. 

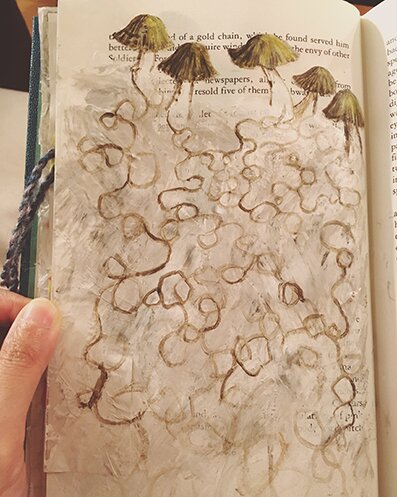
I called this piece “Myceli­um Run­ning,” which is also a very cool title of a book about the unseen organ­isms that keep the bal­ance of the earth. Myceli­um is the veg­e­ta­tive part of a fun­gus. Not the roots, but rather the branch­es. And the mush­rooms are the fruits of the fun­gus. Myceli­um is vital in ecosys­tems for its role in decom­pos­ing plant mate­r­i­al, and it com­pris­es of some of the largest organ­isms in the world. 

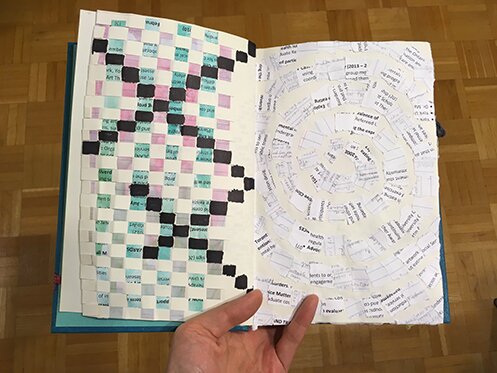
This is called “minc­ing my words,” made after I roy­al­ly failed a job inter­view, and remem­ber­ing oth­er inter­views that did­n’t go as I hoped. With pieces of my hand­writ­ten notes from school and resume, and feel­ing like I was pre­tend­ing to be who I was not, going in cir­cles and nowhere. The weav­ing on the left and the X’s were a way of me say­ing “NO” to the whole thing. 

This is my favourite. It’s called “Revenge of the Upside-Down”. But we, we who are female, we who are racial­ized, we who are dif­fer­ent from the so-called norm, are not back­ing off. 

Close-up of the glit­ter and determination!

So, I thought it’d be fit­ting to post about this project today, and to end the post with this par­tic­u­lar image, as I’m tran­si­tion­ing from full-time front­line work to aca­d­e­m­ic work in the fall, start­ing a new chap­ter, wad­ing through uncer­tain­ties, chas­ing a dream. 

In the mean­while, I’ll have a sum­mer with less work and more time for craft and fun adven­tures :) Stay tuned for more projects and pic­tures! Thank you for jour­ney­ing with me, always.


this week’s awesome finds

Long time no write! Have been work­ing on some long projects for a while, which I will be shar­ing soon! But for now, awe­some projects I came across this week!

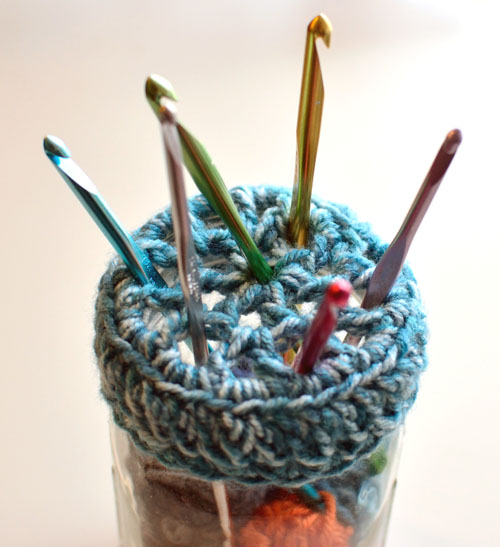
This is bril­liant! I should make one of these so I’m not for­ev­er fish­ing for the right hook in my box full of hooks (and nee­dles, sigh, so dis­or­ga­nized…). From Cro­chet Spot.


Stay calm and smell the laven­der, with­out harm­ful chem­i­cals. How-to for an easy-to-make laven­der room spray on Pure­ly Katie.


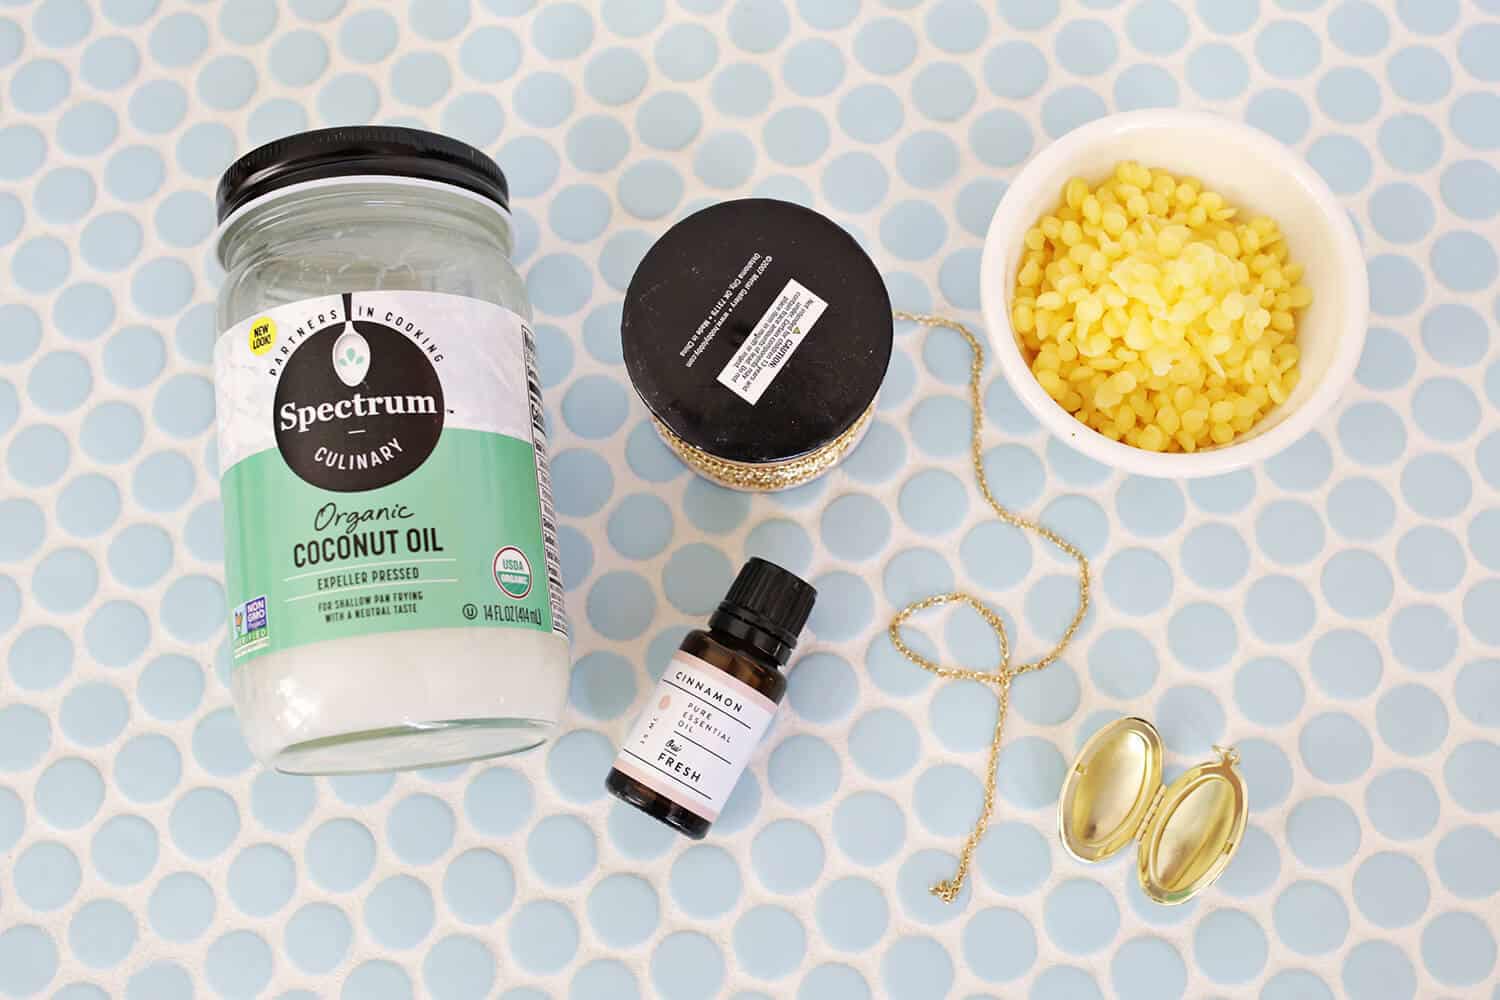
With just 3 ingre­di­ents, per­fect for gift-mak­ing! Tuto­r­i­al for lip balm lock­ets from A Beau­ti­ful Mess.


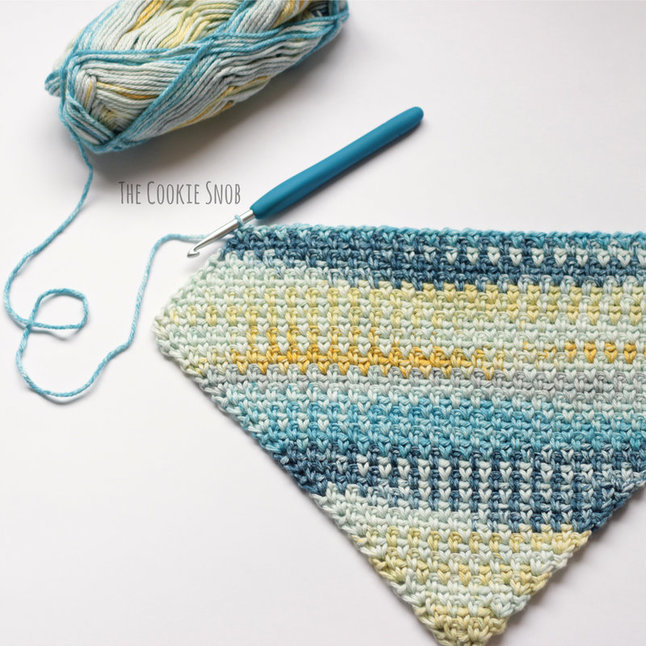
Per­fect use for var­ie­gat­ed cot­ton, a med­i­ta­tive stitch worked from cor­ner to cor­ner so it’s not bor­ing. Pat­tern for a moss stitch dish cloth from The Cook­ie Snob.


I’ll pack a cowl! XD This awe­some cowl is a free Rav­el­ry down­load, by Deb Jac­ul­lo.


What a bril­liant idea, build­ing a ter­rar­i­um with Legos! From Make and Takes.


This chub­by cock­a­too! Free pat­tern from Furls Cro­chet.


Have a fan­tas­tic crafty week, everyone! :)


going places

If I were to give this shawl a name I would name it “going places”. Because of the repeat­ed arrow pattern.

It is a loom knit­ted project, for a gift. I used a 41-peg loom (largest of the set), and fol­lowed this pat­tern for “woven her­ring­bone stitch”, but I replaced all the yarn-overs with purl stitch­es, because the yarn-overs just came out way too loose with the gauge of my loom.

(But you know what, the oth­er night I had a dream that I got a new fin­er gauge loom that works per­fect­ly with worsted weight yarn. Yes, very spe­cif­ic dream. So maybe it’s a sign. We’ll see. Any­way, I digress.)

It’s actu­al­ly a real­ly easy k2 p2 pat­tern repeat with just dif­fer­ent num­ber of knit stitch­es at the start of each row to cre­ate the her­ring­bone pat­tern. Per­fect for knit­ting while TV-watch­ing, but not boring.

The yarn I used was Loops & Threads Barcelona. It’s quite soft, the colour tran­si­tions are fun to knit with, and the weight works well with the gauge of my loom, plus it was on mas­sive sale at Michaels.

The pat­tern is worked over mul­ti­ples of 4 stitch­es, so I knit­ted this over 40 pegs, until it reached 46″. Basi­cal­ly until I ran out of yarn, which is one skein and a bit more (left­over from anoth­er skein). With the reg­u­lar bind-off method it real­ly puck­ered, so I used a stretchy bind-off method. If I were to make it again I would def­i­nite­ly make it longer. I did win at yarn chick­en on this one though, so no complaints!

It was even long enough to work as a squishy scarf :D

Per­haps you’d give this a try? Let me know if you do! :D

Whether you use nee­dles, hooks or looms, have a hap­py craft­ing week!


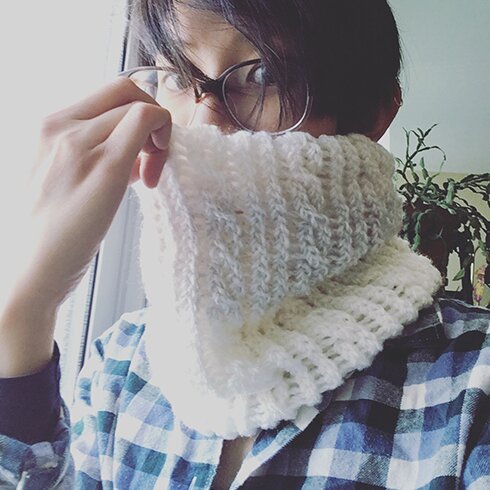
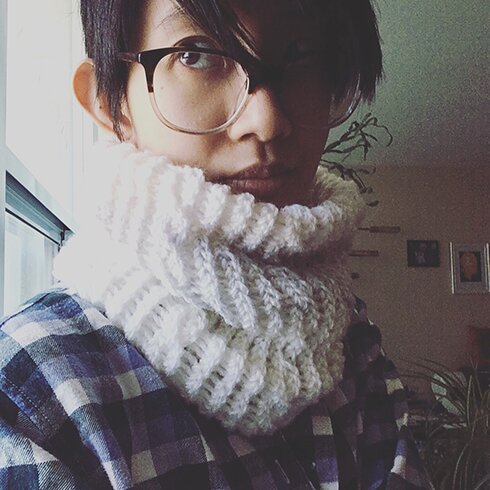
cumulus cowl

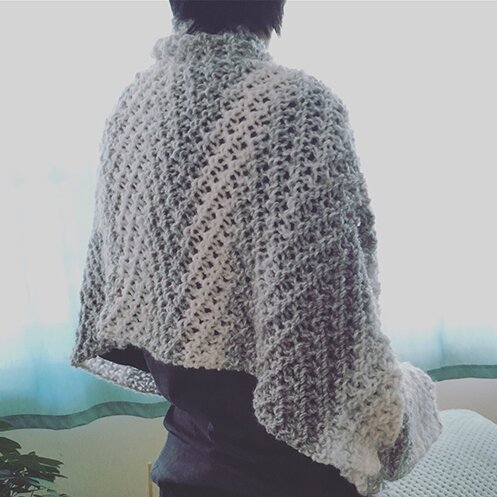
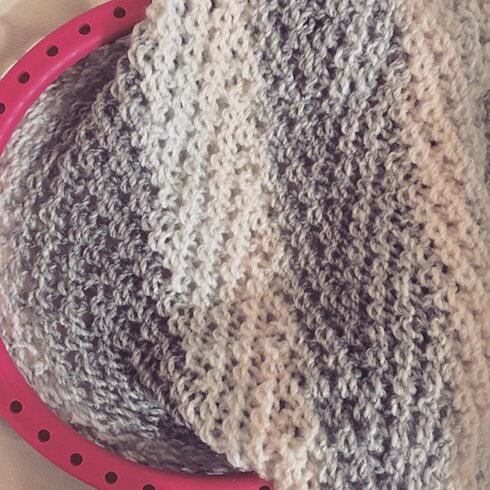
I had a vision of this cowl when I saw the yarn, which was Loops & Threads Barcelona in Arc­tic, and I bought it because it was on mas­sive sale. It is a very fluffy yarn and with the colours it reminds me of clouds. I want­ed to cre­ate a sub­tle cable tex­ture where the cables may not be super notice­able at first glance, and the cross­ing of the stitch­es are a bit hid­den, like clouds, which are eas­i­ly tak­en for grant­ed unless we take time to stop and notice their forms and shapes, and twists and turns.

I was hap­py with the way it came out so I thought I’d share what I did. The fab­ric is dou­bled so it’s extra warm and squishy. It would work nice­ly with any bulky yarn with long colour tran­si­tions of grey and white. (or oth­er colours you like!)


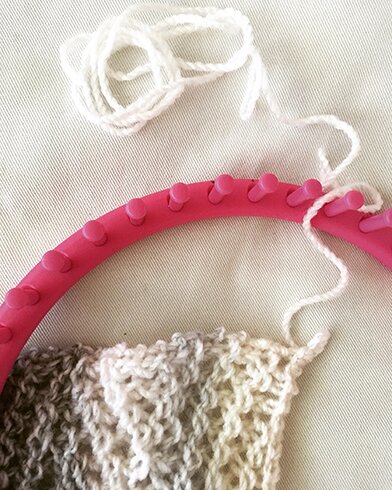
It is a loom knit­ting pat­tern, and if you’re new to it now wor­ries! I include links to video tuto­ri­als for dif­fer­ent tech­niques. Loom knit­ting itself is quite easy, so a begin­ner would be able to fol­low this pattern.

Mate­r­i­al:

Half a skein of Loops & Threads Barcelona — about 150 yards.

41 peg Knit Quick round loom and loom knit­ting hook

4 mm cro­chet hook (for weav­ing in ends)

Pat­tern:

Mark the pegs with elas­tic bands or stitch mark­ers. Mark the first two pegs, *skip two pegs, mark the next two*, repeat from * to * around until there are 3 pegs left.

E‑wrap cast on all the pegs around the loom.

E‑wrap every round until piece is 2″ in length.

Cable round: *Take off and hold the loops from the first two marked pegs. Place the loop from first peg on the sec­ond peg, then place the loop from the sec­ond peg on the first peg, then e‑wrap the two stitch­es* (cable stitch com­plete). E‑wrap the next two stitch­es as usu­al. Repeat from * to * over the next two stitch­es on marked pegs to work cable stitch. Con­tin­ue around work­ing cable stitch over the stitch­es on marked pegs, and work­ing reg­u­lar e‑wraps over unmarked pegs. (Here’s a video for the cable stitch, except that in the video u‑wraps and purl stitch­es are used, where­as in this pat­tern only e‑wraps are used)

E‑wrap 3 rounds.

Repeat the last 4 rounds until piece is 16″ in length.

E‑wrap until the piece is 18″ in length, don’t fas­ten off.

Seam­ing:

Place the cast on loops back on the pegs, care­ful in match­ing the loops to the pegs (i.e. the first loop of the round in the first peg, sec­ond loop on the sec­ond peg, and so on). Bind off loose­ly, treat­ing the bot­tom two loops as one. Fas­ten off and weave in ends.

Move the seam towards the mid­dle of the cowl, and enjoy the fluffiness!

Hap­py week­end, friends! :D


the sharing hat

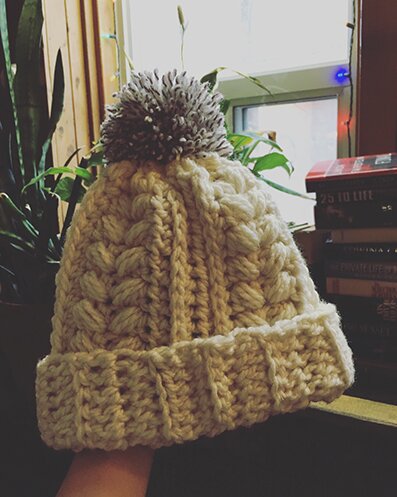
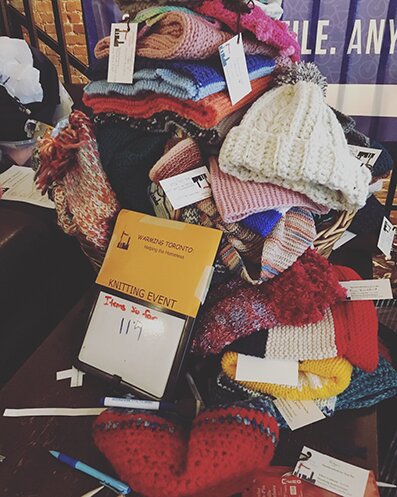
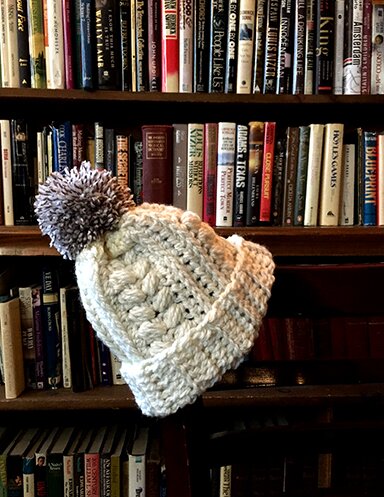
This hat was made and the pat­tern writ­ten while Mike and I par­tic­i­pat­ed at the Warm­ing Toron­to event at the end of Feb­ru­ary, which was an event in which peo­ple gath­er togeth­er and make hats and scarves for shel­ters and out­reach pro­grams in the city. So I’m shar­ing this pat­tern with these intentions:

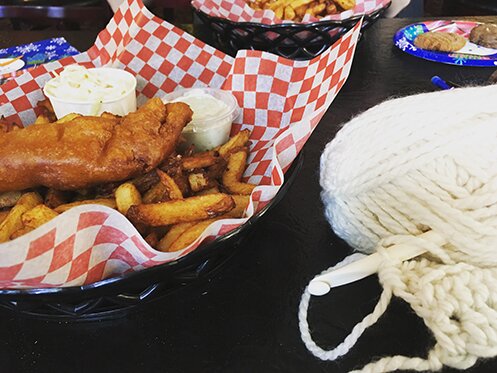
1) The hat is quick to make. I had to restart sev­er­al times while I was fig­ur­ing out a pat­tern, and I was also eat­ing a very deli­cious plate of fish and chips (AWAY from the yarn — this set­up was only for Insta­gram!), but I made the hat from start to fin­ish with­in 4 hours, so mak­ing it from the pat­tern should take much less time!

2) Since it’s such a quick make, I’m hop­ing that this will encour­age you to make one for your­self and make anoth­er to pass it on to some­one who can real­ly use a thick and warm hat!

Behold the cozy yarn pile — by the time I fin­ished the hat we’ve col­lect­ed 114 fin­ished items! :D

The event took place at a pub, which has an upstairs library with couch­es and fire­place, per­fect for yarn-craft­ing and pro­vid­ed back­grounds for my pho­to shoot that are much more inter­est­ing than what I usu­al­ly have :D

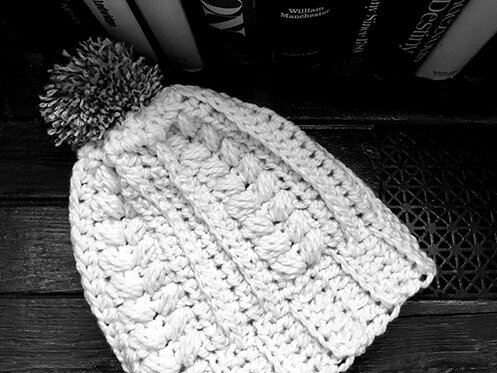
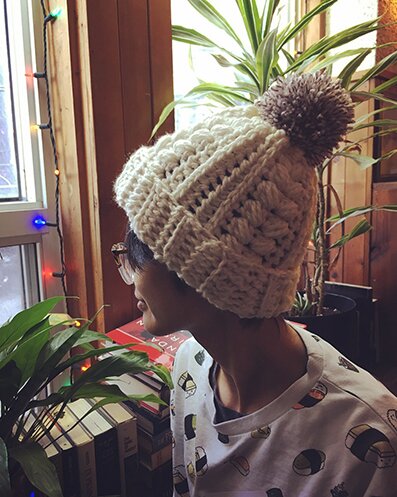
The hat is worked side­ways then seamed togeth­er. It has rows of braid­ed puff stitch and tex­ture cre­at­ed by cro­chet­ing into the 3rd loop on the back of a half-dou­ble cro­chet stitch. If you haven’t tried nei­ther of those stitch­es, don’t wor­ry, I took plen­ty of process pho­tos to show how it’s done :)

The hat mea­sures about 9″ tall (brim fold­ed) and 20″ around. 

Mate­r­i­al:

Two skeins of Bernat Sof­t­ee Chunky, or oth­er super bulky weight yarn (the hat uses about 150 yards, so 3 skeins would make 2 hats! :D)

Con­trast­ing colour yarn for pom pom.

9 mm hook, and a small­er hook for weav­ing in ends.

Yarn nee­dle.

Pat­tern:

*Note: begin­ning ch does not count as a stitch through­out the pattern.

Row 1 (RS): ch 26, hdc in 3rd ch from hook, hdc in each ch to end. (24 hdc’s)

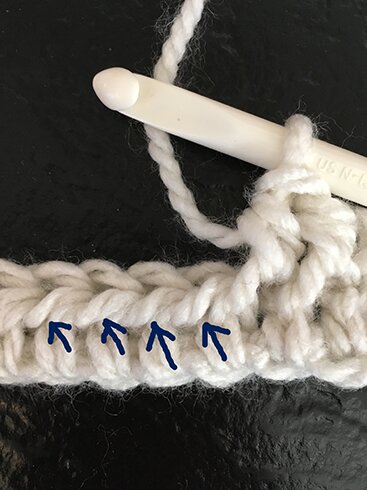
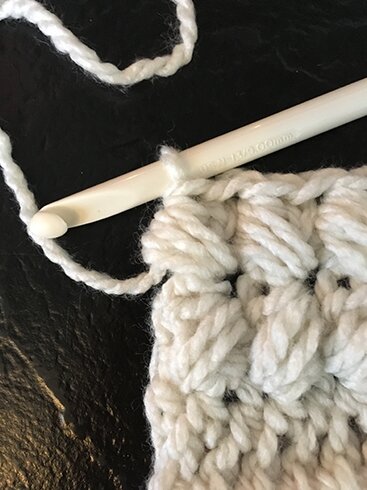
Row 2 (WS): ch 1, hdc in back loop only (BLO) in the first 6 hdc’s, then hdc in the 3rd loop in each of the remain­der of the hdc’s, like so…

You would insert the hook into the strands of yarn in the direc­tion of the arrows. This cre­ates a nice raised braid on the right side :)

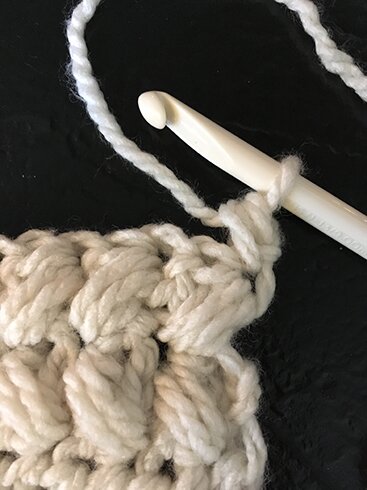
Row 3: (puff braid row) ch 3, skip first 2 hdc, dc in next hdc…

[yo and pull up a loop] three times in the first hdc of the row, then pull through all loops on hook (puff stitch made)…

*skip next hdc, dc in next hdc, puff st in the same hdc as last dc made* rep from * to * till there are 7 hdc’s left in row, dc BLO in each hdc to end.

Row 4: (puff stitch row) ch 1, dc BLO in next 7 dc, sk next st, dc in next dc (between 2 puff st’s)…

puff st in the st before the skipped st…

*skip next st, dc in next st, puff st in st before skipped st* rep from * to * till end of row. When arriv­ing at the end of row, work last dc in the very last st…

Then end with a puff st.

Row 5: ch 1, make sure the first hdc is made in the very first st…

Then hdc in next 17 st’s, hdc BLO in last 6 st’s.

Row 6: ch 1, hdc BLO in first 6 hdc’s, hdc in the 3rd loop in the remain­ing 18 hdc’s.

Row 7: ch 1, hdc in first 18 hdc’s, hdc BLO in remain­ing 6 hdc’s.

Repeat rows 2–7 three more times, except in the last repeat, omit row 7 and end with row 6.

Decrease row at top: ch 1, 2 dc tog even­ly across the top of the hat.

Cut yarn and leave a long tail for sewing. Thread yarn tail in yarn nee­dle, weave yarn tail through the stitch­es at the top of hat, cinch close and tie to secure. Turn hat inside out, sew seam. Make and attach pom pom. Fold up the brim for extra warmth!

I hope you enjoy mak­ing the hat! Leave a com­ment if you have any ques­tions or need clar­i­fi­ca­tions. And if you’re look­ing for places to send your yarn-craft items… 

Here’s a list by the Toron­to Knit­ters Guild of places that accept yarn-craft­ed good­ness in Toronto.

Warm Hands Net­work col­lects and sends hand­made items nation­al­ly and inter­na­tion­al­ly, espe­cial­ly to north­ern locations.

For friends in the USA, the lists on Men­tal Floss and Red Heart may be good places to start :)

With glow­ing heart and busy hands — hap­py yarn-crafting!


winter solace

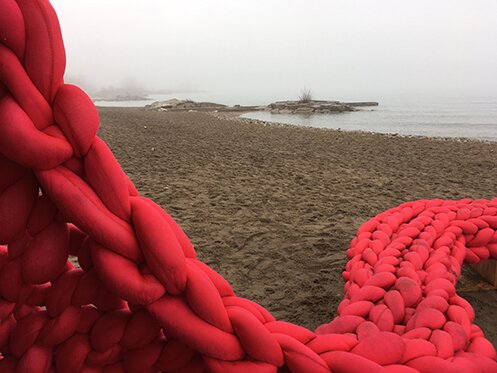
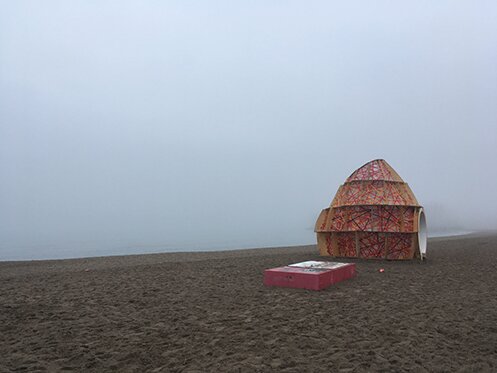
Have been hear­ing about the Win­ter Sta­tions project for a cou­ple of years now, but haven’t had a chance to go. I had a week day off last week, and it was rel­a­tive­ly warm, so I head­ed down to the beach to vis­it this year’s installations.

Win­ter Sta­tions are instal­la­tions that go over life guard posts on the beach. This year it’s nice and close to the bus route on Kew Beach

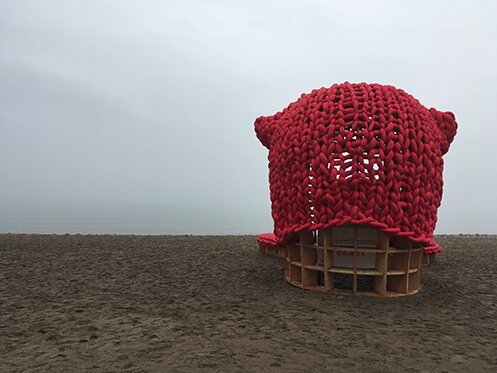
I spot­ted the Pussy Hut from far away.

I love this pic­ture of bright magen­ta knit against a cold, fog­gy lake.

A gem on a des­o­lat­ed win­ter beach.

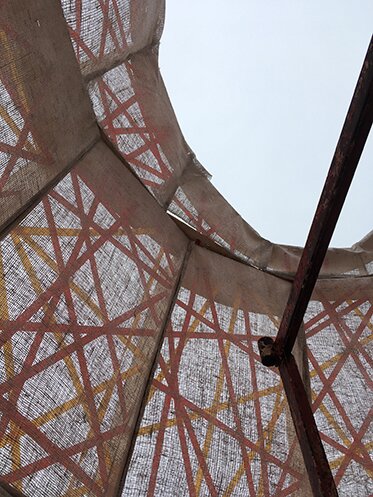
Inside the struc­ture one could see a piece of the sky, and the sound of the waves crash­ing to shore is actu­al­ly amplified.

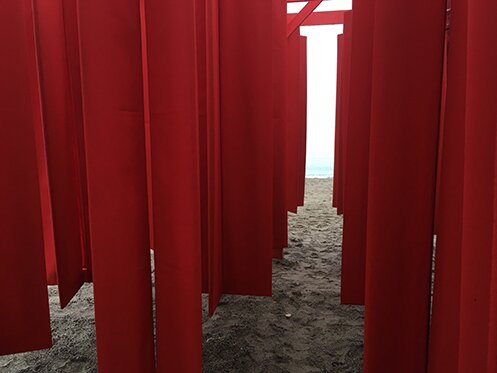
This makes me think of a for­est of strange trees. Designed by OCAD stu­dents! :D

A lace tow­er in the fog.

A clos­er look brings rows upon rows of pin­wheels. It was­n’t very windy that day, but I imag­ine that if it were and if all the pin­wheels were spin­ning it would have looked epic.

This piece was called “Obsta­cle”. The struc­ture seems impass­able until one actu­al­ly tries to walk through it — the pieces spin to make way. There’s always a way out. Prob­a­bly my favourite inter­ac­tive piece.

Win­ter Sta­tions is up until April! Check it out when the weath­er is clear :)

Hap­py March, everyone!


Lately

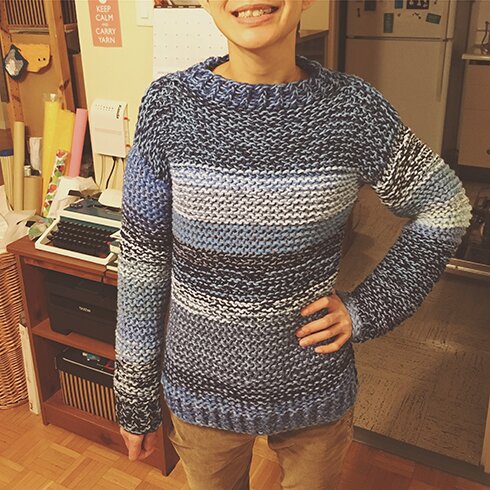
Lots of loom knit­ting projects late­ly. I even made myself a garter stitch sweater.

Real­ly hop­ing to write up a pat­tern soon, but I think I have to give it anoth­er try in order to get some process pho­to to explain the col­lar part. It’s quite thick and warm, and real­ly hap­py to have used up much of my blue yarn stash :D

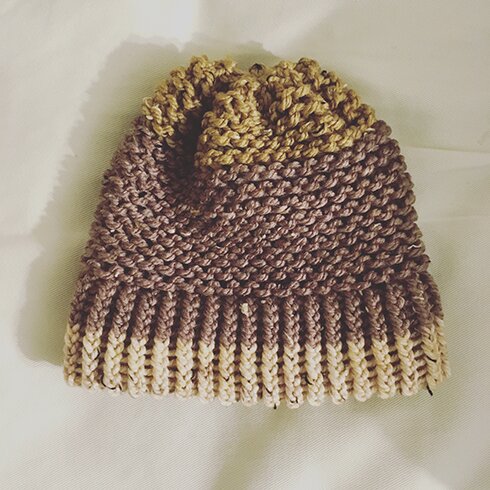
Made a garter stitch hat as well, for my mom. I think I like this look bet­ter than the ewrap stitch ver­sion. And it would look quite nice with a pompom.

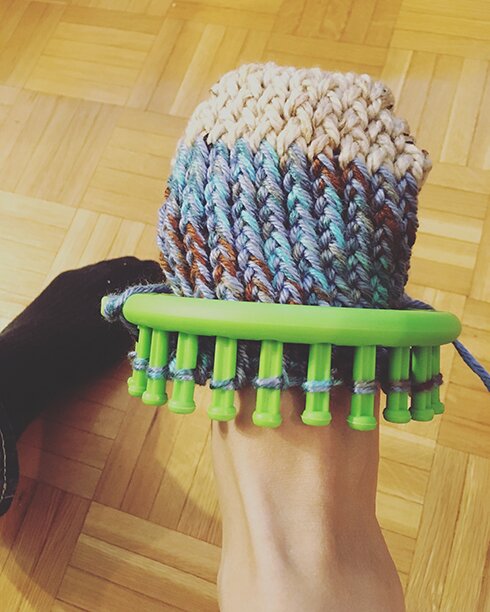
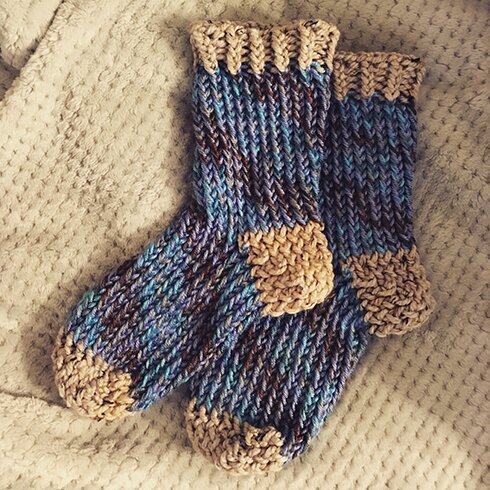
Also learned how to make slip­per socks! I watched this YouTube video to under­stand how to make the toes and heels (which are actu­al­ly made the same way), and then read this blog post to learn the top-up method.

They look cozy don’t they? Kind of like the read­ing socks they sell at book­stores these days.

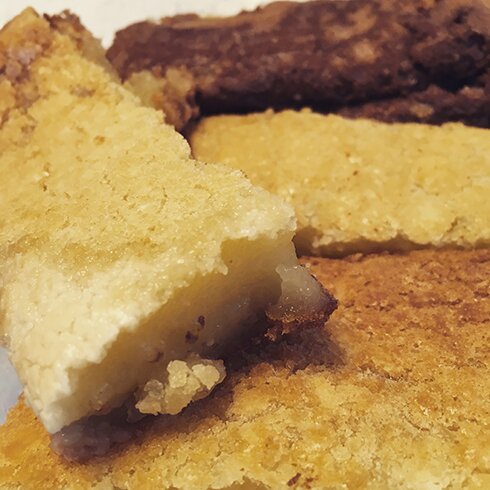
It was Chi­nese New Year a cou­ple of weeks ago, so I made some new year cake to bring to my par­ents’. I fol­lowed the recipe on All About Ami, it was real­ly good, and very, very sim­ple, per­fect for some­one who does­n’t usu­al­ly bake, like me :D

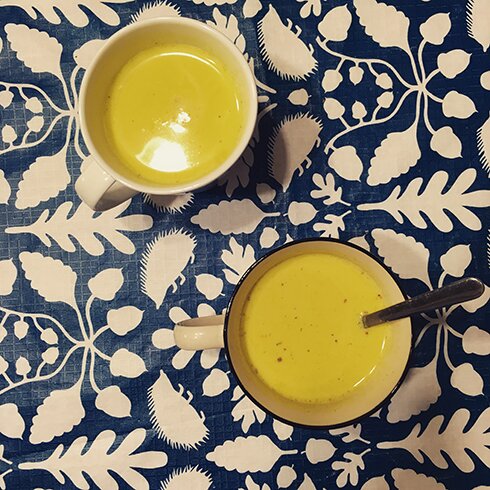
Also on the cook­ing front, my co-work­ers have been rec­om­mend­ing turmer­ic tea for a long time. Mike came across some turmer­ic paste in the gro­cery store, so we gave it a try. I found numer­ous recipes and they’re all very sim­i­lar. I end­ed up just mak­ing this with 1/2 tsp per cup of milk, pinch of black pep­per, pinch of cin­na­mon, pinch of gin­ger pow­der, a few squeezes of hon­ey, and boil­ing all togeth­er. I enjoyed the taste, and hope to reap the health ben­e­fits of it soon!

And if your in the down­town Toron­to neigh­bour­hood tomor­row, it’s the annu­al Warm­ing Toron­to Knit­ting Day, ben­e­fit­ing Street Knit, which brings hand­made mit­tens, hats and scarves to folks who are street-involved. Swing by for some snacks, min­gling and yarn-craft­ing fun! 

Hap­py weekend!
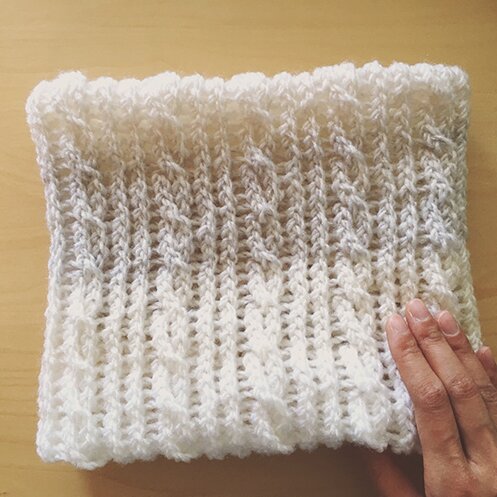
 

this week’s awesome finds

Deep win­ter, indoor mode with busy hands and many projects :)


A cocoon shrug with a gor­geous stitch, paid pat­tern by Eleven Hand­made on Rav­el­ry. (there’s also a sweater version!)


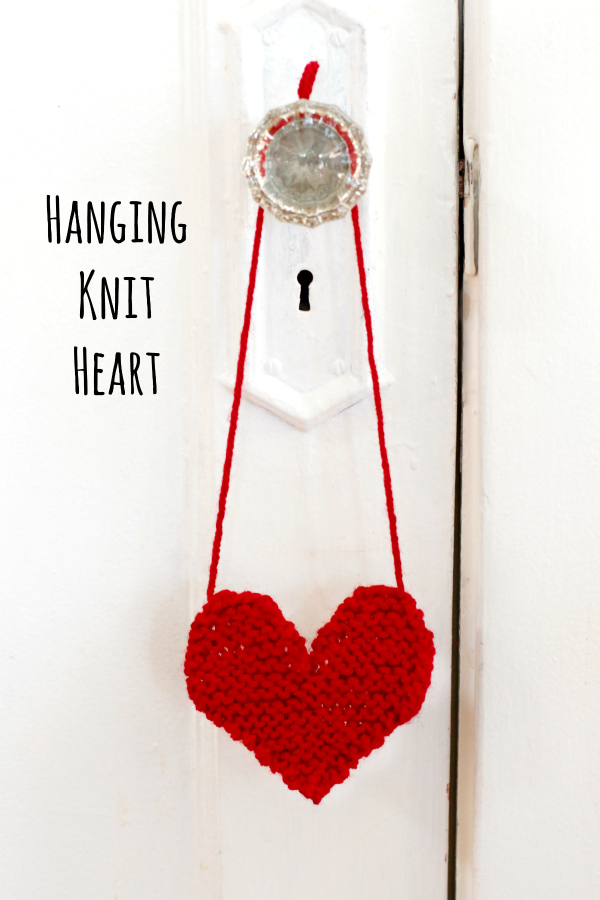
Make one for every door. From Make and Takes.


I’m par­tial to sweaters with side­ways con­struc­tion. This one’s from Lion Brand Yarn (fol­low link from Rav­el­ry). 


An asym­met­ri­cal cro­chet scarf that looks very med­i­ta­tive to make. From Lit­tle Things Blogged.


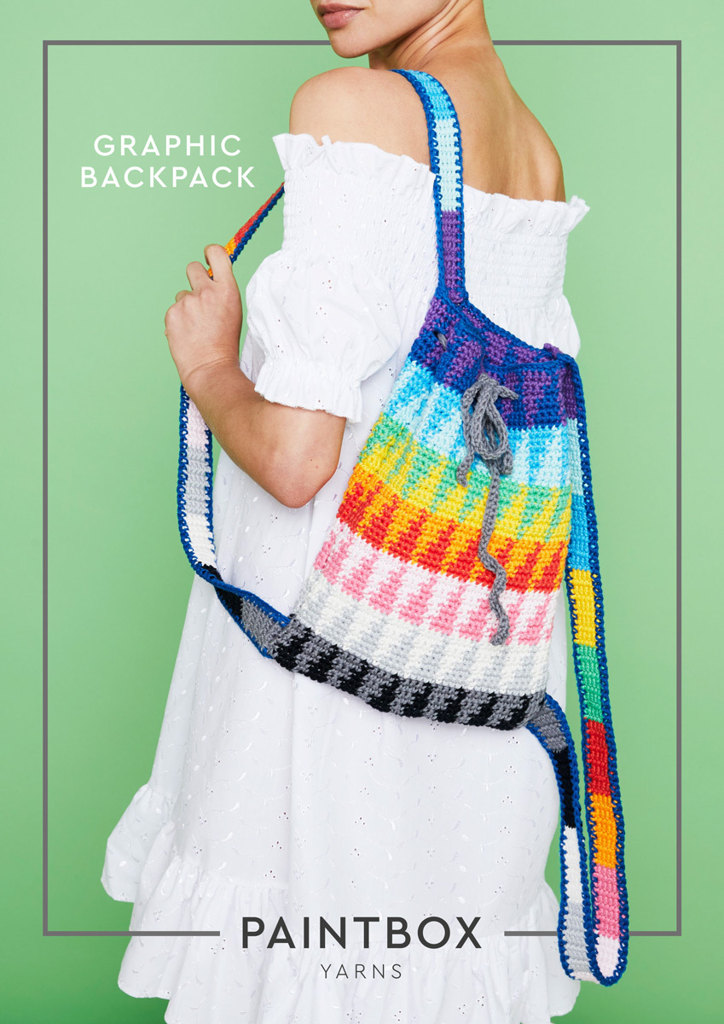
Dream of sum­mer weath­er with this sum­mery back­pack. From Paint Box Yarns.


This pat­tern is called “Diary”, which makes me think of pat­terns that involve mind­ful­ly mak­ing one sec­tion a day, and I always liked patch­work designs. From Wollinger on Rav­el­ry.


Anoth­er side­ways sweater, this one is a cardi­gan and has pock­ets! From Amy Christof­fers on Knit­ty.
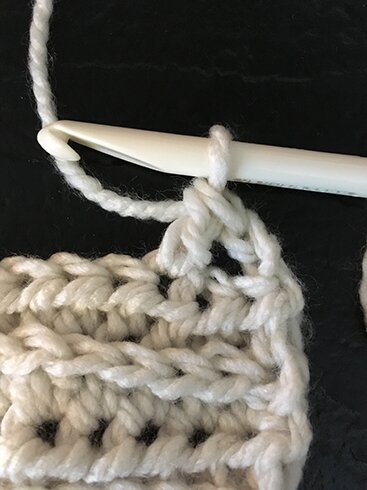
 

So fluffy! I’m intrigued by how to make cro­chet look so fur­ry… And Feb­ru­ary 16 is the first day of the year of the dog! :D Make your own fluffy pups to cel­e­brate! From All About Ami.


And last but not least, this incred­i­bly beau­ti­ful pat­tern from My Cro­cheto­ry.


Stay warm and keep craft­ing! :D