make a rainbow cake slice!


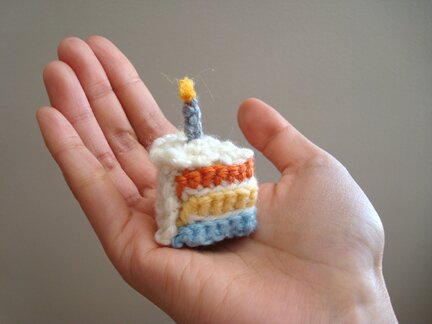
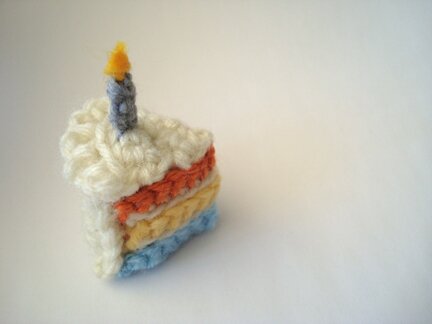
I promised to come back with anoth­er cel­e­bra­to­ry plush pat­tern — and of course, it’s the rain­bow cake slice pic­tured in the blo­giver­sary posts here, and here!

You may notice that it shares the same colour palette as the plush clutch :D It is also based on my moon cake pat­tern, with a colour­ful twist.

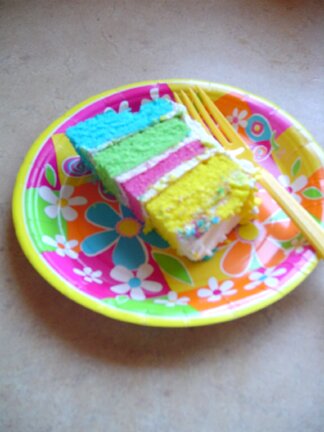
I’ve had the good for­tune of hav­ing a slice of rain­bow cake at my sis­ter-in-law’s bridal show­er. And I must say, it tast­ed… like any oth­er piece of cake. It was cer­tain­ly deli­cious, but if I were to eat it with my eyes closed I prob­a­bly would­n’t say that it’s a pas­try mas­ter­piece. BUT I did­n’t eat it with my eyes closed, and it was amaz­ing. Look how vibrant the colours are! (Please excuse the blur­ri­ness of the pic­ture — that was before I got a cam­era with a macro mode.)

Because I’m kind of a visu­al per­son, I’d say that this rain­bow cake was the sec­ond best cake I’ve ever had. (The best is the Swiss rolls from the Chi­nese bak­ery of the green tea variety, both colour­ful and deli­cious. I’d high­ly rec­om­mend try­ing it if you haven’t already.)

And if you’d like to make some real edi­ble rain­bow cake, here’s a recipe. One can even make some rain­bow pud­ding! Looks like a trip to the bak­ing aisle is in order.

In the mean­while, if you’d like to make the cro­chet (ined­i­ble, but cute!) rain­bow cake, here’s how it’s made — all you need is some yarn, some free time, and some love.

Yarn: bits of worsted weight yarn in blue, yel­low, orange, white, and grey. (I just used these colours to match the plush clutch, but you can use what­ev­er colours that strike your fan­cy. Scraps are great for this project.)

Hook: 3.5mm

Oth­er stuff: sewing nee­dle, stuff­ing, white glue

Top: with white

Row 1: ch 2, 2 sc in sec­ond ch from hook, ch 1, turn.

Row 2: sc in first sc, 2 sc in next sc, ch 1, turn.

Row 3: sc in first sc, 2 sc in next sc, sc in next sc, ch 1, turn.

Row 4: sc in first sc, 1 sc and 1 hdc in next sc, hdc in next sc, sc in next sc, ch 1, turn.

CORRECTED! Row 5 (ruf­fles): ch 2, in front back loop only, sl st in 1st sc, [ch 2, sl st in next st in front back loop only] 4 times. Leave a long tail for sewing, fas­ten off.

Bot­tom: with blue (or what­ev­er the colour of the bot­tom lay­er of cake is)

Fol­low pat­tern for row 1–4 of top of cake slice. Fas­ten off.

Back: with white

Row 1: ch 6, sc in sec­ond ch from hook, sc in each ch across, ch 1, turn.

Row 2: sc in first sc, 1 sc in each sc across, ch 1, turn.

Row 3–7: Repeat row 2. Fas­ten off.

Inside (the rain­bow part): begin with blue (or what­ev­er the colour of bot­tom lay­er of cake is)

(In case you’re inter­est­ed, here’s a sim­ple tuto­r­i­al demon­strat­ing chang­ing colour at the end of row.)

Row 1 (wrong side): ch 12, sc in sec­ond ch from hook, sc in each ch across.

Row 2 (right side): join white, fas­ten off blue. With white, ch 1. In back loop only, sl st in each sc across.

Row 3 (wrong side): join yel­low (or the colour of mid­dle lay­er of cake), fas­ten off white. with yel­low, ch 1. In front loop only, sc in each st across.

Row 4 (right side): join white, fas­ten off yel­low. With white, ch 1. In back loop only, sl st in each sc across.

Row 5 (wrong side): join orange (or the colour of top lay­er of cake), fas­ten off white. with orange, ch 1. In front loop only, sc in each st across. Fas­ten off.

Can­dle: with grey

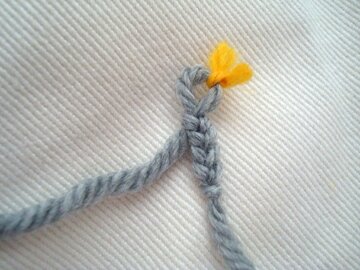
Leav­ing a 6″ tail, ch 4. Remove hook from loop, tie a short length of yel­low yarn to loop, then pull the loop close.

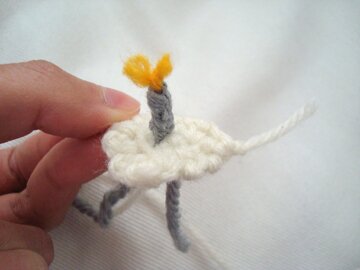
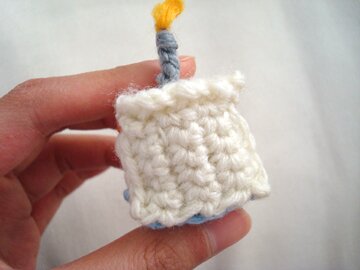
Leav­ing a 6″ tail, cut off yarn. With a nee­dle, thread tail through the 4 ch just made, down to the first ch. Now there are 2 yarn tails at the bot­tom of the can­dle. Pull the 2 tails through adja­cen­t stitch­es in the top piece, then tie them togeth­er on the back­side, like so…

When the whole cake slice is assem­bled, fray the short yel­low yarn tails that are sup­posed to be the flame. With a drop of white glue, roll the yarn tails togeth­er between your thumb and index fin­ger. You might have to clamp it with a clothes­pin for a few min­utes for the glue to dry.

Assem­bly:

1. Sew the long side of the rain­bow part to the bot­tom of cake slice, along the 2 side edges of the bot­tom piece, with half the rain­bow part sewn on one edge and the oth­er half sewn on the oth­er edge.

2. Sew the top of the cake slice to the rain­bow part.

3. Sew the back of the cake slice to the rain­bow part and the bot­tom, leav­ing the top edge open. The back is sewn on side­ways, like so…

4. Stuff the cake slice through the open top edge, then con­tin­ue to sew it close. (The top edge of the back piece is sewn to row 4 of the top piece — the row before the ruf­fles.) Weave in ends.

And here we have it, a rain­bow cake slice! :D

I think it would make a great fridge mag­net, either with a mag­net per­ma­nent­ly attached, or using this trick I men­tioned at the end of the tater tot post.

Thank you so much for join­ing me in my blo­giver­sary fes­tiv­i­ties! I hope you enjoyed them. As usu­al, if you have ques­tions or feed­back about any of my pat­terns, please feel free to leave a com­ment or send me a note, I’d love to hear from you!

Have a love­ly evening, everyone!
 

one crafty year


gen­uine mud­pie turns one today! :D Here’s a look back at the year past.

One impor­tant learn­ing: try­ing my best to do some­thing real­ly, real­ly well, regard­less of whether it would be “worth it”. That was the thought that start­ed this blog, and it is still the goal and spir­it of gen­uine mud­pie. Most of the things I make I don’t plan on sell­ing, and I share my pat­terns freely, but the reward of the cre­at­ing process is tremen­dous. I’m blessed to not have to think about mak­ing a liv­ing through the things I make, and I can there­fore make what­ev­er ridicu­lous things that make me hap­py. Writ­ing here has kept me think­ing cre­ative­ly and helped me through some dif­fi­cult times of doubts and uncer­tain­ty. And if what I make and share here can lead to one oth­er per­son feel­ing hap­py or inspired or moti­vat­ed to cre­ate, then it’s all worth it.

One won­der­ful redis­cov­ery: when gen­uine mud­pie start­ed cro­chet­ing was the only needle­craft I wrote about. But over the past year I’ve begun knit­ting again, and along with it the gate­way to the vast and won­der­ful land of knit­ting pat­terns. Though as I start­ed cast­ing on projects I’m also remind­ed of why I gave up knit­ting in the first place — things can take a long time to knit. My first project was this jack­et, which I actu­al­ly com­plet­ed but took apart, because it turned out too big. Since then I’ve start­ed and tak­en apart 2 oth­er cardi­gans. What hap­pened, you ask? Well, I would start a project and before I get past the waist shap­ing I would come across anoth­er sweater that I like bet­ter, so then I would take apart the first sweater to start on the sec­ond one. Well, this has got to stop or noth­ing will get done! My goal, there­fore, is to stick with the cur­rent cardi­gan I’m knit­ting for my mom and to have it done before her birth­day in May. I can do this thing!

One great under­tak­ing: my Etsy shop opened after years of con­tem­plat­ing. I think hav­ing gen­uine mud­pie the blog makes it a bit eas­i­er to make the com­mit­ment of open­ing gen­uine mud­pie the shop. I guess it’s the fear of fail­ing, you know, what if I put myself out there and I don’t get any sale? So it helps that I’m already “out there” through the blog. But I won’t lie, busi­ness has been slow. It’s a tricky busi­ness, because on top of the price for time and labour (and how does one put a price on that?), there’s the Etsy fees and Pay­Pal fees and the killer ship­ping fees. So the plush­es are not as afford­able as I’d like to price them, and per­haps that con­tributes to the slow sales. I don’t know. But some­how I feel per­fect­ly OK about it. I guess part of it is that once I sew a face on a plush it becomes sort of a crea­ture with char­ac­ter and every­thing and I have a hard time part­ing with it. But I would cer­tain­ly be excit­ed if they could go to a good home and put a sil­ly grin on some­one else’s face oth­er than my own. So the shop is open for now, and peo­ple can go vis­it, and I’m hap­py about that.

One awe­some sup­port­er: gen­uine mud­pie would not be pos­si­ble with­out my hus­band, Mike. The new site would not exist with­out his design and cod­ing exper­tise, and my posts would be utter­ly bor­ing with­out his help with the pho­to shoots. Most impor­tant­ly, he was the one who encour­aged, and con­tin­ues to encour­age, the whole craft­ing endeav­our itself.
“What if nobody reads it? What’s the point of writ­ing a blog if nobody reads it?” I asked a year ago, as I was debat­ing whether to start a craft blog.
“You should do it,” said Mike, mat­ter-of-fact­ly, “because you want to do it, and because it’s fun.”
He said the same about the store too. I am so very blessed to have him in my life, some­one who thinks that a cro­cheted tater tot is impor­tant enough to spend a whole after­noon tak­ing pic­tures of it tum­bling in and out a tin foil pan, some­one who thinks that what­ev­er is impor­tant to me is impor­tant to him too. I can­not ever thank him enough for being such a won­der­ful, gen­er­ous, lov­ing man he is.

And I also can­not thank my fam­i­ly and friends enough (there are too many to name) for tak­ing the time to read this blog on a reg­u­lar basis, and for mak­ing a point to tell me that they enjoy it. I so, so, so appre­ci­ate your encour­age­ment and kind­ness. It means the world to me to hear that gen­uine mud­pie made you smile.

One big thank-you: whether you have been jour­ney­ing with gen­uine mud­pie for some time now, or you’re new to this blog, and whether we have con­nect­ed through your com­ments, or you’ve been qui­et­ly read­ing, I’d like to thank you for being a wit­ness to my cre­ative process by vis­it­ing me here. Thank you so much for stop­ping by, and I hope you con­tin­ue to enjoy read­ing about my crafty endeav­ours and oth­er mus­ings here.

And alto­geth­er, it makes one hap­py, crafty year. HURRAY!!! :D

With much gratitude,
Trish

plush clutch


Wel­come to gen­uine mud­pie’s new home! :D

If you haven’t already, please update your book­mark to www.genuinemudpie.ca.

If you have pre­vi­ous­ly sub­scribed to gen­uine mud­pie on Word­Press (thank you so much for your sup­port!), please re-sub­scribe by enter­ing your email address on the right side bar.

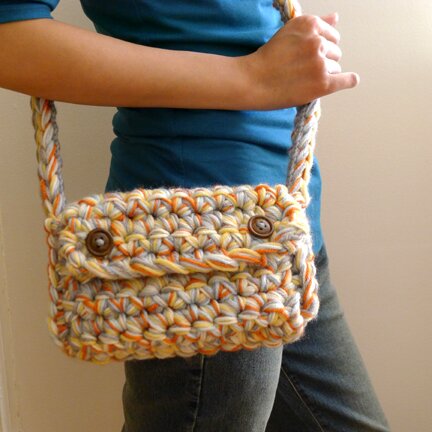
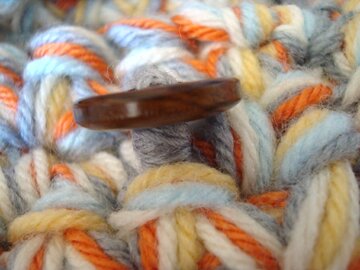
I decid­ed to begin this new chap­ter of the blog with a cel­e­bra­to­ry project to share :D The idea of a plush clutch came from a com­ment that a vis­i­tor, Jen­na, made on the com­i­cal neck­warmer pat­tern, which involves a 16mm hook and cro­chet­ing with mul­ti­ple strands of yarn held together. She sug­gest­ed that the same hook/yarn com­bi­na­tion would look cute for a purse too! I thought it was a bril­liant idea — I could total­ly pic­ture a fun, plushy purse burst­ing with colours. So I did some test­ing, and the plush clutch was born! Thank you, Jen­na! :D

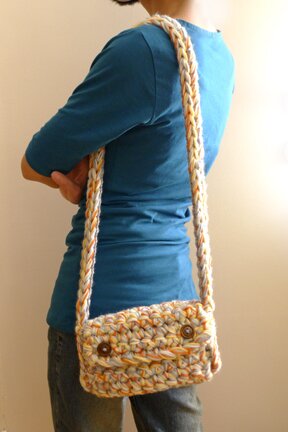
It isn’t tech­ni­cal­ly a clutch, because it has a strap. Clutch­es are for clutch­ing and there­fore don’t have shoul­der straps. But I’m call­ing it such because it kind of rhymes… or at least it kind of has a ring to it… Um. Any­way. It’s real plushy though!

The con­struc­tion is pret­ty sim­ple, just one rec­tan­gle and one real­ly long rec­tan­gle (aka a strap) put together.

It mea­sures 9″ wide, 5″ tall, and 3″ deep, with a 47″ strap.

So, with­out fur­ther ado, here’s how it’s made.

Yarn: I used 6 strands of worsted weight yarn held togeth­er. If you’d like to sub­sti­tute yarn of oth­er weights, I’d sug­gest doing a swatch with sc rows to see if the stitch­es are too loose, and add strands if they are. Because it’s a purse the fab­ric needs to be on the stiff side to hold its shape.

Hook: 16mm

Oth­er stuff: fab­ric for lin­ing, sewing nee­dle, two 1″ — 1.5″ buttons.

Note: To avoid extra, unneed­ed bulk I did not do a turn­ing ch in the begin­ning of each row. Instead I just pull the loop on the hook slight­ly high­er and sc direct­ly into the first stitch of each row.

Bag

Row 1: ch 11, sc in sec­ond ch from hook, sc in each ch across. (10 sc)

Row 2: turn, pull loop on hook slight­ly high­er, sc in first sc, sc in each sc across. (10 sc)

Row 3 — 24: repeat row 2.

Fas­ten off. When fas­ten­ing off, I found that it’s help­ful to leave a 4–5″ tail for weav­ing in. If tail is too short it can eas­i­ly come out, because the stitch­es are so large.

Strap

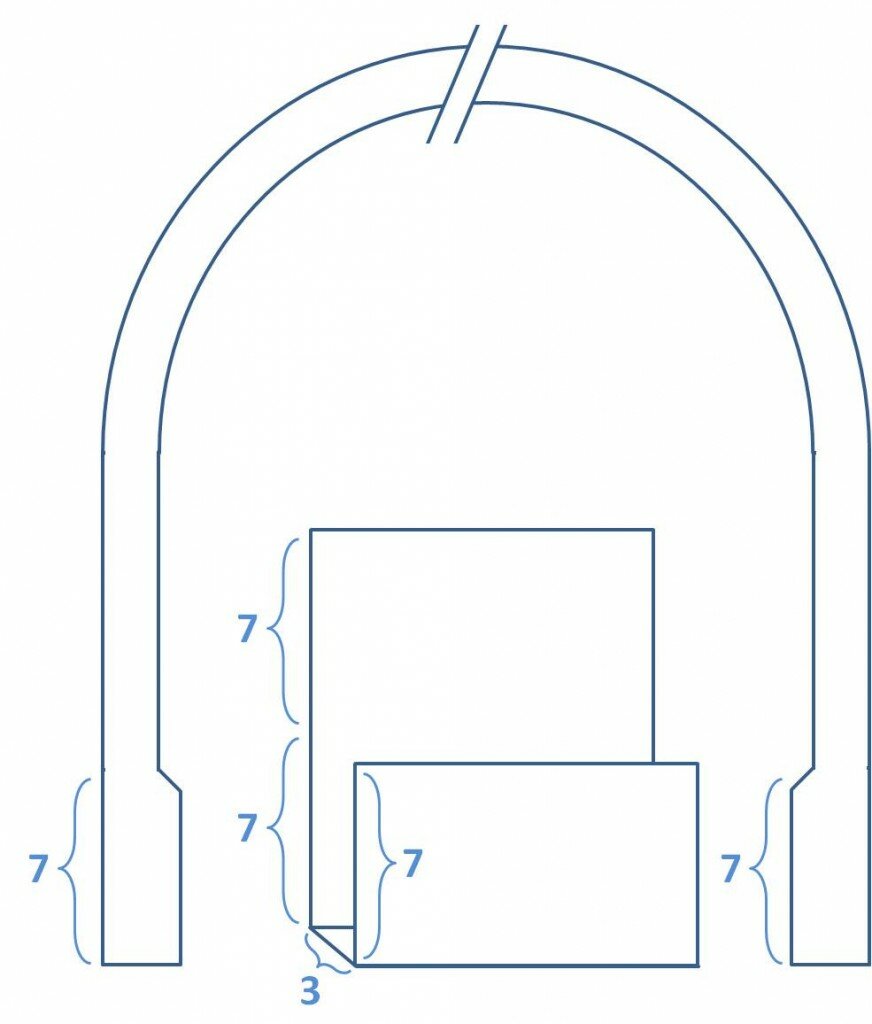
I mea­sured the strap of anoth­er purse (47″, that’s the length of the strap plus the sides of the bag — see dia­gram below) and made the begin­ning ch 4″ short­er (43″), because the stitch­es will stretch quite a bit after the sc row. You can adjust the length of the strap and the num­ber of stitch­es in the begin­ning ch accordingly.

Row 1: ch 72, sc in sec­ond ch from hook, sc in each ch across.

Row 2: turn, pull loop on hook slight­ly high­er, sc in each of next 6 sc, sl st in next sc, fas­ten off, weave in ends.

Join yarn at the top of first sc of row 1, ch 1, sc in first sc, sc in each of next 5 sc, sl st. in next sc, fas­ten off, weave in ends.

Putting it all together…

This dia­gram shows how the strap and bag piece are attached and the row counts of the front, the bot­tom, the back, and the flap.


Row 2 of the strap is attached to the front of the bag on each side. Seam with wrong sides fac­ing out, and turn the bag inside out when finished.

I cro­cheted the seams togeth­er using sc’s with 1 strand of yarn and a 5mm hook, and I decid­ed to do 2 rows of sc on the back of the strap to min­i­mize stretching.

I did the seam­ing and the cro­chet­ing on the strap in one con­tin­u­ous round: start­ing from the top cor­ner of right front, around to the bot­tom right, up 7 rows of the back, then cro­cheted across the strap until I got to the back of the oth­er side of the back, 7 rows away from the bot­tom. Then I start­ed seam­ing again, down the back, around the bot­tom, up the left front, then at the top edge of left front I cro­cheted across the strap the oth­er way until I reached the top of right front, where I started.

Here’s how I cro­cheted the 2 rows of sc across the strap.

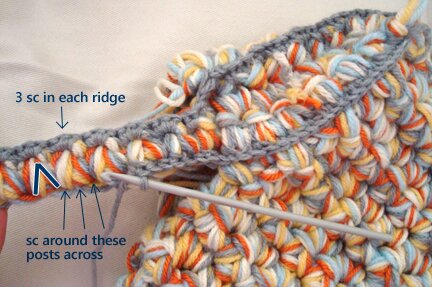
On the back of the strap there are “ridges” near one edge and upside-down‑V shapes across. I did 3 sc’s in each “ridge” down one way, and then when I came around the strap the sec­ond time I did 1 sc around one leg of the upside-down‑V, 1 sc around the strands of yarn between the legs of the upside-down‑V, and 1 sc around the oth­er leg of the upside-down‑V.

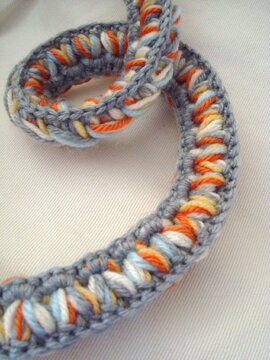
So, after it’s all said and done the back of the strap looked like this:

OK, I under­stand that all these can be a bit con­fus­ing… I wish I could demon­strate this to you in per­son, but I can’t. And I know that I’m not ter­ri­bly good at explain­ing things some­times. So while I want to let you know what I did, I’d encour­age you to put the pieces togeth­er in ways that work best for you. Here are some suggestions:

- sc along the strap before attach­ing to bag, then sew strap to bag with yarn and needle.

- Line the strap with fab­ric, then sew strap to bag with yarn and needle.

Either way, I would high­ly rec­om­mend doing some­thing to sta­bi­lize the stitch­es of the strap. I once cro­cheted a purse and did­n’t line the strap and it got stretched to near­ly twice the length after being used for just a month :S

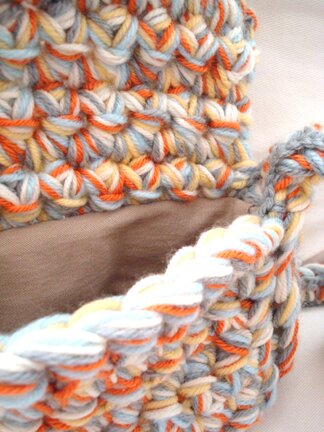
Alright! Now that it’s all put togeth­er, it’s time to line the bag itself. Here are some awe­some tuto­ri­als on how to make a bag lin­ing, and to sew lin­ing to bag on Future­girl’s Blog. I made the lin­ing from a pant leg of some old khakis.

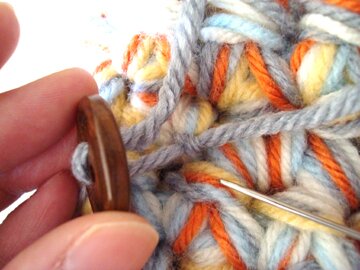
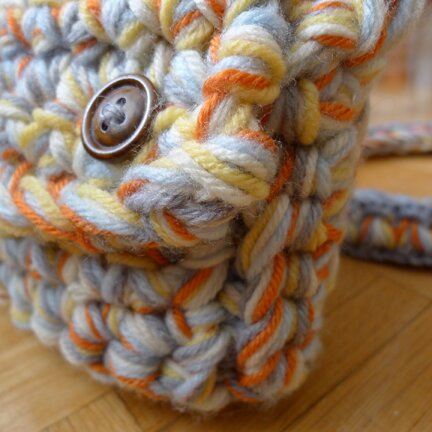
Then I sewed on some but­tons. No need for but­ton holes, the gaps between stitch­es would do. Note that I attached the yarn on the front of the bag, so that I don’t have to sew through the lin­ing, and if the but­tons ever fall off and I have to do some repair­ing I can eas­i­ly untie the yarn. I hid the tails by hook­ing it behind the stitches.

To accom­mo­date the thick­ness of the fab­ric I used the method that I men­tioned in the wrist cuff / cup sleeve pat­tern to sew on the buttons.

AAAAND we’re done! :D


I love the soft spring colours in it :D But I imag­ine it would cre­ate a nice tweed look with some brown and gray yarn. Or sim­i­lar shades of one colour would be love­ly too! Might also be great with t‑shirt yarn, or plarn! I hope you enjoy the pat­tern; if you have any ques­tion or com­ment please feel free to drop me a note! :)

Thank you for vis­it­ing me at my new place! I will be back with anoth­er cel­e­bra­to­ry plush pat­tern lat­er this week! Until then, take care and hap­py craft­ing! :D

blogiversary and the BIG move!

That’s right! Gen­uine mud­pie will be turn­ing ONE on Mon­day March 28!

And to mark the occa­sion this blog will be mov­ing to a new address! The new site does­n’t look very dif­fer­ent from what it is now, but with the flex­i­bil­i­ty of self-host­ing (and with big help from Mike!) I’m hop­ing to make it more orga­nized and its infor­ma­tion more eas­i­ly accessible.

We’re still work­ing on the new site, so it’s not live yet. But it will be up and run­ning in a cou­ple of days and I will post the new URL here once it’s ready :D

I will be post­ing there start­ing Mon­day, and a cou­ple of cel­e­bra­to­ry pat­terns to share over next week!

Stay tuned for more excit­ing news!

botanical adventure


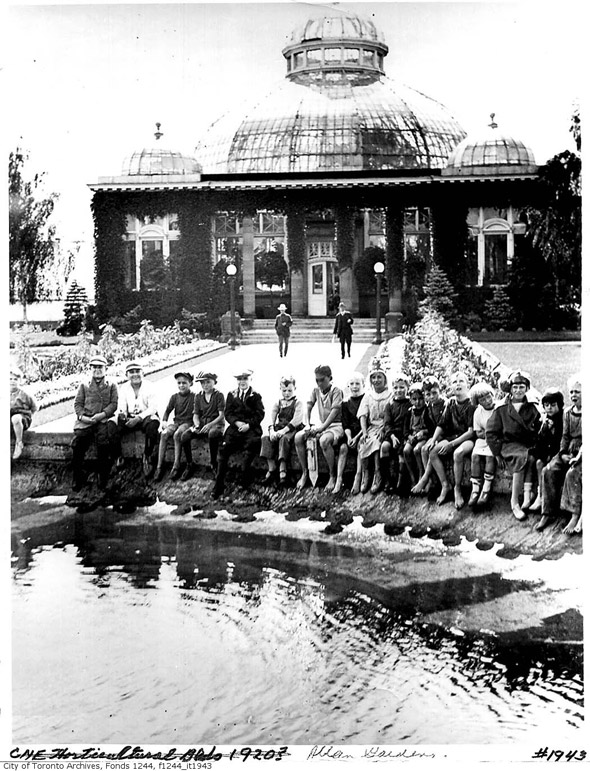
Last Fri­day Mike and I went to the Allen Gar­dens Con­ser­va­to­ry. It was found­ed in 1860 by George William Allan, one-time may­or of Toron­to and long-time pres­i­dent of the Hor­ti­cul­tur­al Soci­ety of Toronto.


And today the win­ter bulbs are on display.

I can’t believe that hav­ing lived in the city almost 8 years I’ve nev­er vis­it­ed this place! I imag­ine that it would be nice to vis­it the park grounds in warmer months, but it’s love­ly to vis­it in the win­ter too, because the green hous­es are so warm, with all the trop­i­cal plants and colour­ful array of flow­ers. One could almost for­get that it’s ‑15°C and snow­ing end­less­ly outside.

I was hap­py to see the bauhinia, flower of Hong Kong again :D

I won­der how old this brass knob is.


I took most of the pic­tures with the Zumi. I fig­ure Mike and I always have dupli­cate pic­tures, and since he brought his super cam­era he can take prop­er shots of the plants and I can exper­i­ment a bit.

I love this quaint lit­tle cactus.


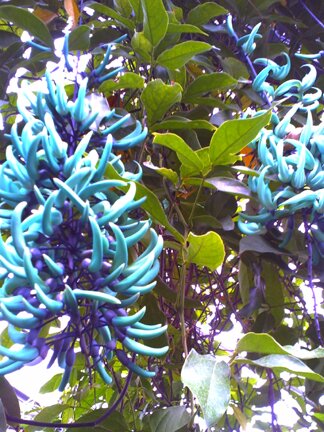
Look how blue! The Zumi usu­al­ly dis­tort the colours but it’s pret­ty accu­rate with this plant — it’s real­ly that blue. I’ve nev­er seen that colour in a plant that’s not dyed before. It’s called the Jade Plant.


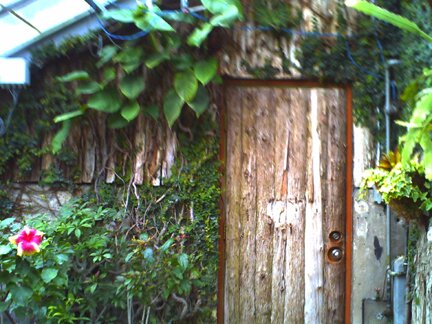
I was most mes­mer­ized by this door, with the tree bark exte­ri­or. I won­dered where it led to, why it had to be dis­guised… sort of. It’s quite plain to every­one that it’s a door. So per­haps the tree bark exte­ri­or is not a dis­guise? So why is it dif­fer­ent from all the oth­er doors? Hmm. And more amaz­ing­ly, check out the pic­ture of it — I did­n’t real­ize how bizarre the focus was until I looked at it on my com­put­er screen.

So! If you’re ever look­ing for great (and free) places to vis­it in Toron­to I would high­ly rec­om­mend these gar­dens. Once the weath­er is nicer (and not snow­ing end­less­ly) we plan on vis­it­ing more of the his­tor­i­cal gar­dens and muse­ums in Toron­to — there are so many awe­some places so close to home that we haven’t seen.

And no mat­ter how the weath­er is, I hope you have a love­ly day!

no ordinary objects

From the desk draw­er, local park, kitchen, and recy­cling bin.

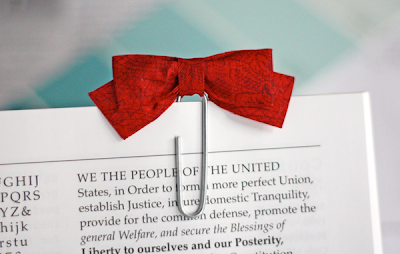
Tuto­r­i­al on how to make the ordi­nary paper clip look­ing extra­or­di­nary on How About Orange.


*Squeal* Totoro paint­ed on acorns! How nifty! Instruc­tion here (in Japan­ese, but with self-explana­to­ry photos).


I can real­ly use one of these but­tons for the sweater I’m knit­ting — they’re made from branch­es! How neat is that? And with detailed tuto­r­i­al too, on Shrimp Sal­ad Cir­cus.


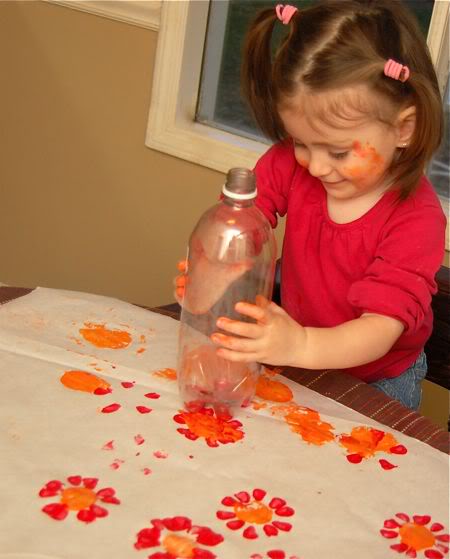
I love this bril­liant print­mak­ing idea — anoth­er thing a pop bot­tle can do before head­ing to the recy­cling bin! Makes great gift wraps and greet­ing cards, me thinks! From Fru­gal Fam­i­ly Fun Blog.


Anoth­er must-try: mak­ing shrink plas­tic from #6 plas­tic! I’ll have to pay atten­tion to the lit­tle tri­an­gles on those clear plas­tic con­tain­ers (actu­al­ly, this has sent me to the gro­cery store look­ing under every sin­gle plas­tic con­tain­er to see what num­ber it is). More #6 plas­tic shrink­ing exper­i­ments on Dab­bled.


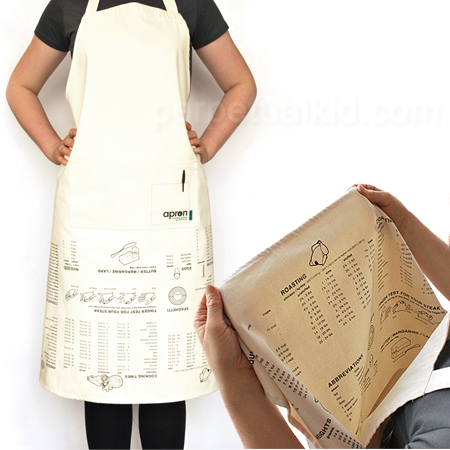
I’m sure there’s prob­a­bly an app for this, but who would want to get out their phone while bak­ing and get it all gooey and cov­ered in sauce? Upside down apron with cook­ing guide by Per­pet­u­al Kid, spot­ted on swiss­miss.


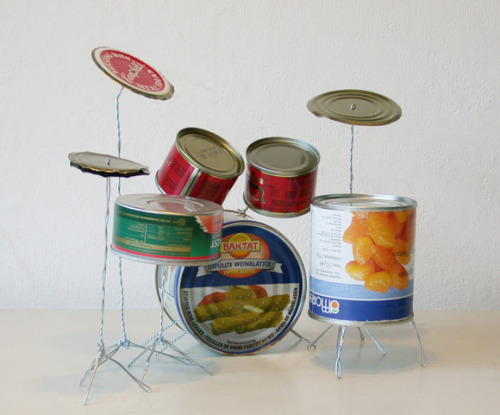
I love that the cym­bals are made of the lids of the cans. Drum kit by Hel­mut Smits, spot­ted on Inspire Me Now.


Have a great evening, everyone!


happy spring!

Hap­py first day of spring, friends! :D


Dia­gram for my daf­fodil came from this book. But a sim­i­lar one is post­ed here if you’d like to make some to cel­e­brate spring’s arrival, like our friend Wage here.

Have a great day!

forget-me-not

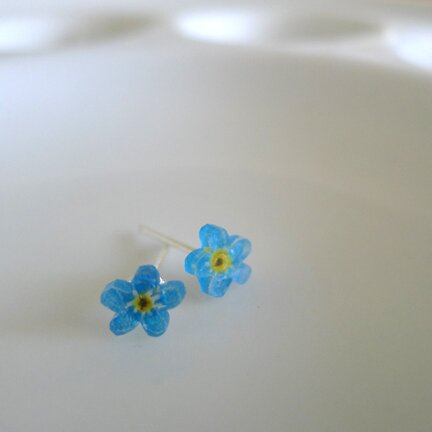
It all start­ed with a thought that came into my head one day: I’d love some ear­rings that look like for­get-me-nots.

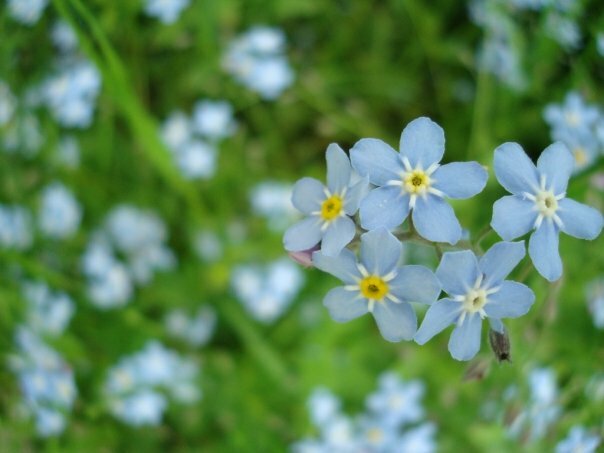
We saw these for­get-me-nots while trav­el­ing in Nova Sco­tia a cou­ple of years ago. They were so small, and so perfect.

Isn’t the blue just stunning?

And if I want to have some­thing, I’ve got to make it. (That’s some­what bet­ter than “I’ve got to buy it,” perhaps?)

And they’ve got to be as small as the real for­get-me-nots, with the same bril­liant blue colour. I thought shrink plas­tic would be per­fect! Because it can make a real­ly small, stur­dy piece of plas­tic and the colour becomes more sat­u­rat­ed as it shrinks.

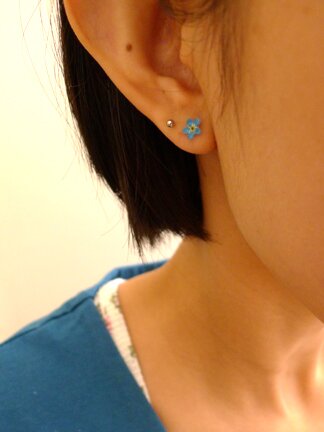
And it did work! They were exact­ly the colour and size I want­ed them to be.

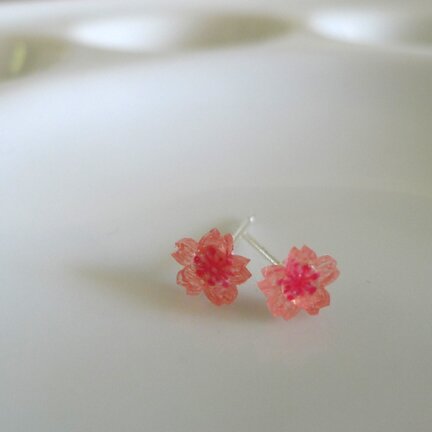
While I was at it, I thought I would also make some cher­ry blossoms…

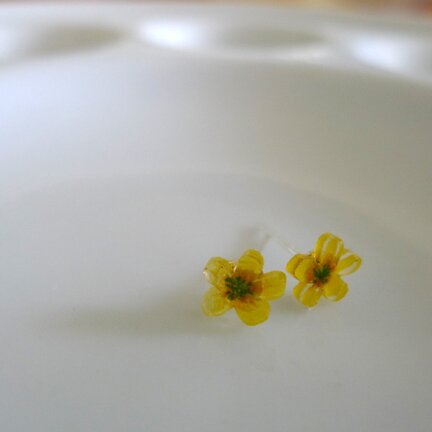
… and sweet lit­tle but­ter­cups.
(If you haven’t seen ¡Three Ami­gos!, you must! It’s total­ly ridicu­lous and absolute­ly hilar­i­ous. My skin tone does­n’t agree with yel­low at all; I only made the but­ter­cups so that I can call them sweet lit­tle but­ter­cups XD)

At the end I’m only real­ly hap­py with the for­get-me-nots. And that was the goal of the project so I was con­tent. But there are still sev­er­al things to fine tune. Next time I’ll have to sand the shrink plas­tic bet­ter, and pay more atten­tion to my colour­ing with the pen­cil cray­on so the colours are more even and less translu­cent, because the ear­ring posts were show­ing through when I glued them on.

Most impor­tant­ly I’ll have to find a bet­ter glue! I used E6000 and every­one raves about it, but it did­n’t work at all. I let these cure for almost a week and I can still pry them apart. Actu­al­ly I used the E6000 on my rose ear­rings and the ros­es fell off after a few days as well. The only thing that it worked on was my dahlia ring. So I won­der if it has to do with the size of the con­tact sur­faces, and the ear­rings are just too small for the glue to work prop­er­ly. I spent quite some time research­ing dif­fer­ent kinds of jew­el­ry glue on the inter­net, but they all have con­flict­ing reviews. Super glue seems to work in the short-term (I used it to fix my rose ear­rings when I was total­ly frus­trat­ed with the E6000), but almost every­one warned against it for jew­el­ry-mak­ing. Even two-part epoxy was described by some review­ers as hit-and-miss, because it won’t work if the two glu­ing com­po­nents were not equal in quantity.

Plus I read that E6000 is tox­ic to peo­ple and the envi­ron­ment. I knew that when I bought it but at the moment I thought it would­n’t mat­ter so much if I don’t use it fre­quent­ly. But the more I thought about it the more I feel that I should at least try and find a less tox­ic alternative.

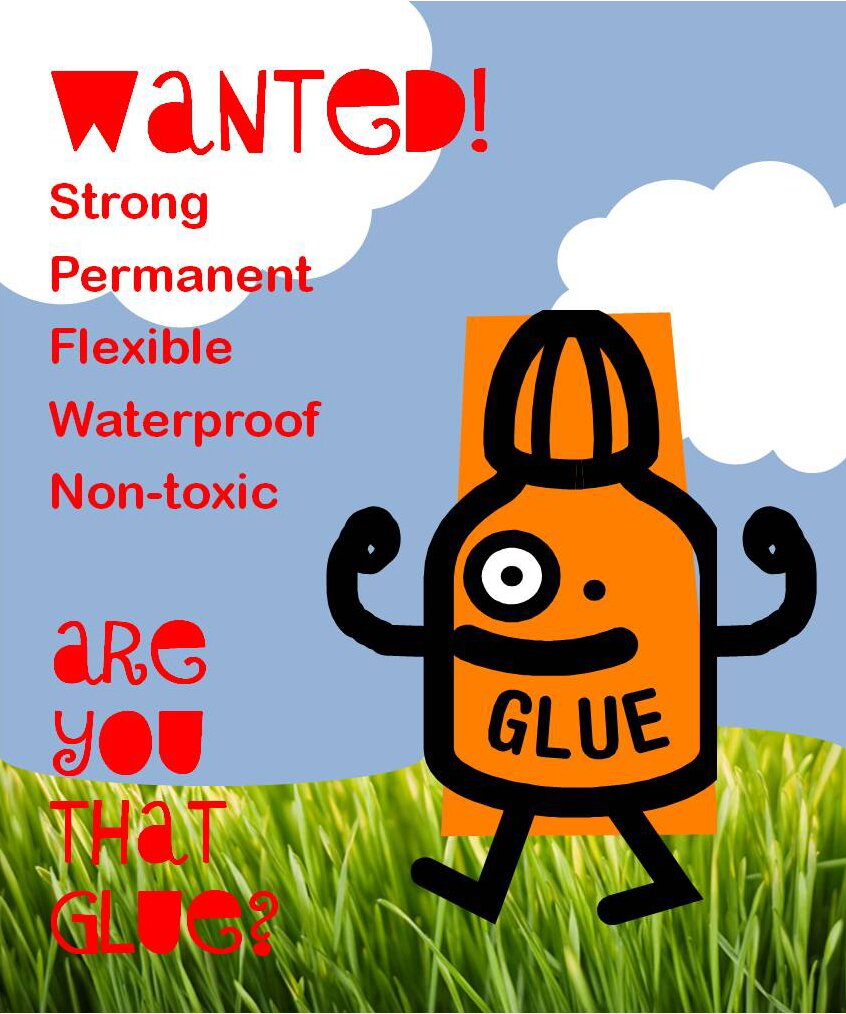
So! I need a glue that’s strong, flex­i­ble (can with­stand stress of twist­ing and pulling on a reg­u­lar basis, because that’s how ear­rings are put on/taken off), per­ma­nent, water­proof, and non-tox­ic. If you have any idea, or a trust­wor­thy glue that you’d rec­om­mend, please let me know! I would real­ly appre­ci­ate your input.

(Have I ever told you about my love/hate rela­tion­ship with Pow­er­Point? Ah, that deserves anoth­er blog post of its own.)

Any­way, I thought if I’m real­ly care­ful I can prob­a­bly wear the for­get-me-nots a cou­ple of times before they fall off the ear­ring posts, and I thought today would be a good day to wear it, because we were going to the botan­i­cal gar­dens! :D


Pic­tures of our botan­i­cal day trip to follow!

Have a love­ly evening, everyone!

shamrock


After sev­er­al months of hiber­na­tion my pur­ple sham­rock is grow­ing again, in full speed, as if catch­ing up for lost time. At the end of every fall, every leaf and stem would wilt. Then around day­light sav­ing time I would start water­ing it, water­ing a pot of dried dirt, believ­ing that the bulb under­neath the soil, the source of life that I can’t see, is still alive and will sprout again. And it does, every spring for the past three years.

On Mon­day I found the young leaves just begin­ning to take shape and open up.


Today the leaves are com­plete­ly opened. Their colours much more sat­u­rat­ed and they’re stand­ing tall.


Well, their stems are also very gan­g­ly. I will need to add some new soil and fer­til­iz­er. You can prob­a­bly tell I’m not a very good gardener.

The pur­ple sham­rock is called a sham­rock because it looks like a sham­rock. But, of course, it’s not a sham­rock. The species is called Oxalis Tri­an­gu­laris, and their open leaves close up at night like lit­tle umbrellas.

Leg­end has it that a pot of gold can be found at the end of the rain­bow. Well, in my house today I found a pot­ted plant returned from the dead at the end of a long win­ter. The promise of spring and regrowth, even though it appears to be all ruined. That brings me hope.

I hope you find your own rain­bow and pot of gold today. Hap­py St. Patrick­’s Day!
 

coming together

A piece of the earth fell apart, but peo­ple all over the globe are com­ing togeth­er to offer sup­port and prayers. Crafters and artists are donat­ing great work for the recov­ery efforts in Japan.

A bit of this and a bit of that — host­ing online auc­tions with many craft blog­gers; check back this Fri­day for a list of all par­tic­i­pat­ing blog­gers and auc­tion items.

Bloe­sem — list of prints and pho­tographs, most with 100% of pro­ceed going to Red Cross.

Bugs and Fish­es — a blog that I fol­low and designs I love, is donat­ing 50% of sales of the love­ly cher­ry blos­som head­bands and brooches.

Cre­at­ing Cup­cakes — donat­ing prof­its from the Kon­nichi­wa stamp set.

Felt Cafe Japan — has a grow­ing list of crafters donat­ing their work for relief efforts.

Kitchen Sink Dye­works — is host­ing a raf­fle for yarn and patterns.

Oktak — Hand­made cute clutch­es, coin purs­es and bags, with 50% of sales going to Japan Tsuna­mi Appeal.

Pat­aPri - based in Japan, donat­ing $5 for every hand-print­ed tow­el sold until April 13.

Super Cute Kawaii - All this week, donat­ing 100% of sales from book about trips to Japan in writ­ing, illus­tra­tion and pho­tog­ra­phy.

This and That from Japan — Based in South­ern Japan, car­ries Japan­ese fab­ric, craft sup­plies and craft books, donat­ing 15% of all sales to Save the Chil­dren Japan.

Hand­made for Japan — Auc­tion in their Ebay shop fea­tur­ing ceram­ic wares start­ing next Thurs­day, March 24.

And count­less shops on Etsy pour­ing in their support.

Or donate direct­ly through orga­ni­za­tions such as World Vision (Cana­da / US), Red Cross (Canada / US) and many oth­ers.