sunday video

Stop-motion ani­ma­tion + hot drinks on a rainy day = ♥ ♥ ♥
Enjoy! (via swiss­miss)

Edit: The video that I want­ed to share worked this morn­ing, but then it was­n’t acces­si­ble when I checked it again :( (it’s like that one time when we rent­ed a Miyaza­ki movie, but only to find out after we got home that Home on the Ranch was inside the DVD case) But no wor­ries, here’s one that’s equal­ly awe­some  in the stop motion cat­e­go­ry, and even more awe­some in the cute cat­e­go­ry :D Enjoy!

[vimeo 14190306]

(Psst! See how you can make your own Mar­cel the Shell here!)

favourite things friday!

Con­tin­u­ing with more of flow­ery crafts this week, and some sea crea­tures too — for the antic­i­pa­tion of sum­mer! :D


Anoth­er genius, sim­ple, and super adorable tuto­r­i­al from Ruf­fles and Stuff! Don’t even need to break out my nee­dles and thread for this one :D


The instruc­tion calls for flo­ral paper punch (a Martha Stew­art one, to be spe­cif­ic :P), but I think once the fab­ric is stiff­ened it would be easy to just hand cut these, no? How-to on the Martha web­site.


Also from the Martha web­site, these are quite addic­tive! It did take me a while to fig­ure out how to make them. It seems to me that the video (on the right side­bar of the Martha web­site) has left out a bunch of steps. I even­tu­al­ly gave up after watch­ing that same clip 5+ times and just tried to fig­ure it out by look­ing at the pic­ture (maybe I’m just dense…). But once I under­stood the struc­ture it was real­ly fun to make. I’ve made quite a few cards already, like this one from last week… in the mid­dle of mak­ing more…


A dain­ty flower brooch made from cro­chet­ing thread. Sim­ple and sweet. Pat­tern by Good­knits.


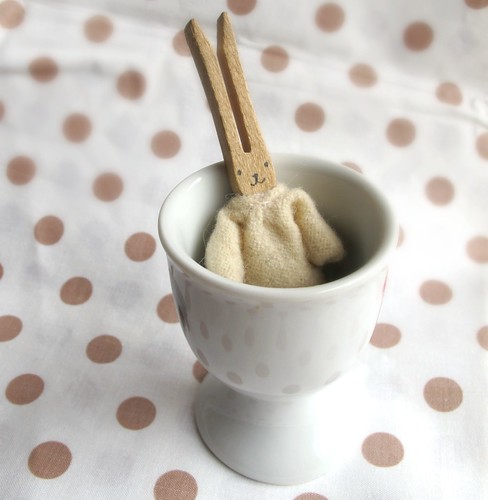
Also sweet is this clothes pin bun­ny. Tuto­r­i­al from Maya Made.


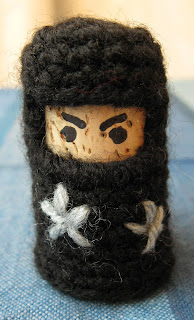
Anoth­er bril­liant use of every­day object — cork char­ac­ters! I espe­cial­ly love this nin­ja, but there are also pat­terns for a gnome and a knight. I can see the poten­tial of mak­ing a whole series of out­fits for the cork guys! I’m not a wine-drinker, but I have friends who appre­ci­ate a glass of red with the beef from time to time. I need to vis­it them more often. Pat­terns gen­er­ous­ly shared by Lucy Raven­scar.


A whale for hire! To store your head­phones and keep them clean and safe! It’s such an awe­some design it’s def­i­nite­ly worth more than the $3 down­load fee! If you pre­fer cro­chet­ing, like me (that’s because I can’t knit very well… but that’s anoth­er sto­ry), there’s a cro­chet ver­sion of the whale too! On Roman Sock.


How awe­some are these? Knit­ted nau­tilus! When I was a kid I went through this phase of obses­sion with fos­sils and pre­his­toric crea­tures (ok, I still let out a not-so-sub­tle squeal when I find rocks with fos­sils at the beach). I once want­ed to become an arche­ol­o­gist (ok, I still wish I were an arche­ol­o­gist). So, all that is to say that these belong on my couch. Pat­tern is free on Knit­ty, so all I need now is bet­ter knit­ting skills.


Saw this on Whip Up, which fea­tures a nice review on the book Pup­pet Play, where this cat pup­pet comes from. The cat pup­pet tuto­r­i­al is a sam­ple project, made with a sweater sleeve, a scarf, or a leg warmer.


I’ve always won­dered whether beets would make a good dye­ing, paint­ing, or print­ing mate­r­i­al, because it stains absolute­ly every­thing (espe­cial­ly the white chop­ping board). These love­ly beet prints are from My Lit­tle Hen.


These real­ly remind me of the leg­endary tur­duck­en. It’s a straw­ber­ry, stuffed with cake, and cov­ered in thick lay­er of choco­late. Though they are def­i­nite­ly more appeal­ing (to me, any­way) than the tur­duck­en. A very detailed tuto­r­i­al on 1 Fine Cook­ie.


Ok, humour me for a moment, and imag­ine that it’s rush hour, and you’re on a crowd­ed sub­way train, and you see that all around you are men and women dressed in pressed busi­ness suits wear­ing these face masks, nod­ding at their smart phones… That thought real­ly made me chuck­le when I first spot­ted the face mask sty­lus on Inspire Me Now.


On that note, have a fun-and-laugh­ter-filled week­end, every­one! :D

the most magical time of the year


I vote cher­ry blos­som sea­son to be the most mag­i­cal time of the year.

Walk­ing under­neath canopy after canopy of pink and white blos­soms is such an incred­i­ble expe­ri­ence. You look up and there are mil­lions of petals gen­tly sway­ing in the wind. An end­less sea of flow­ers. It real­ly feels sur­re­al. (I tried to cap­ture that expe­ri­ence in a video too, it’s post­ed here if you haven’t seen it :D)

We’ve only start­ed going to High Park to see the cher­ry blos­soms in the last cou­ple of years (hav­ing lived in Toron­to for some 13 years now, why I did­n’t start going before last year is beyond me), but we so look for­ward to it every spring. I’m sure lots of peo­ple do too — there was already a siz­able crowd in the ear­ly morning.

High Park orga­nizes a cher­ry blos­som walk every year, but I don’t think there’s an offi­cial fes­ti­val for the cher­ry blos­soms in Toron­to. But I call it a fes­ti­val any­way — it’s such a love­ly cel­e­bra­tion of spring’s arrival, and the cher­ry trees them­selves rep­re­sent a won­der­ful piece of his­to­ry as well. The trees were donat­ed to High Park in 1959 by the City of Tokyo, in appre­ci­a­tion of Toron­to accept­ing relo­cat­ed Japan­ese-Cana­di­ans after the 2nd World War.

Here’s Zumi’s take on a flower bud. I real­ly like what this pho­to cap­tured — the sparkling light, the soft and del­i­cate petals, the sub­tle shade of pink before full bloom to white.

And here’s Zumi’s take on a cer­tain fes­ti­val-goer, with his film cam­era. Who uses a film cam­era nowa­days? That’s why I love him ;)

This real­ly has noth­ing to do with the cher­ry blos­som, but I just want­ed to show you this taro brick toast I had, when we stopped for a snack after the park. I’ve had green tea brick toast, and con­densed milk brick toast, but nev­er taro (brick toast is a Tai­wanese snack made with a real­ly thick piece of toast, with but­ter and var­i­ous top­pings). I was intrigued. It was so purple!

My only regret of the day was that I for­got to bring Saku­ra Mochi with me :( So I hung it on my purse the next day when we went out to church.

But then after church a friend men­tioned that he had walked by a bunch of cher­ry trees in the morn­ing near Robarts Library, and offered to take us there to see them. So yay! Saku­ra Mochi still gets a pic­ture with the cher­ry blos­soms this year! (Psst! To cro­chet your own saku­ra mochi for the sea­son see here)

These trees are part of the Saku­ra Project, gift­ed by the Con­sulate Gen­er­al of Japan in Toron­to as a sym­bol of friend­ship and goodwill.

While tak­ing yet more pho­tos of cher­ry blos­soms (don’t wor­ry, I’ll just keep them to myself rather than dump­ing them all here :P) I spot­ted this red and white cord tied to a branch. It’s some­thing that I have seen sev­er­al times last spring, here, and here.

So that made me real­ly curi­ous, and I did some dig­ging (i.e. Googling). I’ve always thought that it has to do with a Japan­ese tra­di­tion, because of the red and white colours. But am I ever wrong! The red and white cords are part of a Roman­ian tra­di­tion, MărÈ›iÈ™or, mean­ing “lit­tle March”, and cel­e­brat­ed on March 1st for the arrival of spring. The cords have a real­ly poet­ic mean­ing: the white sym­bol­izes win­ter, and the red rep­re­sents spring, fire, blood — the sym­bol of life; the entwined cord there­fore sym­bol­izes the pass­ing and com­ing of the sea­sons, the con­tin­u­ous cycle of nature. The red and white cords are worn as pins and then tied to the branch­es when the trees begin to bloom.

Ah, it’s nice to learn some­thing new every­day :D

I hope you’re enjoy­ing some love­ly spring weath­er like we do here!


sandal season! :D


I bought these shoes in Sin­ga­pore, when we went on the trip last Novem­ber. After 5 cold months of wait­ing and look­ing at them on my shoe rack long­ing­ly, I’m final­ly wear­ing them today for the first time! :D

I’m not a shoe per­son, and I loath shoe-shop­ping, because my feet are weird­ly shaped and it’s dif­fi­cult to find shoes that don’t hurt. I’ve nev­er worn heels in my life for that rea­son. But these were almost an impulse pur­chase (well, more like a “pres­sure” pur­chase). I saw an old lady wear­ing shoes like those at the beach and I real­ly liked them (yes, an old lady). Then I saw them at a mar­ket place in Sin­ga­pore so I stopped to take a clos­er look. But as soon as I held the shoes in my hands the shop­keep­er lady imme­di­ate­ly pulled up a stool behind me and demand­ed that I sit down and try them on. So I did and they seemed to fit, and the next thing I knew the lady was stand­ing in front of me with a plas­tic bag ready to close the deal. So I paid.

And you might ask, What?! What kind of push-over are you? Well, the worst kind. I mean, I did do some quick cal­cu­la­tions in my head and fig­ured that the shoes cost around $6 CAD. And they did fit. So I took the eas­i­er route and just bought it. It would’ve been hard­er for me to put them back and walk away feel­ing like I’ve offend­ed the storekeeper.

So, any­way. I do love these shoes. They’re going to be my san­dals for the sum­mer. I wore them around this morn­ing and it felt alright.

So that was my thought of the day. Just enjoy­ing the sun.

Chee­rio!


blooming kaleidoscope


Recent­ly I received a love­ly email from a vis­i­tor to the blog :D She’s an edi­tor of a book arts jour­nal in Aus­tralia (being able to con­nect with won­der­ful peo­ple from dif­fer­ent cor­ners of the globe is one of the best things about keep­ing a blog! :D), who kind­ly shared not only encour­ag­ing words but also lots of great ideas and inspi­ra­tion about print­mak­ing and book arts. (One of which is gelatin print­ing — so intrigu­ing! I’ve got to try that out soon!)

Con­ver­sa­tions about book arts remind­ed me of a book­bind­ing class I took while in uni­ver­si­ty. (Ah, that was quite a few years ago…) The book­bind­ing course was one of my favourite class­es, and one of the coolest assign­ments was the altered book project, using dis­card­ed books from the Ref­er­ence Library.

I pulled this botan­i­cal ref­er­ence book from the dis­card­ed book pile.


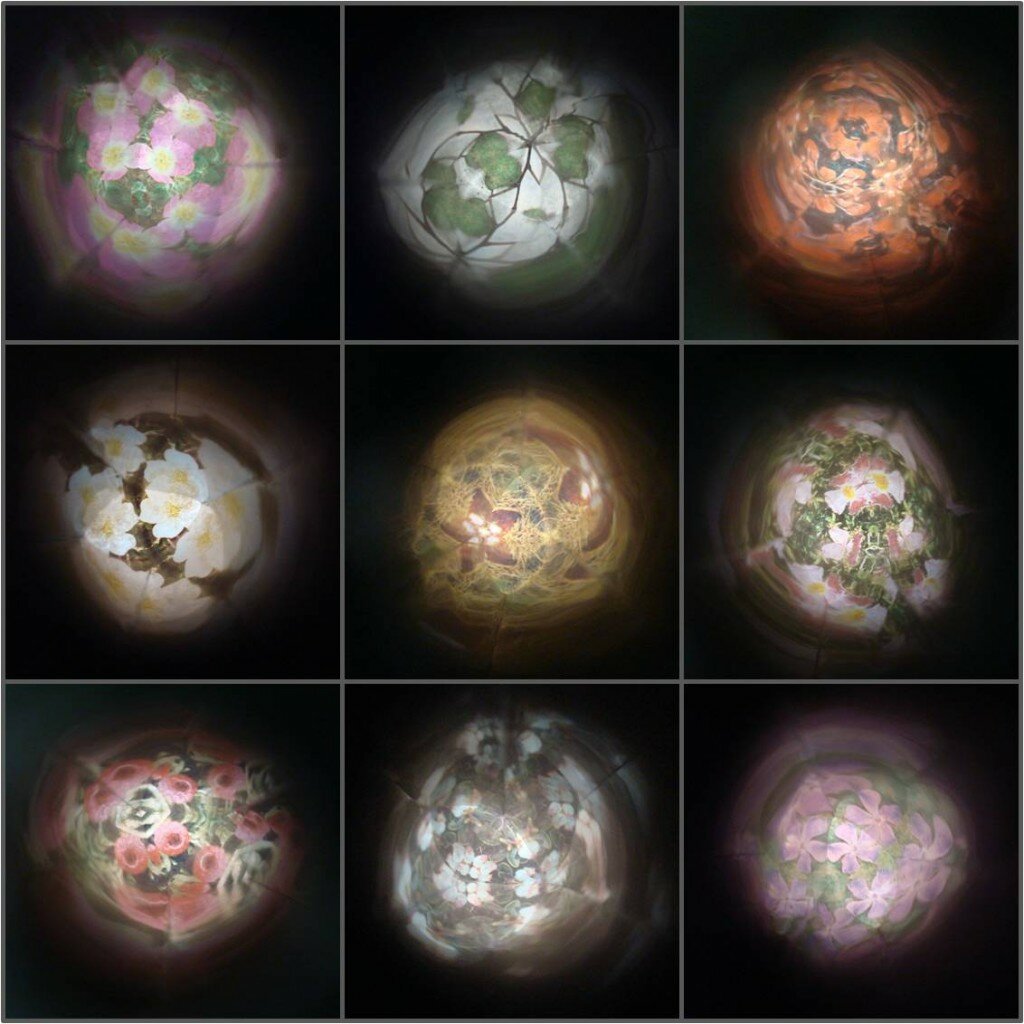
I could­n’t read the text, but I loved the pic­tures of flow­ers and plants. One of my first child­hood toys was a kalei­do­scope, and I remem­bered how much time I’ve spent look­ing through it, could­n’t put it down, just mesmerized. I thought the bright pho­tographs of the plants and flow­ers would make beau­ti­ful images to look through with a kalei­do­scope. So that was what I made (cylin­der on the right), and I cov­ered it with the end papers of the book.

It real­ly does work! See? This is the hole through which one looks in, made with the table of contents.


The book now hous­es the inter­change­able “lens­es”, made with the pages of pho­tographs and illus­tra­tions from the book. Kind of looks like a col­lec­tion of spec­i­mens in petri dishes.


The end piece fits around the look­ing tube like this…


And you turn it and take a look through… (psst! click for a larg­er image!)


It’s more crafty than “art­sy”, and I guess since I was attend­ing an art col­lege I should be mak­ing some­thing “art­sy”, with more of a state­ment or mean­ing or what­ev­er, but I was rather hap­py with it. Just a sim­ple appre­ci­a­tion of light and the per­fect beau­ty of nature.

And with the bril­liant weath­er we’ve been hav­ing late­ly, I’ve had a great time look­ing through all of the “spec­i­mens” again with the love­ly sun­light stream­ing through.

In order for the kalei­do­scope to work I made the images trans­par­ent. That process in itself needs a post of its own, I think. I’ll write about it more in the next week or so, stay tuned! :D

Have a great day! :D

sunday video

So excit­ed to show you this week’s Sun­day video — made by yours tru­ly! :D Fea­tur­ing cher­ry blos­soms at High Park, tak­en with the Zumi.

I’ve made videos before, but this is the first time I make a mon­tage kind of video. I did­n’t start out want­i­ng to make a mon­tage, but I’m not very good at tak­ing videos, and so out of the numer­ous clips I took (I lost count) only bits and pieces are usable. So I fig­ure I’d just piece them togeth­er and hope it works.

Edit­ing the video was a nau­se­at­ing expe­ri­ence. I don’t have a very steady hand, and I sup­pose the Zumi isn’t the best cam­era for tak­ing videos (it’s not shock-proof at all), and I moved around too much too quick­ly in an attempt to take in as much of the blos­soms as pos­si­ble… So all the flow­ers and branch­es and pieces of the sky were all spin­ning and swirling togeth­er on my screen… @_@ Any­way, I cut out all of the intense­ly swirly bits, and added oth­er rel­a­tive­ly still clips that I also took at the park, of the weep­ing wil­lows, the duck, and the geese for some visu­al breaks, so hope­ful­ly when you view it it would be more enjoyable.

Final­ly, because Mike is far more knowl­edge­able in music than I am, he picked a bril­liant song clip from his col­lec­tion, A Ten­der His­to­ry in Rust by Do Make Say Think (from Toron­to!). It worked out per­fect­ly :D

More pic­tures of cher­ry blos­soms to fol­low! Here’s one I real­ly like, also tak­en by the Zumi.

Have a won­der­ful Sunday!

favourite things friday

Lots of Moth­er’s Day ideas this week! But of course, one does not need to wait until Moth­er’s Day to express appre­ci­a­tion. Here are some crafty gifts that would be won­der­ful to give to moth­ers (or oth­er spe­cial women in our lives) any time of the year :D


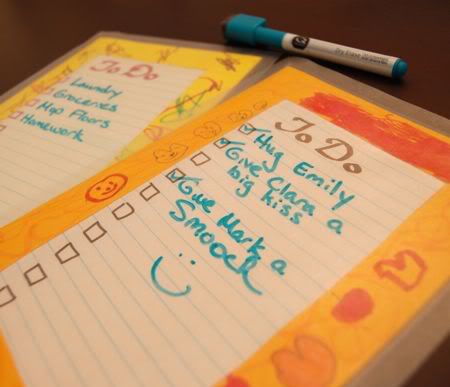
Bril­liant­ly sim­ple, charm­ing, and prac­ti­cal — a mag­net­ic reusable to-do list from Fru­gal Fam­i­ly Fun Blog. Also great for mak­ing gro­cery lists, notes to self, and moti­va­tion­al mes­sages! A won­der­ful project to make with kids, too!


Aren’t these so cute? Makes a love­ly key ring or a brooch! I love their rib­bon-trimmed tails. Tuto­r­i­al and tem­plates on Paper-and-String.


Spring daf­fodils that keep bloom­ing all year long :D How-to on While She Naps.


This one does­n’t only bloom all year long, it’s also wear­able! Tuto­r­i­al and tem­plates for a gor­geous flower head­band by Bugs and Fish­es ‑ I will have to make one for myself :D


No need to spend a for­tune at the flower shop. Find some old mag­a­zines and take a trip to a near­by patch of grass where the wild flow­ers grow, and you’ve got a per­fect gift! :D Tuto­r­i­al for mag­a­zine flower bas­ket from Made by Joel.


Now this requires more work, but will be absolute­ly worth the effort. Planters made out of old books for suc­cu­lents! How-to on Apart­ment Ther­a­py.


These cer­tain­ly make delight­ful pothold­ers, but I think small­er ver­sions of them would also make great brooches! Free pat­tern from Delights-Gems.


Make some styl­ish wall art or table dec­o­ra­tion (which dou­bles as a pothold­er) using the hum­ble sisal or jute rope! How-to on Design Sponge.


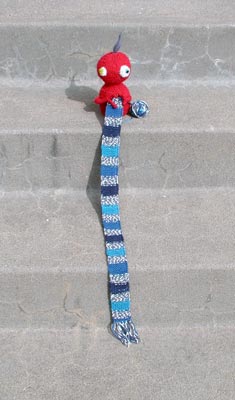
For the pub­lic knit­ter — make a pub­lic knit­ting crit­ter! :D Pat­tern by The Thrifty Knit­ter.


For the sub­way read­er — page cor­ner book­marks! Bril­liant­ly sim­ple but so awe­some! How-to on I Could Make That.


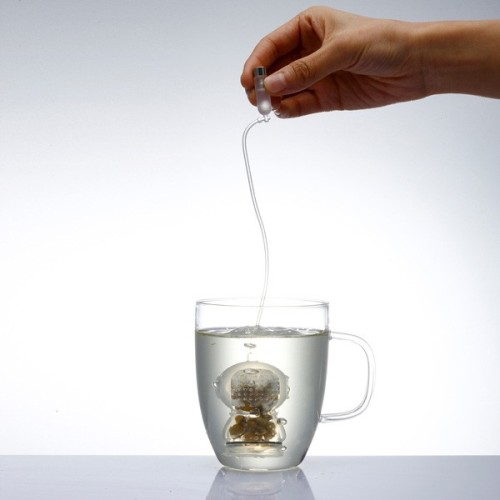
For the tea lover — Tea Div­er by Yanko Design. I love the tiny oxy­gen tank! (via Inspire me now)


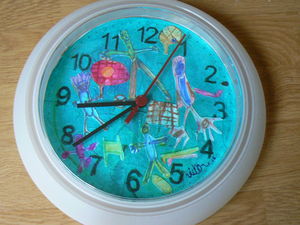
Cus­tomize a plain ol’ clock! The face of the clock is clev­er­ly cov­ered in tis­sue paper so one could trace the num­bers through it (i.e. none of that divide-the-pie-in-12-equal-parts math). Tuto­r­i­al at Leon, pas sur les murs! (Blog is in French, I don’t know much French, but the pho­tos are pret­ty self-explana­to­ry. Plus I use Google Chrome and it trans­lates it for me :D)


This was made to be a straw­ber­ry par­ty favour, topped with a straw­ber­ry plant, but I think it would make a nice kitchen planter, topped with herbs and stuck on the fridge! Instruc­tion on One Charm­ing Par­ty.


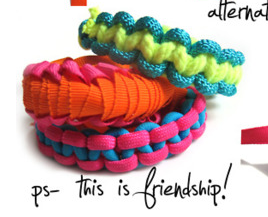
Made with the same knot­ting method as the tra­di­tion­al friend­ship bracelet, but I think I much pre­fer these bright, bold, and styl­ish ones made with thick ropes and rib­bons. Plus, they don’t take for­ev­er to make like the tra­di­tion­al friend­ship bracelets. Per­fect for chil­dren’s atten­tion span — oooh, a squir­rel! — from p.s. I made this.


And some­times a gift does­n’t have to be some­thing that one can keep for­ev­er. It could be a ges­ture, like mak­ing food for some­one, or offer­ing some­one a sim­ple fruit drink on a hot sum­mer day, like agua fres­ca, made with fresh fruit, water and ice all blend­ed togeth­er into a refresh­ing good­ness. Read fur­ther on Make and Takes for more ideas and recipes! (If we go straw­ber­ry-pick­ing again this sum­mer I’m def­i­nite­ly mak­ing some straw­ber­ry agua fres­ca!)


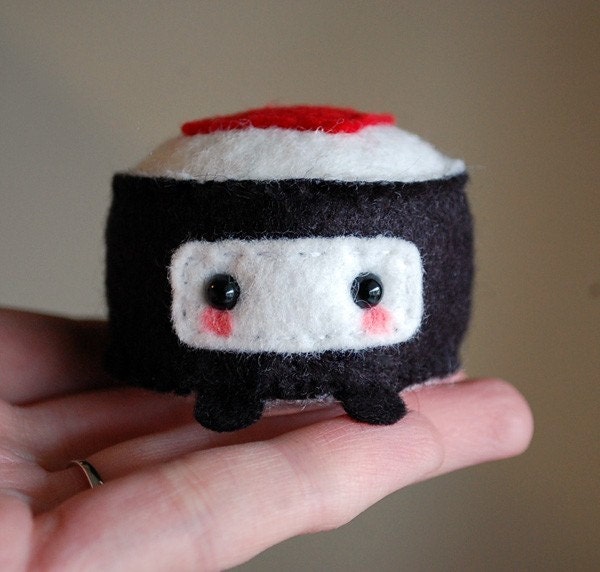
And I just have to post this — not only because he’s so very adorable, but because there’s actu­al­ly a sushi place called Nin­ja Sushi in my par­ents’ neigh­bour­hood, and they make excel­lent sashi­mi! You can find this nin­ja sushi at twisty­fishies’ Etsy shop! :D


Have a love­ly Fri­day, everyone!

sakura treats


Tried the coconut ice recipe I wrote about last week! They’re not like saku­ra mochi, but I made them pink and white because it is indeed cher­ry blos­som sea­son :D

The recipe calls for des­ic­cat­ed coconut. I did­n’t think I would find any in the gro­cery store and was just going to use the shred­ded coconut we always see in the bak­ing aisle. But we went to a Chi­nese gro­cery store last week and there is was! Des­ic­cat­ed coconut, made by WD Hap­py Boy.


And in the next aisle we found some Lucky Stars con­densed milk.


Now that we feel both hap­py and lucky, it is time to get to work! I neglect­ed to take pho­tos of the process, but there was not much to it any­way. Just a lot of stir­ring, stir­ring, and s‑s-stir-r-ring. Con­densed milk is real­ly thick and with the huge pile of pow­dered coconut and sug­ar, the mix­ture became real­ly thick and a bit dif­fi­cult to maneuver.

The recipe is sup­posed to make over 1 kilo of coconut ice. I like coconut, but that’s a bit much, I think. (Great for a bake sale though! Must keep that in mind when Christ­mas sea­son rolls around.) Plus, I did­n’t have enough icing sug­ar, so I just eye-balled maybe half a bag of coconut and 2/3 can of con­densed milk. It made about 3 dozens 1“x1“x1.5″ bars, like these…

And in the morn­ing I had enough con­dense milk left to make milk toast — deli­cious! :D Brings back fond child­hood mem­o­ries too.


I’m pray­ing for good weath­er this Sat­ur­day, so we can final­ly vis­it the cher­ry blos­soms at High Park! If rain is not in the fore­cast it might be good to bring some of the coconut ice with us for a mini picnic!

It was a beau­ti­ful day in our neigh­bour­hood today — hope you’ve enjoyed some love­ly sun­shine too!

a mind-shrinking experiment!

No joke, when I opened my new pack­age of Shrinky-Dinks, this was what I saw:

“Mind-shrink­ing ideas”.

Hmm.

Do they actu­al­ly mean mind-bend­ing? Mind-bog­gling? Mind-blow­ing? Or, they real­ly did mean mind-shrink­ing. But then one’s cre­ativ­i­ty is expect­ed to expand at the same time.

Fas­ci­nat­ing.

So, any­way. I bought the Shrinky-Dinks for a com­mis­sioned project, which I can’t show you just yet, because… well, I haven’t fin­ished yet, and I’d have to deliv­er it to the cus­tomer first before show­ing it to you. But soon :D

While I was bak­ing the store-bought shrink plas­tic, I thought I would also give the #6 plas­tic a try. Since I first saw the idea on Dab­bled I’ve col­lect­ed a cou­ple of #6 plas­tic con­tain­ers, main­ly from dough­nuts (Yes, I did buy the dough­nuts for the plas­tic, but I cer­tain­ly enjoyed the sweets too :D).

So here’s one flat piece of #6 plas­tic I’ve har­vest­ed from the dough­nut con­tain­er. The Shrinky Dink man­u­al says that one could use acrylic on the plas­tic, so I did the same with the #6 plastic…

I think I lay­ered on the paint too thick­ly. Or acrylic just does­n’t work in the shrink plas­tic process at all. Or I just real­ly should­n’t trust those mind-shrink­ing ideas from the Shrinky Dink man­u­al anymore.

So, when it came out from the oven the paint was all flak­ing away…


But it shrank beau­ti­ful­ly. Nice and thick and per­fect­ly pro­por­tion­al. I was actu­al­ly real­ly sur­prised how well it worked, because, you know, it came from a dis­pos­able plas­tic con­tain­er! I scrubbed away the flaky paint so you can see…

After doing some research (i.e. look­ing under every kind of plas­tic con­tain­er in gro­cery store) I real­ized that #6 plas­tic is actu­al­ly not that easy to find. Most plas­tic con­tain­ers are made of #1 plas­tic. I pret­ty much used all of the usable spaces on the dough­nut con­tain­er to make the mush­room (because there was only one flat piece on the top, which was part­ly cov­ered by a stub­born, sticky piece of label, and the rest of the box have ridges all over it), so I thought I would just wait until I come across more #6 plas­tic to con­tin­ue experimenting…

And then, this past week­end we went to the Chi­nese gro­cery store and bought some deli­cious Chi­nese bak­ery swiss rolls (it was hon­ey­dew mel­on flavoured :D)…


I actu­al­ly want­ed to get the swiss roll­s for the swiss rolls, not for the plas­tic con­tain­er. But to my sur­prise, as we were half way done the swiss rolls, I noticed that the con­tain­er has a tiny #6 on it — SCORE!

This time, I learned not to use acrylic paint, and instead sand­ed the plas­tic thor­ough­ly with some fine sand paper, and then coloured it with pen­cil crayon.

I made an owl charm…

… and I real­ly like it :D


And then, inspired by the love­ly neck­laces from this shop, I attempt­ed to make a Hong Kong Island charm. If I had the mon­ey, I would absolute­ly order from the shop and have Hong Kong Island made in sil­ver. But for now I’m hap­py with some recy­cled plastic.

Hong Kong actu­al­ly also includes the Kowloon Penin­su­la and a num­ber of small sur­round­ing islands, but those would be dif­fi­cult to incor­po­rate in a charm. Plus, I thought Hong Kong Island would make a fun neck­lace charm because it looks like a frog (like the chant I was taught in school as a child, to learn the geo­graph­ic fea­tures of the land, “Hong Kong Island is shaped like a frog”. In Can­tonese, of course).

I print­ed out a map and traced over it. The first attempt turned out some­what squished. It looks like it has­n’t com­plete­ly fin­ished shrink­ing, but I watched it for half a minute and it did­n’t con­tin­ue to shrink, and I did­n’t want it to melt or burn, so I just took it out.


So for the sec­ond attempt I stretched the map ver­ti­cal­ly a bit in Pho­to­shop before print­ing it, and its shape turned out much better.


Unfor­tu­nate­ly, because of where I put the hole it did­n’t hang prop­er­ly (did­n’t think it through…). So with the last bit of plas­tic I tried again.


And that’s what I set­tled with. It’s stretched a bit fun­ny too, but not because of the bak­ing, but because the map I traced it with was stretched length-wise, since I thought the plas­tic would stretch side­ways in the bak­ing. But now I think plas­tic has some kind of “grain”, like paper, where it would stretch one way and not the other.

But any­way, it was great fun! My cre­ativ­i­ty has cer­tain­ly expand­ed, but I hope my mind has­n’t shrunk…

And the quest for #6 plas­tic continues!

Have a great day, every­one! :D