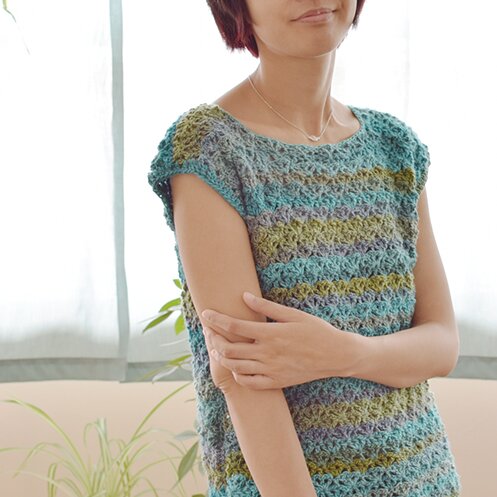
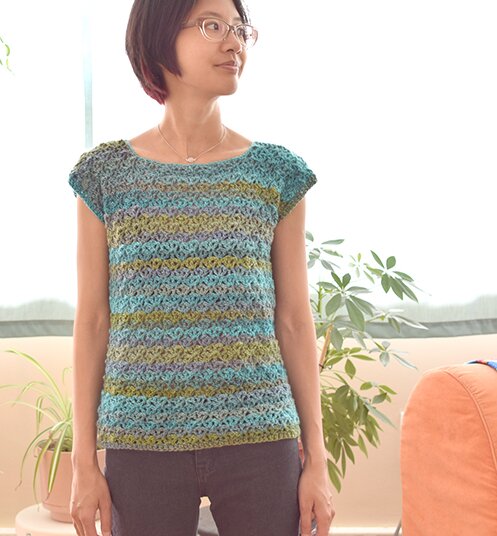
A remake of the Pastel dress, with a yarn that reminds me of the seashore — the different shades of blue in the distance, the greens of algae and seaweed washed up on the rocks.
Similar to the remake of the Ginkgo top, this sweater uses the same lace pattern as the top of the Pastel dress (which was a variation of the Ginkgo lace pattern), minus the armhole shaping and with a simpler boat neck shaping.
The yarn I used was Mary Maxim Prism in Still Waters. I love this yarn. It’s affordable, super washable, the colours are amazing, has a nice drape. I wish there is a Mary Maxim closer to where I live… *sigh*
It has a very simple shape and stitch pattern, so I imagine it would look nice with a variegated yarn like Noro, or a sparkly yarn for fancier occasions :)
I used:
Light worsted weight yarn, approx. 700 yards
5 mm and 4.5 mm hooks
Tapestry needle for sewing
Sweater measures: 34″ around, 19.5″ in length
Length is easily adjustable by working more or fewer rows. Width can be adjusted by adding or subtracting stitches in the foundation ch by multiples of 6.
6 stitches = 1 3/8â€
Pattern:
Stitch pattern:
Fan = [dc, 2 ch, dc, 2 ch, dc] in same space
Front:
With 5 mm hook, ch 85.
Row 1: dc in 6th ch from hook, skip next 2 ch, dc in next ch, [skip next 2 ch, fan in next ch, skip next 2 ch, dc in next ch] to end, [dc, ch 2, dc] in last ch, turn.
Row 2: ch 3, skip first dc, fan in dc between fans, [dc in 2nd dc of next fan, fan in next dc between fans] to end, dc in 3rd ch of turning ch, turn.
Row 3: ch 5, dc in 1st dc, dc in 2nd dc of next fan, [fan in next dc between fans, dc in 2nd dc of next fan] to end, [dc, ch 2, dc] in turning ch, turn.
Repeat rows 2 & 3 until there are 34 rows altogether, ending with row 2.
Neck shaping:
Row 35: work in pattern to the 4th fan of the row, dc in 2nd dc of the 4th fan, dc in next dc between fans, turn.
Row 36: ch 5, dc in next dc, dc in the 2nd dc of next fan, work in pattern till end, turn.
Row 37–38: work in pattern. Fasten off.
Attach yarn to the other corner of row 34, repeat rows 35–38.
Back:
Repeat pattern for front until neck shaping. Work 2 more rows so that there are 36 rows altogether, ending with row 2.
Neck shaping:
Row 37–38: repeat rows 35 and 36 of front. Fasten off.
Attach yarn to the other corner of row 36, repeat rows 37–38.
Assembly:
With right sides together and wrong sides facing, sew shoulder seams together.
With right sides together and wrong sides facing, sew side seams together, starting at the top of the 11th row from the top of the sweater.
Turn sweater right side out.
Edging: with 4.5 mm hook
Neckline: attach yarn to a dc (not part of a fan) on the back of neck. ch 1, sc in same dc, [sc in 1st dc of fan, sc in next ch 2 sp, skip 2nd dc of fan, sc in next ch 2 sp, sc in 3rd dc of fan, sc in next dc] around, sl st in beginning sc of found, fasten off.
Armholes: attach yarn to any space on the armhole. We will be crocheting into the side of the rows, or what I call “row-ends”. ch 3, work 2 dc in each row-end around, sl st in top of beginning ch 3, fasten off. Repeat for the other armhole.
Bottom edge: attach yarn to any ch 2 space, ch 3, work 1 dc in every ch 2 space, every base of a fan, and every base of a dc, sl st in top of beginning ch 3, fasten off.
Weave in all ends.
And it’s done! :D
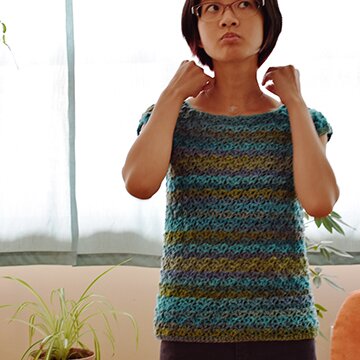
Here’s an in-between shot in which I was caught adjusting the necklace, which I thought turned out kind of cool and stylish :D
Hope you enjoy the remake! Have a happy Saturday! :D


This sweater looks so lovely, Trish, very much the sea shore…thank you for the pattern…
Trish, the water’s edge is beautiful and looks great on you! Thanks for sharing.
Thanks so much Sue! :D
Thank you Patricia! :D
It is beautiful, Trish! Fantastic work and I love the colors!
Thank you! I’m really happy with the colours too!
It’s so beautiful and simple, I really love it. Any ideas of how make it M and XL?
Thank you for visiting Mariel! To make larger sizes I would suggest first figuring out the bust measurement that you want, i.e. 36″ for size M, then try the following guide:
Length is easily adjustable by working more or fewer rows. Width can be adjusted by adding or subtracting stitches in the foundation ch by multiples of 6. 6 stitches = 1 3/8â€
The pattern makes a sweater that’s about 34″ around. So if you’re trying to make a sweater that’s at least 36″ around, then you would add 6 ch to the foundation ch for both the front and back pieces, ending up with a sweater that’s approx. 36 3/4″ around.
For a size XL (typically approx. 43″ around), theoretically you would add 24 ch to the foundation ch of both front and back. But now you’ll have to change the stitch counts for the neck shaping… I haven’t tested larger sizes and if I were making an XL size I would just measure as I go… if you’re trying to make an XL size, please feel free to leave another comment when you get to the neck shaping part, and I can give you more suggestions for the stitch count.
Hope this helps!
Thanks you soooo much for the pattern. I will try to make it quite soon and i’ll show you the pictures via IG.
you’re so welcome Raquel! i’d love to see pictures! :D
This shirt is so beautiful! I would love to translate it into Dutch on my website if you are okay with it. I am sure there are a lot of Dutch crocheters who will love this shirt as well. Ofcourse all credits will go to you and I will post the link to your website. I am looking forward to your reply.
Thanks so much Lisa for offering to translate my pattern! That would be so wonderful. Please send me the link once it’s done, I’ll link to it on my blog and Ravelry page. Thanks again!
Hi Trish,
The translation is done! Thanks again for the great pattern, really kind of you. You can find the Dutch version of your pattern here:
http://haakinformatie.nl/patroon/haakpatroon-waaier-t-shirt/
Have a nice day!
Lisa
Thanks so much Lisa! I will add the link to the Ravelry pattern page and on the blog! :D Thank you again for taking the time to translate!
Trish,
Would the multiple to add be 12 for a Large size? I read your reply to Mariel and I thought that if the stitch count to increase is multiples of 6 for a Medium (34″) and 24 total for an XL (~ 43″) then the add for a Large must be 12 stitches, correct??
Thanks for giving me something else to make with my RHU!!! This top is BEAUTIFUL!
Hi Susan, glad you like the pattern! The pattern makes a sweater that’s about 34″ around. 6 sts = 1 3/8″
Adding 6 ch to the foundation ch for each of the front and back pieces (so you’re actually adding 12 sts altogether) you would end up with a finished size of approx. 36 3/4″ around.
Adding another 12 ch to each of the front and back pieces (so that would be 24 sts more than the original pattern) will make a finished size of approx. 39.5″.
Hope this helps!
I would like to known what size of hook is 5mm is this American size please help
Hi Marie,
5mm hook is size H/8 in US size. Here’s a handy conversion chart that I always use :) http://www.yarnfwd.com/crochetconv.html
Is this an error… or what does this mean?
Row 3: ch 5, ch in 1st dc
the ‘ch in first dc’ part??
Hi Alyssa, thank you for pointing that out! it should be “dc in 1st dc”. It’s now corrected. Thanks again! Happy crocheting!