favourite things of the week!

I’ve been see­ing a lot of things that I like via the Crafty Crow late­ly. It’s a chil­dren’s craft col­lec­tive, so I guess it appeals to my inner child. Or the child who is actu­al­ly me. Any­way. I love these plas­ticine stamps from Filth Wiz­ardry!

Christ­mas cards idea, per­haps! I think it’s per­fect with those chunks of plas­ticine that’s got so many colours mixed in them that they’ve become real­ly dull and nobody wants to use them and they just sit sad­ly in the bot­tom of the tub, just want­i­ng to be squeezed… but dull no more! It can bring out hun­dreds and thou­sands of won­der­ful pic­tures! I love how the blog own­er says that the process is so tem­po­rary and unex­pect­ed (because plas­ticine is pli­able and the shape of the stamp changes after a few prints). And if you scroll down on the post you’ll see all the dif­fer­ent impres­sions made with dif­fer­ent objects! I’m sooo going to try this out when I get my hands on some plasticine!

I think after mak­ing some plas­ticine prints I would also want to make this bril­liant art­work dis­play wall-hang­ing from This and That.

And maybe not only art­work, but also post­cards and pho­tos, and greet­ing cards, and coast­ers from pubs, and oth­er clip­pings of inspi­ra­tion, and paper cutouts? Like these paper cutouts?

Per­haps these paper cutouts are best on win­dows and cof­fee tables — but aren’t they love­ly? The tem­plates are from Zak­ka Life. I love the oak and gink­go ones, which are pictured.

And along the theme of dis­play and dec­o­ra­tion, I stum­bled upon this bril­liant idea via Whip Up.

They’re book­shelves! Lit­er­al­ly! :D I’d love it sim­ply because it’s a pun. But I dou­bly love it because it’s old books! Imag­ine dis­play­ing cro­cheted mush­rooms hous­es on them! The instruc­tion is avail­able on Real Sim­ple.

And there you have it, a week of favourite things! What are your favourite things? Feel free to share by leav­ing a com­ment! Hap­py Wednesday!

favourite things of the week!

This week I came across these sweet pear orna­ments from lil fish stu­dio… per­fect for a Christ­mas tree! Now I just need to find a partridge…

Found par­tridge! Well, very cool-look­ing birds any­way. Made from paper mâché by that artist woman! And step-by-step instruc­tions on how to make them too!

See? This is a par­tridge. Our paper mâché friend looks pret­ty much like it, does­n’t it? Um, maybe I’ll need to make my paper mâché par­tridge with a small­er head and a big­ger, more pear-like body…

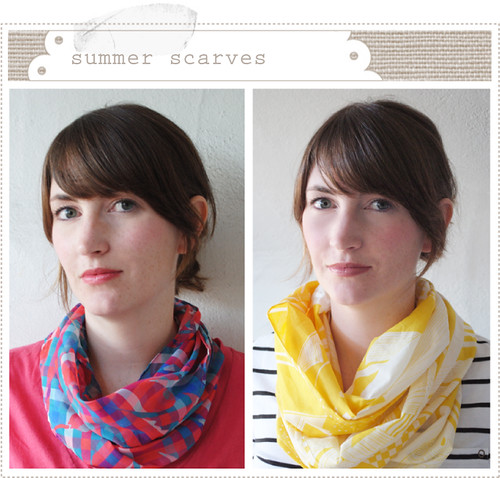
While I keep find­ing great ideas for Christ­mas (and I find them all year long), I do agree that Sep­tem­ber is a bit too ear­ly to start work­ing on them… so, here’s a won­der­ful­ly sim­ple yet amaz­ing­ly styl­ish fall project — A fab­ric scarf from mer mag!

I love cro­chet­ing cowls and wear­ing indoor scarves, because they make me look old­er :P But this time a year it might be a bit warm to wear a wool­ly thing round one’s neck… This scarf is made of light-weight fab­ric so it’s per­fect for fall :D I also real­ly like this because it’s sewn into a ring, like a cowl, so I won’t have to wor­ry about how to styl­ish­ly drape the ends of the scarf, which I always had trou­bles with, because I’m not so much a styl­ish per­son. So! Need to make a trip to the fab­ric store soon! :D

And then I recent­ly came across these gor­geous cro­cheted mush­rooms on Wun­derkam­mer, aren’t they cool? The pat­terns for mak­ing them are for sale!

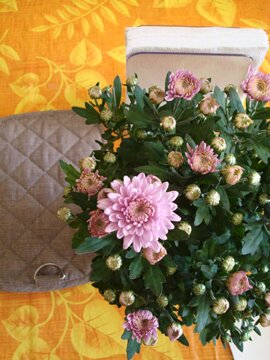
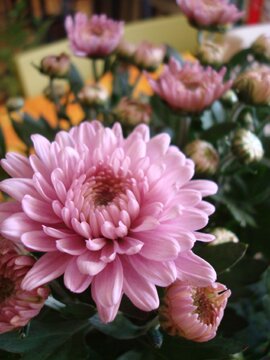
And final­ly — love these fall flow­ers sit­ting on our din­ing table! :D

I love fall flow­ers in gen­er­al, but these are espe­cial­ly lov­able because Mike brought them home for me today :D

Hap­py Wednesday!

Favourite things of the week!

Hope you’ve had a fab­u­lous long week­end! Did­n’t write for sev­er­al days because I have been away, but I’ve also been sav­ing these links to share! :D

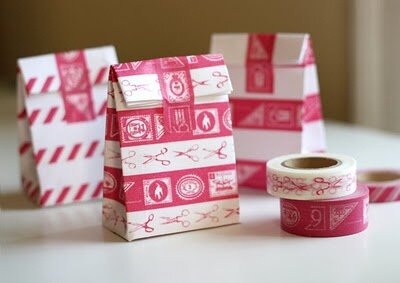
I saw this quite a while ago — anoth­er bril­liant, bril­liant way to make small gift bags by How About Orange! From envelops! And also pret­ty tape! Per­fect for Christ­mas cook­ies, I think. Or those cook­ie mold orna­ments I was mak­ing! :D

Spot­ted anoth­er paper-fold­ing project recent­ly via Whip uppaper crane cup­cake top­pers! Would go well with green tea cup­cakes, I imag­ine. This looks like a promis­ing recipe…

And a real­ly neat activ­i­ty I saw today via The Crafty Crow, Com­bin­ing music-mak­ing, song-writ­ing, and water­colour! :D Read the post on Net­tle’s Notes to see how it works, it’s real­ly cool.

I stum­bled upon these fab­ric flow­ers on Sim­ply Vin­tage­girl a while ago — look how pret­ty!!! Real­ly want to try mak­ing them, but kind of weary about the flame part for the petals… the tuto­r­i­al has real­ly clear instruc­tions though! So maybe if I come across some syn­thet­ic silk one day I’ll give them a try…

Aaaand last but not least (though the tini­est), saw these can­dy corn *squeal* by Danielle­o­ra­ma on Tiny Plush Tues­day! They remind me that fall is quick­ly approach­ing and that makes me so very hap­py :D (Yes, I’m one of those odd species that aren’t too fond of sum­mer) I’m also feel­ing rather inspired to start cro­chet­ing a can­dy corn :D

Hap­py day!


The making of a notebook

This post is ded­i­cat­ed to a dear friend of mine. She likes to write things down. Wher­ev­er she goes, when­ev­er she comes across inter­est­ing tid­bits of infor­ma­tion or things that inspire her or a book title that seems intrigu­ing, she would write it down. In book­stores, in the park, on the street, she takes notes, and she takes in all the love­li­ness that life has to offer. And so that inspired me to make a handy palm-sized notebook!

But before I go into the process of mak­ing it, I must say that I did­n’t come up with this idea entire­ly on my own. Besides being inspired by my friend, I’ve also got­ten this book-mak­ing idea from Flipflops and Apple­sauce. I mere­ly built on the idea to cre­ate a note­book with more pages.

Any­how, that’s how I did it:

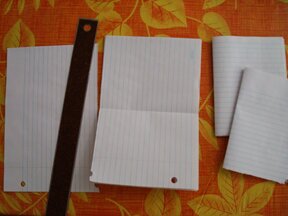
I used lined 3‑hole paper because that’s all I have at home, I sup­pose it would look more neat with plain lined paper, or plain unlined paper… but I did­n’t mind hav­ing holes in my note­book :P
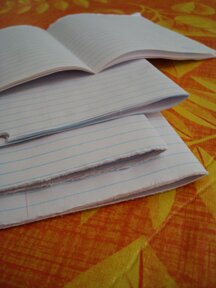
I took about 15 pieces of lined paper, divide into two stacks, and tore each stack in half. I then end­ed up with 4 stacks of 1/2 sheet paper, and I fold­ed each stack in half, as pictured.

So then I end­ed up with 4 sections.

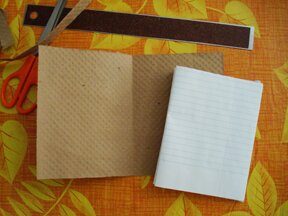
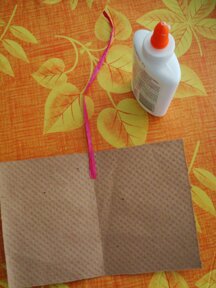
Then I took a thick­er paper and tore it to size to fit the pages, for a book cov­er. Of course, one could also mea­sure and cut the paper to size, but I pre­fer eye-balling, tear­ing with the ruler, and imper­fec­tions :) I think this paper was used to wrap ceram­ic wares when I bought them from a store.

I want­ed to have a built-in rib­bon book­mark, so before I sta­pled every­thing togeth­er, I attached a bit of pink raf­fia to the top edge of the book cov­er with some white glue.

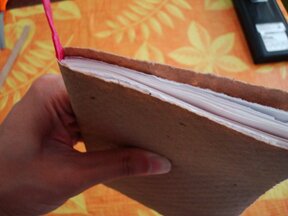
After the glue is dried, I wrapped the cov­er around all 4 sec­tions, with the book­mark stick­ing out at the top…

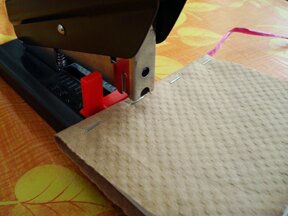
… and sta­pled the whole thing togeth­er. Mike hap­pens to have a heavy-duty sta­pler from his school days, which is real­ly handy for this project. But with a reg­u­lar sta­pler one could also sta­ple from the front of the cov­er, then sta­ple from the back, and repeat, alter­nat­ing sides with each sta­ple, and sta­ple very close­ly togeth­er down the fold side of the book. That should hold all the pages together.

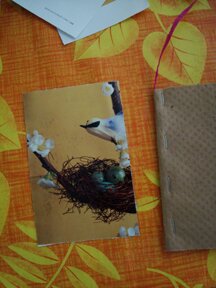
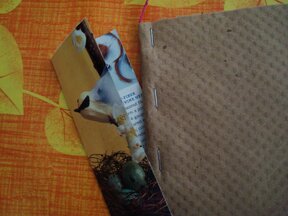
Now this is the fun part — choos­ing a pret­ty paper to wrap around the spine! I like choos­ing from mag­a­zines because I can find lots of inter­est­ing and mean­ing­ful pic­tures that way. But I’ve also used origa­mi paper. I imag­ine gift wrap­ping paper would be nice too! I tore the image to size — width does­n’t real­ly mat­ter but the height needs to be the same as the book’s height.

I fold­ed the image in half length­wise to cre­ate a crease, and then opened it up to apply glue (I used spray adhe­sive so the cov­er does­n’t buck­le), and then wrapped it around the book’s spine.

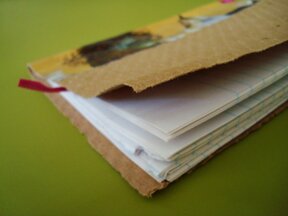
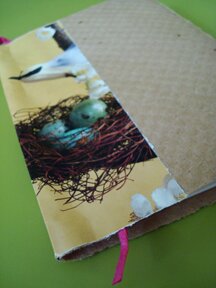
And here we have it, a notebook!

With lots of pages to write in!

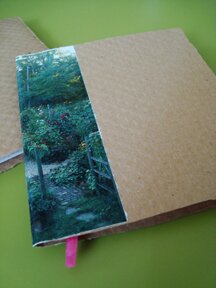
And I also made a gar­den-themed one…

… and an art jour­nal with dif­fer­ent kinds of paper in it! Will have to write about that art jour­nal someday…

I think it def­i­nite­ly beats buy­ing a $10 note­book at the bookstore!

Have a love­ly weekend!

Greetings!

Some time in the spring I devel­oped a fond­ness for cut­ting block let­ters from mag­a­zine pages, free-hand. I find it rather calm­ing. And so, when­ev­er I had a break in my work day, if I were not eat­ing or doing paper­work, I would be sit­ting there cut­ting out block let­ters from mag­a­zine pages. Not just aim­less­ly cut­ting out block let­ters, but mak­ing greet­ing cards! Here are a few that I’ve made over the past few months. I liked them so much that I did­n’t quite want to part with them, but I had to send them off because that was the point of mak­ing a greet­ing card… so I took pho­tos of some of them.

This is one I made for a wed­ding, with bub­ble wrap print. The let­ters were cut from the rain­bow-colour cup­cakes on the cov­er of a Valen­tine’s Day issue of the Martha Stew­art Liv­ing mag­a­zine. I also stuck a pic­ture of a cup­cake on the inside.

This one I made for my sis­ter, for her grad­u­a­tion! She is an Eng­lish major, so I cut out let­ters from an old book. And also berries and flow­ers from the Martha mag­a­zines. (The Martha mag­a­zine has got the best pic­tures for mak­ing greet­ing cards with!)

This is for some­one who real­ly likes water and the colour yel­low, on a piece of paper I made. The pic­ture might be too small to see, but the let­ters were cut from a pho­to­graph of a body of water. And the maple leaf is real — it’s from the tree that the birth­day per­son­’s hus­band had plant­ed :D I par­tic­u­lar­ly like the yel­low tomatoes.

More bub­ble wrap print! With knit pat­tern on the let­ters. I love cut­ting out things from mag­a­zines because I nev­er know what I’ll find, but what I do find is always per­fect. It’s like a gift.

This one has laven­der in the let­ters, and I was sur­prised to see that when I went to deliv­er the card to the per­son­’s house, she had just plant­ed laven­der in her front yard.

Thank you for vis­it­ing my show-and-tell! :D