yarn elfing

If you have been jour­ney­ing with me on this blog, you might recall that I like to call hol­i­day gift-mak­ing “elf­ing”. It is that time of the year again for us busy elves! Although I’m not a very pro­duc­tive elf this year… Not much yarn-craft­ing hap­pen­ing, just paper-writ­ing… sup­pose those count as gifts for my professors…

It is also the time of year when we think about mak­ing for those beyond our own cir­cles of fam­i­lies and friends who can real­ly use our gifts of crafti­ness with yarn. The nice folks at Yarn Cana­da are part­ner­ing with Bernat Yarn to give away yarn for indi­vid­u­als and groups who craft for a good cause! Do you and your friends make scarves and hats for peo­ple to find? Or win­ter gears for shel­ters? Or soft pros­thet­ics for breast can­cer sur­vivors? Or prac­tice oth­er kinds of yarn-kind­ness? Check out this page on Yarn Canada’s web­site for more details on how to enter this give-away for a good cause! 

In the mean­while, here are some awe­some ideas I found for the yarn-craft­ing elves…

These very cute cup cozies are loom knit­ted on a 24-peg loom. It’s a paid pat­tern on Rav­el­ry but the how-to video is free on Tuteate’s Youtube chan­nel (which have excel­lent and real­ly well-made loom knit projects!). By Mireia Marcet on Rav­el­ry.


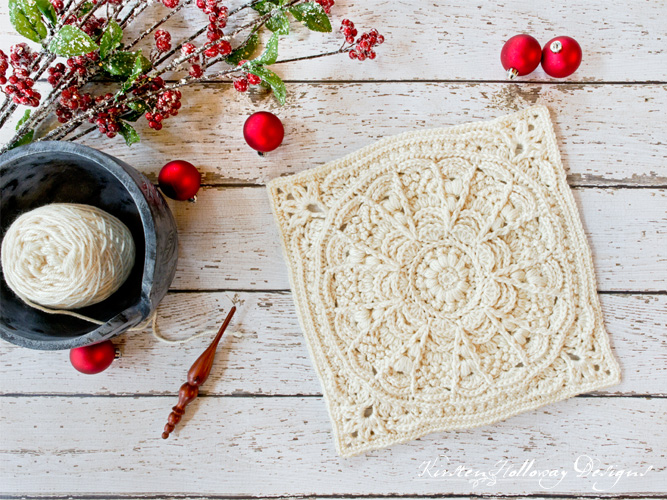
Absolute­ly stun­ning granny square by Kirsten Hol­loway Designs.


A free pat­tern on We Are Knit­ters and it’s an amigu­ru­mi alpaca! :D


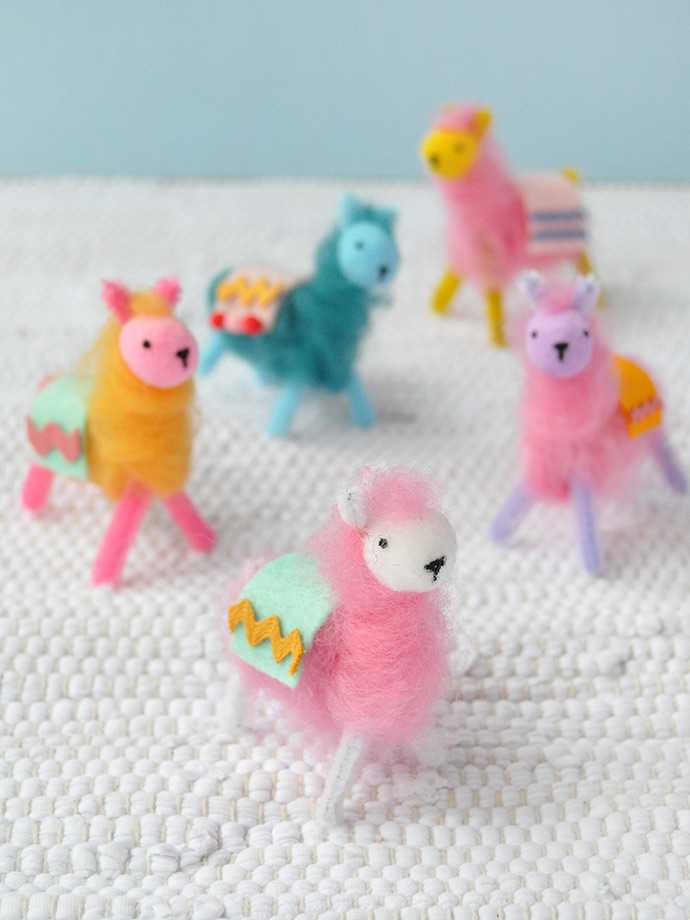
An ins­ta-grat­i­fi­ca­tion wool-craft, all you need is some tufts of wool, some pipe clean­ers, some poms, and some love. Bril­liant. From Hand­made Char­lotte.


Hap­py craft­ing, everyone!


casper-go-round

Yikes! I haven’t writ­ten for over a month! I don’t think that that’s ever hap­pened since I start­ed this blog in 2010! Oh man. It’s been very, very busy with school and work, just get­ting a bit of breath­ing space after fin­ish­ing a mid-term paper today… And! We North Amer­i­cans get an extra hour thanks to day­light sav­ing! So guess what I did with that extra hour?

Block­ing! :D

The real­ly nice folks at Yarn Cana­da sent me a cou­ple of cakes of Red Heart It’s a Wrap quite a while ago to try out and review, and I recent found a per­fect pat­tern for it — it calls for a thread/lace weight cot­ton, it’s a rel­a­tive­ly quick project, and it’s some­thing that I think my BFF will real­ly like…

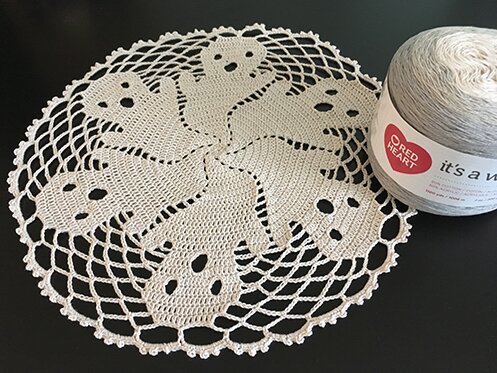
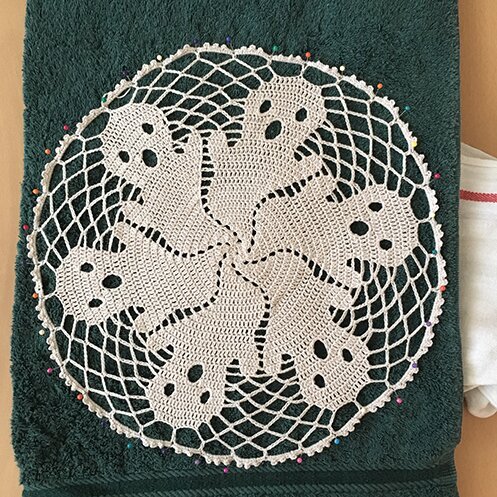
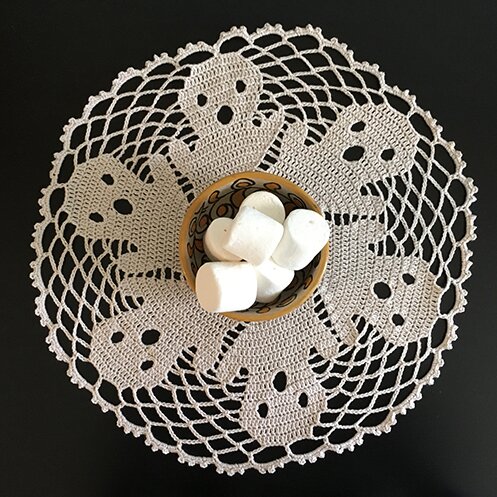
A ghost­ly doily! :O

I like to call it the Casper-go-round — it’s got the per­fect Casper head-shape!

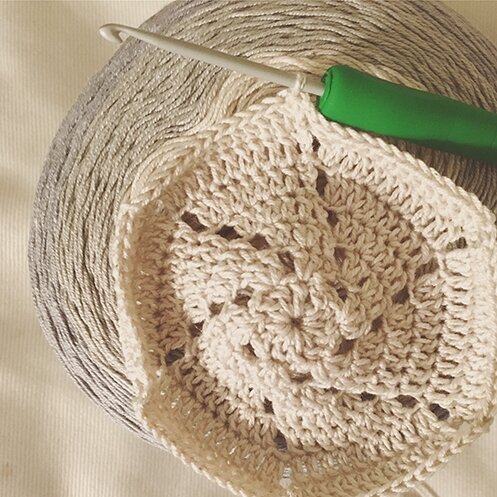
My BFF loves all things Hal­loween, so I’m think­ing she will enjoy this even when it’s not Hal­loween. (and she does­n’t read my blog, so she won’t know this is com­ing her way. shhh.) This bril­liant (free!) pat­tern is called “Boo” by Mar­sha Glass­ner on Rav­el­ry. The pat­tern calls for a lighter thread, but for the Red Heart yarn I used a 2.5 mm hook.

With 50/50 cot­ton and acrylic con­tent, the yarn was smooth and soft to work with and has great drape. While I’m try­ing my hands on it with the doily I’m think­ing it would be great for a garment.

It has excep­tion­al yardage — 1100 yards per cake (for under $12 CAD!). I used less than half of the cen­tre beige sec­tion for a 13″ doily, with the “West­ern” colour­way because I’m par­tial to mut­ed colours, but the yarn also offers oth­er colour com­bi­na­tions that are more bright and cheer­ful. It would be great for shawls, cardi­gans, even a tod­dler’s dress, with all that yardage!

Because it is a lace pat­tern it was nec­es­sary to block, which I’m not too famil­iar with. But I did get some tips from a knit­ting cir­cle I was a part of in the sum­mer, so I gave that a try, and I thought it would also be a good way to test out a dif­fer­ent aspect of the yarn for this review. 

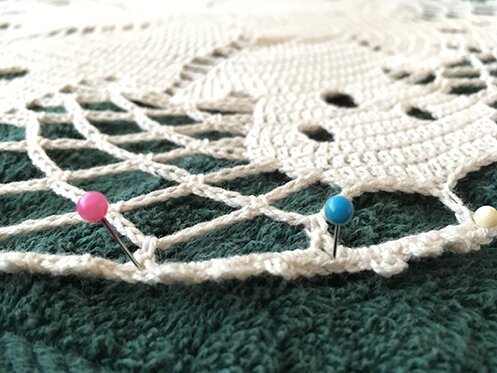
So first, I soaked a hand tow­el and wrung out the excess water. Then I rolled the doily in the tow­el and added more water to it, then care­ful­ly pressed the excess water out (but care­ful not to wring, I was told). Then I laid the doily on a fold­ed large tow­el (the plushi­est I have, because I don’t have block­ing mats), and stretched and pinned it to shape.

It only took sev­er­al hours to dry. Because of the cot­ton con­tent of the yarn, it most­ly held its shape after unpin­ning. It did start to spring back a tiny bit, I guess because of its acrylic con­tent (or maybe I was stretch­ing it too much), but I think for this pat­tern it’s fine for it to shape-shift a lit­tle :) I was think­ing if it con­tin­ues to lose shape I can also press it with an iron under a tow­el, which I had done with acrylics before. 

Per­fect under­neath a can­dy dish! Stay Puft would be proud :D

With the rest of the yarn I’m going to start on a cro­chet pullover pat­tern that I’ve been eye­ing for a long time. It’s going to take a while… but will sure­ly share when it’s done!

Be sure to check out Yarn Cana­da’s huge selec­tions of yarn, I always think it’s pret­ty incred­i­ble that they offer free ship­ping on orders over $45 or flat rate of $5 (with­in Cana­da). It’s also pret­ty con­ve­nient when I have such short­age of time these days… too convenient…

Hap­py November!


*Dis­claimer: I received prod­uct from Yarn Cana­da to write a review of the prod­uct; the opin­ions expressed on this blog are entire­ly my own.


this week’s awesome finds

Fall is the sea­son for curl­ing up with a good mug of tea wrapped in a wool blan­ket with wool socks on and craft­ing :D 

Love­ly ear­ring orga­niz­ers, so handy and they look easy to make. From Ole­an­der & Palm.


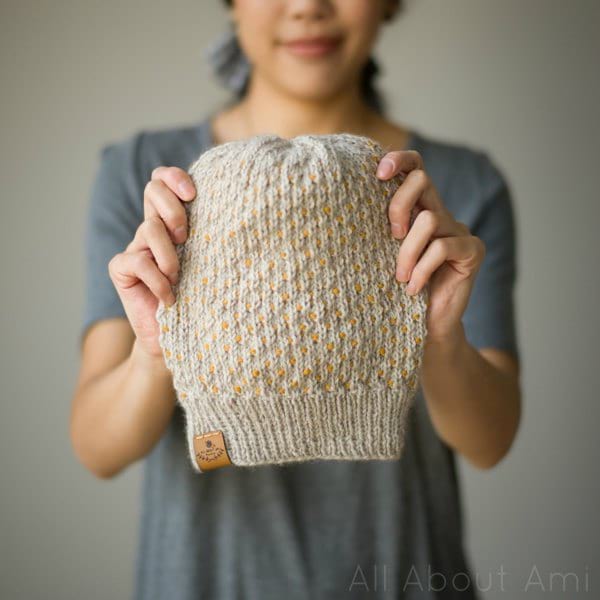
This reminds me of those can­dy dots! Sweet hat pat­tern by All About Ami.


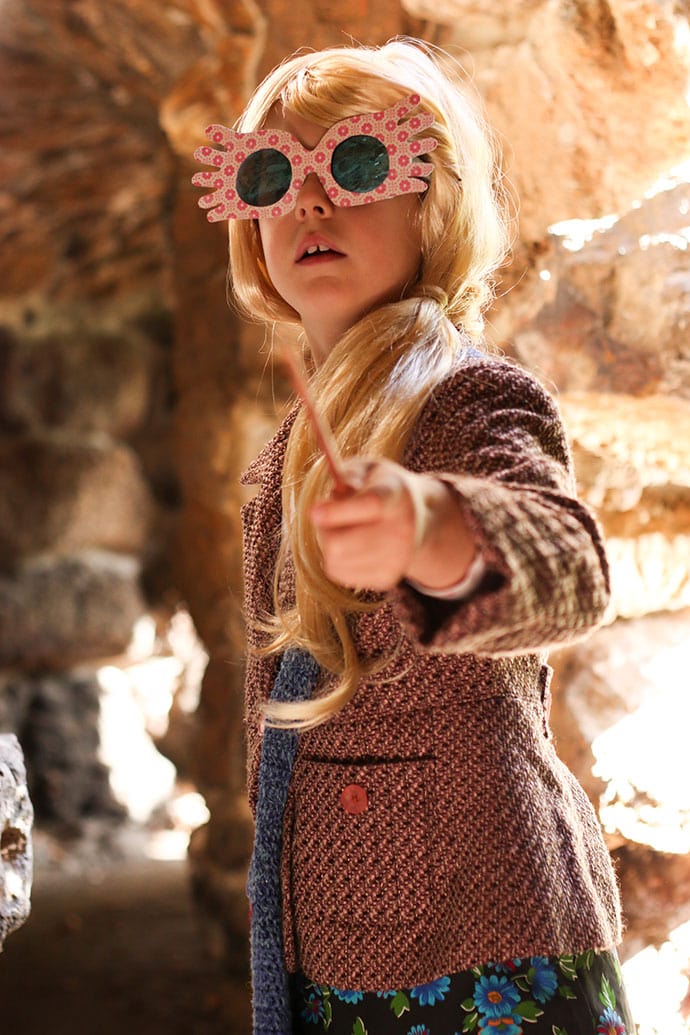
I love Luna Love­g­ood. Tuto­r­i­al to craft her fab specs at My Pop­pet.


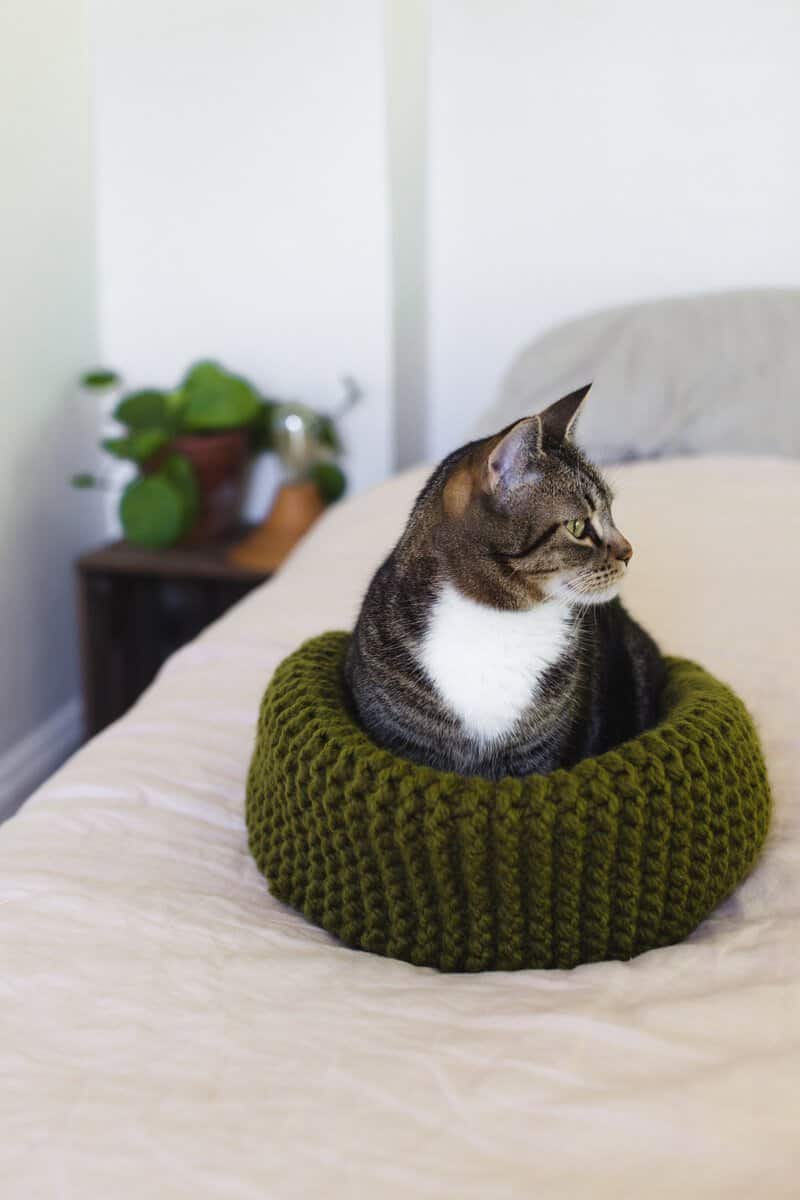
If I have a cat I would make this cat bed. If I were a cat I would love this cat bed. And it’s actu­al­ly just a garter stitch rec­tan­gle, much like knit­ting a scarf! Best first project. From A Beau­ti­ful Mess


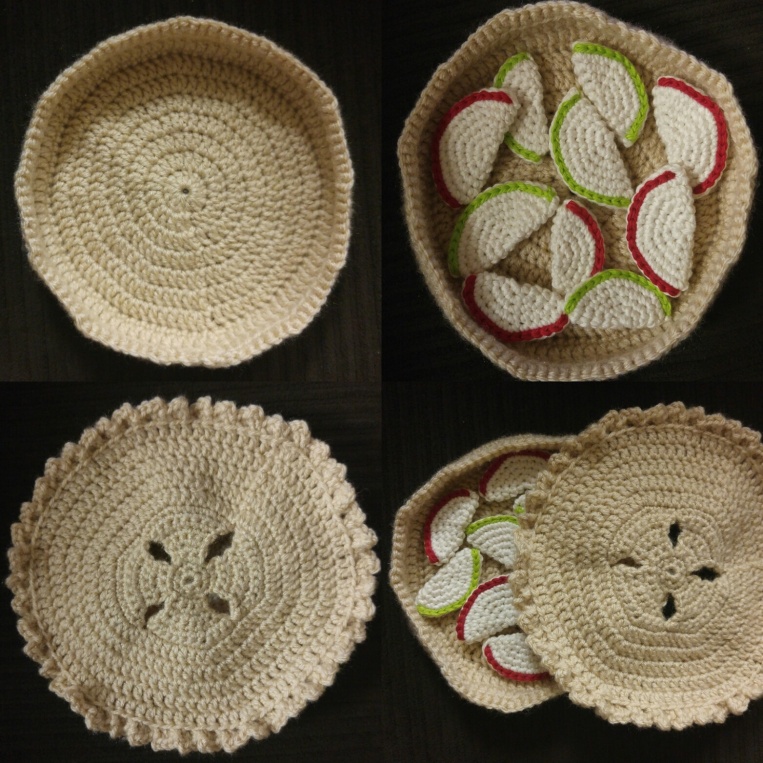
Fall bak­ing! :D Bril­liant play food set pat­tern from Mama Bice Makes.


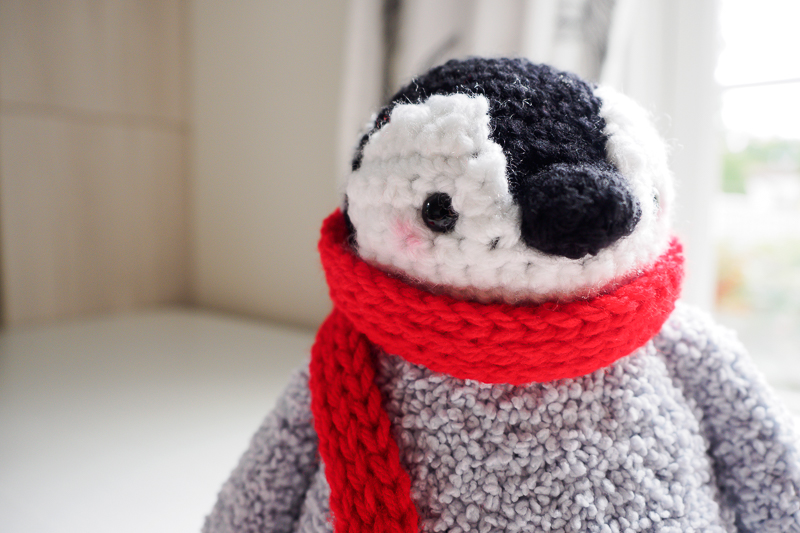
I espe­cial­ly love the ver­sion with the boucle yarn! Plush pen­guin pat­tern from One Dog Woof.


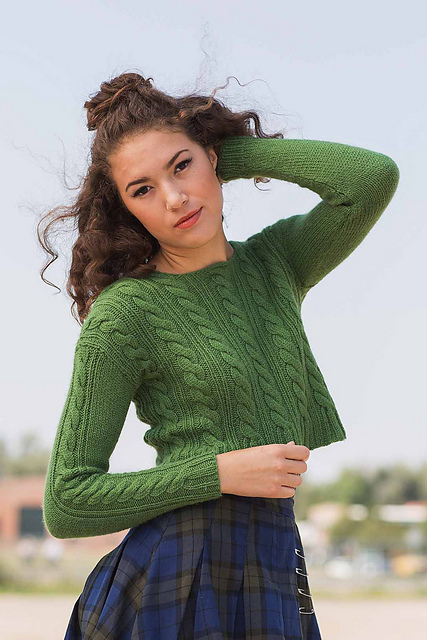
Check out this epic fish­er­man sweater! And it’s a free pat­tern! From Hope­ful Hon­ey.


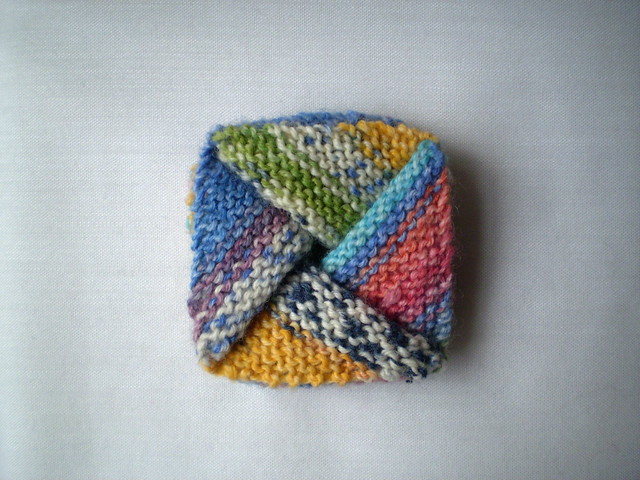
Mag­ic origa­mi purse. Can make it with love­ly bits of sock yarn, and appar­ent­ly things don’t fall out of it! Will have to give it a try. From Frankie Brown on Rav­el­ry.


Hap­py Octo­ber! :D


fab kimono

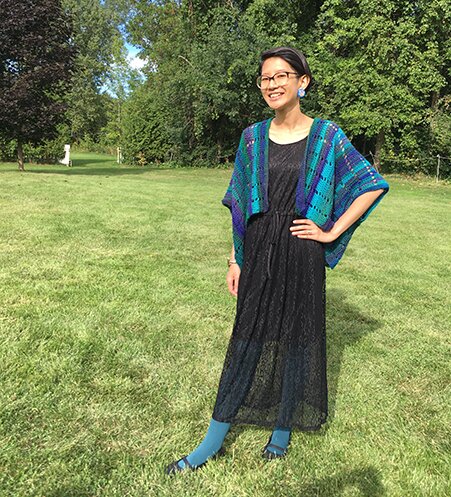
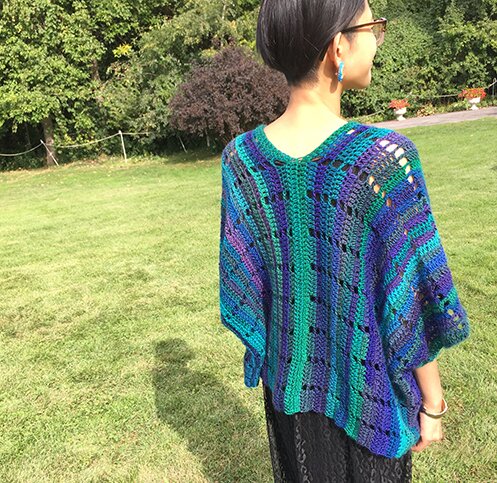
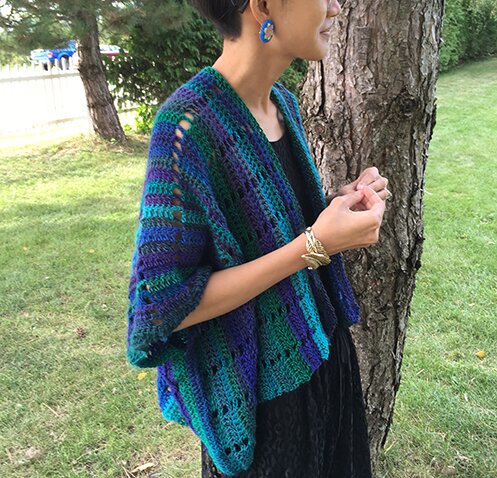
A quick kimono style cardigan/shrug I pulled togeth­er to wear to my cous­in’s wed­ding this week­end :) Can’t come up with a more poet­ic name, but thought it looks pret­ty fab (if I do say so myself), so fab kimono it is :D

I had quite a bit of left­over Red Heart Unfor­get­table after mak­ing a scarf as a gift, so I bought anoth­er skein to make this. It’s cropped length because I was going to wear this long black dress and want­ed some con­trasts in style. But it’s easy to make longer if you’d like.

It’s cro­cheted from side to side, mak­ing both front and back pieces at the same time (so there’s no seam­ing in the mid­dle!). It is then fold­ed in half with just 2 short sides to seam at the end.

With autumn in the air I think this is a good lay­er­ing piece for wear­ing with sum­mer dress, t‑shirt, long sleeve shirt, or even but­toned up col­lared shirt.

Size: 

Length (shoul­der to low­er edge) — 17″

Around — 60″

Gauge:

16 st = 4.5″

I used:

3 skeins of Red Heart Unfor­get­table in Dragonfly

6.5 mm hook

Tapes­try needle

Small­er hook to weave in ends with

Pat­tern:

Left front/back:

Row 1: fdc 126 (see instruc­tion for foun­da­tion dou­ble cro­chet or fdc here)

To increase length, add 16 fdc for every 4.5″.

Row 2: ch 3 (counts as 1 dc), dc in next 5 dc, ch 2, sk 2 dc, *dc in next 6 dc, ch 2, sk 2 dc* repeat from * to * to end, dc in last 6 dc. 

Repeat row 2 until piece mea­sures 15″ (approx. 26 rows).

Next row: dc in every dc and 2 dc in every 2 ch sp. 

Split right front:

Next row: ch 3, dc in next 62 dc, fdc 63 and leave the remain­ing dc from pre­vi­ous row unworked.

Repeat row 2 of left front/back until piece mea­sures 15″ from split. 

Last row: dc in every dc and 2 dc in every 2 ch sp. Fas­ten off.

Assem­bly:

Fold piece in half so that the split is per­pen­dic­u­lar to the fold line. The fold line will be the shoulders. 

Sew side seam togeth­er by attach­ing yarn at the low­er edge, match­ing stitch­es on front and back pieces, sew togeth­er the next 30 dc. Fas­ten off. Repeat on the oth­er side seam. Weave in ends.

Wear and be fabulous!


this week’s awesome finds

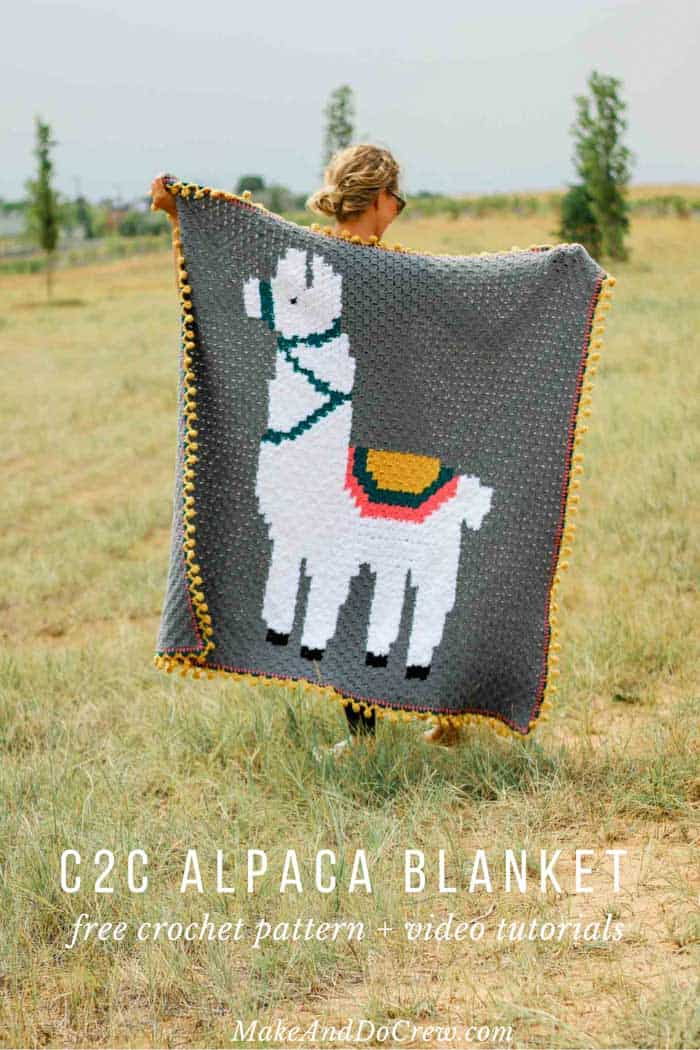
Llama/alpaca love con­tin­ues with this adorable blan­ket, I need to make this! From Make and Do Crew.


Also this hook-keep­ing lla­ma! A paid pat­tern by Irene Strange on Rav­el­ry.


I spot­ted this sweater at a local yarn shop, Yarns Untan­gled, and was instant­ly in love, then learned that one of the staff wrote the pat­tern! This will be my next project, with the pink hand-dyed wool that I’ve been sav­ing for a good project for the last cou­ple of years. Paid pat­tern by Nicole Tavares on Rav­el­ry.


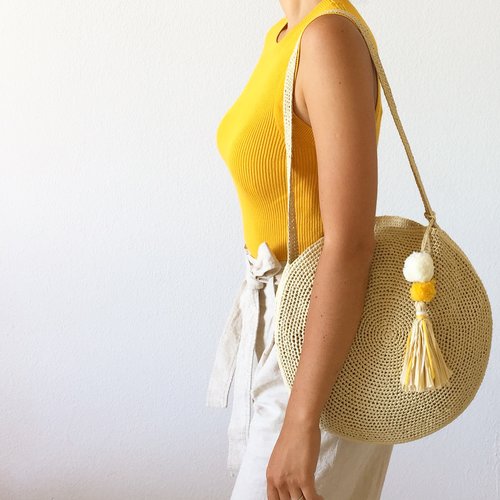
Sim­ply a great bag, I espe­cial­ly love it with the pom poms! From Life is Cozy.


These are bril­liant. Flo­ral hoop ear­rings from How Did You Make This.

Hap­py last week of August! Sweater weath­er is just around the cor­ner! :D


lately

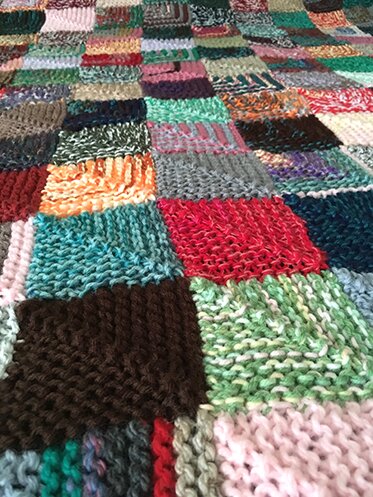
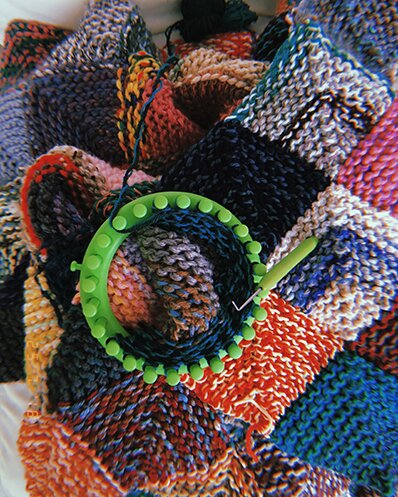
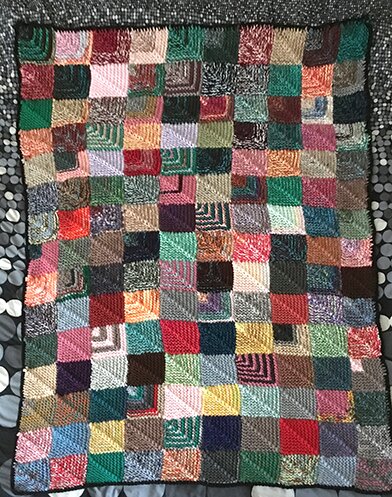
It is granny square day today! So I thought I’d take the oppor­tu­ni­ty to final­ly take a pic­ture of my fin­ished mitered square blan­ket :D it’s loom-knitted!

150 squares! It took about 2 months to make, it’s the biggest blan­ket I’ve ever made, 42″ by 63″!

I made a series of tuto­ri­als if you’re inter­est­ed in mak­ing your own! (a dish cloth / pothold­er with four squares is a fun make too if you don’t want to com­mit to an entire blanket)

After the blan­ket and the c2c top in my last post, I found a pat­tern that would be per­fect for the yarn I won at the Yarn Hop raf­fle, from Yarns Untan­gled, in “untan­gled” colourway :)

The pat­tern is Retro Sol­stice Eclipse by JL on Rav­el­ry. And look! I’m knit­ting in the round! (I’m always kind of afraid of pat­terns that knit in the round, but once I get start­ed I find it actu­al­ly eas­i­er than knit­ting flat) I also fig­ured out why my last in-the-round sweater had this weird gap at the joint — my stitch mark­er was too big. That seemed like a real­ly sil­ly mis­take. But now I have these sleek stitch mark­ers that came with the raf­fle prize so it’s all going smoothly :)

Speak­ing of the Yarn Hop, since we’ve had so much fun the day of, we’ve been meet­ing through­out the sum­mer! Here we were enjoy­ing the park…

And here were were at Spin Me a Yarn, who gra­cious­ly host­ed our meet­up last week!

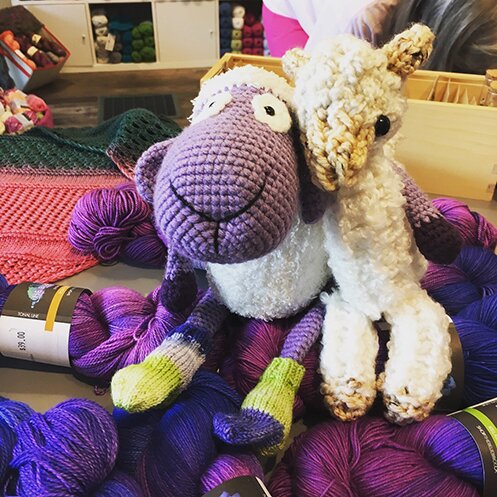
Can you spot Albert the Alpaca shar­ing a chair with me? :D Albert final­ly got to meet Lam­bert, the res­i­dent lamb at the shop, look­ing spiffy with sock in his own “Lam­bert” colourway.

If you live in Toron­to and would like to join us at our mee­tups be sure to fol­low The Great Toron­to Yarn Hop on Face­book!

Hope you’re enjoy­ing sum­mer and much crafting!


8‑bit

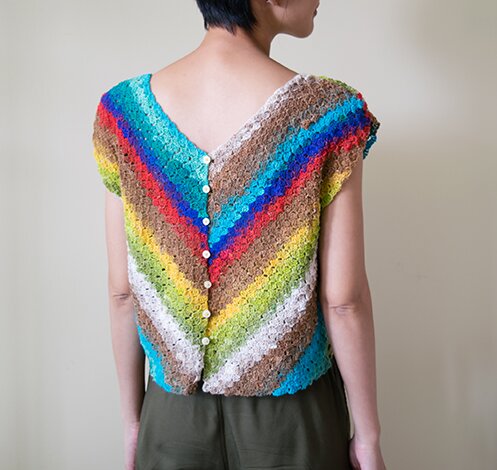
So ear­li­er in the sum­mer I start­ed writ­ing a num­ber of cro­chet pat­terns that I was hop­ing to com­pile into an e‑book for sale. But the sum­mer is quick­ly going by, and I’ve had more free­lance work than expect­ed (which is a good thing). So then I real­ize I don’t real­is­ti­cal­ly have the capac­i­ty to pat­tern-test, cal­cu­late for dif­fer­ent sizes, etc. in order to make the pat­terns sell-able. So! I’m just going to con­tin­ue in this blog’s tra­di­tion in shar­ing pat­terns for free! :D It’s just that it will require some creative/math work if you’re not mak­ing the exact same size I’m wear­ing. But that also means lots of rooms for cus­tomiza­tion! This is the first of the few pat­terns I was work­ing on :)

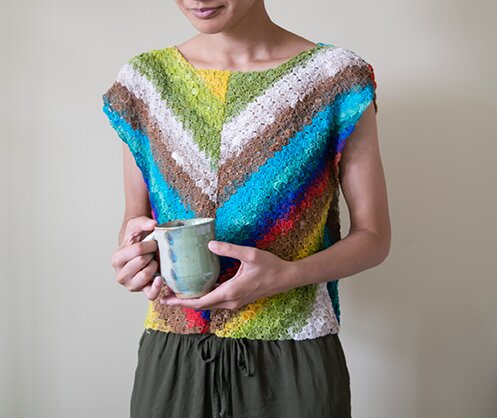
I’ve always want­ed to try using cor­ner-to-cor­ner (c2c) cro­chet to make a top. My first idea was a cozy sweater with a dinosaur on it (I might still do that, we’ll see!), but all these heat waves we’ve been hav­ing are not con­ducive to cozy sweater-mak­ing, so I thought I’d try with a lace weight yarn for a breezy sum­mer top. 

The “tiles” made in c2c cro­chet reminds me of colour­ful pix­els, and Nin­ten­do video games of my child­hood, and sum­mer vaca­tion spent play­ing these games. So I called it “8‑bit”.

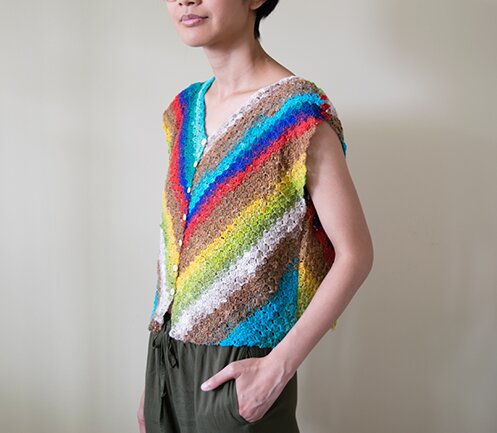
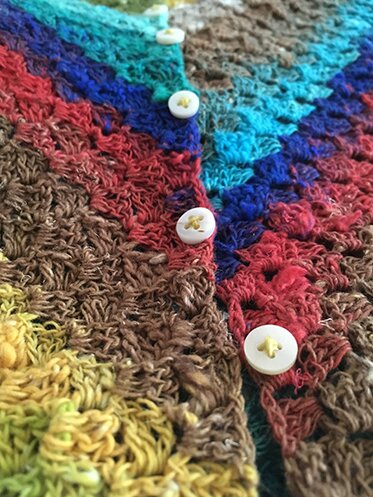
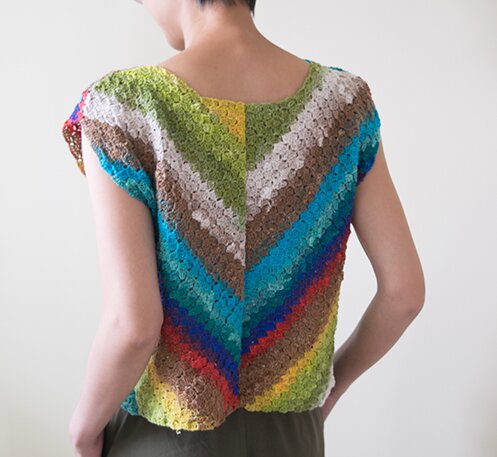
It can be worn both ways, either with the but­tons on the front, or on the back!

But­tons in the front makes it a cardi­gan, which can be paired with a spaghet­ti strap sum­mer dress!

The top is made in 4 pieces then sewn togeth­er. So you can also sew the v‑neck pieces togeth­er and place the but­tons on the round-neck side.

There is also some shoul­der shap­ing so that the cap sleeves will fol­low the shoul­ders rather than stick out. I thought that goes bet­ter with the gen­tle, del­i­cate feel of the lace weight Noro Taiyo.

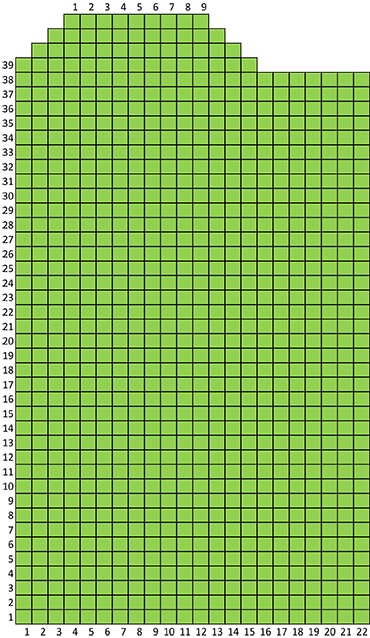
Size: Bust 36″, arm­hole depth 7″, neck open­ing width 8″, total length 17″

Size is easy to adjust as you go with the c2c cro­chet stitch. There will be tips for adjust­ment through­out in ital­ics.

Gauge: 5x5 “tiles” = 2“x2”

Mate­r­i­al: 

3.5 mm hook, and the small­est hook you have for weav­ing in ends (mine is 1.5 mm)

Lace weight yarn about 1100 yards (I only used a bit of the sec­ond skein of Noro Taiyo Lace, one skein of this is over 900 yards), larg­er sizes will require more yarn

Sev­en 1/2″ buttons

Sewing nee­dle

Cor­ner-to-cor­ner cro­chet: this pat­tern requires famil­iar­i­ty with c2c cro­chet. If you’ve nev­er used this stitch before, no wor­ries! It’s quite easy and I find it rather med­i­ta­tive too. There are tons of very detailed tuto­ri­als out there. I learned from the pho­to tuto­r­i­al by One Dog Woof, take a look and use some scrap yarn to prac­tice, and I’m sure you’ll be ready in no time!

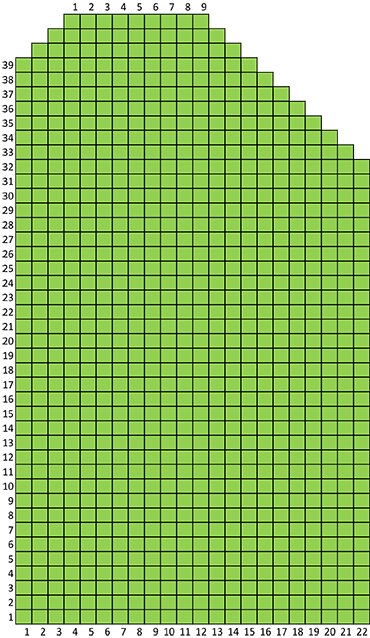
Charts:


Pattern/recipe:

V‑neck piece (make 2):

Start from the low­er left cor­ner, tile 1. Con­tin­ue through chart. Chart is read diag­o­nal­ly. Fol­low this excel­lent pho­to tuto­r­i­al by One Dog Woof if you need some help!

When there are 22 tiles on both edges, begin decreas­ing on the right edge by work­ing 1 sl st through each dc just made, and sl st in turn­ing ch, then ch 3, 3 dc in turn­ing ch, and con­tin­u­ing on.

For a larg­er gar­ment, con­tin­ue work­ing more tiles until desired width before decreas­ing. To deter­mine “desired width”, decide on fin­ished bust mea­sure­ment you’d like for the top. Say 40″. Divide it by 4, which is 10″. Then con­tin­ue c2c cro­chet until both edges are 10″ long before decreas­ing on the right edge. Note the num­ber of tiles you have at the bot­tom edge when you reach desired width. You will need to have the same num­ber of tiles on the bot­tom edge of each of the pieces.

Con­tin­ue increas­ing on the left edge but decreas­ing on the right edge until the left edge has 37 tiles. 

For a longer gar­ment, con­tin­ue increas­ing on the left edge until desired length. Note the num­ber of tiles when you reach desired length.

Shape shoul­der:

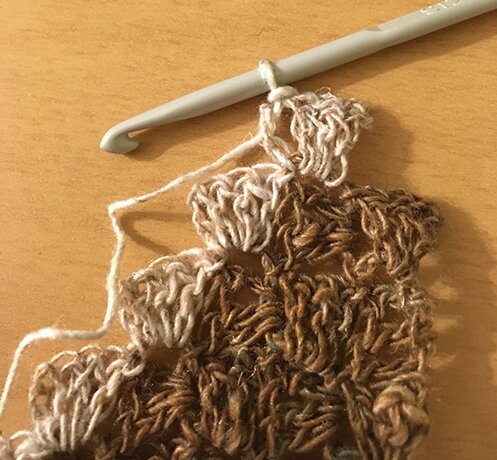
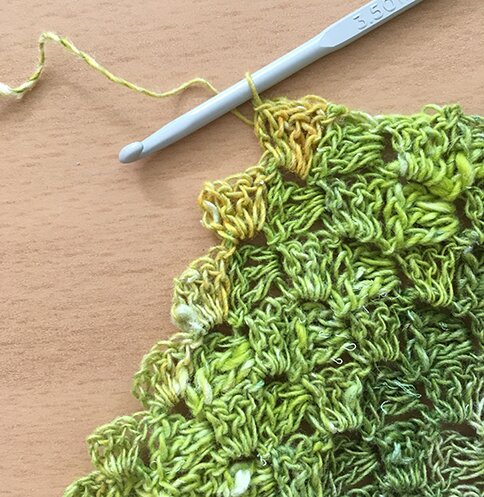
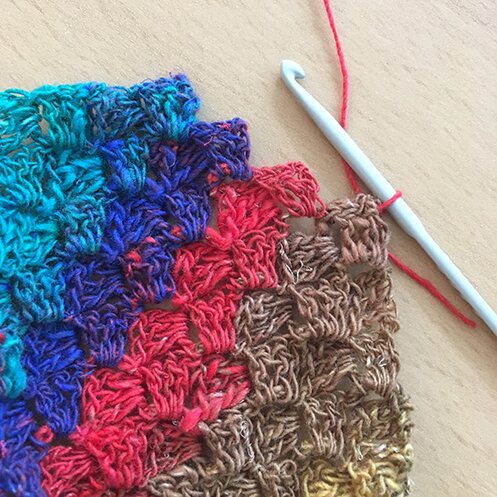
Begin decreas­ing on the left edge after the 37th tile (or desired length). Work one row towards the right edge, then one row towards the left edge. After cro­chet­ing the last tile on the top edge, work anoth­er tile on top of the pre­vi­ous row (I placed an addi­tion­al white tile on top of the brown tile of the pre­vi­ous row).

Then, as usu­al, turn, sl st in next 3 dc, sl st in turn­ing ch.

And con­tin­ue down the row.

Repeat the above steps for shoul­der shap­ing until shoul­der resem­bles the chart. 

(We’re of course not going to leave the shoul­ders jagged! We’ll fill in the cor­ners as we sew them togeth­er later.)

Then, decrease on both the top edge and the right edge until there are 9 tiles at top edge. End with work­ing loop on the top edge, don’t fas­ten off.

If you have increased in the bot­tom edge, increase the same num­ber of tiles at the top edge.

Neck edge:

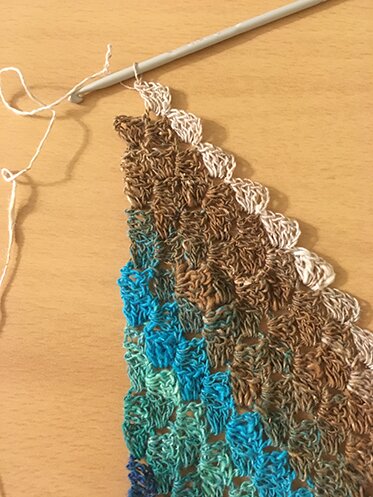
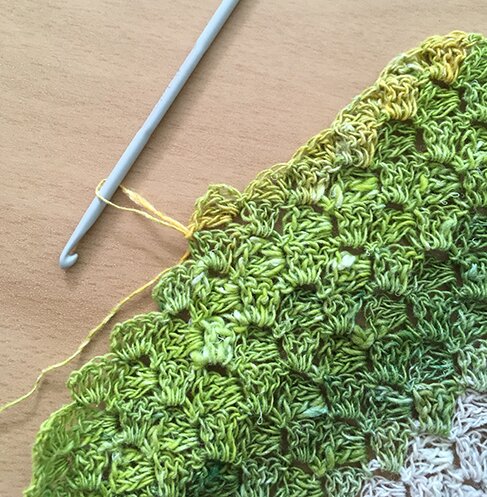
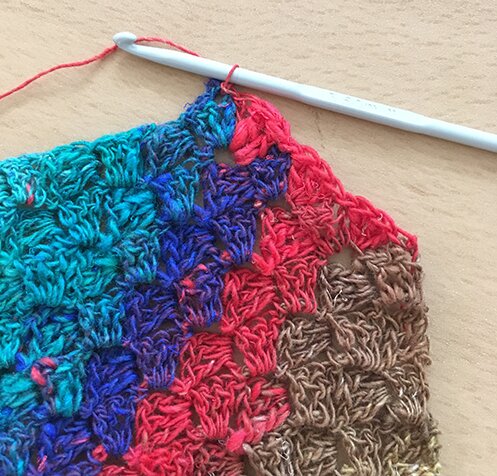
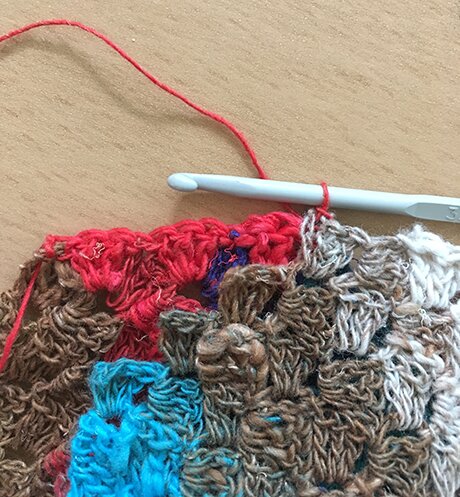
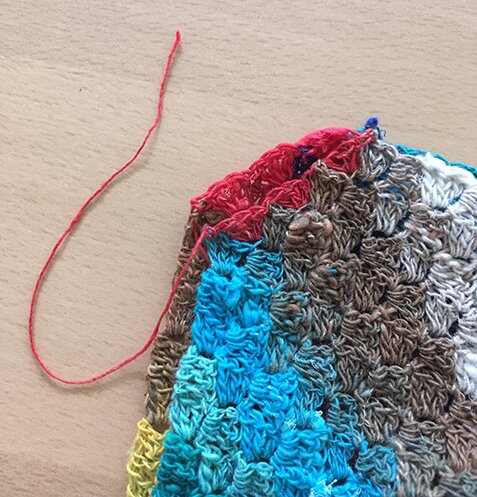
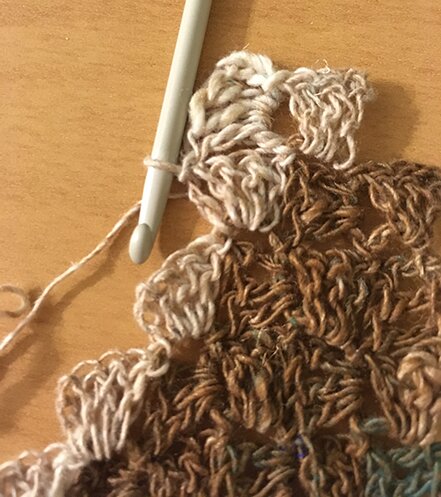
*Work 3 dc in the cor­ner between first two tiles (where the low­er left cor­ner of the tile the work­ing loop is on meets the top right of the next tile), sl st in next turn­ing ch* repeat from * to * until end of row (the neck edge is shown in the next pho­to). Fas­ten off.

Round-neck piece (make 2):

Fol­low pattern/recipe until neck edge. (mak­ing the same increas­es if you’ve made them in the v‑neck pieces.)

*Work 3 dc in the cor­ner between first two tiles, sl st in next turn­ing ch* repeat from * to * 3 more times, ch 3, 3 dc in turn­ing ch.

Con­tin­ue in c2c stitch pat­tern, decreas­ing on both edges until there final tile is made, fas­ten off.

Sew halves together:

Sew togeth­er the cen­tre seams of the two round-neck pieces.

Seam­ing shoulders:

With wrong side fac­ing, attach yarn to low­er edge of shoul­der on one piece.

*Work 3 dc in cor­ner between the first two tiles, sl st in next turn­ing ch* repeat from * to * until end of row, don’t fas­ten off.

With right sides togeth­er, place shoul­der of v‑neck piece to the shoul­der of the round-neck piece just com­plet­ed, match­ing both pieces. With work­ing loop still attached to the round-neck piece, sl st in top of shoul­der of v‑neck piece.

*Work 3 dc in cor­ner between the first two tiles, sl st in next turn­ing ch* repeat from * to * until end of row, leave a long tail for sewing, fas­ten off. 

Sew entire shoul­ders togeth­er (the slopes we just worked on and the top edges). Repeat on the oth­er shoulder.

The rest of assembly:

With wrong sides fac­ing, sew side seams togeth­er. For my top I count­ed 17 tiles down from shoul­der for 7″ in arm­hole depth, then start­ed sewing to the bot­tom edge. If mak­ing a deep­er arm­hole, mea­sure the desired depth and count the num­ber of tiles with­in the measurement.

But­tons:

Sew but­tons on one edge where the turn­ing ch on the edge will form nat­ur­al but­ton holes, which is every 4th tile.

Weave in all the ends with a tiny hook, and we’re done! :D
Leave a com­ment if you have any ques­tions or need clar­i­fi­ca­tions! Hap­py crocheting!
 

this week’s awesome finds

Beau­ti­ful cor­ner to cor­ner cloud blan­ket and chart from Kikalite.


If I con­jure up enough patience, I will make these. Bead­ed ear­rings how-to from How Did You Make This?


We nev­er grow tired of lla­mas <3 Video tuto­r­i­al from Picot Pals.


Also from Picot Pals, Ice­land pop­pies! They’d make great brooches would­n’t they?


These made from, can you guess it? — hot glue sticks! Tuto­r­i­al from AdTech, the com­pa­ny that makes the glue sticks.


This one’s a planter! <3 paid pat­tern by Hel­lo Hap­py on Rav­el­ry.


Hap­py Thurs­day, and have a love­ly week­end, everyone!


Lately

After a bit of fren­zy gear­ing up for the Yarn Hop, I’ve been qui­et on the blog late­ly, catch­ing up on oth­er things…

My niece and nephews have birth­days rel­a­tive­ly close to each oth­er, so every sum­mer we give them all their gifts at the same time — that way every­one gets to open a gift! :D

One of the gifts was a loom knit­ted dinosaur — when I first stum­bled upon it on the web I thought I had to make this! The pat­tern is by The Loom Muse

(The wood­en dinosaur is a gift from a dear friend :D) I find that with the extra small 12-peg loom the gauge is very loose, and I end­ed up hav­ing to weave a strand of yarn through all the stitch­es in every col­umn of knit­ting to pre­vent the stuff­ing from being vis­i­ble. Per­haps I will have to try using an even heav­ier yarn next time (I used extra bulky for this one). I’m still quite hap­py with how it turned out!

Anoth­er gift was an owl pup­pet, pat­tern also by The Loom Muse but only avail­able as a video. The pat­tern is for a stuffed owl but I ran out of yarn, so I left the bot­tom open and a pup­pet it is!

I love that it also has a tail! :D

And we’ve all met the alpaca! The mas­cot I loom-knit­ted for the Yarn Hop (because we were team alpaca). The pat­tern is also by the Loom Muse (it is a trea­sure trove of stuffed ani­mal pat­terns!). Here’s our fab­u­lous team in front of the won­der­ful Pur­ple Purl! (You can also kind of see the makeshift alpaca car­ri­er on my tote.)

Through­out the day alpaca got named Albert, inspired by Lam­bert at Spin Me a Yarn, anoth­er local yarn shop :D (you’ll find Lam­bert and his yarn adven­tures on this Ins­ta feed)

Here’s Albert at Yarn­som­ni­acs enjoy­ing the very soft yarn made by his friends.

As you can see we also made an alpaca sign to keep us humans from wan­der­ing off. The super cute tem­plate is from Picot Pals. Here he is at Knit-O-Mat­ic with every­one busy look­ing and crafting! 

And here we are at Pas­sionknit — note the beau­ti­ful wall of Cana­di­an hand dyed yarn on the right!

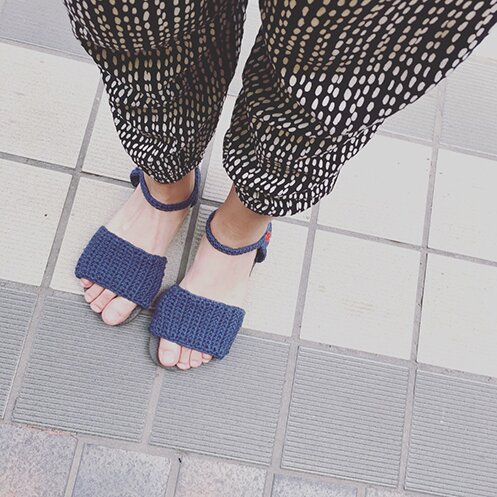
In oth­er news, I wore my cro­cheted san­dals out­side for the first time since mak­ing them last year (or even the year before?). I don’t know why I haven’t worn them. Wor­ried they’ll break I sup­pose. But it’s been so warm late­ly, I decid­ed to give them a go. It’s real­ly dif­fi­cult for me to find san­dals that don’t hurt my feet, so I haven’t bought or worn san­dals for like the past ten years, and always suf­fered from socks and sneak­ers no mat­ter the heat wave >_< 

So I wore these out on the street, walked around, took the sub­way and street­car, walked on the grass… and they’re real­ly com­fort­able! My sum­mer shoes prob­lem is solved! :D 

In case any­one’s inter­est­ed, they’re made with flip flop soles and worsted weight cot­ton, pat­tern is here.

And final­ly, I’m down to my last row of the mitered square blan­ket!! 

There will be 150 squares in total! And about 4 feet by 5.5 feet! I have been slow­ing down with mak­ing this though because inevitably I have to put it on my lap to knit and it’s been real­ly warm >_< def­i­nite­ly a win­ter project, for next time. But soon I’ll be able to show you the blan­ket with all 150 squares in all its glory! 

Until next time, keep on crafting!
 

today is the day! =(^・x・^)=
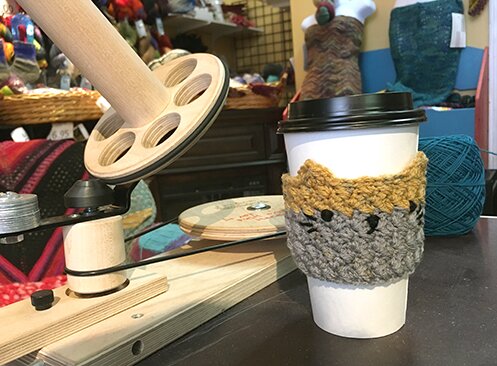
Today IS the day! The annu­al Toron­to Yarn Hop! Catur­day the cup cozy is chill­ing out at my neigh­bour­hood LYS Yarn­som­ni­acs, one of the many excit­ing stops on our grand tour of Toron­to LYS’s today!

A bunch of us (over 120 peo­ple, to be more pre­cise! :D) are yarn-craft­ing in pub­lic tran­sit and going around to dif­fer­ent inde­pen­dent yarn shops today while rais­ing funds for Sis­ter­ing, a 24/7 drop-in/­sup­port cen­tre for women who are home­less or pre­car­i­ous­ly housed. Last year we raised around $2700, which went toward much need­ed ser­vices such as pri­ma­ry health­care, coun­selling, sup­port groups and meal pro­gram (learn more about the event by read­ing my pre­vi­ous post here).

If you’re not able to phys­i­cal­ly come to the yarn hop this year, you can still join us (and help us reach our fundrais­ing goal of $3000!) by donat­ing to Sis­ter­ing through this link here, and in return I will send you the pat­tern for the Catur­day cup cozy (more pho­tos here), which is a pat­tern that I wrote for yarn hop par­tic­i­pants to cro­chet along. You can donate any amount and you don’t have to tell me how much or send me proof, just sim­ply make a dona­tion then email me at genuinemudpie@gmail.com to let me know, and I will send you the pat­tern in appreciation :)

Hap­py weekend!