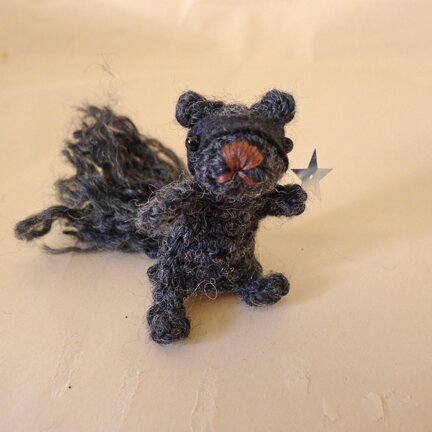
katsu, the ninja squirrel

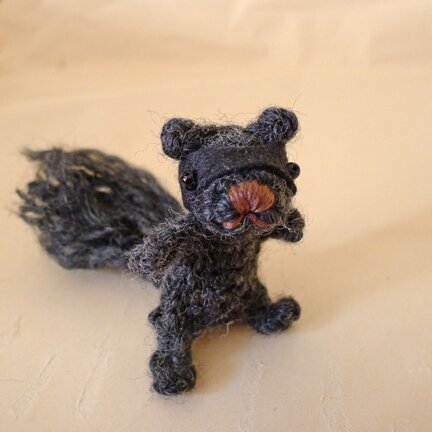
 Last week I men­tioned mak­ing a nin­ja squir­rle, Kat­su, for my sis­ter. Final­ly writ­ten up a pat­tern, so you can make your own nin­ja too! :D 

And unlike most squir­rel plush, Kat­su is grey. Because most squir­rels in Toron­to are actu­al­ly grey, char­coal, or black, (and on extreme­ly rare occa­sion, white!) but not brown.

Alright, here’s the pattern…

I used: 

Patons Shet­land Chunky — Charcoal

3.75mm hook

Bit of black craft felt — for the satchel

Two 4mm glass beads — for eyes

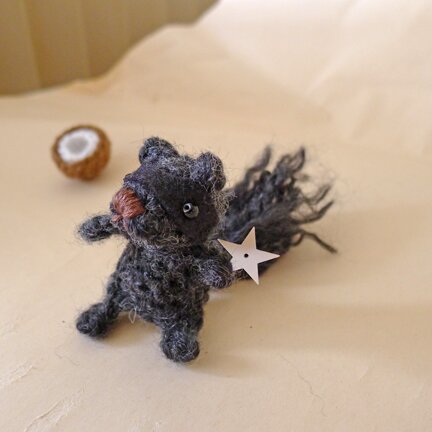
Star con­fet­ti — for nin­ja stars

Straight pins, tapes­try nee­dle, sewing nee­dle, black thread

Stuff­ing (I used bits of scrap yarn)

A note on yarn and hook: I used Shet­land Chunky because that’s what I have. Oth­er chunky or heavy worsted weight yarn would do. Or one could prob­a­bly sub­sti­tute with a worsted weight yarn, but may have to use a 3.5mm hook instead. I like to have a fair­ly tight gauge when cro­chet­ing plush, so it would keep its shape. 

A note on pat­tern: I like to cro­chet while watch­ing TV and I don’t like to count stitch­es. So what I start­ed to do is repeat­ing the same stitch (or set of stitch­es) around and around until the pieces gets to a cer­tain length. As such, the pat­tern is writ­ten in steps rather than in rows. I find that eas­i­er, and I hope it works for you too. But if you need clar­i­fi­ca­tion please feel free to leave a com­ment or con­tact me. I’d be more than hap­py to con­nect with you :D

Kat­su is very small (about 2.5 inch­es tall) so it helps if one is famil­iar with cro­chet­ing in the round on a small scale. The upside is, because he’s so small there are not very many stitch­es involved and so it does­n’t take very long :D

The stitch­es involved are:
chain (ch)
sc (sin­gle cro­chet)
sl st (slip stitch)
2 sc tog (work 2 sin­gle cro­chet stitch­es together)

Here it goes…

HEAD:

Step 1: ch 3, 5 sc in 3rd ch from hook, sl st in top of begin­ning ch.

Step 2: ch 1, [2 sc in next sc, sc in next sc] for 2 rounds. (So you’d see 3 rows of stitch­es alto­geth­er all around.)

Step 3: sc in each sc until piece mea­sures 1″ from beginning.

Step 4: 2 sc tog until there are 5 sc left, sl st in next sc, leav­ing a 6″ tail, fas­ten off.

Stuff head, weave tail in the 5 stitch­es around the open­ing and pull taunt, tie off.

*Head posi­tion: begin­ning of step 1 = nose, tie off = back of head

EARS:

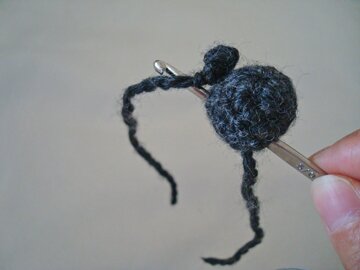
Leav­ing a 4″ tail, ch 3, sl st in 3rd ch from hook, leav­ing a 4″ tail, fas­ten off.

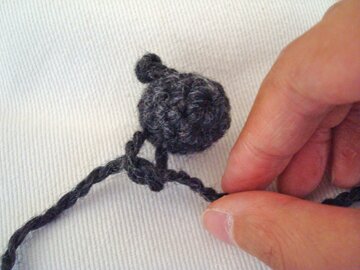
Posi­tion ears on head. Using cro­chet hook, pull tails, one at a time, through the head and out through adja­cent stitch­es at the bot­tom of the head.

Tie tails at the bot­tom of the head.

Repeat for the oth­er ear. 

MASK:

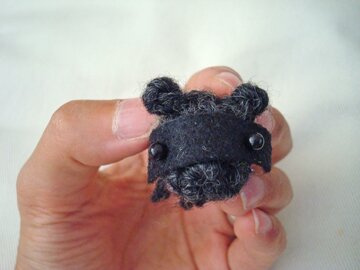
Cut a small strip of black felt and pin it to head with straight pins to deter­mine posi­tion of eyes. I hap­pen to have straight pins with black bead pin­heads, which make per­fect stand-ins for eyes.

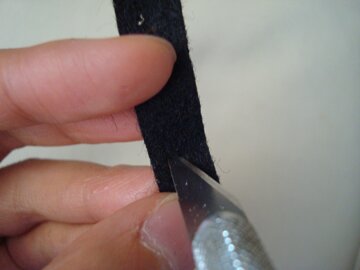
Take mask off head. Note where the pin holes mark the eyes, and cut the holes big­ger with an Exac­to knife.

Trim the mask between the eyes and bot­tom left and right to cre­ate a more mask-like shape.


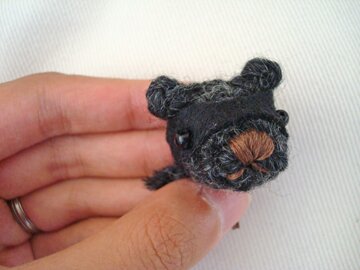
Sew mask to head, then sew on eyes and embroi­der nose/mouth. Head is com­plete! :D

 Now we move on to the body…

BODY, LEGS & ARMS: (all made in one piece)

Step 1: ch 10, sl st in 1st ch to form a ring. 1 sc in each ch around.

Step 2: sc in 1st sc, con­tin­ue to work 1 sc in each sc for 2 rounds. (So you’d see 3 rows of stitch­es altogether.)

Step 3: 2 sc in next sc, 1 sc in each of the next 4 sc, 2 sc in  next sc, then 1 sc in each sc until piece mea­sures 1 1/4″.

You’ll get a tube shape. Flat­ten the “tube” for the fol­low­ing steps.

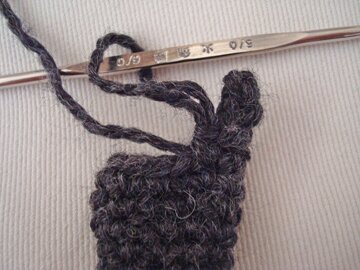
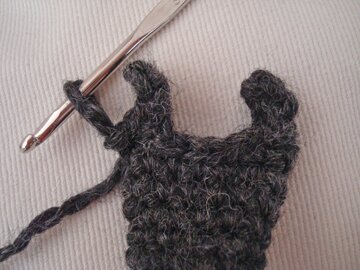
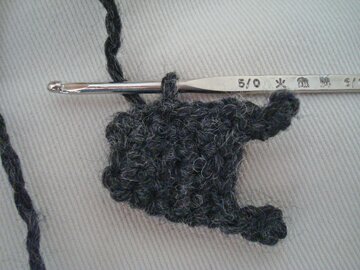
Step 4 (leg): ch 4, sc in 2nd st from hook, 1 sc in each of next 2 ch, sc in the stitch beside where the ch 4 of leg began.

Step 5: Cro­chet­ing through both front and back piece of body, sl st in each of the next 4 sc.

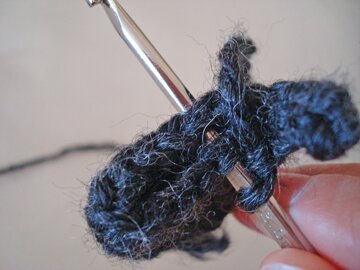
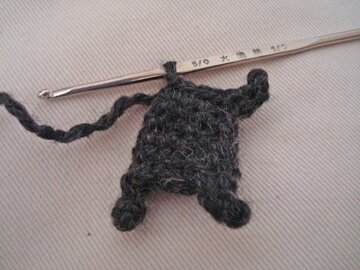
Step 6 (oth­er leg): ch 4, sc in 2nd ch from hook, 1 sc in each of the next 2 ch, sl st in next clos­est stitch of body.

Step 7: sl st up the side of body until 3rd last round before neck. 

(Begin arm) ch 4, sc in 2nd ch from hook, 1 sc in each of next 2 ch, sl st in next sc of body.

Step 8: sl st across neck open­ing in front lay­er ONLY. 

(Begin oth­er arm) ch 4, sc in 2nd ch from hook, 1 sc in each of next 2 ch, sl st in next sc of body. Sl st down the side of body until begin­ning of leg. Fas­ten off.

Stuff body through neck open­ing. Sew head to body.

Squir­rels can­not stand on their own with­out their big fluffy tails. To make tail:

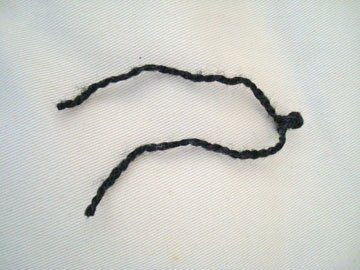
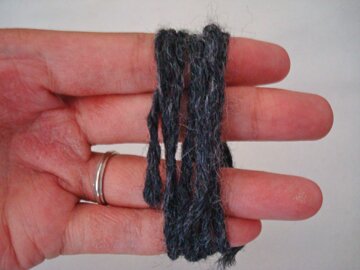
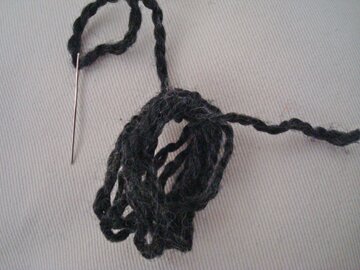
Wind yarn around 4 fin­gers 7 times.

Cut yarn. Take yarn loops off hand while keep the loops. Thread a nee­dle through one of the yarn tails while keep­ing the oth­er yarn tail free. Wrap yarn tail through the loops, like so…

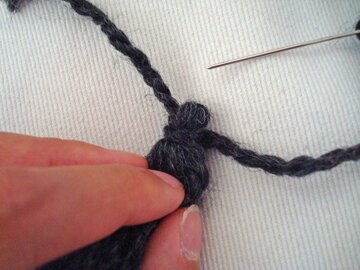
Bunch the loops togeth­er and wrap yarn tail around the bunch of yarn loops, like so…

Tie the two tails togeth­er. With the nee­dle still thread­ed, pin the tail to the squir­rel :D and secure with a few stitches.

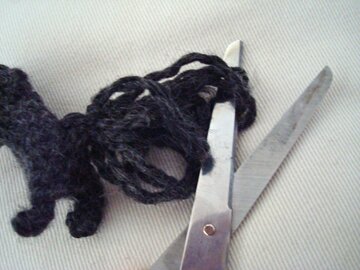
Cut all the yarn loops open. Fray the indi­vid­ual strands of yarn. Then gen­tly roll the tail between palms.

Tail com­plete! :D

To make Satchel, where nin­ja squir­rels keep their nin­ja stars:

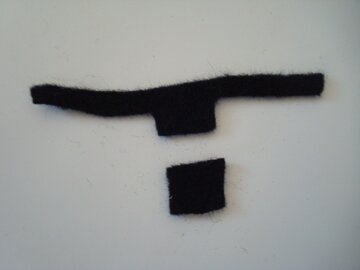
I cut from black felt these pieces…

Then I sewed 3 sides of the rec­tan­gle to the belt­ed part, leav­ing the top open. Then I just put it on Kat­su and pinned the back togeth­er with a tiny safe­ty pin.

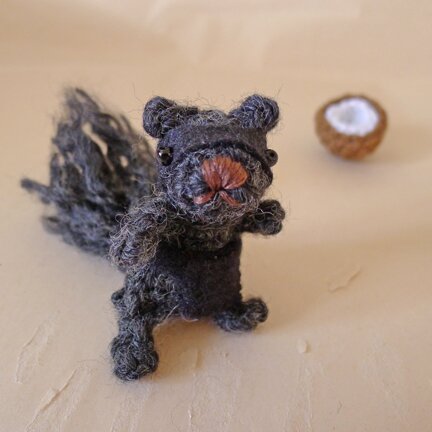
Here’s Kat­su with his satchel…

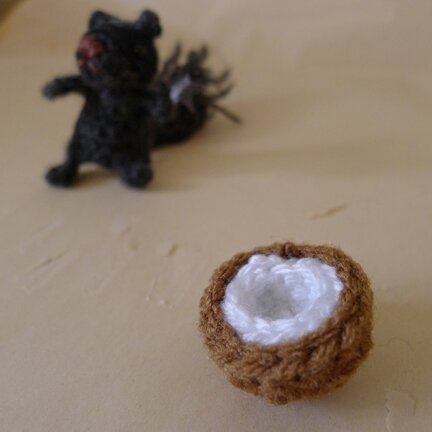
The pat­tern for the coconut, if you’re inter­est­ed, is part of the pina cola­da pat­tern. (Won­der what the coconut is doing here? Full sto­ry in last week’s post.)

Aim­ing at target…

Hi-YA!
 

ninja squirrel! (忍者松鼠!)
Meet Kat­su, the nin­ja squir­rel accom­pa­ny­ing my sis­ter to the land of cute things (aka Hong Kong)! 

My sis­ter is going to Hong Kong for a year to pur­sue a grad­u­ate degree in Eng­lish-Chi­nese trans­la­tion, which is why the title of this post is direct­ly trans­lat­ed to Chi­nese in hon­our of that :D

I decid­ed to make my sis­ter a gift to bring with her on her year-long jour­ney. One of the ways we con­nect, since she was born, is through mak­ing up sto­ries for our stuffed ani­mals. So I thought it would be fit­ting to make her a plush.

Kat­su’s sto­ry stems from some­thing that my sis­ter encoun­tered. My sis­ter would have been able to write this much more com­pelling­ly, since she has a degree in Eng­lish and cre­ative writ­ing, but my lit­tle descrip­tion here will have to do…

One day in the win­ter, my sis­ter came across some squir­rel tracks beside half a coconut shell in the snow. She found it strange but thought noth­ing of it until after school she took the bus home, and spot­ted through the bus win­dow some squir­rel tracks and half a coconut shell in the snow in a field just a block away from home.

Pret­ty eerie, she thought :S

That must have been a nin­ja squir­rel trav­el­ling with his coconut, I thought :D (“Shtealth!” the nin­ja squir­rel says, in my head)

I actu­al­ly did­n’t think of mak­ing a nin­ja squir­rel until one day I was hang­ing out in a park with two friends from school. We saw some dogs chas­ing a squir­rel and we joked that the dog would nev­er catch up to the squir­rel, and then spon­ta­neous­ly we start­ed tak­ing pho­tos of our­selves pos­ing as nin­ja squir­rels… (well, what do you expect from art therapists?)

One of the friends sug­gest­ed that a nin­ja squir­rel would car­ry his nin­ja stars in a satchel. The oth­er friend said that he should have a pouch like a kan­ga­roo. I think they would be hap­py to know that I’ve found a hap­py medi­um — a fan­ny pack! :D (I still call it a satchel though, because it’s one of my favourite words.)

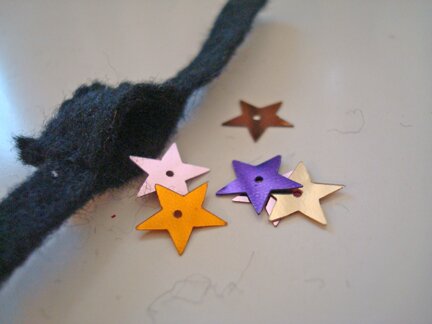
I can’t find four-point nin­ja stars but I have star con­fet­ti. There’s even a pur­ple one — my sis­ter favourite colour :D I stuffed them all into the satchel and put it around Kat­su’s mid-section.

But you can see his agili­ty bet­ter with­out his satchel.

Fierce!

I’m pret­ty proud of Kat­su, so I’ve writ­ten down the pat­tern and will share that next week. But for now, I’m going to write about what I’ve learned from my sister.

Though I have to say, isn’t it kind of sad that I don’t reflect much on how much I admire the peo­ple around me until there comes a time when I would­n’t see them for a while. Good thing my sis­ter is only going to be away for a year.

But I must write this, about how awe­some my sis­ter is. Even though she’s much younger, she taught me many things. 

I learned from my sis­ter how she humbly accepts her mis­takes and short­com­ings. She humbly acknowl­edges that she could have done bet­ter and does­n’t give her­self excuses. 

I learned from my sis­ter how she serves and helps oth­ers in all the ways she can even with­out any kind of acknowl­edge­ment or reward. She spend hours and hours every week vol­un­teer­ing at dif­fer­ent places. She only shares what she learns and the peo­ple she meets and maybe the chal­lenges she was con­cerned about, but she nev­er com­plains about the amount of work she’s been asked to do for free. 

I learned from my sis­ter how she sim­ply accepts things the way they are, and not com­plain. Her com­mute to school was a whop­ping four hours on stinky Toron­to bus­es with con­stant delays and I nev­er hear her com­plain about it (and you can prob­a­bly guess how much I despise and there­fore com­plain about bus­es…) Her school’s admin­is­tra­tion is extra­or­di­nar­i­ly dis­or­ga­nized (as I’m expe­ri­enc­ing it now, start­ing at the same uni­ver­si­ty next month…) but my mom does­n’t remem­ber the last time she complained.

I learned from my sis­ter her courage and deter­mi­na­tion. From get­ting her dri­ver’s license to speak­ing a new lan­guage to decid­ing to stay a year in Hong Kong. Leav­ing her com­fort zone. Doing what she feels is right even though it also feels tremen­dous­ly scary.

I learned from my sis­ter how she tru­ly cares about every­one around her. From the bot­tom of her heart she tru­ly, tru­ly wants them to do well and be hap­py, and she’s reli­able and keeps her promis­es when her friends need help.

My sis­ter is some­one who would look past all of my mis­takes and short­com­ings and love me with all her heart. I must say, I was rather mis­er­able and deranged in my youth and I have done some pret­ty thought­less and mean things toward her. But still, she wept with me when my heart was bro­ken and cheered with sheer joy when I cel­e­brat­ed all my milestones.

So today I cel­e­brate my sis­ter’s mile­stone, a new chap­ter in life, as she heads toward the future (indeed, Hong Kong is 12 hours ahead of Toron­to!) and embarks on a new excit­ing adven­ture in just a few hours. I am cheer­ing with sheer joy but also feel­ing in my heart a sad, sad void as I think about not see­ing her for a whole year, which is kind of unimag­in­able, but I’m sure we’ll deal with it just fine. And I’ll try not to com­plain :P 

Cheers, Cil! May your jour­ney be safe, hap­py, and full of bless­ings! Know that I’m very, very proud of you.


Al McFluffytail

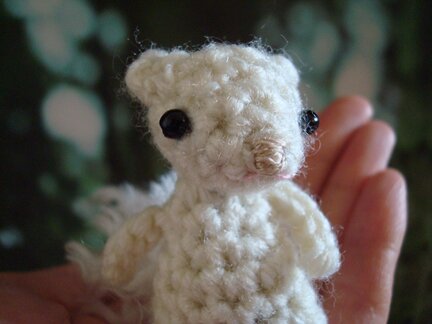
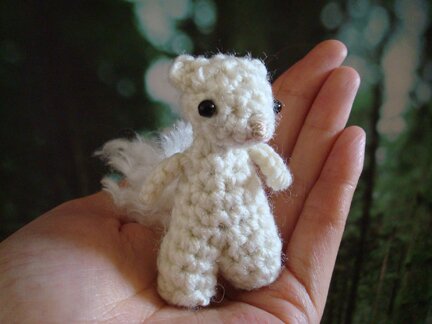
I decid­ed to make a white squir­rel for the plush swap I men­tioned yes­ter­day. I heard that Al McFluffy­tail the white squir­rel has safe­ty arrived in the UK! :D 

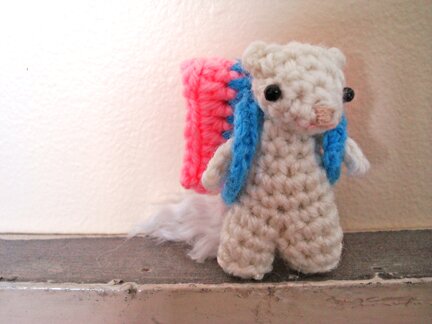
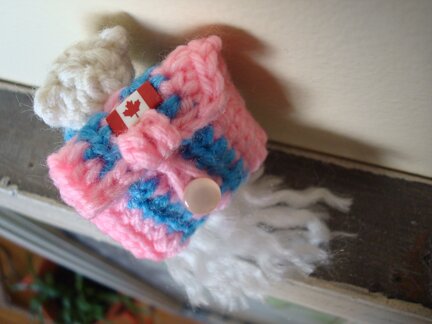
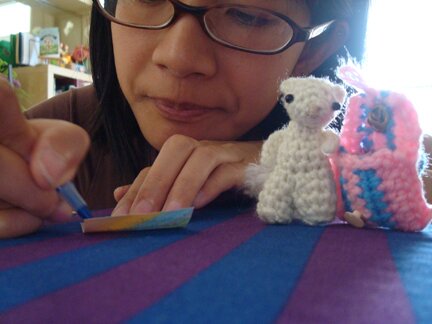
Al is a dis­tant (and cro­cheted) cousin of the leg­endary white squir­rel, Whitey McRedeyes of Trin­i­ty Bell­woods Park in Toron­to. Since the theme of the swap is “stars and stripes” (to cel­e­brate Inde­pen­dence Day), Al has a stripy back­pack. And like it is with all good Cana­di­an back­pack­ers, his back­pack proud­ly bears a Cana­di­an flag :D

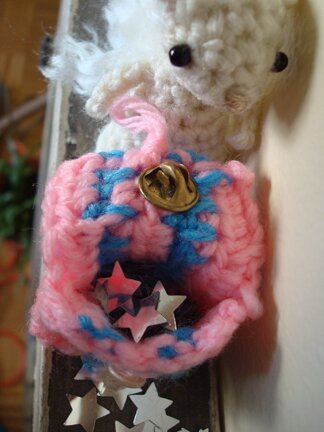
Inside his stripy back­pack, spilling its content…

Star­dust con­fet­ti! :D

Before send­ing him off at the post office, we did a pho­to shoot in front of my for­est backdrop.

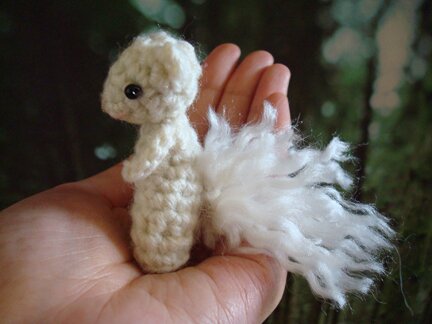
Liv­ing up to his fam­i­ly name — his tail is extra fluffy! :D

He dic­tat­ed the note for his new friend at his new home…

I was going to send him off in a tea tin, but then decid­ed against it, because of a ter­ri­ble men­tal image of the tea tin rolling away off the post truck and Al being lost on the road for­ev­er… >_< so in the end I used a box wrapped in an enve­lope. But I think Al rid­ing in a tea tin makes a good photo.

I’m so hap­py that Al has gone too a good home now. But we’ll still be think­ing about you always, Al McFluffytail! 


royal mail! :D

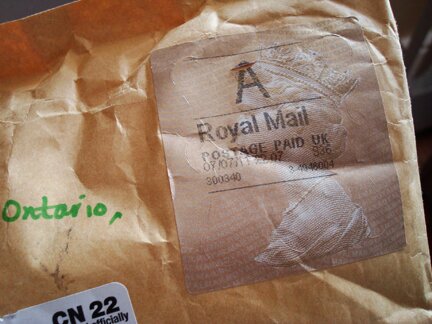
I par­tic­i­pat­ed in a plush swap recent­ly (to find out more about future swaps see this Face­book page) and my swap arrived from the UK, via Roy­al Mail! :D I always feel extra spe­cial when I receive mail from the UK and it says Roy­al Mail with the Queen on it :D

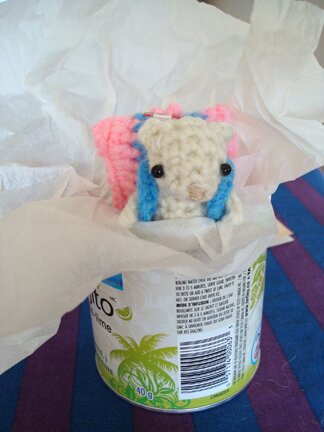
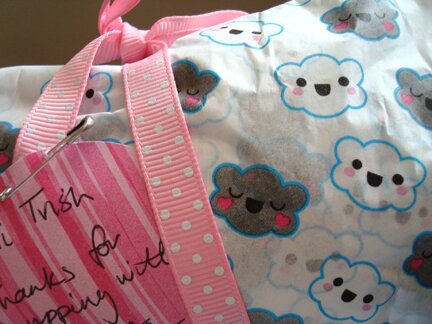
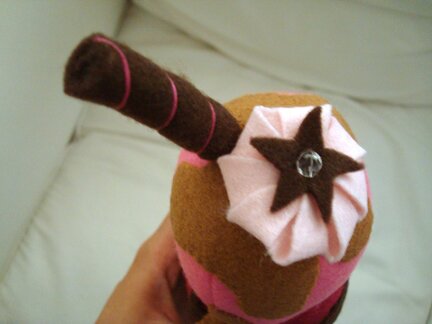
I was so so so excit­ed so I feel com­pelled to take step-by-step unbox­ing pho­tos… it was wrapped in this super cute cloud tis­sue paper, with a pol­ka dot pink rib­bon, and a real­ly nice note :D

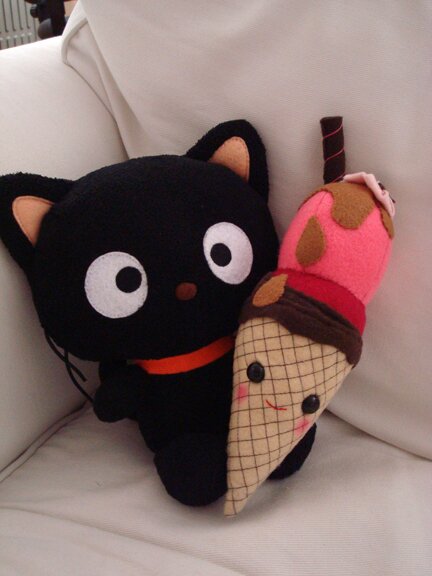
And it was… it was a plush ice cream cone!!! It’s total­ly some­thing I would have on my favourite / wish list on Etsy, some­thing I would total­ly buy if mon­ey isn’t an issue. It’s just what I always want­ed — a large felt plush dessert! It’s going to live on the couch with Fil­bert the Choco­cat! :D

I love, love, love the drip­ping caramel sauce and the stitch­ing on the cone! And check out the choco­late cook­ie roll and the pink mousse top­ping! :D

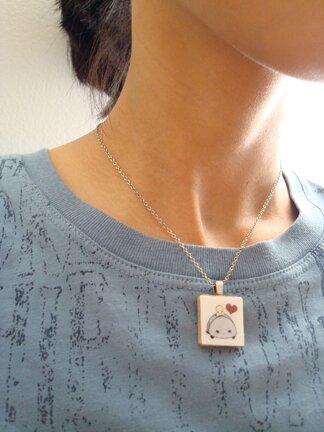
My swap part­ner even sent a toast­er charm with the pack­age! I wear it as a necklace. 

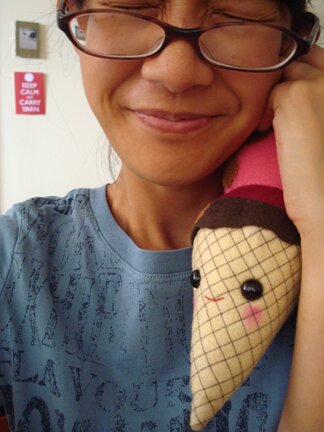
Ice cream hug!! XD (it was­n’t inten­tion­al but my “keep calm and car­ry yarn” post­card in the back­ground is quite fit­ting here :D)

I feel so spoiled by my swap part­ner — some­one I’ve actu­al­ly nev­er met in per­son! I’m so thank­ful for her gen­eros­i­ty and kind­ness, and I feel so very spe­cial receiv­ing the pack­age — what a gift it is! Think­ing about it has put a sil­ly grin on my face for the past few days.

I live in a met­ro­pol­i­tan city that is not known for the friend­li­ness or cour­tesy of its peo­ple. So when­ev­er a stranger offers a help­ing hand or a kind remark or even a smile it total­ly makes my day. 

No words can ful­ly express how grate­ful I am and how much the plush means to me. Thank you so much, Kate! :D

Tomor­row I’m going to show you what I sent over­seas for the swap, hope­ful­ly. I say hope­ful­ly because our inter­net con­nec­tion has been spot­ty. But the cable guy is com­ing to check things out tomor­row so I’m hop­ing that it will return to nor­mal shortly!

Hap­py Mon­day! :D

with glowing heart and beaver tail

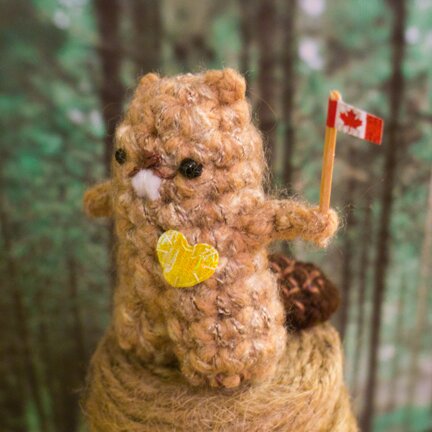
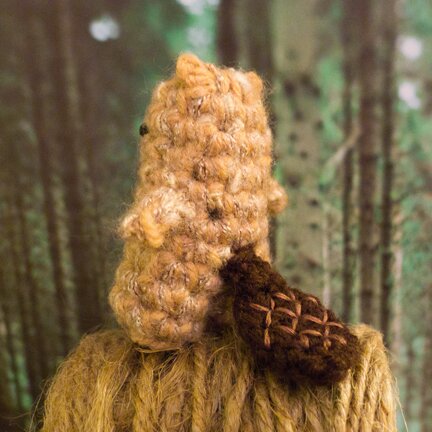
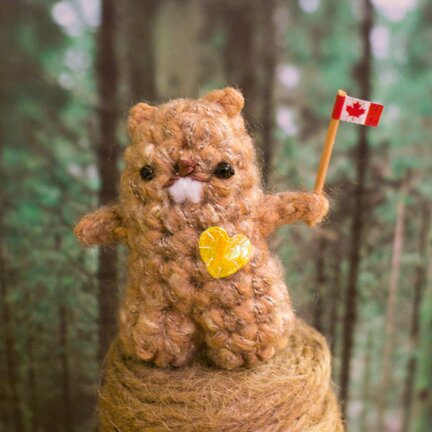
It’s Cana­da Day on Fri­day! And proud Cana­di­an Beaver, with glow­ing heart, is here to cel­e­brate! :D

I was sur­prised how dif­fi­cult it was to find glow-in-the-dark stick­ers at the dol­lar store. There were plen­ty of glow sticks, but no glow-in-the-dark stick­ers. Even­tu­al­ly I set­tled on some reflec­tive fab­ric appliqué. So Beaver’s heart badge is more shiny than glow‑y, but it will not damp­en his cel­e­bra­to­ry spirit.

You may have noticed already, but Beaver is made exact­ly the same way as Ground­hog, except for the tail. (I also made Beaver’s teeth a bit larg­er than Ground­hog’s, with bits of white felt.)

To make your own Beaver friend (and cel­e­brate Canada’s birth­day with us! :D), fol­low the Ground­hog pat­tern for head/body, ears, and arms.

To make Beaver’s tail:

Tail is made in con­tin­u­ous rounds, with 3.5mm hook and brown worsted weight yarn:

ch 3, 4 sc in 2nd ch from hook, sc in the top of begin­ning ch, *2 sc in next sc, 1 sc in each of next 2 sc*, repeat from * to * once.

1 sc in each sc around until piece is 3/4″ long. Then *2 sc tog, 1 sc in each of next 2 sc*, repeat from * to * once.

2 sc tog, 1 sc in each of next 4 sc. Leav­ing a 12″ tail for sewing, fas­ten off.

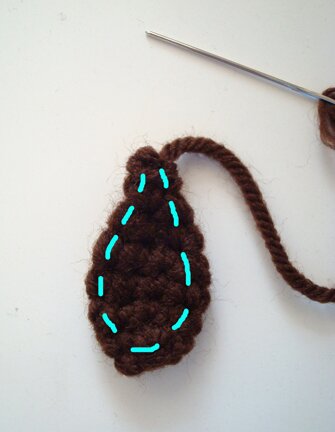
The result will be a pouch shape. Flat­ten the pouch and, with the tail left for sewing, sew a line of run­ning stitch through both lay­ers, like so…

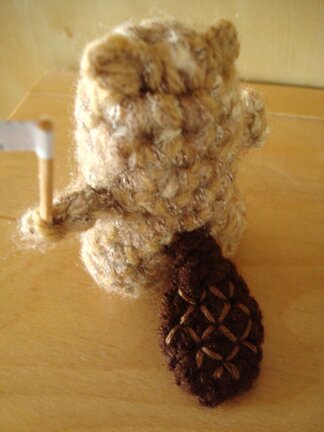
Embroi­der criss­cross pat­tern on top lay­er only, then sew to body.

And here’s to Cana­da ‑ glo­ri­ous and free! *waves flag*

Cheers! :D


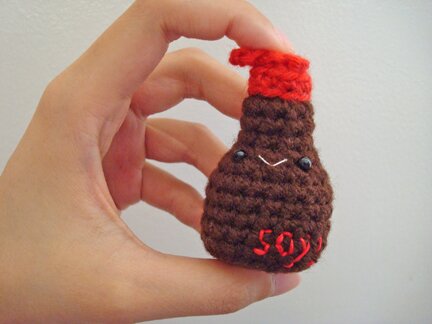
happy together: dumpling + soy sauce :D

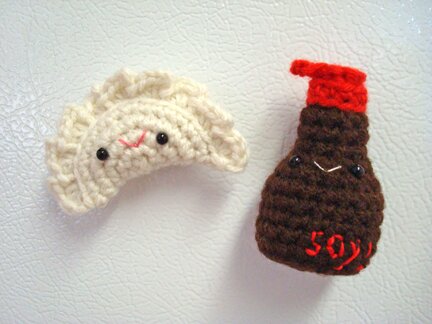
Anoth­er pair of plush­es for the hap­py togeth­er series! :D (I’m con­tem­plat­ing the idea of mak­ing a sep­a­rate page for the series, but for the time being you can see oth­er char­ac­ters of the series here, here, and here.)

I’m mak­ing this as a wed­ding gift for a friend who first met her fiancé at a dumpling gathering!

I always eat dumplings with soy sauce… but I don’t know if that’s the norm. I think so… any­way, I wrote down the pat­tern to share. One might think of oth­er things to make that pair bet­ter with soy sauce. (Wasabi? Sushi? Plain bowl of rice? Pos­si­bil­i­ty is end­less for this lit­tle bot­tle of soy sauce!)


Mate­ri­als:

Bits of worsted weight yarn in white, brown, and red

3.5mm cro­chet hook

Stuff­ing (I used yarn ends from unrav­el­ing old work)

Embroi­dery thread in pink and white

Nee­dle and thread

4mm black beads for eyes


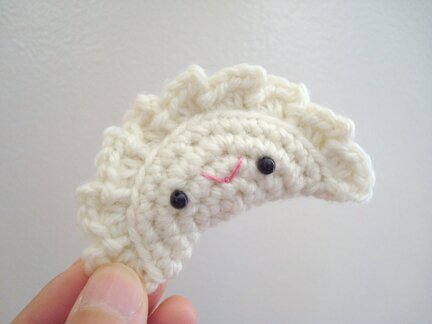
Dumpling is made by cro­chet­ing a cir­cle, which is then fold­ed in half and seamed togeth­er with a scal­loped edge.

The cir­cle is cro­cheted in con­tin­u­ous rounds (i.e. no slip stitch at the end of round):

With white

ch 3, 5 sc in 3rd ch from hook, 2 sc in top of begin­ning ch, 2 sc in each of next 4 sc, sc in next sc, repeat [2 sc in next sc, sc in next sc] until piece mea­sures 1 3/4 inch­es across.

Then, repeat [1 sc in each of next 5 sc, 2 sc in next sc] until piece mea­sures 2 1/4 inch­es across. Then sc in next sc, sl st in next sc. Don’t fas­ten off.

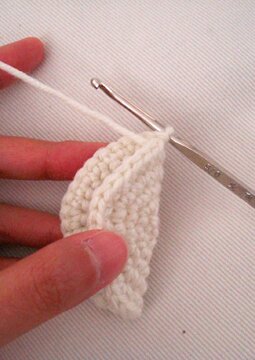
Fold piece in half so that the raw stitch lies on the fold line, like so…

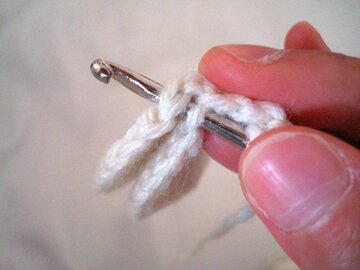
The scal­loped edge is worked through both lay­ers of the fold­ed cir­cle, through the back loop only of the front lay­er and both loops of the back lay­er, like so…

Cro­chet scal­loped edge as follows:

[ch 2, 3 hdc in next st, sl st in next st] 4 times. Leave hook on loop, sew on the eyes and mouth.

Con­tin­ue with repeats of [ch 2, 3 hdc in next st, sl st in next st] across until there are 3 or 4 stitch­es left. Stuff dumpling, then com­plete scal­loped edge, fas­ten off.

And dumpling is com­plete! :D

Now on to the bot­tle of soy sauce. It’s made in rounds, and each round ends with a sl st into the first sc of the round.

With brown

Round 1: ch 3, 5 sc in 3rd ch from hook, sl st in top of begin­ning ch.

Round 2: ch 1, sc in same st, 2 sc in each sc around, sl st in first sc.

Round 3: ch 1, sc in same st, [sc in next sc, 2 sc in next sc] 6 times, sl st in first sc.

Round 4: ch 1, sc in same st, through back loop only, 1 sc in each sc around, sl st in first sc.

Round 5: repeat row 4, except work each stitch through both loops.

Round 6–8: repeat row 5. Don’t fas­ten off.

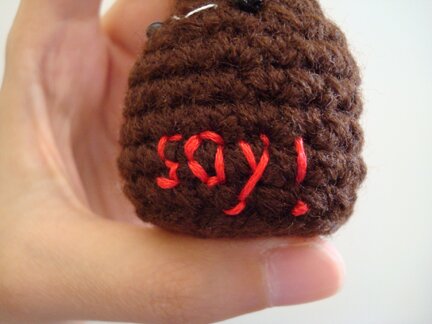
I embroi­dered “soy!” on the bot­tle at this point.

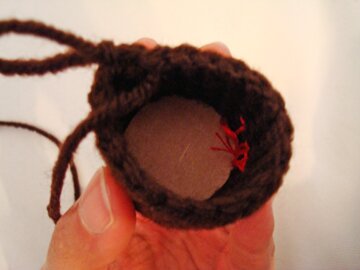
Cut a round piece of card­board (I cut mine from a frozen piz­za box) about the size of the bot­tom of the bot­tle and place it into the bot­tom of the bot­tle. This way the bot­tom will stay flat when the bot­tle is stuffed.

Con­tin­ue with shap­ing the bottle:

Round 9: ch 1, sc in same sc, [2 sc tog, sc in next sc] around, sl st in first sc.

Round 10: repeat row 9.

Sew on eyes and mouth.

Round 11–13: ch 1, sc in same sc, 1 sc in each sc around, sl st in first sc. Fas­ten off.

Now we make the bot­tle cap:

Round 1: Join red where brown is fas­ten off, sl st in each sc around in front loop only.

Round 2: ch 1, sc in same st, through top loop only, 1 sc in each st around, st sl in first sc. Leave a 6″ tail for sewing, fas­ten off.

Stuff bot­tle firm­ly to keep shape.

Top of cap, with the sprout:

With red

Round 1: work 6 sc in mag­ic ring, sl st in 1st sc.

Round 2: ch 3, dc in next sc. Fas­ten off.

Sew top of cap to top of bot­tle, weave in ends.

Soy joy! :D

Every­body says “soy!”

And here they are again, hap­py togeth­er :D


If you spot any mis­take or need clar­i­fi­ca­tion please feel free to drop me a note! Chee­rio! :D

dim sum love

I love dim sum.

I like going to dim sum with my fam­i­ly. Lots of chat­ting, lots of eat­ing, lots of dawdling. Makes a relax­ing Sat­ur­day morning.

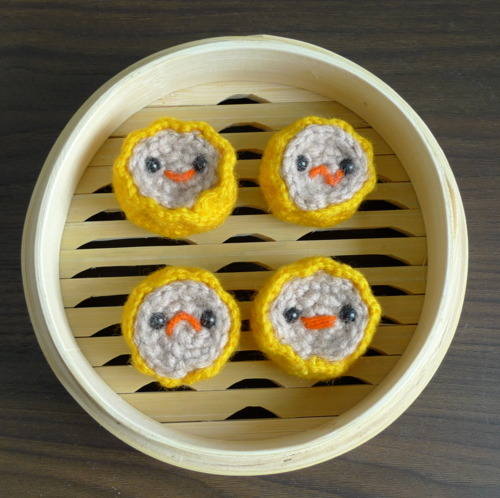
I also tried to make dim sum at home, with the frozen stuff, steamed in a large saucer. (I tried microwav­ing them before, it was bad news. They must be steamed.)

And of course, I have to make them with yarn.

If you like all-day dim sum that smiles back at you, they’re in my shop :D

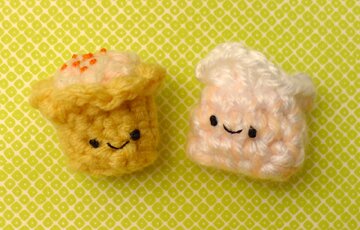
The one on the right is a shrimp dumpling (蝦餃, “har-gau,” the pale pink one), and the one on the left is a pork/shrimp dumpling (燒賣, “siu-mai,” the yel­low one). Siu-mai was the kind I was steaming.

Har-gau is a steamed dumpling filled with shrimp and wrapped in a white, translu­cent wrap­per. Siu-mai is also a steamed dumpling filled with both pork and shrimp and wrapped in a yel­low wheat wrap­per and topped with crab roe.

If you do know how to cro­chet though, here’s a bril­liant pat­tern for mak­ing siu-mai from All About Ami! I’m so tempt­ed to make them, they would make a great “how are you feel­ing today” chart on my fridge! :D

If you pre­fer to knit, I stum­bled upon this great pat­tern for knit­ting dumplings (or jiao-zi, in Man­darin)! The writ­ten pat­tern is a free Rav­el­ry down­load if you’re a Rav­el­er, but there’s also a how-to video for every­one. The cre­ator stuffed the dumplings with cat­nip for her cat to play with :D


I’ve been work­ing on some dumplings as well! Cro­chet­ing, of course, and adding anoth­er pair of char­ac­ters to my “hap­py togeth­er” series (which includes, so far, nigiri and wasabi, napa cab­bage and chest­nut, and pina cola­da). Char­ac­ters in the hap­py togeth­er series were main­ly made for wed­dings (except for the napa cab­bage and chest­nut, which are for my mom), and these ones I’ve just made are no excep­tion — they’re for an old friend who first met her fiance at a dumpling gath­er­ing! She’s prob­a­bly too busy to read my blog at this point, and I’m going to block her from see­ing this post on Face­book, so it should be safe to show you… if you promise to keep a secret, that is.

Ta-da! Dumpling, and a lit­tle bot­tle of soy sauce! XD They’re spend­ing a few hap­py days on my fridge, then I must say good­bye to them and send them to their new home on Sat­ur­day… *sniff* But I’ll be ok…

Stay tuned for the pat­tern, com­ing in the next cou­ple of days!

Hap­py Monday!

adventures of avocado finn

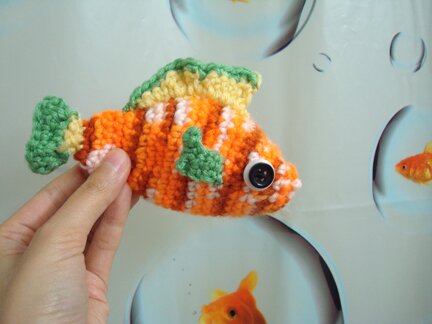
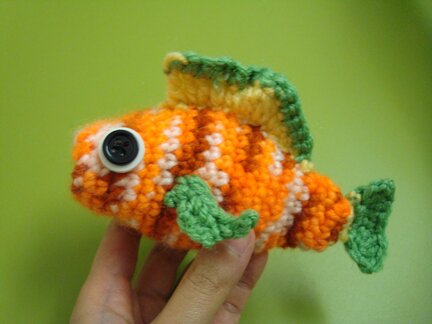
Meet Avo­ca­do Finn, my new plush friend! :D

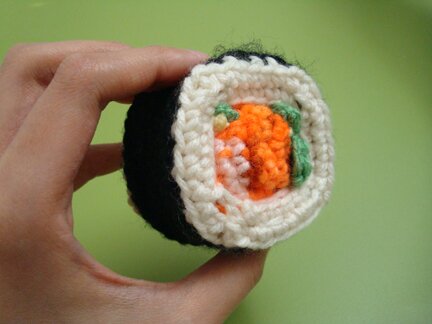
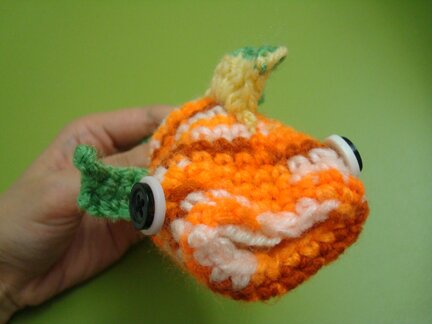
Avo­ca­do Finn is no ordi­nary fish. When I first met him, he did­n’t quit look like himself…

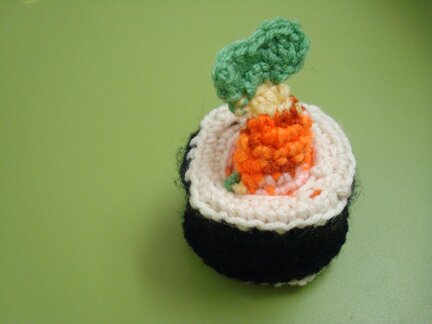
He was a maki roll.


A maki roll with… a tail?


Ah! Flip­pers!

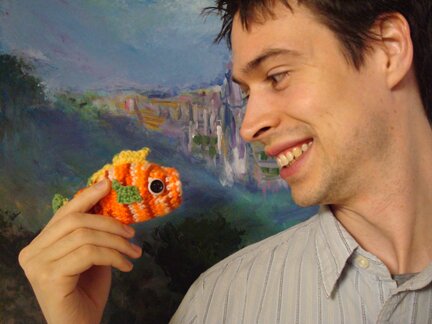
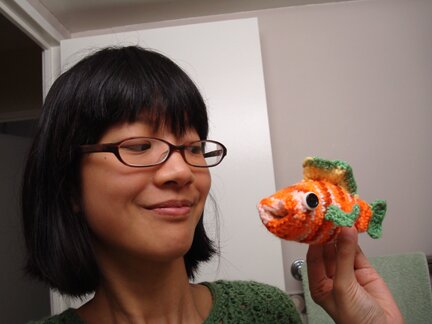
No fish has ever gone to being a piece of sushi and come back per­fect­ly intact. Avo­ca­do Finn is tru­ly an extra­or­di­nary fish. And a rather friend­ly fel­low, too. His goofy smile puts every­one at ease…

… and makes you for­get, that as a fish, he should­n’t be able to sur­vive out of water. But look, here he is, chat­ting away, and Mike does­n’t even seem to notice the difference…

And I was com­plete­ly enchanted.

And then I remem­ber this car­toon I used to watch when I was a kid, called “Gold Fish Warn­ing”, about a pink gold fish that not only could live out­side of water but also fly.

(Yes, huge spark­ly eyes and pink hair. Clas­sic girly anime.)

Whether Avo­ca­do Finn has any­thing to do with that pink gold­fish is a mys­tery, as Finn him­self has­n’t giv­en me any clue about his per­son­al his­to­ry. But he’s made him­self quite com­fort­able on our couch, and made a new friend.

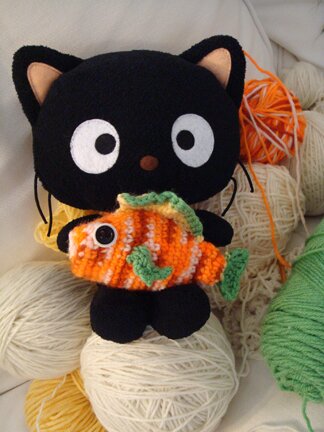
He’s even able to make Fil­bert the cat believe that “fish is friend, not food” (at least when it comes to Avo­ca­do Finn).

Don’t need to feel bad for Fil­bert though, he’s in heav­en just hav­ing those balls of yarn around, and he always loves a new friend.

To make your own extra­or­di­nary fish friend see genius fish-to-sushi cro­chet pat­tern from Irka! While you’re at it, be sure to also check out the awe­some egg-to-chick­en pattern!

Hap­py Tues­day! :D


toppers at work! :D

Yay! Cus­tomer photos!

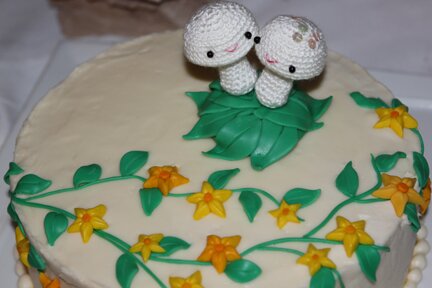
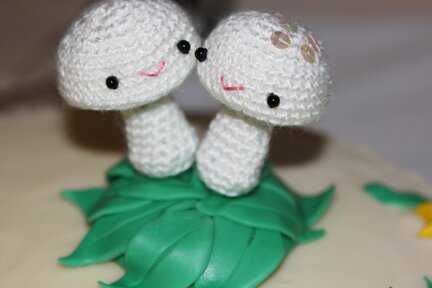
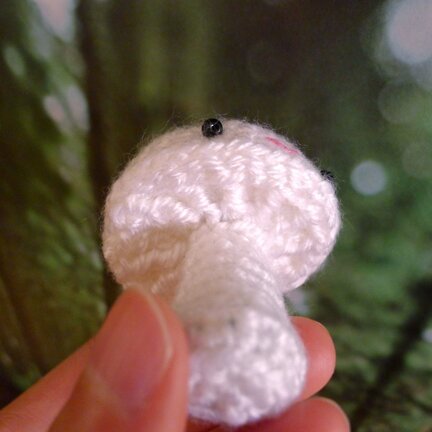
The snow mush­rooms were a cus­tom order from a love­ly bride, to serve as cake top­pers at her wed­ding, and one of the wed­ding guests kind­ly for­ward­ed some pho­tos to me (thank you so much!).

Here they are stand­ing on top of the love­ly cake, so very hap­py to be able to help cel­e­brate this beau­ti­ful event…

Cheers, to the new­ly-weds! :D

toppers!

Yay for cus­tom orders! :D


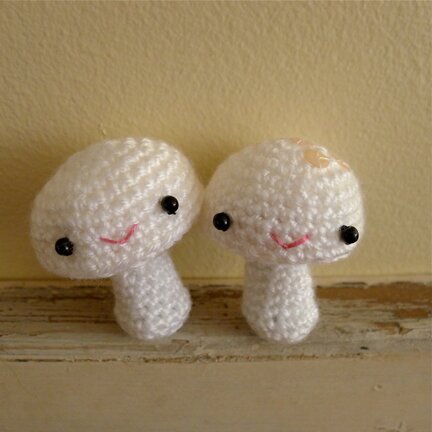
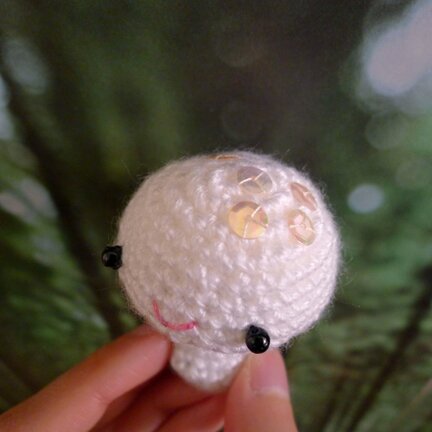
You may have noticed that my mush­room friends have appeared on the Etsy badge over on the right side­bar- they’re a cus­tom order for a very cre­ative bride-to-be :D And they’re going to be cake top­pers, along with oth­er cre­ations that the bride is going to make! I can’t wait to see what the fin­ished cake top­per (and the cake!) looks like :D

They may look plushy, but they’re actu­al­ly pret­ty hardcore.

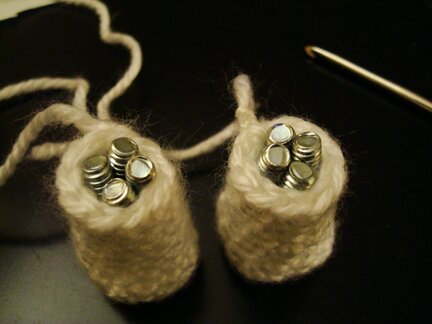
Well, that’s what a mush­room’s got­ta do when it’s going to be on its feet (foot?) all day! Yes, inside the mush­room stems are screws, and wash­ers at the bot­tom, so that they could stand on their own with­out tip­ping over.

I also added gills…


And one mush­room has spark­ly sequins atop its head…


I love cus­tom orders. I love hear­ing the sto­ries behind the orders and I feel so hon­oured that my plush friends can be part of the sto­ry. And I’m just so excit­ed that the snow mush­rooms are going to be a part of a wed­ding! The orig­i­nal snow mush­rooms appear on snow days to spread hol­i­day cheers. I’ve asked these spe­cial top­per mush­rooms to spread wed­ding cheers and well wish­es at the recep­tion; I think they will do a good job :D

If you have some­thing in mind that I may be able to make for you, feel free to vis­it my shop or con­tact me, I’d love to chat!

Have a love­ly Wednesday!