lately

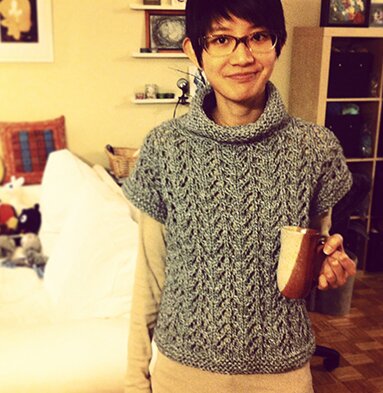
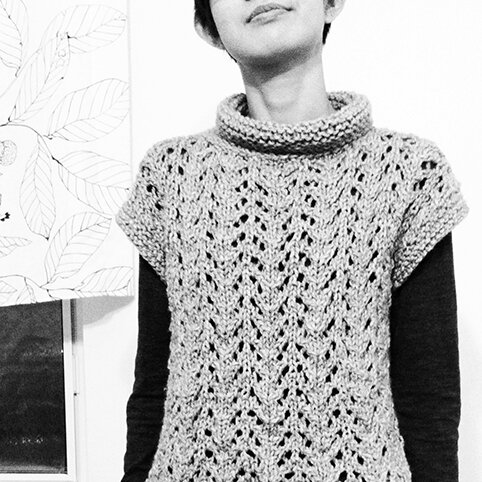
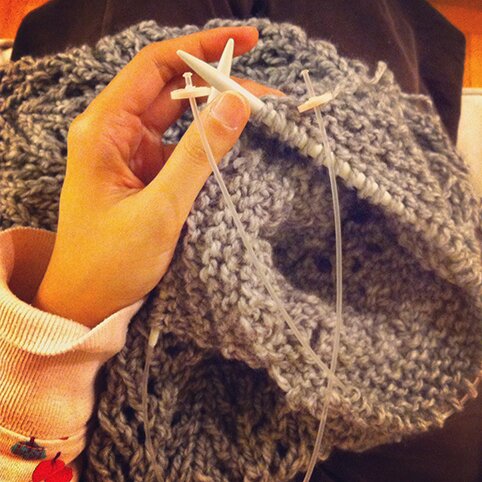
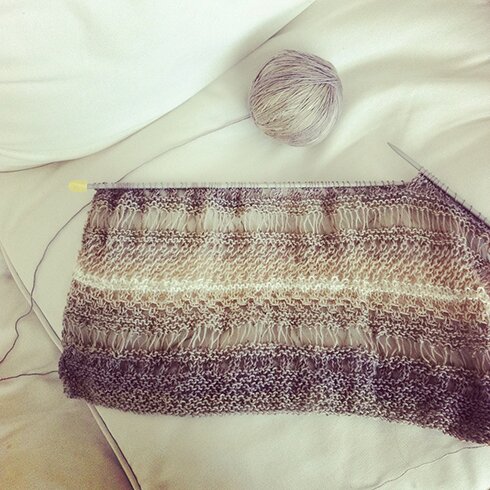
Lately, I’ve been working on this nice knitted lace top (it’s a free Ravelry download! :D).

Photo 2015-04-25, 8 49 59 AM

I got this yarn last year to make the Convergence top. I was using a bit of a heavier yarn than called for, so I increased the hook size to 4mm instead of 3.75mm, expecting that the entire top will turn out a bit larger, which would be fine for me, because I like loose fitting tops in the summer, and the measurements for size small really looks rather small even for me… but for some reasons it turned out narrower than the given measurements, and wayyy longer. So I took it apart. And I’m now working on this knitted top. I think the lace panels go well with the variegated yarn :) Will definitely show you when I’m done!

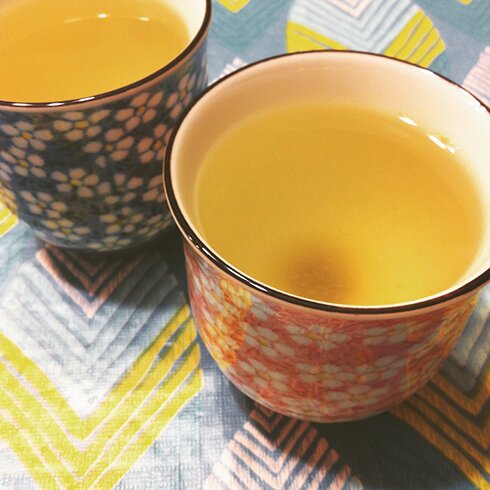
Lately I have also been enjoying some konbu cha in the evening :D

Photo 2015-04-23, 9 39 31 PM

Not to be confused with kombucha, which is the sweetened fermented tea. Konbu cha is kelp tea. My friend, who is Japanese, gifted it to me last week when we ran into each other at a workshop :D It tastes like seaweed salad in a cup, and to me it tastes more like broth than tea, but I love it! I love kelp. I will have to get more of it at Asian grocery stores.

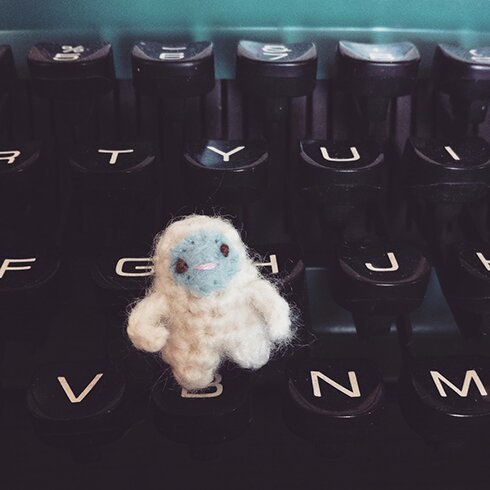
Lately I have also been working on a couple of Etsy orders, one of which is the tiny yeti pin. Here he is, all ready for his journey to a good home :D

Photo 2015-04-19, 12 26 18 PM


Hope you are having a good week!


Tweet about this on TwitterShare on FacebookPin on PinterestShare on TumblrPrint this page

find me on instagram! :D

11138167_10155441384950581_6342954459285264197_n

Did you know that genuine mudpie is on Instagram? :D

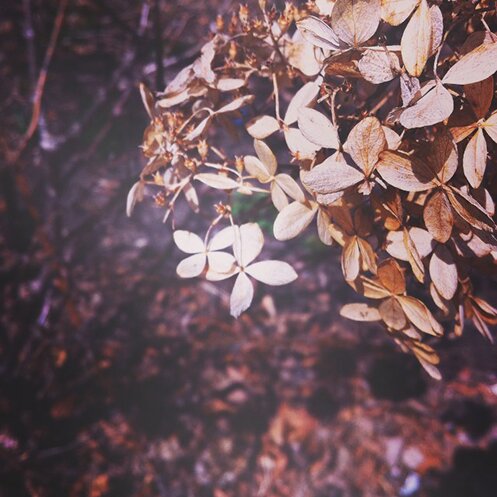
Lately I’m finding myself posting more work-in-progress and other photos (like this one here from my outing to the Toronto Botanical Garden) on Instagram. I’ve talked about how I’ve been posting a bit less on this blog because of lack of time. Instagram is really a much quicker way of sharing. Pictures that I would post here a couple years ago (like experiments with smoothies and short rows, or almost-weekly origami challenge with my niece and nephews), I now post on Instagram.

But I also want to say that Instagram posts will not replace this blog. I can’t see myself posting a pattern on Instagram, for example. I also know that not everyone has Instagram, so noticing my increased Instagram activity and decreased blog activity is also motivating me to work on posting here more regularly.

(If only Instagram and WordPress will sync! *shakes fist*)

But if you are on Instagram please come by to say hello! :D

Happy Sunday!


Tweet about this on TwitterShare on FacebookPin on PinterestShare on TumblrPrint this page

let’s make tiny donuts! :D

And the tiny donut party continues! *throws glitter*Photo 2015-04-04, 11 47 19 AM
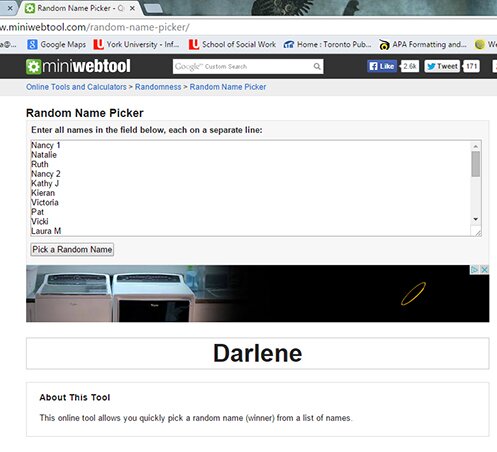
Before digging our hands into yarn and making more donuts, we need to pick a winner for the giveaway!I used this simple random name-picker tool. And the winner is…
giveawaywinner

DARLENE!!! Congratulations!!! :D *throws more glitter*

(Now we all gotta imagine ourselves all glittery from head to toe, ’tis how a virtual party works, except we’re not really covered in glitter and we don’t have to spend hours washing it out of our hair only to find more glitter on us weeks later — ’tis the beauty of virtual party :D and if you’re receiving this post by email you might want to click on to the actual blog so you can get more of the glitter experience ;) anyway, I digress)

Darlene please send me an email at genuinemudpie(at)gmail(dot)com, letting me know which 3 donuts you want and your mailing address :)

Thank you everyone for participating, and leaving all the wonderful comments about this blog (and donuts!)! It means the world to me that you’re enjoying reading about my crafty adventures! I look forward to sharing more craftiness with you! :D

And now, we make more tiny donuts! :D

This is actually more like a recipe than a pattern. My donut turns out to be just shy of an inch across. You can make it smaller or larger by using a lighter (fingering, embroider thread?) or heavier (worsted) yarn, and changing hook size accordingly (2mm for finer yarn and 3.5mm for worsted, for example). You can also make a larger donut by increasing the number of beginning ch by multiples of 2, and repeating row 3 a couple of times (more about that in the recipe below). I wouldn’t start with fewer stitches than what the “recipe” calls for though, it can be really tricky to manage such small number of stitches.

I initially developed this recipe to make donut earrings for my shop. It took a few attempts to get the size right and the icing looking the way I wanted. I think I’ve perfected the recipe now :) AND!! The entire donut is only made of 5 rows! You can make an army of them in an evening :D

I used:

Small amount of sport weight yarn in donut and icing colours (tan, brown, pink, yellow, white, etc.)

Embroidery thread in sprinkle colours

3mm hook, 2.5mm hook or smaller (for pulling in ends)

Needles for sewing and embroidering

Recipe:

Round 1: With donut colour (i.e. tan), ch 8, join with first ch to form ring.

NOTE: The side that is facing you (i.e. the front of the work) is the INSIDE of the donut. For the first 3 rounds you’re working with the inside of the donut facing you. So the back of the work is the outside of the donut.

Here I have finished the first 3 rounds of the donut, crocheting with the inside facing me.
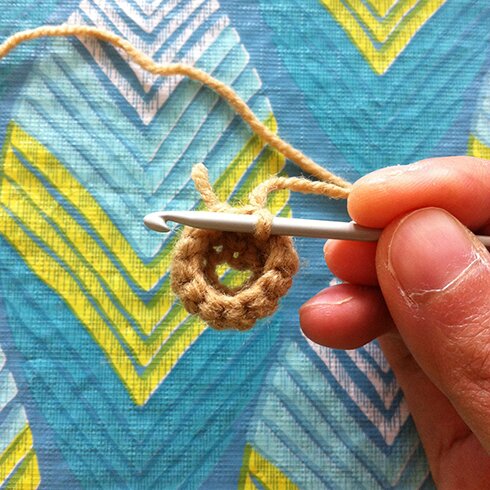
Photo 2015-04-11, 10 57 57 AM

Here is what the outside of the donut looks like after the first 3 rounds.
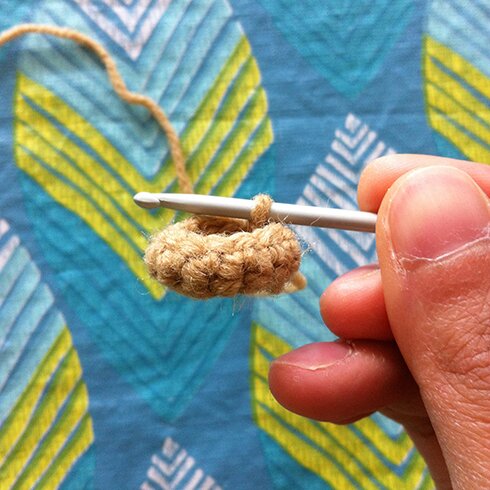
Photo 2015-04-11, 11 00 27 AM

Round 2: ch 1 (does not count as a stitch), sc in first ch, 2 sc in next ch, [sc in next ch, 2 sc in next ch] around, sl st in first sc to join (12 sc).

Round 3: ch 1, sc in each sc around, sl st in first sc to join (12 sc).

NOTE: If you’remaking a larger donut and started with a few more beginning ch’s, you can repeat round 3 one or two more times.

Round 4: Attach icing colour, fasten off donut colour. TURN (now you’re working with the outside of the donut facing you), ch 1, sl st in each sc around in the front loop only, sl st in first sl st to join (12 sl st). (Be careful not to pull too tight while making the sl st in this round, otherwise the next row would be difficult.)

Here I’m working on found 4, inserting my hook in the front loop of a stitch.
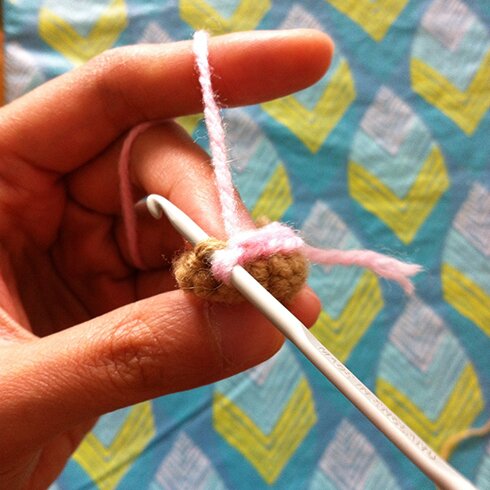
Photo 2015-04-11, 11 05 21 AM

NOTE: If you’remaking a larger donut and started with more beginning ch’s, you can repeat round 3 one or two more times with icing colour before starting round 5.

Round 5: ch 1, TURN (now you’re working with the inside of the donut facing you again), working in the front loop only, sc in first st, 2 sc tog over next 2 st, [sc in next st, 2 sc tog over next 2 st] around, sl st in first sc to join (8 sc), leaving a long tail for sewing, fasten off.

Sew the final icing round to the first donut round using whip stitch, matching the stitches.
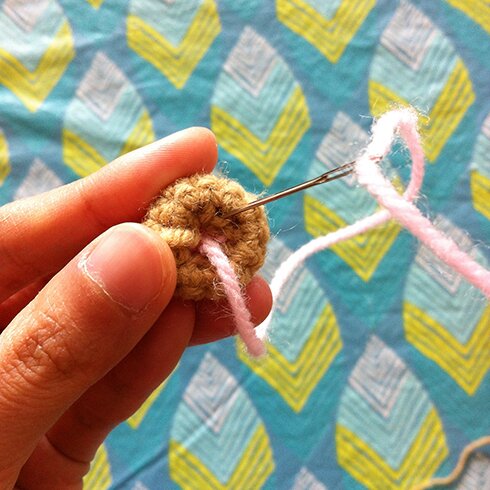
Photo 2015-04-11, 11 23 19 AM

I find it really difficult to sew the donut together with stuffing inside, and because the donut is so tiny I don’t feel it needs stuffing. I just pull all the yarn ends into the donut with a crochet hook after it’s sewn together.

Embroider sprinkles to your heart’s content :)

Pull all yarn ends and thread ends into the inside of the donut with a small crochet hook.

And here we have it, a tiny donut! :D
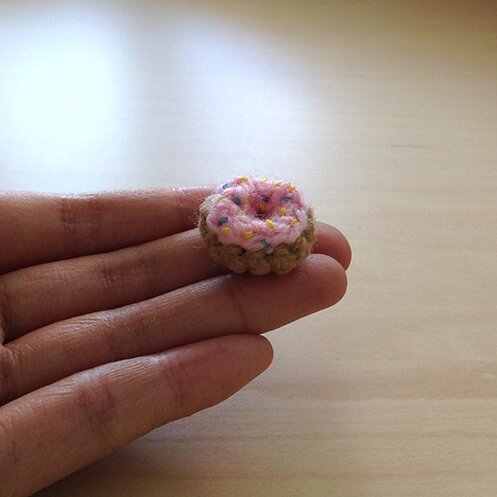
Photo 2015-04-04, 11 49 01 AM


If you’re making these donuts, let me know what flavours you’re making, I’d love to see them! :D

Hope you have a wonderfully sparkling weekend! :D *throws glitter*
 

Tweet about this on TwitterShare on FacebookPin on PinterestShare on TumblrPrint this page

one more day!

Donuts

One more day to leave a comment before I draw a name for the tiny donut give-away tomorrow (Friday) night at 11pm EST!

The winner gets to choose 3 of the tiny donuts shown in this post, and I will attach a tiny safety pin to each one too so they can be worn as brooches :)

To enter you just need to leave a comment on this post or the previous post. If you subscribe to this blog (thank you!) and receive blog posts by email, please comment on the actual blog post (rather than sending a reply email) so I can include your name in the draw :D

Will be announcing the winner AND posting the donut pattern on Saturday! :D Stay tuned! Until then, have a happy Friday!


Tweet about this on TwitterShare on FacebookPin on PinterestShare on TumblrPrint this page

tiny donut party (a giveaway!)

Photo 2015-04-04, 11 47 19 AM

Guess what? It’s the genuine mudpie blog’s 5th anniversary! :D

Can’t believe I’ve been writing and doing crafts on this blog for 5 years already. I’ve definitely slowed down a little with the blogging (but not with the crafting!), especially recently, because of school and work. But I’ve always found it so comforting to return to this space and share what brings me joy. Thank you so much for supporting genuine mudpie by visiting, leaving comments and journeying with me on various crafty adventures! :D

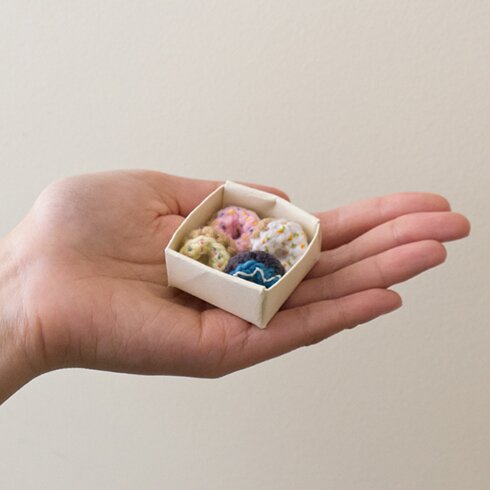
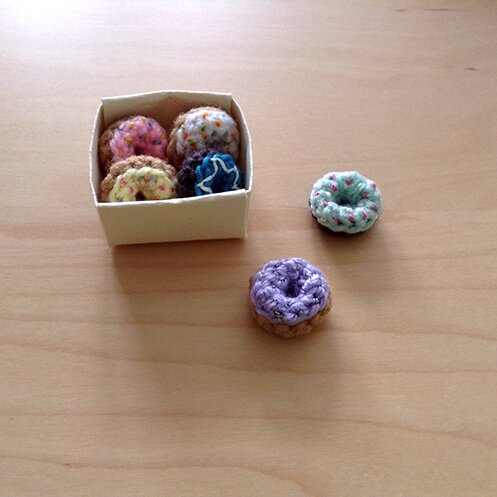
So! To celebrate, I’m doing a giveaway of tiny donuts! Simply leave a comment on this post by next Friday April 8th, and I will randomly draw a name from the comments. I will announce the winner here on Saturday April 9th. The winner can choose any 3 of the donuts shown here. I will attach a safety pin to the back of each donut — so you can wear one proudly and share the rest with your friends (or not :P). And yes, I ship worldwide :)

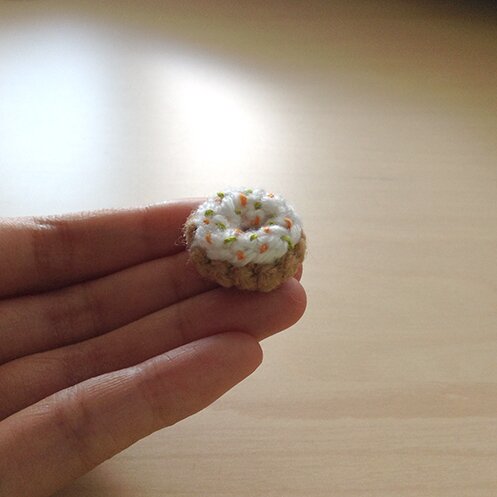
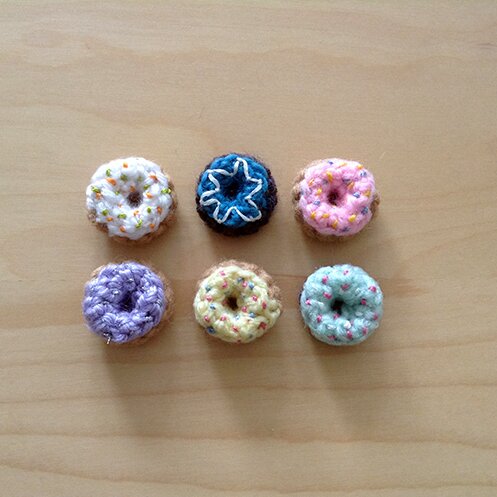
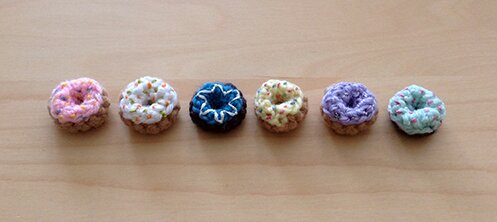
Each donut is a little shy of 1″ across.

Photo 2015-04-04, 12 01 01 PM

And here are some of the flavours :D We have classic pink frosting…

Photo 2015-04-04, 11 49 01 AM

Carrot cake!

Photo 2015-04-04, 11 49 58 AM

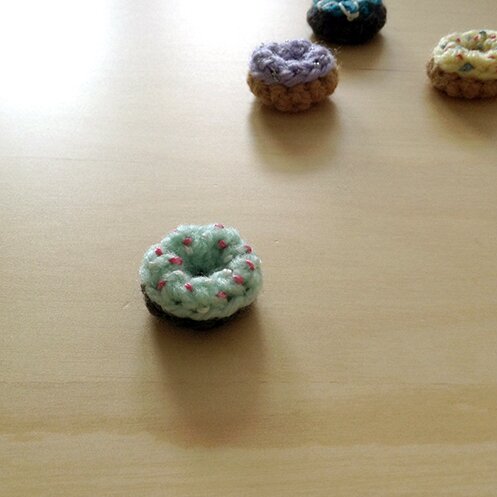
Mint chocolate.

Photo 2015-04-04, 11 57 33 AM

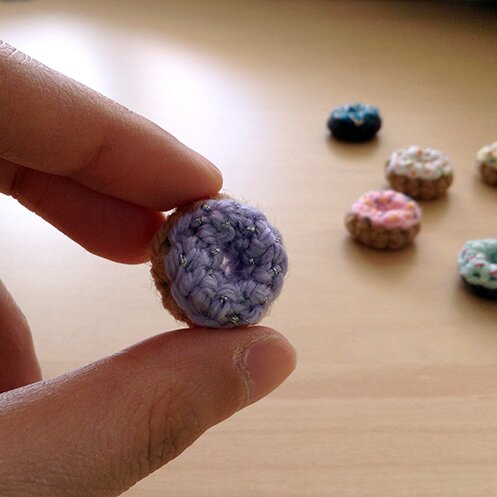
Special sparkly lavender.

Photo 2015-04-04, 11 52 33 AM


And more :)

Photo 2015-04-04, 11 59 12 AM


They’re actually a lot of fun to make and very quick too, so I will also be sharing the pattern next Saturday so everyone can make them :) But if you’d like the chance of receiving cheerful tiny donut pins in the mail, please leave a comment below! :D

Happy Saturday!


Tweet about this on TwitterShare on FacebookPin on PinterestShare on TumblrPrint this page

this week’s awesome finds

Perfect bunny hat for a spring tea party :3 From Mamma in a Stitch.

Such impressive-looking soap — makes impressive-looking gifts :) From Fall for DIY.

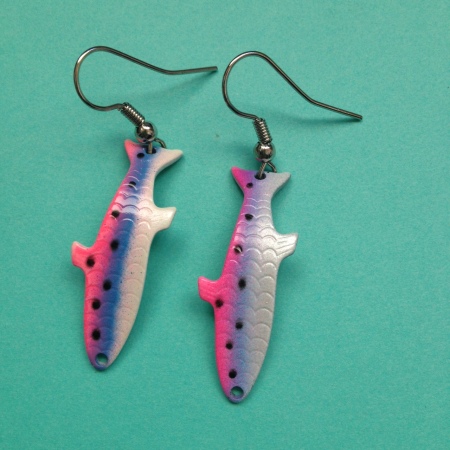
These from fishing lures, super fun! From The Tragic Whale.

So very pretty for springtime. From Red Heart Yarn.

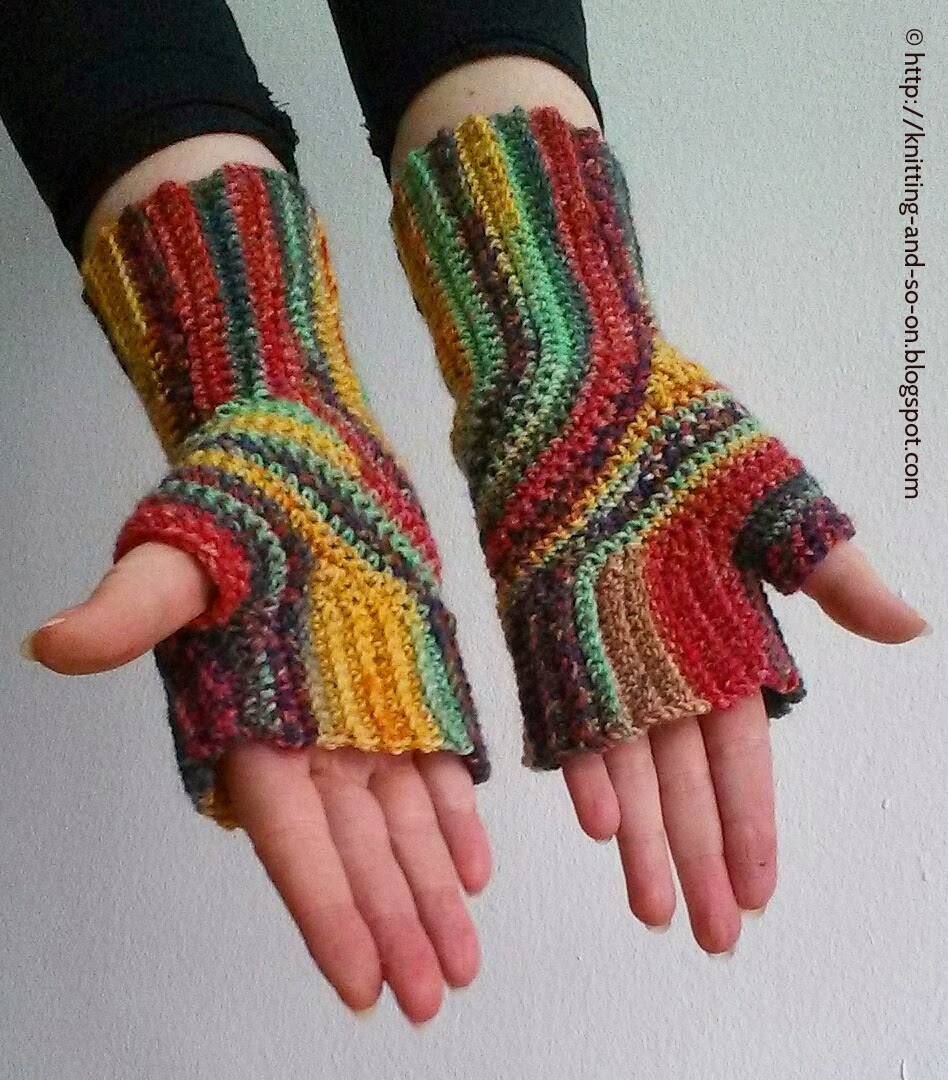
Best mitts to show off gorgeous hand-dyed variegated yarns! From Knitting and so on.

I always find pineapples really cheerful, and these are just the most cheerful party favour bags ever. From The House the Lars Built.

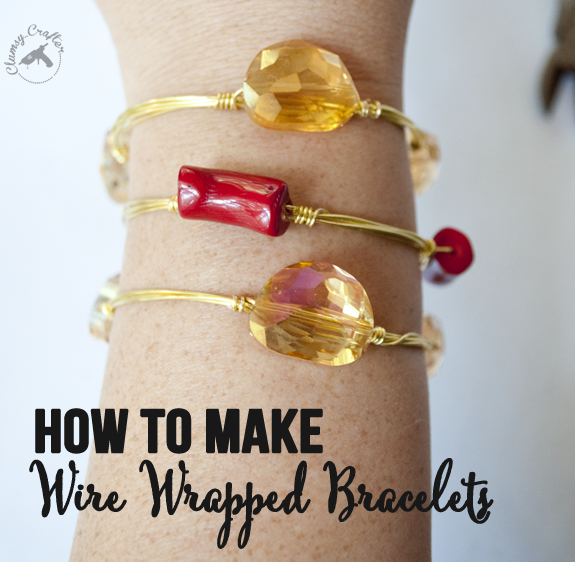
Wish I had come across this tutorial before scouring for a bracelet to wear with my very plain black dress to a wedding this weekend… but it’s not too late, I’d still like to make one one day! I love the simplicity of the design, perfect for showcasing special stones. From The Clumsy Crafter.

Have an awesome week, everyone! :D

Tweet about this on TwitterShare on FacebookPin on PinterestShare on TumblrPrint this page

ode to luna

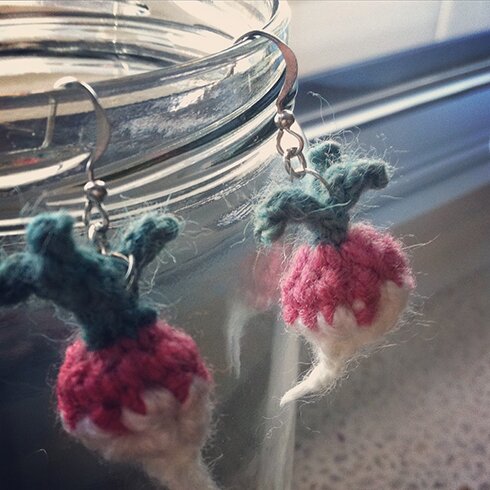
rad raddish

I like Luna Lovegood, and her radish earrings (though apparently they’re supposed to be dirigible plums). I made a pair when I was trying to come up with cool ideas for earrings to put in the shop, so I thought I’d share the pattern too because I think radish earrings are also pretty awesome for spring.

I used:

Deep pink, dark green and white yarn in sport or DK weight

3mm and 1.5mm hooks

Yarn ends for stuffing

Earring hooks

Jump rings

Jewelry pliers

Needle for sewing

Fabric glue (or white glue, but preferably fabric glue because it’s waterproof)

Pattern:

The radish is worked from top down. Do not join at end of round.

Rnd 1: With pink and larger hook, 10 sc in magic ring.

Rnd 2: sc in each sc around (10 sc), switch to white, fasten off pink.

Rnd 3: [2 sc tog over next 2 sc, 1 sc in each of next 2 sc] two times, 2 sc tog over next 2 sc.

Rnd 4: [2 sc tog over next 2 sc] two times, leaving a long tail, fasten off. Stuff radish.

Weave yarn tail through the remaining 5 stitches at opening, pull tight. With 1.5mm hook and the yarn tail, ch 3, fasten off. Put a small dab of fabric glue on the yarn end to shape it to a point.

The leaves are worked continuously, there’s no fastening off in between, but I’ve broken up the instruction so it’s easier to read.

With green and larger hook, ch 6, sl st in 2nd ch from hook, sc in next 2 ch, sl st in next 2 ch,

ch 5, sl st in 2nd ch from hook, sc in next ch, sl st in next 2 ch, sl st in the very first ch,

ch 6, sc in 2nd ch from hook, sc in next ch, sl st in next 3 ch, sl st in very first ch, leaving a long tail for sewing, fasten off.

Assembly

Roll up the base of the leaves, using the yarn tail, sew a few stitches at the base of the leaves to tighten and secure. Sew base of the leave to the top of the radish.

Repeat for the other radish.

Attach jump ring to the base of the leaves of the radish. Attach earring hook to the jump ring.


Hope you’re enjoying the spring sunshine!


Tweet about this on TwitterShare on FacebookPin on PinterestShare on TumblrPrint this page

hagelslag :D

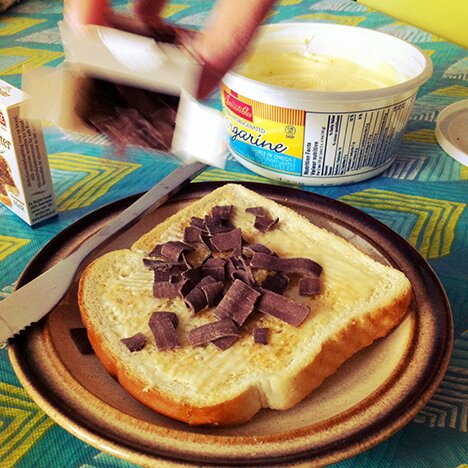
Sprinkles are one of Mike’s very favourite things.

One day he came across this video about breakfasts from different parts of the world, and when it got to the part about the Netherlands, he thought, “I’ve got to get some of that!”

So with a little research he found out that hagelslag is sold at Dutch Dreams, our local ice cream shop (and favourite place in the summer :D).

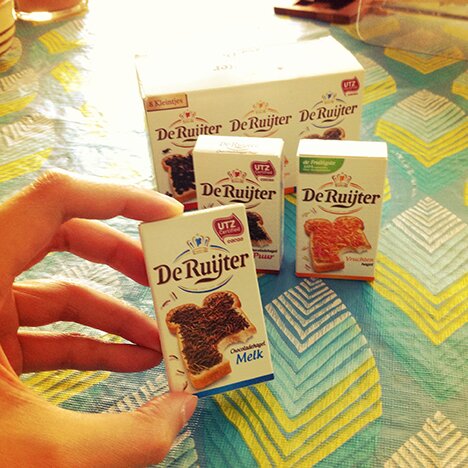
They came in a variety pack with (very cute) small boxes that looked like mini cereal boxes.

hagelslag

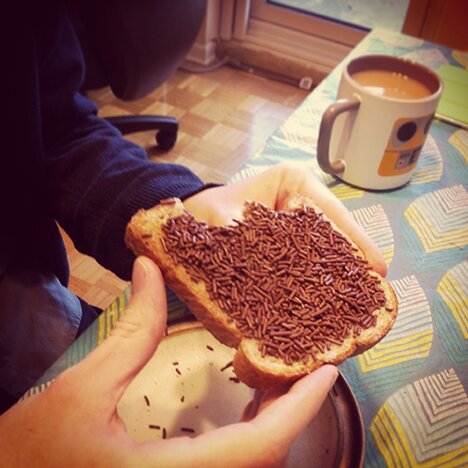
So we got our toasts buttered and ready. Mike tried the regular chocolate one.

milk chocolate

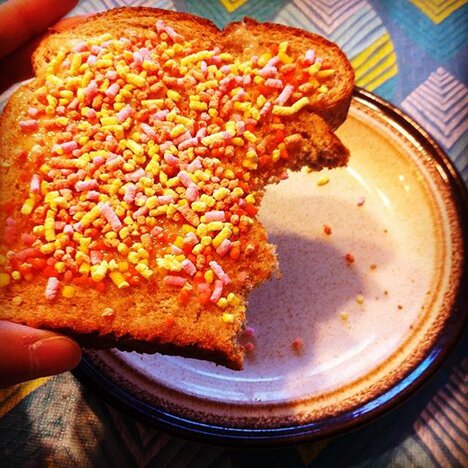
And I tried the fruit variety, vruchtenhagel, which I think means “fruit hail”.

fruit hail
It turned out to be a bit sweeter than I would like, but I do enjoy how, unlike the sprinkles we get on cupcakes and such, these melt in the mouth! Combined with the buttery bread it reminds me of the dessert buns (i.e. pineapple buns or custard buns) at the Chinese bakery.

I think my favourite is the chocolate shavings variety.

shaved milk chocolate

Hope your week is filled with small things that make you smile :)


Tweet about this on TwitterShare on FacebookPin on PinterestShare on TumblrPrint this page

this week’s awesome finds

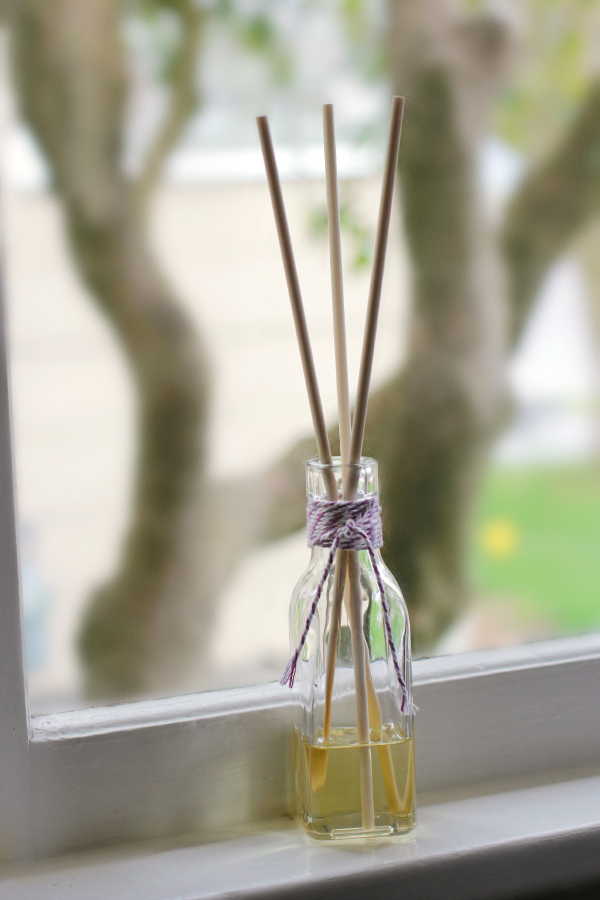
Homemade reed diffuser, easier to make than I thought! Didn’t know that one could even use bamboo skewers for this. From Make & Takes.

I like tiny stud earrings, and these heart-shaped ones are just lovely. From Fall for DIY.

I often see coffee pots at thrift stores and wondered what they can be used for. Now I know — a terrarium! Though last time I tried growing air plants it didn’t work out so well, they just shriveled up and died. How I could kill an air plant that only requires air to live I don’t really know. But anyway, this coffee pot terrarium from A Charming Project is brilliant!

I must share this, because I <3 Chococat :D Pattern from Sabrina’s Crochet.

I do like cats very much, and this is SO cute! The pattern is in French but Google Translate does a pretty good job. From La Souris aux Petits Doigts.

This tunic might be my next project :D Looks fantastic with the variegated yarn. From Red Heart.

Add some subtle cuteness to any outfit with this donut ring, spotted on Dream a Little Bigger.

Love this stitch pattern, might make a cozy sweater too. Pattern from Slugs on the Refrigerator.

And finally, if you like The Grand Budapest Hotel as much as I do (and if you haven’t seen it, I highly recommend!), and if you like to bake, you might enjoy making these pastries from the film! Video recipe spotted on Make.

Happy Wednesday, everyone!


Tweet about this on TwitterShare on FacebookPin on PinterestShare on TumblrPrint this page

silverwoods


Photo 2015-02-11, 8 01 11 PM

This is a remake of this crocheted sweater that I made a long time ago. I had been wearing it less and less frequently ever since someone commented that it looked like an armor :S (I think it was meant to be a compliment) so I figure I’d unravel it and make it into something with a more softened look.

I tried making the beautiful February Lady Cardigan a while ago but wasn’t successful. But I really like the lace pattern in the cardigan, so I tried to adapt the pattern into something that I could manage (i.e. without having to knit in the round).

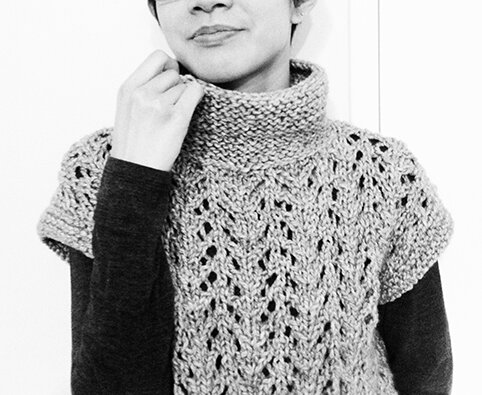
And this was the result! The bulky lace reminds me of trees in the winter.

Photo 2015-02-09, 9 29 02 PM


It has a bit of a cowl neck. Or one could roll down the collar for a more sculptural look.

Photo 2015-02-11, 7 55 43 PM

(It’s been difficult to take good pictures in the apartment in the winter when there’s no daylight left when I come home from work, so I put this black & white filter on and hoped that it comes across sort of stylish…)

Anyway, here’s my pattern adaptation of Elizabeth Zimmermann’s February Baby Sweater, in the middle of February :D It’s a very quick make. Took me several weekends while watching Harry Potter movies.

What I used: 

Approx. 700 yards of Patons Shetland Chunky, in grey. (my sweater is kind of a cropped style, but if I had more yarn I’d probably make it longer)

7mm and 6.5mm needles

Stitch markers or pins

Needle for sewing

Finished size: bust 38″ / length 17″ / arm opening circumference 14″ / neck opening circumference 18″ (Size easily modifiable. Suggestions for modifying size in pattern below.)

What I did:

This sweater is knitted flat. The front and back are knitted in one piece with some stitches bound off and then cast back on to create neck opening. Then stitches are picked up along the sides to knit the arm bands. The sides are then seamed. And finally the collar is knitted.

**************

Gull Lace pattern, from Elizabeth Zimmermann’s Knitter’s Almanac, with slight modification (I just added a knit stitch in the beginning and end of each row):

Rows 1 and 3 (WS): k1, p to last st, k1

Rows 2 (RS): k1, *k1, k2tog, YO, k1, YO, ssk, k1* rep from * to * till last st, k1

Row 4 (RS): k1, *k2tog, YO, k3, YO, ssk* rep from * to * till last st, k1

**************

Body:

With larger needle, CO 58.

(The Gull Lace pattern is worked over a multiple of 7 stitches, so to make a larger size, one can add multiple of 7 stitches from number of CO. One pattern repeat or 7 stitches = 2.25″)

Knit 9 rows.

Begin Gull Lace pattern rows 1–4. Repeat Rows 1–4 until piece is 17 inches from beginning, or desired length. End with row 1 or 3.

Next row (neck opening): work 15 st in pattern, BO 28 st, work remaining 15 st in pattern.

(If you have added more stitches in the beginning, you can perhaps divide the shoulder/neck/shoulder stitches as follows:
Added 7 stitches — work 15 st in pattern, BO 35, work 15 st in pattern
Added 14 stitches — work 22 st in pattern, BO 28, work 22 st in pattern
Added 21 stitches — work 22 st in pattern, BO 35, work 22 st in pattern)

Next row: k1, p14, CO 28, p14, k1. (or adjust number of stitches as listed above)

Continue in pattern until piece is 17 inches from neck opening, or same length as the other side, end with row 1 or 3.

Knit 9 rows, BO.

Arm bands/sleeves:

On the side seam, find the mid point that divides front and back. Mark this point with stitch marker or pin. Measure 7″ (or length as desired) down the side seam from the mid point, mark this point. Measure 7″ (or same length as the other side) up the side seam from the mid point, mark this point. Remove marker at mid point.

With smaller needles and right side facing, pick up 44 stitches evenly along side seam from marker to marker (or more stitches if added more length; generally 1 stitch per row). Knit 6 rows, BO. Repeat on the other arm.

Sew side seams from underarm to bottom of sweater.

Collar:

With smaller needles and right side facing, pick up stitches evenly around neck opening. Knit every row until collar is 3.5″ tall (or desired length). BO, weave in ends.

(One could use circular needle or DPNs and knit in the round. I’m not really good at knitting in the round, but I inherited these flexible needles from my mom, so the collar is knitted back and forth and then seamed. Doesn’t look as great as if it were knitted in the round, but it worked out :D)

Photo 2015-02-07, 11 45 09 PM


This was a fun knit! And a cozy layering piece for February :D

Hope everyone has a good week!


Tweet about this on TwitterShare on FacebookPin on PinterestShare on TumblrPrint this page