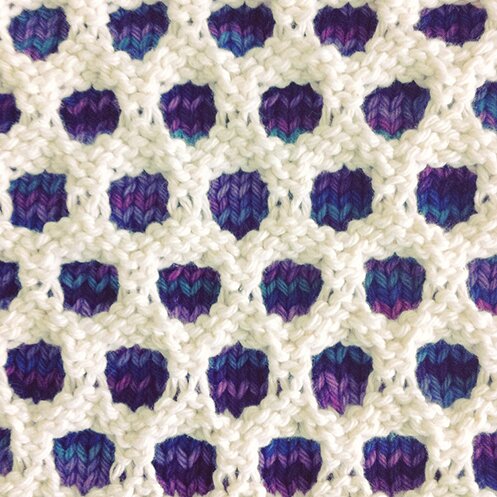
I was thinking of making some practical Christmas gifts for family. I thought of making wash cloths. Because everyone can use more wash cloths. And I made a couple using this excellent pattern from Hakucho. It’s a lot of fun to knit using variegated yarn!
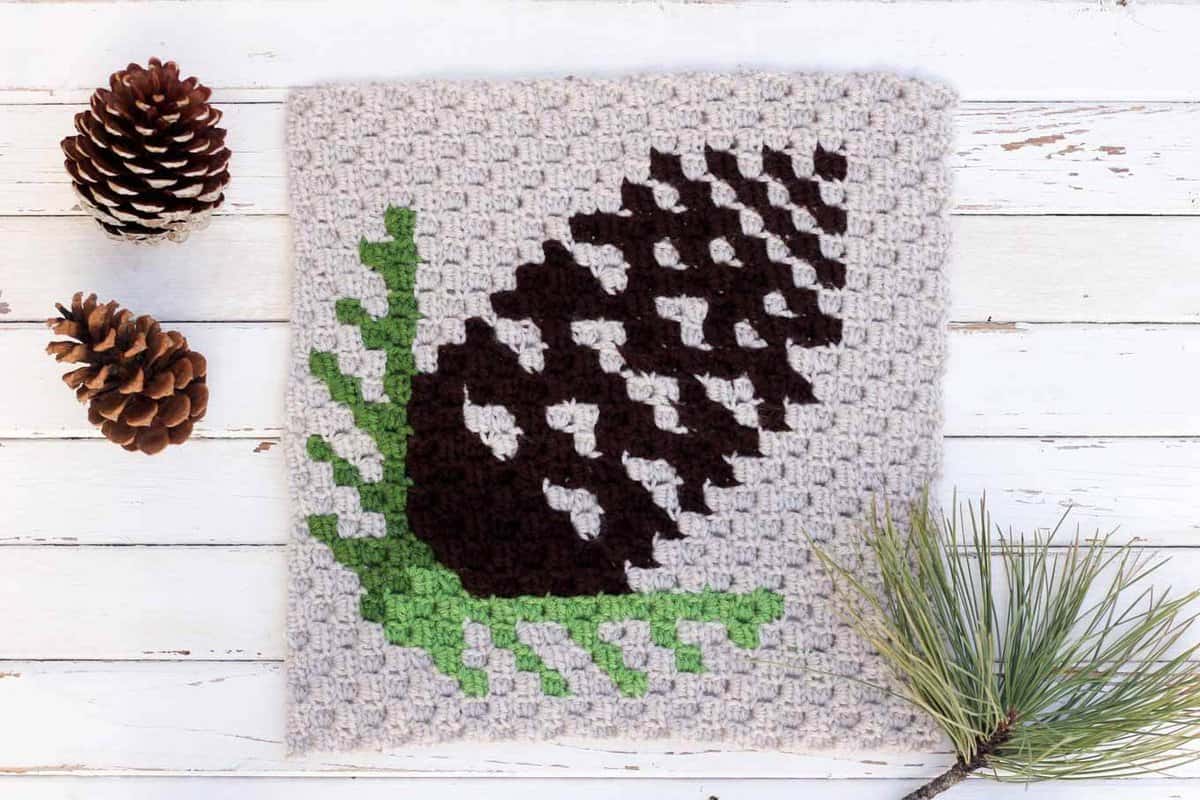
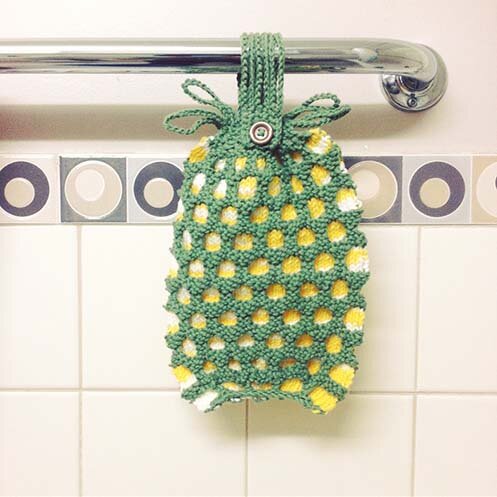
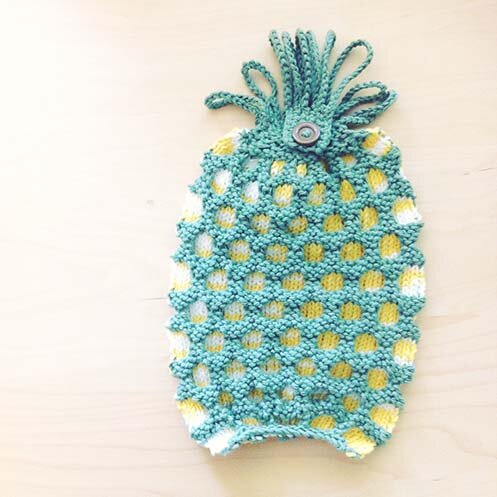
And then I thought I could modify the stitch pattern a bit and make some hand-drying towels. I know that the specific gift recipients I’m thinking of are always inviting people over and hosting gatherings for family and friends. And the hexagon pattern lends itself easily to the making of a pineapple, and pineapple is a symbol of warm welcome, friendship and hospitality (read more here if you’re interested!). So the pineapple hand-drying towel pattern was created. And since it is a symbol of friendship, it must be shared ^_^
I used Bernat Handicrafter Cotton in “Lemon Swirl” and “Sage Green”. I wish I could find a brighter yellow and a lighter green, but there weren’t any other kind of worsted cotton at the Michaels I visited. But I think overall it still looks like a pineapple.
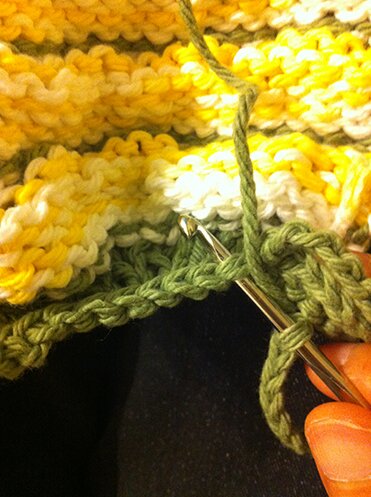
This pattern uses both knitting and crochet. Crochet is only used in the top (green, hanging) part. It’s not complicated, just involves making chains, single crochet and slip stitch.
I used two 4.5 mm straight needles and a 3.5 mm crochet hook. Also used tapestry needle for sewing and a 1‑inch button.
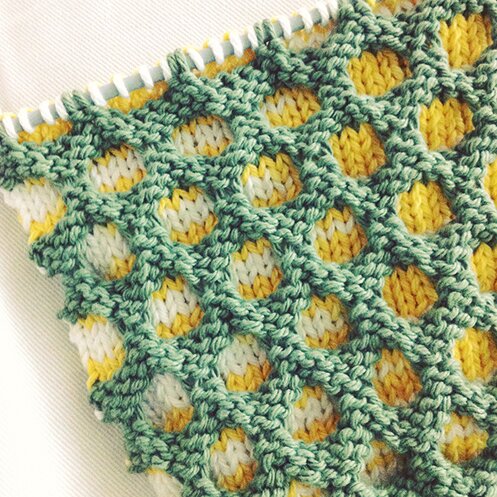
Knit — pineapple body:
First, download the free Circle Cloth pattern from Hakucho. (I know it’s a bit annoying to go back and forth between two patterns, but the knitting pattern isn’t mine so I don’t want to reproduce it here — so please bear with me >_<)
With green, CO 14.
Row 1: p all stitches.
Row 2: kfb all stitches (28 st).
Rows 3–8: Attach yellow, work pattern rows 3–8 in Circle Cloth pattern.
Row 9: Switch to green, work pattern row 9 in Circle Cloth pattern.
Row 10: k2, *k1fb, k1*, repeat from * to * across until last 3 st, k3 (40 st).
Rows 11–12: Work pattern rows 11–12 in Circle Cloth pattern.
Rows 13–18: Switch to yellow, work pattern rows 3–8 in Circle Cloth pattern.
Rows 19–22: Switch to green, work pattern rows 9–12 in Circle Cloth pattern.
Rows 23–28: With yellow, work pattern rows 13–18 in Circle Cloth pattern.
Rows 29–32: With green, work pattern rows 19–22 in Circle Cloth pattern.
Now there should be 3 sections of yellow completed.
Repeat pattern rows 3–22 in Circle Cloth pattern 3 more times. Then repeat pattern rows 3–8 once more. There should be 10 sections of yellow altogether. Fasten off yellow.
Pineapple top row 1: With green, work pattern row 9 in Circle Cloth pattern.
Row 2: k1, k2tog to last st, k1.
Row 3: p1, p2tog to last st, p1. (11 st.)
Row 4: k all st.
Row 5: p all st.
BO all st, don’t fasten off. Insert crochet hook in last remaining loop.
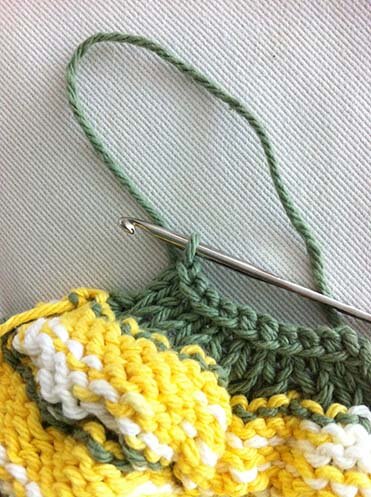
Crochet — pineapple top:
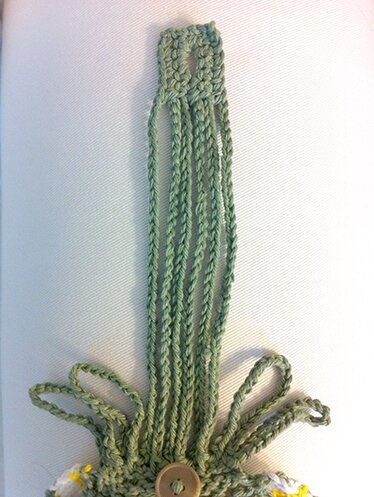
The pineapple top is crocheted in loops. We’ll first make 2 loops attached to the pineapple top, then make 3 longer loops going from the pineapple top and attached together at the top creating a buttonhole tap, and end with 2 loops attached to the pineapple top, like so…
Loop 1: From where we left off in the knitting part, ch 25, sc in same st at beginning of ch. When crocheting into the knit part, be sure to insert hook through both loops in the BO stitches.
Loop 2: ch 25, sc in next BO st.
Loop 3: sc in next BO st, ch 42, sc in 2nd ch from hook, sc in next 5 ch, ch 35, sc in next BO st at pineapple top.
Loop 4: sc in next BO st, ch 35, sc in each sc in the 6‑sc row that was made in loop 3, ch 1, turn (turning ch does not count as a st), sc in first sc, ch 3, skip 3 sc, sc in next 2 sc, ch 35, sc in next BO st.
Loop 5: sc in next BO st, ch 35, sc in next 2 sc at top of loop 4, 3 sc in next ch 3 sp, sc in last sc, ch 1, turn, sc in next 6 sc, ch 35, sc in next BO st.
Loop 6: sc in next BO st, ch 25, sc in next BO st.
Loop 7: ch 25, sl st in same st at beginning of ch, fasten off. Weave in ends.
Sew button to the knit part of the pineapple top. And we’re done! :D
Hope you like the project and have fun if you do give it a try. Have a fabulous first week of October! :D


/http://assets.curbly.com/photos/0000/0022/3536/purple-rain-costume-2297.jpg)