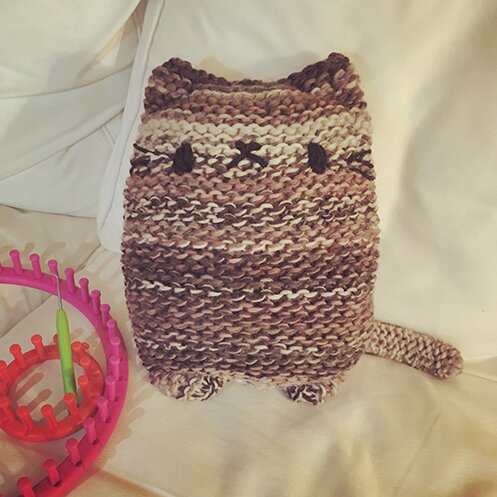
tchotchke the cat pillow

I bought some very chunky, very fluffy wool in Cape Bre­ton a few years ago. It knits up in var­ie­gat­ed stripes and I thought it would make a won­der­ful cat pil­low. And the yarn weight is great for the large gauge of loom knitting. 

I named the cat Tchotchke, because I like the sound of the word :D and because I have a lot of cat tchotchkes.

It’s basi­cal­ly a tube shape with­out any shap­ing, it’s the sewing togeth­er that makes the feet nub­by feet and the ears. It’s a very begin­ner-friend­ly project :)

Reg­u­lar knit­ting: Alter­na­tive­ly, if one isn’t into loom knit­ting, I imag­ine that this cat pil­low can also eas­i­ly be made with a 10 mm cir­cu­lar nee­dle and super chunky yarn. Just cast on 41 stitch­es, then knit one round and purl one round (garter stitch) until it’s 14 inch­es in length, then pro­ceed with the sewing instruc­tions. (I haven’t tried it though, so I don’t know if it might knit up small­er using reg­u­lar nee­dles, and one would there­fore make the cat shorter.)

I used:

41-peg loom, from this Loops & Threads set 

12-peg loom (option­al, just eas­i­er when mak­ing the tail)

Loom knit­ting pick

Super chunky weight yarn about 200 m / 150 g (I sug­gest using the chunki­est fluffi­est yarn you can find so less stuff­ing show through)

Poly­ester stuffing

Tapes­try needle

Black yarn (I used worsted weight dou­bled up)

Body:

With draw­string cast-on (instruc­tion video here), cast on all the pegs of the 41-peg loom using the super chunky yarn.

Knit one row (knit stitch instruc­tion video here, ignore the cast-on part in the beginning).

Purl one row (purl stitch instruc­tion video here, again ignore the cast-on part).

Repeat the pre­vi­ous two rows (thus work­ing the garter stitch) until the piece is about 14 inch­es in length.

Bind off (bind off instruc­tion video here).

Tail:

Cast on 7 pegs on the small­er loom or the same loom. 

Knit one row and purl one row. Repeat these two rows until the piece is 12 inch­es long. 

Leav­ing a very long yarn tail, weave the tail through the stitch­es on the pegs, then remove the stitch­es from the pegs and cinch to gath­er the stitch­es. Fold the tail in half length-wise and sew togeth­er using mat­tress stitch. Stop sewing and tie off 2 inch­es away from the end.

New we sew it togeth­er and make a cat shape!

With the draw­string cast-on on the body, pull on the yarn tail and cinch it close, but not too tight­ly. It will form a sort of curve. Tie off, then sew the open­ing close by sewing through both lay­ers of fab­ric using whip stitch. (pic­ture below)

With the oth­er end of the tube (the ears and head), using whip stitch again, and sewing both lay­ers of fab­ric togeth­er, sew from the edge in about 2 inch­es toward the cen­tre. Repeat from the oth­er edge. It will leave an open­ing in the cen­tre of the head. 

Stuff with stuff­ing, but not too firmly.

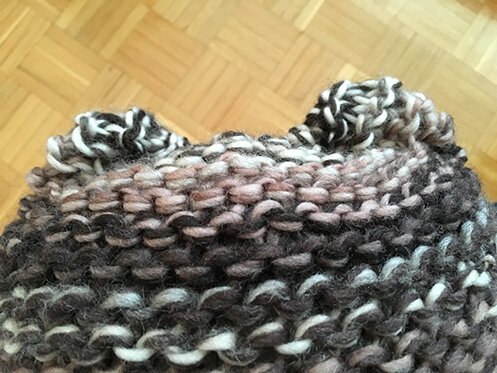
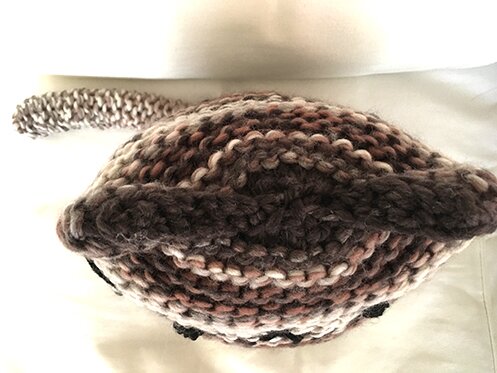
Weave a piece of yarn around each stitch in the cen­tre open­ing, cinch it tight­ly closed, and tie off secure­ly. (pic­ture below shows what the top of the head looks like after it’s all sewn together.)
With the tail, spread open the end of the tail and sew around its edges while attach­ing it to the body using whip stitch. It will look like this:
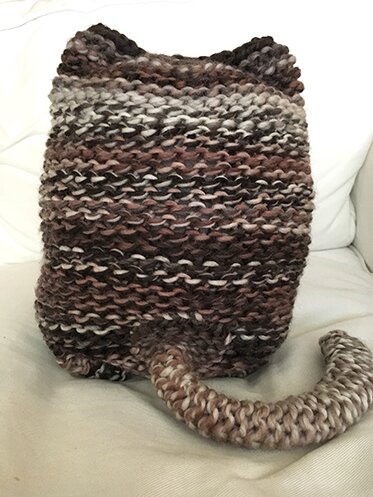
Final­ly, sew on eyes, nose/mouth and whiskers with the black yarn. 

A new friend to watch TV and hang out with! :D
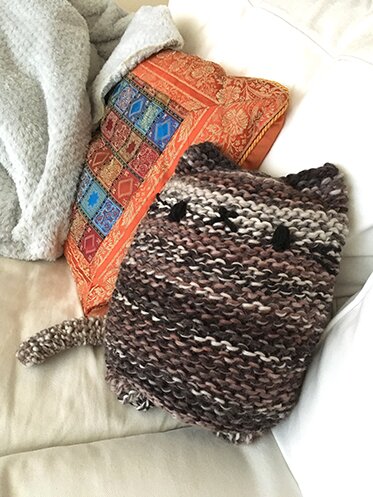
Have a good week everyone!
other fun things

I’ve been only post­ing about the 12 Days of Wood­land Crea­tures for the past month! But you know me, that would­n’t be the only project I’ve been work­ing on — here are some of the oth­er fun things that have been keep­ing my hands busy :D

Photo 2014-09-19, 6 47 03 PM

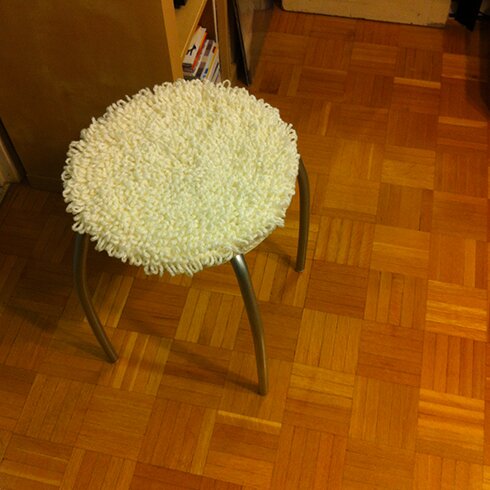
About a month ago I made a cou­ple of stool cov­ers for my awe­some friends as a wed­ding gift, fol­low­ing this pat­tern by We are Knit­ters. Yes! The loop stitch! It’s just so fun to make! But after mak­ing hun­dreds, pos­si­bly thou­sands of loop stitch­es to make the 2 cov­ers I think I will give it a rest for now… I think the cov­ers will also make nice padding for reg­u­lar chairs or extra floor seatings!

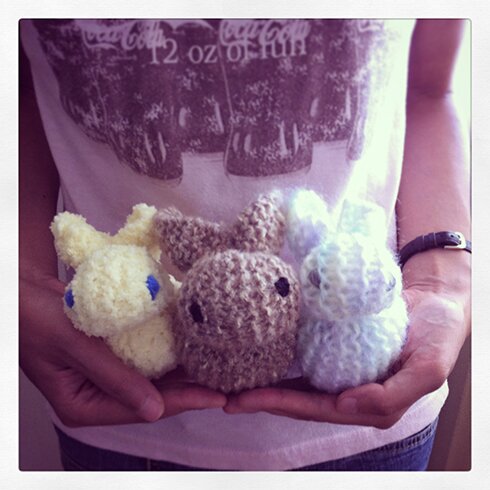
I also made these very cute (and very easy! Instant plush!) knit square rab­bits fol­low­ing this pat­ter from Lebenslustiger, for my niece and nephews to cel­e­brate the arrival of the new baby broth­er :D

square rabbits

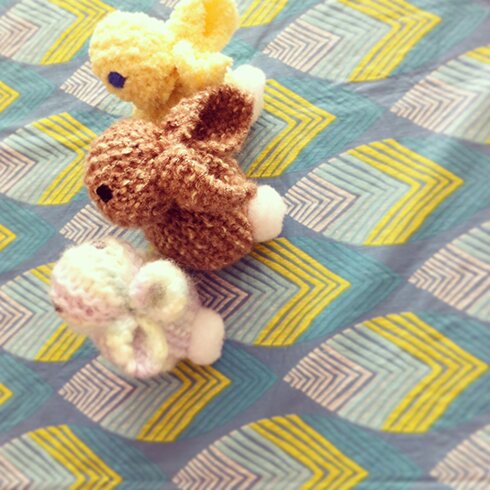
They have white pom poms for tails.

square rabbits 2

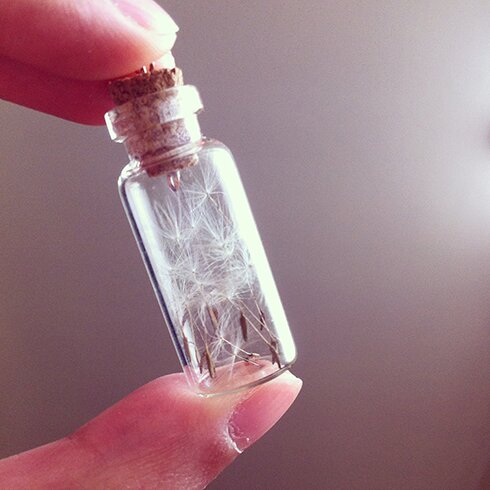
One day I went out to gath­er the last few dan­de­lion­s and filled a few small bot­tles with the seeds.

wishes

As you can see I’ve attached a head pin to the cork — they turned into neck­laces and are now in my friend’s shop, amongst oth­er things…

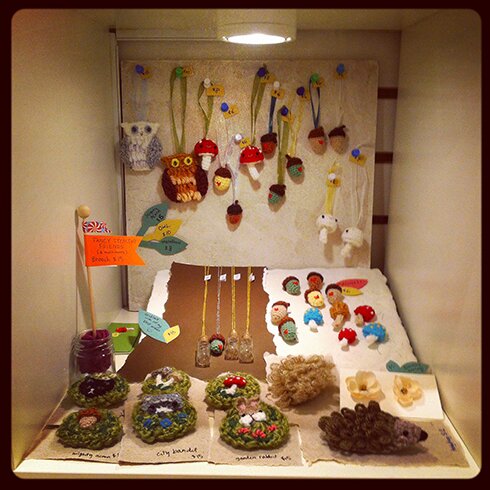
new shopThat’s right! I’ve joined my friend Jes­si­ca’s shop again this month :D It’s a shop in down­town Toron­to that rents out spaces to local artists/artisans. Please vis­it if you’re in the neigh­bour­hood :D You might rec­og­nize some of the pins that I made ear­li­er (see bet­ter pic­tures of them in this post) for an out­door craft show (which was unfor­tu­nate­ly can­celled due to bad weath­er), and the hedge­hogs and owls!

AND! As you may have noticed on the right side­bar of this blog I’ve also reopened my Etsy shop. I took a break from both the phys­i­cal shop and the Etsy shop last year because of a very packed sched­ule of school and work. But since I’ve grad­u­at­ed (yay!) I’ve got more time on my hands :D

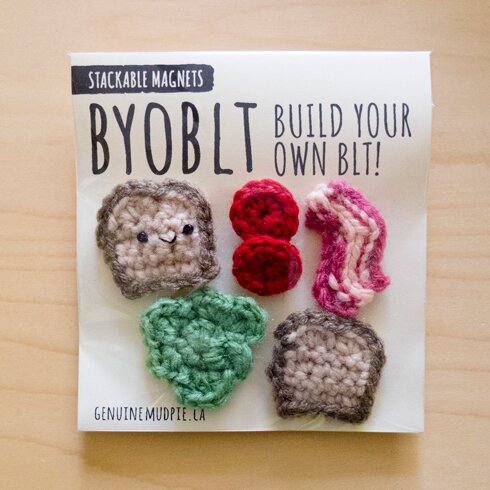
So one item I recent­ly list­ed — and I’m quite proud of it — is the BYOBLT stack­able mag­net set!

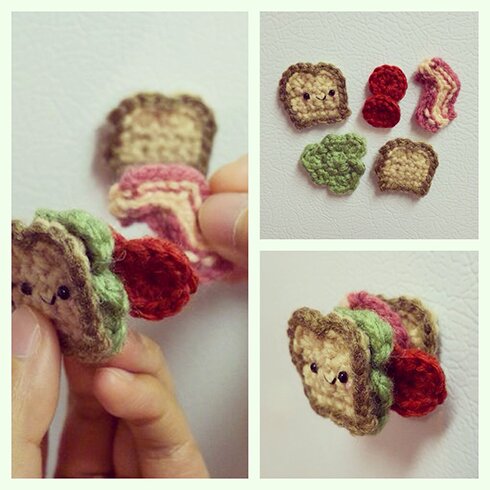
BYOBLTMike designed the pack­ag­ing for it — isn’t it so pro­fes­sion­al-look­ing? Here it is in action!

BYOBLT (2)

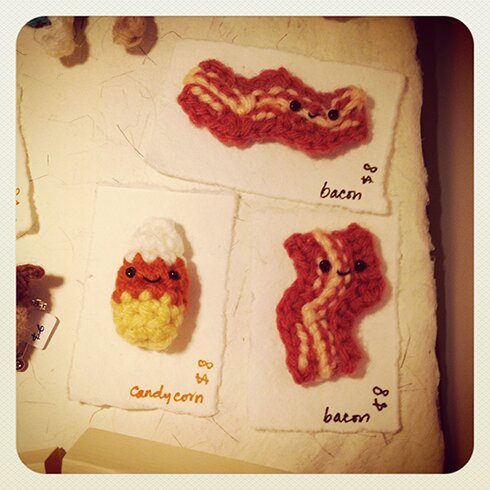
And because the bacon was a lot of fun to make, I made a few smil­ing bacon mag­nets for the phys­i­cal shop as well (plus some very fes­tive can­dy corns for the sea­son!). Maybe I will list them on Etsy too.

bacon

I have def­i­nite­ly been enjoy­ing more time to craft and be creative!

Wish­ing you a won­der­ful Fri­day and weekend!


order of the year

Because I only get about one order a year. And that’s per­fect­ly ok, because I’ve been real­ly busy with school and work. But I do real­ly enjoy work­ing on these. Makes me real­ly miss hav­ing a shop. I hope that one day I’ll be able to get back to it. 

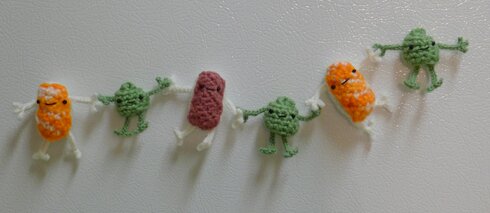
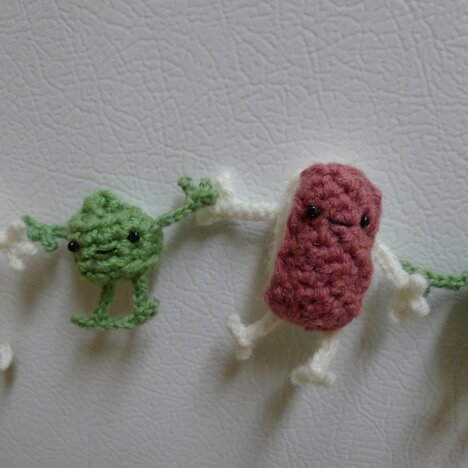
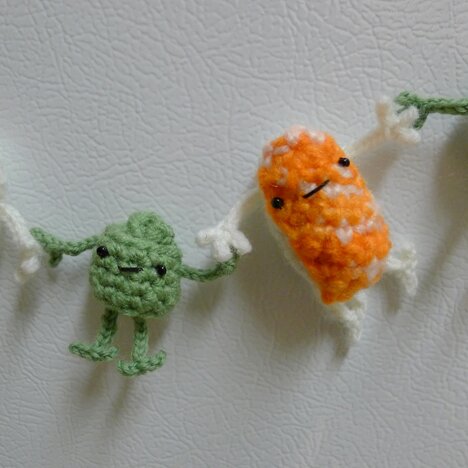
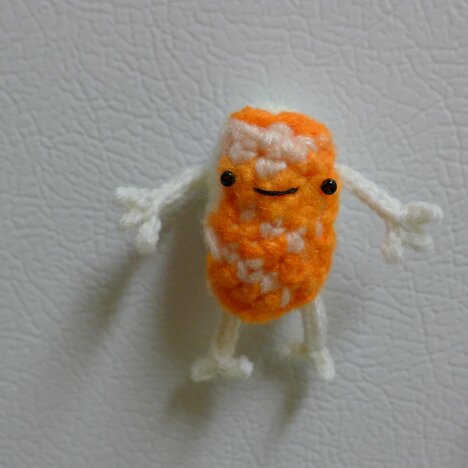
But here it is, nigiri and their wasabi friends :D

team sushi


Close up of the tuna…

nigiri and wasabi friend 2


Close up of the salmon… I found this nice var­ie­gat­ed orange yarn with white/peach, I think it mim­ics the mar­bling of the salmon nicely.

nigiri and wasabi friendsalmon

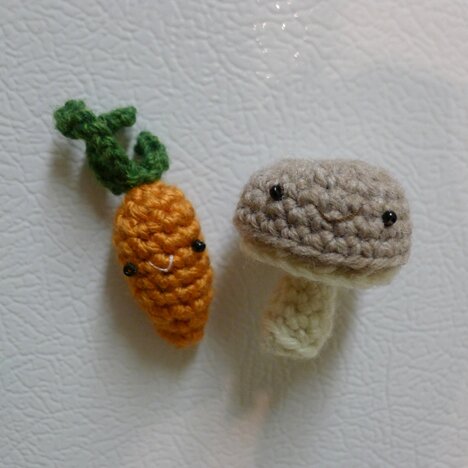
Plus a car­rot and cri­m­i­ni duo.

team veg

They’re on their way to the east coast (my favourite part of the coun­try!) as I write! Safe trav­els, tiny plush friends! 

Now that I’m on break, will be back with more fes­tive post­ings soon! Cheers!


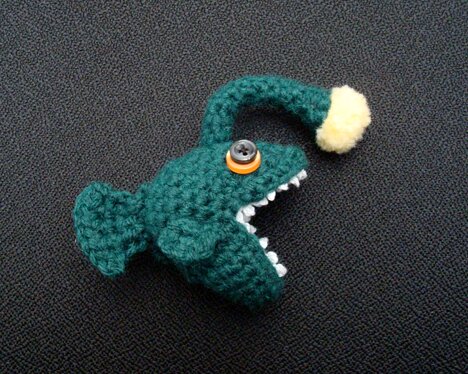
an angler fish named grace

grace 2

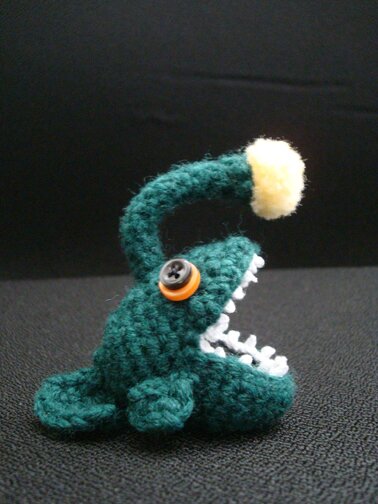
An angler fish named Grace, grate­ful for the light before its path.

It’s made from a pat­tern from this book, but the pat­tern is also online for free :D

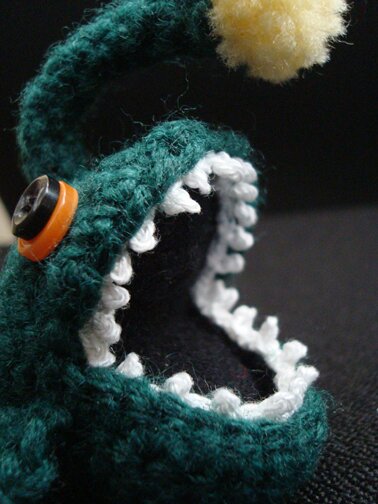
The pat­tern uses rib­bon for teeth, but I don’t have that kind of rib­bon, so I cro­cheted them with thread. I’m quite hap­py with how they turned out. And the mouth is lined with black felt.

teeth


She looks rather hap­py :D

grace 1


Have a great week!


sherbert, the yeti


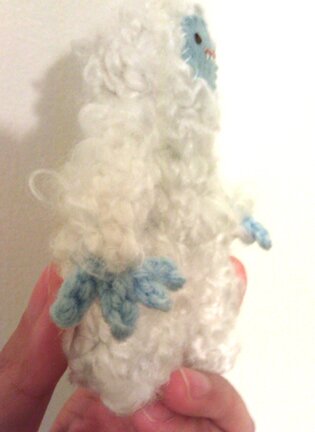
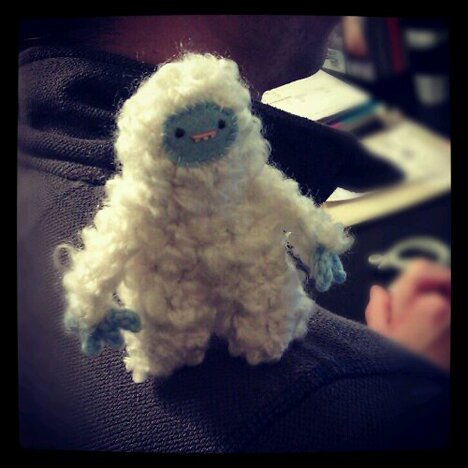
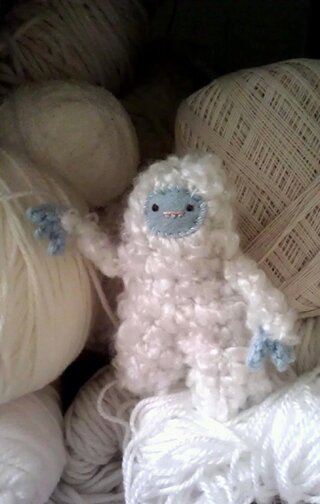
Meet Sher­bert, the yeti :D

Sher­bert lives on our couch with Fil­bert the Choco­cat and Her­bert the tiny ele­phant (Mike found him wan­der­ing about at a trade show and invit­ed him home).

Any­hoo, here’s how I made Sher­bert the yeti. He’s actu­al­ly made based on the ground­hog pat­tern, just with a more elon­gat­ed body and legs, and dif­fer­ent arms. And because of the kind of yarn and size of hook used, he turned out quite a bit big­ger than ground­hog (Sher­bert is 4″ tall, while ground­hog is 3″), but still tiny, for a yeti.


I used:

A fuzzy kind of yarn in white, like this one.

Worsted weight yarn in light blue

5.5mm and 3mm hook

Sewing nee­dle and white thread

Tapes­try needle

Small piece of  felt in light blue

Embroi­dery thread in brown, pink, and white

Stuff­ing (I used yarn scraps)


Head and Body:

With white yarn and 5.5mm hook:

Row 1: ch 3, 5 sc in 3rd ch from hook, sl st. in top of begin­ning 2 ch.

Row 2: ch 2, [2sc in next sc, sc in next sc] 3 times, sc in top of begin­ning ch.

Row 3 and on: sc around until piece mea­sures 1.5 inch­es from the begin­ning,  take hook off loop, don’t fas­ten off.

Cut an oval out of the light blue felt about 1″ wide and 3/4″ tall. Embroi­der eyes, mouth, teeth, and oth­er facial fea­tures as desired. Sew face to head (the piece you just cro­cheted) with sewing nee­dle and thread.

Put hook back in loop where you left off. Con­tin­ue with sc in each sc until piece mea­sures 2.5″ from the begin­ning. End with last st in cen­tre front (I just eye­balled it, but one could count the stitch­es to make sure it’s cen­tered if desired), don’t fas­ten off, con­tin­ue onto legs.

Legs:

ch 2, bring the ch across the open­ing of the body and sc in a st in cen­tre back (I just eye­balled it, but one could count the stitch­es to make sure it’s cen­tered if desired — the ground­hog pat­tern has process pho­tos that explains this step). 

Then, sc in each sc until the ch 2 in the mid­dle, sc in each ch, then sc in each sc for 3 more rounds, sl st. in each of next 2 sc, fas­ten off.

For the oth­er leg, attach yarn to the same st in cen­tre front at the base of the oth­er leg, ch 1, sc in next sc, sc in each sc until the st in cen­tre back at the base of the oth­er leg, sc in the st in cen­tre back, sc in each ch of the ch 2 in the mid­dle (one would have to cro­chet in the back loops of the chain), sc in the begin­ning ch 1 of this leg, sc in each sc for 2 more rounds, sl st in each of next 2 sc, fas­ten off.

Now would be a good time to stuff the ground­hog through the open­ings at the bot­tom of the legs. After stuff­ing, close the bot­tom of the legs by weav­ing through the inner loops of the open­ing with yarn and tapes­try nee­dle. Weave in ends.

Arms (make 2):

ch 5, sl st in 2nd ch from hook, sl st in each of next 2 ch, ch 1, fas­ten off.

This makes a thick chain with kind of a forked end, like this…

Weave ends into the thick chain.

Hands (make 2):

With light blue yarn and 3mm hook:

ch 4, sl st in 2nd ch from hook, sl st in each of next 2 ch, *ch 2, sl st in 2nd ch from hook, sl st in very first ch*, repeat from * to * once more, ch 4, sl st in 2nd ch from hook, sl st in each of next 2 ch, sl st in very first ch, fas­ten off. 

The hand looks like this…

Assem­bly:

Sand­wich the top half of the hand between the forked ends of the arm, hid­ing the yarn ends of the hand. Sew in place with sewing nee­dle and white thread (the fuzzy yarn is real­ly good with hid­ing sewing stitches).

Repeat for the oth­er arm and hand.

With sewing nee­dle and white thread, sew arms to body.

The arm and hand look like this…


And yeti is ready to take on the world! :D


Even chal­leng­ing the dif­fi­cult and dan­ger­ous mount of yarn, fac­ing the great risk of a yarn avalanche!


But at the end of an adven­tur­ous day, Sher­bert the yeti is back on the couch, enjoy­ing a cup of cocoa with his friends, and wish­ing every­one an awe­some week filled with won­der­ful, excit­ing things.


P.s. if you spot errors or any­thing unclear about the pat­tern feel free to drop me a note! 


hmm.

Not much to report late­ly. Still try­ing to get a rhythm of all the dif­fer­ent (and some new) projects and time­lines this fall. 

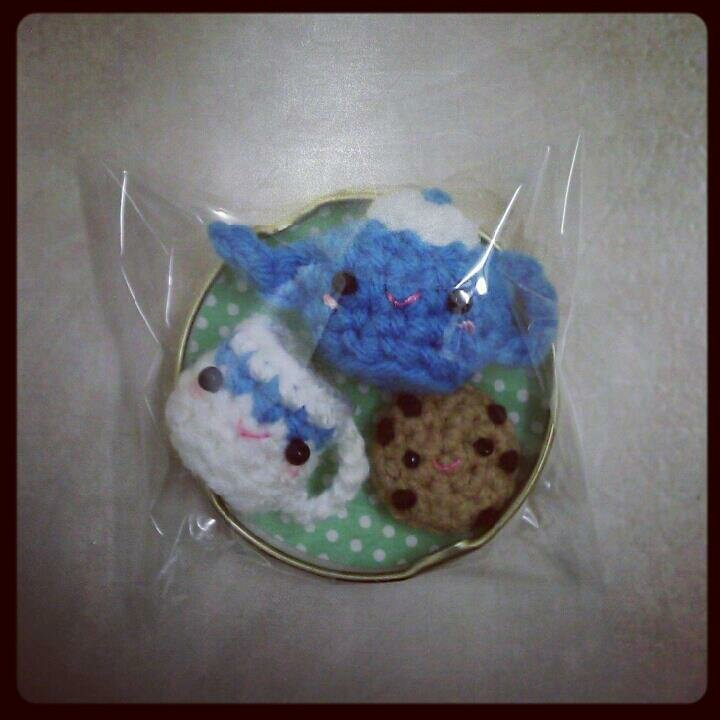
But at the end of the sum­mer I did man­age to fin­ish a new set of mag­nets. The idea of it has been lin­ger­ing in my head for a while. Tea time! :D


For­got to take a pho­to before I pack­aged it up for the shop, the shape of the teapot is a bit obscured by the plas­tic, and you can’t see the tea in the teacup (it’s made with yarn the same colour as the cook­ie)… will have a take bet­ter pho­tos if I make anoth­er set. Quite proud of the teapot, I must say!

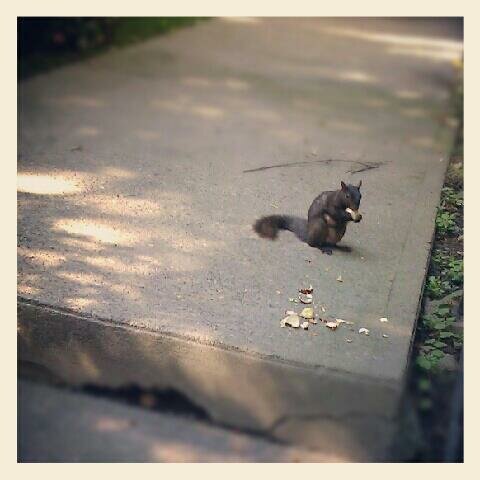
And last week I saw this squir­rel eat­ing a pret­ty siz­able chest­nut. Â 

He was so focused and still that I was able to take a pic­ture of him (maybe it’s a she…?). And here he is, hav­ing peeled off all the shells and enjoy­ing the chestnut.

I love chest­nuts too.

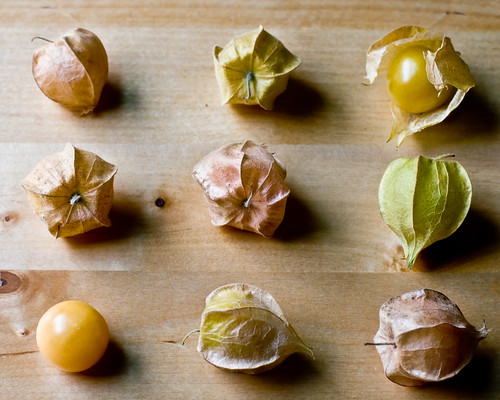
Yes­ter­day, I tast­ed ground cher­ries for the first time! :D

(found this nice pic­ture here, with recipe! :D)


Intense flavour for such a small fruit!

New dis­cov­er­ies everyday.

Think­ing maybe I need to come up with a dai­ly art prac­tice in the midst of this busy­ness (which means it would have to be very short, so the square-a-day project would­n’t work very well — but I think it’s impor­tant for me to take the time to pause and make some­thing). Will keep you post­ed! :D

Have a great week­end, everyone!


at the shop

I men­tioned a while ago that my friend opened a shop across from the art col­lege we attend­ed, and I was rent­ing some space for my plush… I don’t think I’ve ever showed you pic­tures of my plush in the shop! 

Here they are! :D


That was back in April. I’ve added more stuff this past weekend.

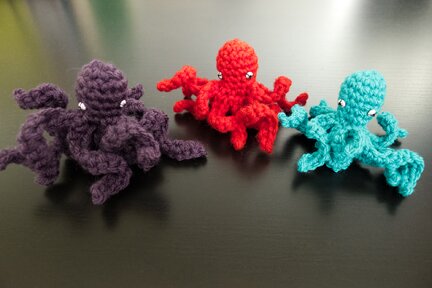
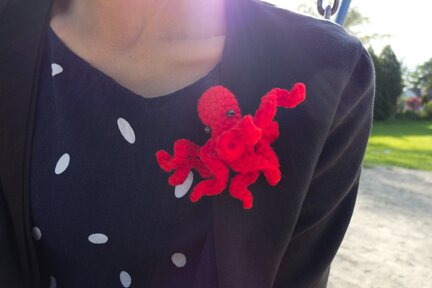
Fierce octo­pus pins!


The pro­to­type had eyes made of beads from the gift pack­age that my friend sent me — they’re extra fierce, bul­gy eyes! So I had to keep it for myself :D


Close up of the extra bul­gy eyes…


Also made tea rose pins that can also be worn on a necklace.


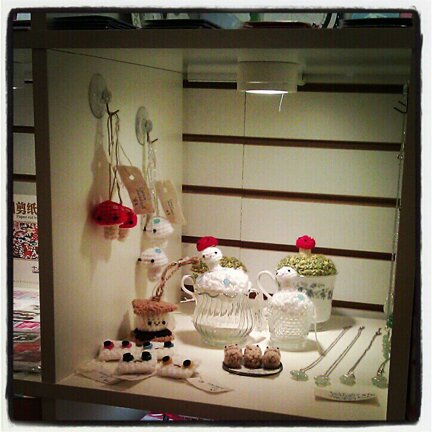
And the updat­ed shop! :D


Mike brought the new items to the shop and took this pic­ture for me, because I did­n’t have time to go that day. If you look close­ly you’ll see that one of my snow mush­room lid has been pushed into the jar… I sup­pose a cus­tomer thought it belonged inside the jar rather than sit­ting on top of it. And I sup­pose that’s one of the risks of putting my beloved plush into a pub­lic, phys­i­cal shop. My friend kind­ly fixed it for me afterward. 

I actu­al­ly found it dif­fi­cult to walk away from all my plush­es when I put them into the shop. Felt like I was leav­ing them behind… :’( So I like sell­ing online for this rea­son, I can keep my plush­es with me indef­i­nite­ly, until some­one buys them. At the same time, sales have been extreme­ly slow at my Etsy shop, while quite a few things have gone to good homes at my friend’s shop. So I’ve been con­tem­plat­ing whether to keep the Etsy shop…

Also, I’ve been hear­ing a lot about unfair prac­tices on Etsy late­ly. The lat­est news came from one of my favourite crafters. 

I won’t repeat the sto­ries here (if you’re inter­est­ed in learn­ing more please vis­it the above and fol­low­ing links), but I will cer­tain­ly join the protest, because a lot of what has hap­pened is sim­ply not right and our voic­es need to be heard.

Some believe that clos­ing our shops for one day won’t make a dif­fer­ence. My shop, for instance, will like­ly not make any sales on any giv­en day even when it’s open. Thus, its tem­po­rary clo­sure pret­ty much means noth­ing to Etsy in terms of profit. But I sup­pose by join­ing in the protest I can at least let the com­pa­ny know that I’m not okay with its unfair prac­tices toward my fel­low crafters and its inac­tion toward reselling.

Some expressed con­cerns that all the shops that are involved in the protest will be closed down by Etsy. I per­son­al­ly don’t believe that will hap­pen. And if that hap­pens then I will def­i­nite­ly not part­ner with an orga­ni­za­tion that oper­ates through dic­ta­tor­ship and sim­ply seeks to elim­i­nate all expres­sions of oppo­si­tion. I sup­pose the stakes for me is not as high as arti­sans who depend on their hand­made busi­ness to make a liv­ing. So that’s all the more rea­son for me to con­tribute my voice to this protest, in the hope that things can change for the bet­ter espe­cial­ly for crafters and arti­sans whose inde­pen­dent busi­ness­es are their main sources of income.

Sup­port handmade!


a long overdue shop update!

Spent the past week cro­chet­ing and sewing, and final­ly a shop update! :D I haven’t been putting a lot of effort into the Etsy shop, to be hon­est, but my friend has just opened a phys­i­cal shop down­town and I real­ly want­ed to make some stuff for her, so I thought I’d put some new stuff in my shop as well :D


I had this idea in my head for a long time, a grassy brooch with flow­ers on it, but could­n’t fig­ure out what I should use to make the flow­ers, what kind of flow­ers I want to make, etc. It final­ly all came togeth­er when the weath­er was get­ting warm and the dan­de­lions start­ed bloom­ing, and I was remind­ed of the back­yard in my fam­i­ly’s first home in Cana­da. It was in North­ern Ontario and we had wild ros­es and, of course, dan­de­lions in the yard. We’ve nev­er had a yard or gar­den in Hong Kong, so this was quite new to us. We plant­ed oth­er things too, like pan­sies. But the wild ros­es and dan­de­lions, they’re the ones that came back spring after spring with­out water­ing, tena­cious­ly, per­sis­tent­ly, care-free.

So! The spring gar­den brooch is in the shop! :D


I also made an oval one.


The brooches were a lot of fun to make. I’m hop­ing to make more soon, maybe with dif­fer­ent flowers.

And here’s snow mush­room’s cousin, spring mush­room! :D


Spring mush­rooms like sun­bathing and pic­nick­ing on sun­ny days and falling asleep to the sound of the rain. He has shiny sequins on his cap. 


There’s also anoth­er cousin of snow mush­room, the snowflake mush­room. She will be liv­ing in my friend’s shop.


Snowflake mush­room has snowflakes on her cap.


The orig­i­nal snow mush­room is still avail­able at the shop :D

And here are the ones I’m bring­ing to my friend’s shop — the teacup mushrooms!

It’s also an idea that I’ve been think­ing about for a while. The grassy bit is a lid, so one could put things in the teacup, like can­dy, loose change, a rock col­lec­tion, love notes…

Here’s anoth­er one…


When I was at the thrift store I saw these glass­ware and I thought these would be just per­fect for the snow mush­rooms! So I had to make them too.


They have spark­ly beads on their caps :D


The teacup and glass­ware mush­rooms are only at my friend’s shop for now, but I’d be hap­py to mak­ing them on com­mis­sion :D


It was a bliss­ful week cro­chet­ing, drink­ing tea and watch­ing Gil Gris­som solve crimes…

The mush­rooms and I wish you a love­ly week­end! :D 


shop revisited

I have plush in my shop again! :D Since I had to list a cus­tom order I re-list­ed the orna­ments as well. 

There’s a s’more… he’s in stock.


And snow mushrooms… 


The snow mush­rooms in the pic­ture have been sold, so they are made to order, and will like­ly look like this one…


With the rib­bon loop instead of jute. And has gills under its cap! :D (the old ones did­n’t have gills.)


Drop by for a vis­it if you have a minute! :D


super quick penguin tots!

Inspired by a dear friend of mine who loves pen­guins :D

Remem­ber the tater tot pat­tern? It’s just adding a few things to the tots to make them look like penguins.

Super quick to make and hard­ly uses any yarn!


You’ll need:

A bit of yarn in pen­guin colours (blue, black, teal?)

A bit of felt in pen­guin colours

A bit of felt in white

A 3.5 or 3.75mm hook

Small round black beads for eyes

Sewing / embroi­dery needles

White, black, and pen­guin colour sewing thread

Orange embroi­der floss

Stuff­ing (I use yarn ends)

Jin­gle bells (option­al)


Sor­ry for some of the blur­ry pho­tos due to low light con­di­tions. It’s been dif­fi­cult try­ing to take pho­tos in full day light since day­light sav­ing time with the sun going down at 4pm :( If you need clar­i­fi­ca­tion please feel free to leave a com­ment or send me a message!


First, fol­low pat­tern for tater tots up to row 5 (before decreas­ing). Remove hook but don’t fas­ten off.

With white felt, cut a small round­ed trape­zoid-like shape for bel­ly and sew it onto the pen­guin body. Then sew on the eyes with the black beads and embroi­der the beak with orange embroi­dery floss. (Now that I look at it, it might look even cuter with some rosy cheeks with pink embroi­dery floss!)


After all sewing/embroidering is done stuff the pen­guin. I also threw in a jin­gle bell. The jin­gling is muf­fled by the stuff­ing but it still makes a fun noise.


Con­tin­ue onto row 6 and the rest of the tater tot pat­tern. 

Then, using the pen­guin colour felt, cut out two small teardrop shapes for wings, and sew them onto the sides of the penguin.


And guess what? Now you have a pen­guin! *jin­gle jin­gle jingle*

To make it into an orna­ment, I did­n’t want to just attach the yarn to the top of the pen­guin because it might pull it out of shape. So instead I hooked a piece of sil­very yarn right through the length of the body. This might be a bit tricky with the jin­gle bell in it, but it’s pos­si­ble to maneu­ver through.


Pull the piece of yarn from the bot­tom of the pen­guin and out through the top. Then pull the one end back down through a dif­fer­ent stitch from the top and out through a dif­fer­ent stitch at the bot­tom. This dia­gram here may make it eas­i­er to understand…


Through dif­fer­ent stitch­es at the top…

Through dif­fer­ent stitch­es at the bottom…


Now make a knot at the top…


And tie the two ends togeth­er at the bottom…


Then weave the ends into the body.

And our pen­guin is ready to dangle!

Cheers! 


Â