a good day after all

On Fri­day, errands and a meet­ing brought me to Queen Street West, an area of the city that brings up fond mem­o­ries of art col­lege days. 

Usu­al­ly I would rum­mage through antique shops and read as many cro­chet and knit­ting books as I can at Rom­ni Wools, but I was­n’t hav­ing a very good day, still recov­er­ing from a par­tic­u­lar­ly tough day at work ear­li­er in the week. Self-doubt came rush­ing in like a giant wall of waves. And the future sud­den­ly seemed very bleak. Like noth­ing I do is ever good enough, or ever going to be good enough.

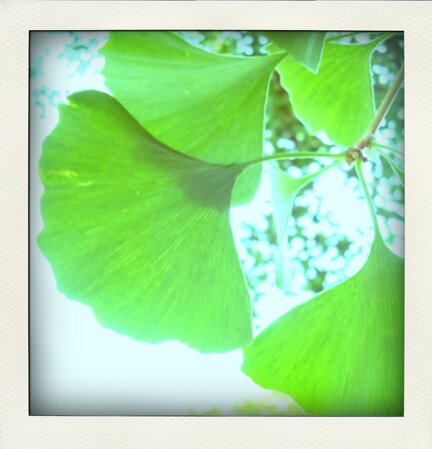
After run­ning those errands I still had plen­ty of time before the meet­ing, so I decid­ed that I would try to find the white squir­rel at Trin­i­ty Bell­woods Park. But not only the white squir­rel, all the squir­rels must be hid­ing in cool places in the trees — I could hard­ly see any squir­rel at all! I dragged my heavy bags and tired legs for­ward in an attempt to find a park bench in the shade — avoid­ing the sun­ny spots was what need­ed to be done here — but the only free ones were those bak­ing in the sun, of course. So I walked toward a friend­ly-look­ing tree that offered a large area of shade. Once I was under its shade I looked up, and real­ized that it was a gink­go tree — a liv­ing fos­sil, my favourite kind of tree! That made me hap­py, like spot­ting a friend in a par­ty of strangers, or receiv­ing kind­ness from a passerby. 


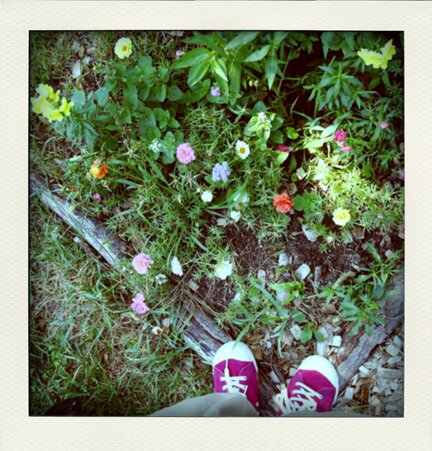
I sat in the shade for a bit, and when I was less tired I got bored, so I walked around the park, and found a small flowerbed, with flow­ers of all dif­fer­ent colours, like a celebration.


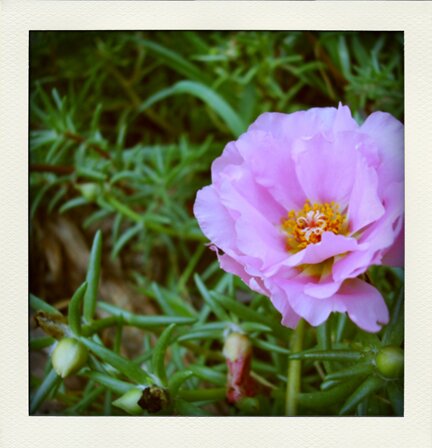
There were lots of these flow­ers that looked like they were made out of crepe paper. I don’t know much about plants and dont’ know what they’re called. Per­haps you can help me out?


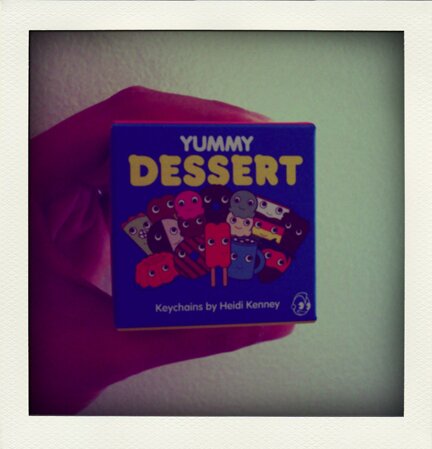
After wan­der­ing in the park I still had more time, and I was feel­ing a bit bet­ter, so I thought I’d wan­der in the streets. After all, while being all gloomy ear­li­er I skipped some of my favourite shops. So I wan­dered into Mag­ic Pony, and was sur­prised that they car­ry the Yum­my Dessert key­chains by Hei­di Ken­ny ‑ I thought they were only sold in the US! Hei­di Ken­ny’s blog was one of the first ones I fol­lowed and inspired this lit­tle blog of mine. So I thought I must get one of those keychains!

Prob­lem was, they were sold in blind box­es, which meant that one could­n’t choose the par­tic­u­lar toy one want­ed. You know which one I want­ed to get most? My favourite is the jel­lo mold. 


I read on the box that I had a 1/25 chance of get­ting the jel­lo mold. I thought as long as I did­n’t get the white and brown cook­ie I would be hap­py (not that it was­n’t cute, it just did­n’t quite look like a cook­ie…). I picked up a box with my eyes closed. As the friend­ly Mag­ic Pony staff cheered me on, I anx­ious­ly opened the pack­ag­ing and out it tumbled…

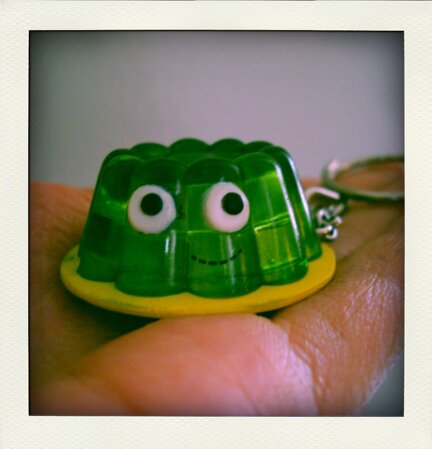
A JELLO!!!

OMG I GOT A JELLO!!!

XD 

The Mag­ic Pony is indeed magical.

It’s even slight­ly squishy like real jel­lo! XD

I made it just in time to my meet­ing with my super­vi­sor. I real­ized how much I miss being in a com­mu­ni­ty of peo­ple who do the same kind of work — the same kind of wide­ly-mis­un­der­stood-and-unrec­og­nized-by-the-main­stream work — and under­stand. I was once again remind­ed of the pur­pose of my work, and the skills that I do have. And the future seemed a bit more hope­ful. (If you want to know what kind of work I do head over to the about page. I updat­ed it recent­ly :D)

When I got home it was late. I checked my emails and Word­Press told me that a love­ly vis­i­tor had com­ment­ed that she liked my favourite things posts and may con­sid­er writ­ing in her blog again. These words of kind­ness remind me of those moments when a client looks up from the art she’s mak­ing and smiles with her eyes, sat­is­fied by a moment of joy or heal­ing or insight or con­nect­ed­ness with a vibrant­ly cre­ative part of self. It’s about offer­ing what lit­tle I have and see­ing oth­ers turn it into some­thing amaz­ing beyond my imag­i­na­tion. I mean, the abil­i­ty to turn ordi­nary things into amaz­ing things is already inside every­one, whether I put things out there or not. But I guess the dif­fer­ence is that I did put things, or some­times myself, out there. Some­times it does noth­ing, but I know that some­times it can make a dif­fer­ence. And that, I remind myself, is what I will have to hold on to as I trav­el along.

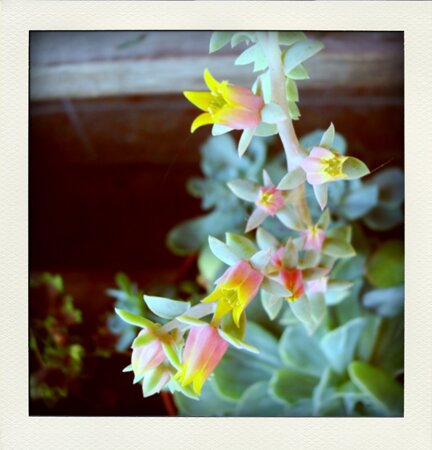
Today we walked passed a food mar­ket and saw this bloom­ing suc­cu­lent plant (again, I have no idea what it’s called). I’ve seen the same kind of plant before, and when it blooms it has a long stem com­ing out of the mid­dle of the plant with small pink flow­ers branch­ing out at the top. I always thought it looks like it’s offer­ing its flow­ers to the world.


It’s a bit of a long-wind­ed post. A bit all over the place, too. But I guess at the end of the day it’s just about catch­ing the bright things, and find­ing parts of myself and my place in the world in the midst of the bright things and not so bright things.

And see­ing that it’s almost Sun­day, I’ll end with a video that cap­tures a small, but very bright moment :D


Have a good day, friends!


favourite things friday


Make a sum­mer­time wind chime with bam­boo stakes! Tuto­r­i­al from Michele Made Me.
 

I love shrink plas­tic, and these shrink plas­tic pins are adorable! How-to on Wee Won­der­fuls, spot­ted on my plush swap part­ner’s love­ly craft blog, Kitsch-n-Zinc :D
 

Made with acrylic paint and water in spray bot­tles! Acrylic paint real­ly does not come off cloth­ing (the splash of pur­ple paint that I got on my tan colour coat has­n’t even fad­ed after 4 years and count­less wash­es) and in this case it’s a good thing :D I’ve got to give this a try with some plain old t‑shirts some­times! From Fru­gal Fam­i­ly Fun.


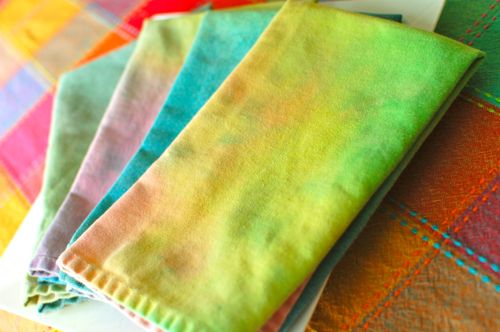
I have this duvet cov­er from Ikea! :D This duvet-cov­er-to-pil­low-mat­tress makes a won­der­ful day bed, with­out hav­ing to buy the bed frame and every­thing. How-to on South­ern Dis­po­si­tion.


This remind­ed me of some­one from art col­lege, who one day brought his bicy­cle into school, laid out sev­er­al large pieces of paper in the hall­way, some­how cov­ered the wheels of his bike with print­ing ink, and rode his bike across the paper :D Don’t have room in the apart­ment to ride a bike across the paper, but this rolling pin method seems fun! From Irre­sistible Ideas.


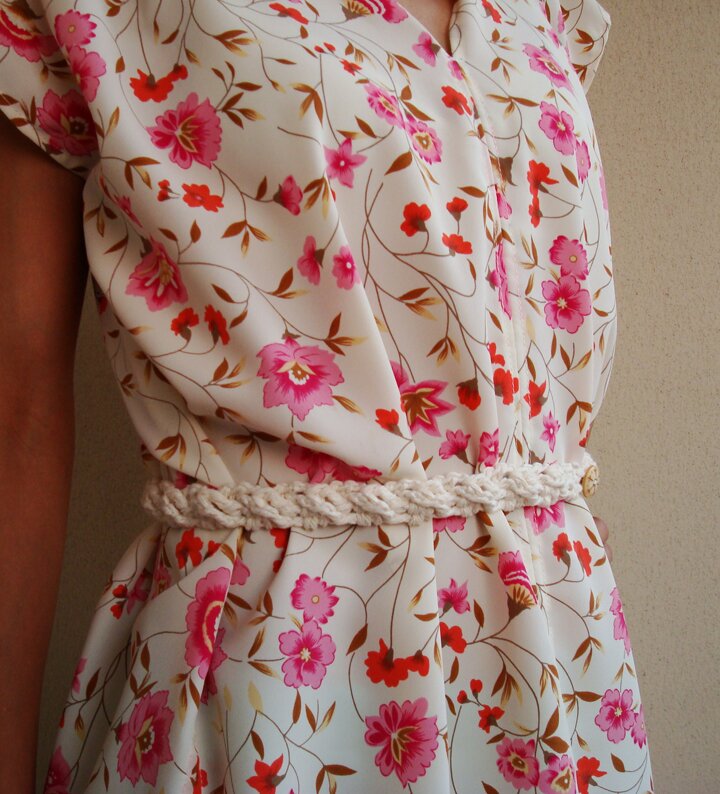
When we went to Malaysia, our tour guide was always wear­ing these real­ly flowy tops that were basi­cal­ly a great big piece of fab­ric, fold­ed in half with a hole cut out for the neck­line and stitched togeth­er on the two side seams. Appar­ent­ly they’re called pon­cho top/tunic, but I also like to call them the but­ter­fly top/tunic. Any­way, I love the sim­plic­i­ty of the design and con­struc­tion, and loose-fit­ting cloth­ing actu­al­ly feels a lot cool­er (both tem­per­a­ture-wise and style-wise) than tight-fit­ting cloth­ing with lit­tle fab­ric. Here’s an awe­some how-to for the but­ter­fly pon­cho top, from Blooms and Bugs :D


I’ve nev­er worn heels in my life (for real!) but these are cute. Heels embell­ished with bias tape! I’m sure it will also work on a plain pair of flats. Genius idea from The Moth­er Hud­dle.


This is fas­ci­nat­ing — print­ing on cro­chet and knit items with cyan­otype. It’s unlike­ly that I will try it because of the com­pli­cat­ed chem­i­cals involved, but it’s love­ly to look at. If you’re inter­est­ed there’s a detailed how-to on Craft! 


When I was in high school sol­id per­fume from the Body Shop was par­tic­u­lar­ly pop­u­lar. I got one from a friend for Christ­mas. The ingre­di­ents in this project looks man­age­able, with beeswax and essen­tial oils — a Christ­mas gift project, per­haps! From Design Sponge.


This is so sim­ple — just a pen­cil with an eras­er top and ink pads — but the pos­si­bil­i­ties are end­less! From Mom­tas­tic.


A real­ly neat way to make a paper cut por­trait, using pho­to-edit­ing soft­ware to sep­a­rate the high­light and shad­ows of a pho­to. Tuto­r­i­al on Dude Craft.


We’re in need of more work­ing sur­faces in our apart­ment, so this mini lap top desk tuto­r­i­al from Fresh Home Ideas real­ly caught my eye. We’re not handy kind of peo­ple though, so we’re prob­a­bly going to look for a ready-made desk rather than build one. It’s a cool-look­ing desk nonetheless!


These orange boat jel­lo cups are bril­liant! Part of a how-to for a pirate-theme par­ty on Make and Takes.


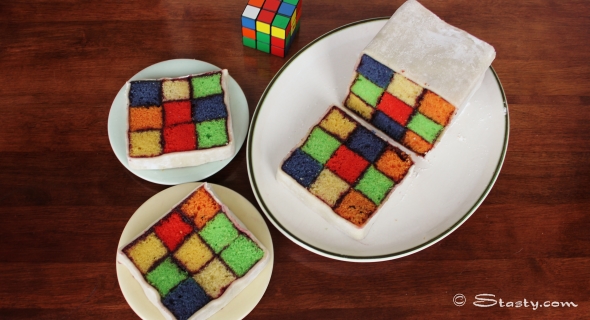
And this Rubik Bat­ten­burg cake would be a hit at any par­ty. Recipe and how-to on S’tasty.


Have a great week­end, every­one! :D

red belt

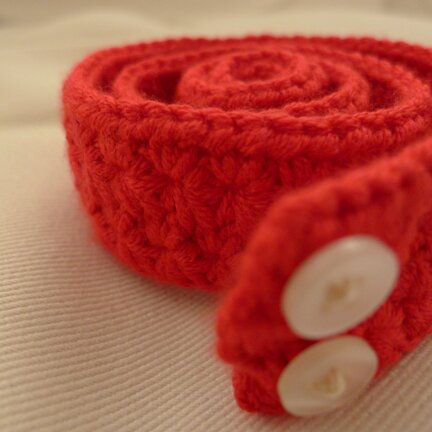
I recent­ly made a dress out of a pil­low­case inspired by this tuto­r­i­al (more on that dress lat­er — I’m going to make one big post of my recent dress­mak­ing adven­tures :D) and I real­ly want­ed a red belt to go with it. I real­ly like the tex­ture of this star stitch coin purse pat­tern so I decid­ed to mod­i­fy it a bit to make a belt. 

So the pat­tern isn’t real­ly my orig­i­nal — I owe much to Fruit­ful Fusion, the blog where I found the free star stitch coin purse pat­tern, and for which I’m very thank­ful because I learned a new stitch! :D I think it works real­ly well for a belt because it’s tight and stur­dy, so I doc­u­ment­ed what I did in case oth­ers are inter­est­ed in mak­ing a belt too.

I used some ran­dom red yarn in my stash, which was gift­ed to me along with three oth­er box­es of yarn so there was no label, but it should be a sport weight or light worsted weight. I used a 3.5mm hook to make the stitch­es tight and stur­dy. I also used two 1/2″ but­tons, plus nee­dle and cro­chet thread to sew on the but­tons. Belt is about 1 1/4″ wide.

Abbre­vi­a­tions used:
ch — chain
sl st — slip stitch
yo — yarn over
hdc — half dou­ble crochet 

To start, make a long chain such that when wrapped around the waist the two ends meet.

ROW ONE

First stitch: insert hook into 2nd ch from hook, yo and pull up a loop. Insert hook into next ch, yo and pull up a loop. Insert hook into next ch, yo and pull up a loop… 

(First stitch con’t) … yo and pull through all 4 loops on hook, ch 1.

Sec­ond stitch and on: insert hook into the ch 1 just made (arrow 1 in above pho­to), yo and pull up a loop. Insert hook into the base of last stitch on the base ch (arrow 2 in above pho­to), yo and pull up a loop. Insert hook into next ch, yo and pull up a loop. Insert hook into next ch, yo and pull up a loop — 5 loops on hook…

(Sec­ond stitch con’t)… yo and pull through all 5 loops on hook, ch 1.

Repeat sec­ond stitch to end.

*Note: if you have an odd num­ber of stitch­es in your base chain alto­geth­er, you will have one extra stitch in the end. But I would­n’t wor­ry about count­ing the ch to make sure there’s an even num­ber. At the last pat­tern repeat just insert hook into that last ch and pull up a loop, so there will be 6 loops on hook, then pull through all loops and ch 1 as usual.

ROW TWO

ch 2, turn, 2 hdc under each ch 1 space to end.

Note that I work the hdc under the ch 1 space from pre­vi­ous row, rather than into it, to avoid hav­ing a ridge between the rows of star stitch­es. The pic­ture below demon­strates where I’m insert­ing the hook.

At the end of the row, work 1 hdc into the top of the turn­ing ch of the pre­vi­ous row.

ROW THREE

First stitch: ch 2, insert hook into the 2nd ch from hook, yo and pull up a loop. Insert hook into the first hdc, yo and pull up a loop…

(First stitch con’t)… insert hook into the next hdc, yo and pull up a loop. Insert hook into the next hdc, yo and pull up a loop — 5 loops on hook…

(First stitch con’t)… yo and pull through all 5 loops on hook, ch 1.

Sec­ond stitch and on: insert hook in ch 1 just made, yo and pull up a loop. Insert hook in base of last stitch in hdc, yo and pull up a loop. Insert hook in next hdc, yo and pull up a loop. Insert hook in next hdc, yo and pull up a loop. Yo and pull through all 5 loops on hook, ch 1.

Repeat sec­ond stitch to end. In the last pat­tern repeat, insert hook in turn­ing ch of pre­vi­ous hdc row, yo and pull up a loop. Yo and pull through all 5 loops, ch 1.

Row 4: Repeat row 2. Don’t fas­ten off.

But­ton loops: worked over the short end of the belt.

ch 1, sl st in end of row 4, ch 5, sl st in the same space as pre­vi­ous sl st, sl st in end of row 3, sl st in end of row 2, ch 5, sl st in the same space as pre­vi­ous sl st, ch 1, sl st in end of row 1. Don’t fas­ten off.

Sew but­tons onto the oth­er end of the belt (as usu­al I refer to this method to cre­ate more space behind the but­tons for the but­ton loops).

Try on belt and read­just the num­ber of ch in the but­ton loops if nec­es­sary. Fas­ten off, weave in ends, wear with dress or tunic! :D


As usu­al if you have any com­ment or ques­tion please feel free to drop me a note! Have a hap­py Wednes­day! :D


Al McFluffytail

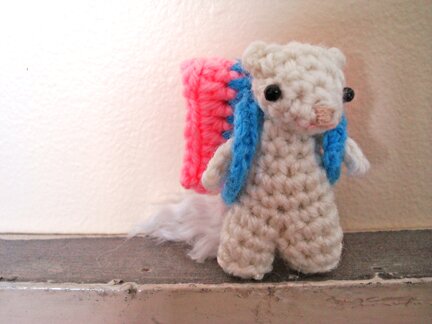
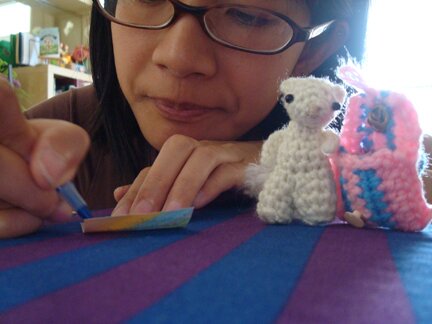
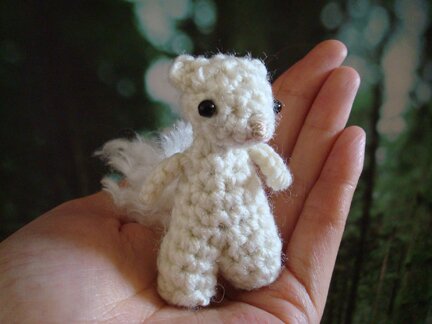
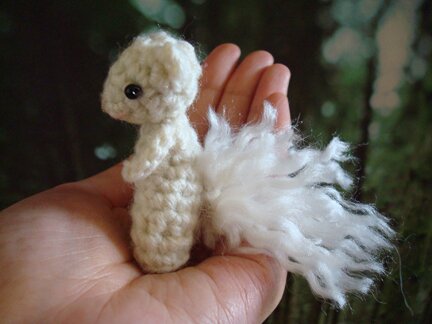
I decid­ed to make a white squir­rel for the plush swap I men­tioned yes­ter­day. I heard that Al McFluffy­tail the white squir­rel has safe­ty arrived in the UK! :D 

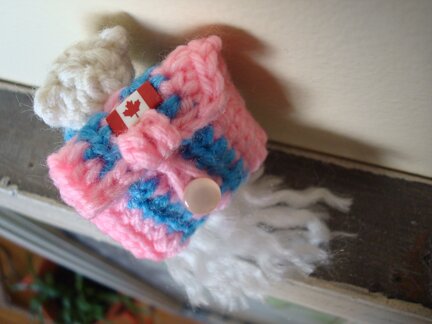
Al is a dis­tant (and cro­cheted) cousin of the leg­endary white squir­rel, Whitey McRedeyes of Trin­i­ty Bell­woods Park in Toron­to. Since the theme of the swap is “stars and stripes” (to cel­e­brate Inde­pen­dence Day), Al has a stripy back­pack. And like it is with all good Cana­di­an back­pack­ers, his back­pack proud­ly bears a Cana­di­an flag :D

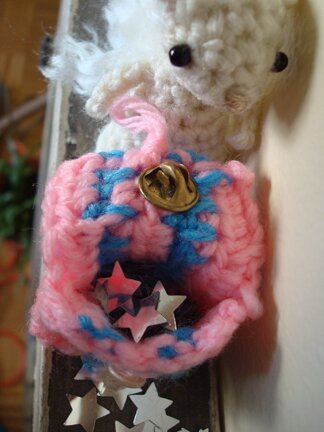
Inside his stripy back­pack, spilling its content…

Star­dust con­fet­ti! :D

Before send­ing him off at the post office, we did a pho­to shoot in front of my for­est backdrop.

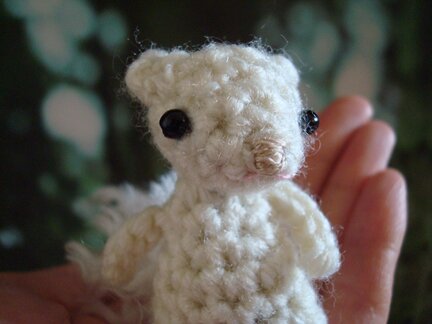
Liv­ing up to his fam­i­ly name — his tail is extra fluffy! :D

He dic­tat­ed the note for his new friend at his new home…

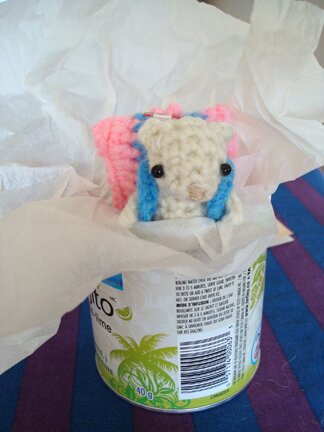
I was going to send him off in a tea tin, but then decid­ed against it, because of a ter­ri­ble men­tal image of the tea tin rolling away off the post truck and Al being lost on the road for­ev­er… >_< so in the end I used a box wrapped in an enve­lope. But I think Al rid­ing in a tea tin makes a good photo.

I’m so hap­py that Al has gone too a good home now. But we’ll still be think­ing about you always, Al McFluffytail! 


royal mail! :D

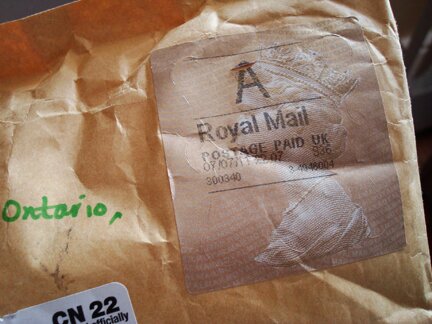
I par­tic­i­pat­ed in a plush swap recent­ly (to find out more about future swaps see this Face­book page) and my swap arrived from the UK, via Roy­al Mail! :D I always feel extra spe­cial when I receive mail from the UK and it says Roy­al Mail with the Queen on it :D

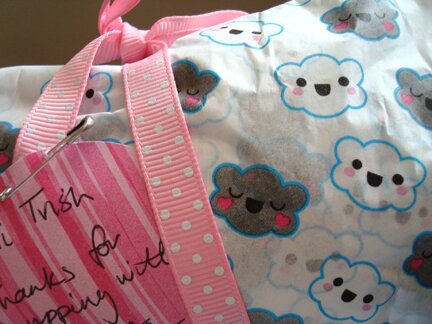
I was so so so excit­ed so I feel com­pelled to take step-by-step unbox­ing pho­tos… it was wrapped in this super cute cloud tis­sue paper, with a pol­ka dot pink rib­bon, and a real­ly nice note :D

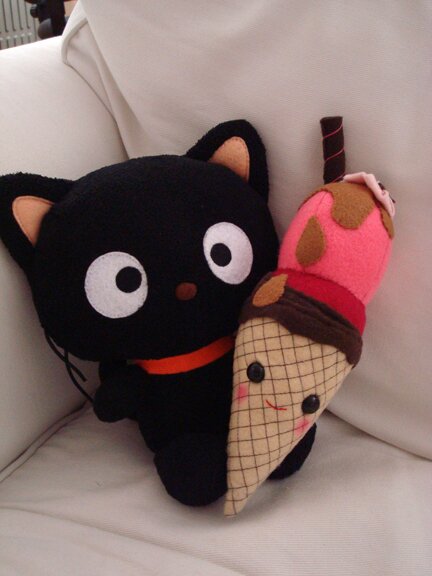
And it was… it was a plush ice cream cone!!! It’s total­ly some­thing I would have on my favourite / wish list on Etsy, some­thing I would total­ly buy if mon­ey isn’t an issue. It’s just what I always want­ed — a large felt plush dessert! It’s going to live on the couch with Fil­bert the Choco­cat! :D

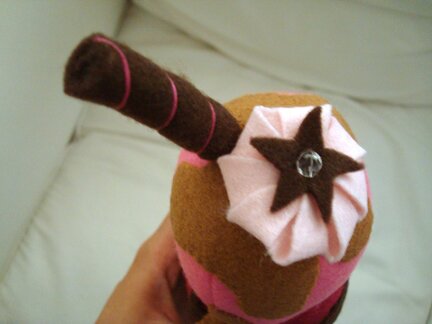
I love, love, love the drip­ping caramel sauce and the stitch­ing on the cone! And check out the choco­late cook­ie roll and the pink mousse top­ping! :D

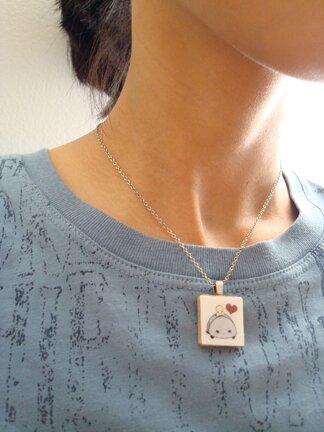
My swap part­ner even sent a toast­er charm with the pack­age! I wear it as a necklace. 

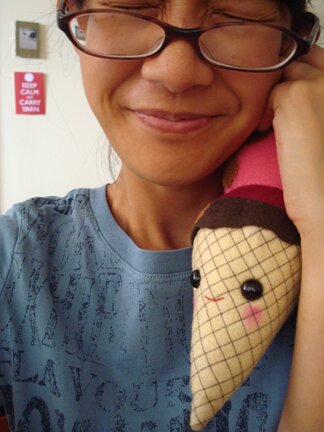
Ice cream hug!! XD (it was­n’t inten­tion­al but my “keep calm and car­ry yarn” post­card in the back­ground is quite fit­ting here :D)

I feel so spoiled by my swap part­ner — some­one I’ve actu­al­ly nev­er met in per­son! I’m so thank­ful for her gen­eros­i­ty and kind­ness, and I feel so very spe­cial receiv­ing the pack­age — what a gift it is! Think­ing about it has put a sil­ly grin on my face for the past few days.

I live in a met­ro­pol­i­tan city that is not known for the friend­li­ness or cour­tesy of its peo­ple. So when­ev­er a stranger offers a help­ing hand or a kind remark or even a smile it total­ly makes my day. 

No words can ful­ly express how grate­ful I am and how much the plush means to me. Thank you so much, Kate! :D

Tomor­row I’m going to show you what I sent over­seas for the swap, hope­ful­ly. I say hope­ful­ly because our inter­net con­nec­tion has been spot­ty. But the cable guy is com­ing to check things out tomor­row so I’m hop­ing that it will return to nor­mal shortly!

Hap­py Mon­day! :D

sunday video: two sixty four


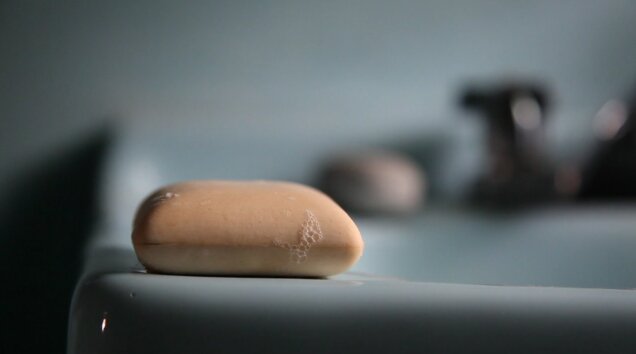
This video reminds me of the begin­ning sequence of the ani­mat­ed film Up, which always brings a tear to my eye. I love the way it cap­tures the small things, so mat­ter-of-fact yet with such ten­der­ness. Like the old chair, the piano keys, the bar of soap, the diary, and a life­time of stories.


Have a hap­py and re-ener­giz­ing Sun­day everyone!

favourite things friday


I was nev­er a big fan of mak­ing friend­ship bracelets. I think the pat­terns are intrigu­ing but they take too long. These cro­chet ones may be a quick­er alter­na­tive. They’re bead­ed too, and very styl­ish. Pat­tern on Green Eyed Mon­ster.


Prob­a­bly requires a lot of t‑shirts but a cir­cu­lar loom from a hula hoop is a neat idea. (The cir­cu­lar rug is tied off and detached from the hula hoop after the weav­ing is fin­ished, so the hula hoop can still be a hula hoop! :D) For how-to, fol­low the Crafty Crow!


I had a minia­ture hour glass key chain when I was a kid. I would stare at the falling sand and think that it’s the longest minute ever, but when the sand was all piled at the bot­tom of the glass it real­ly made it tan­gi­ble to me to under­stand that that was a minute passed and a minute I would nev­er get back… Per­haps a nice instru­ment to teach chil­dren the val­ue of time, to make your own hour glass see Paris Bourke.


I have been won­der­ing if it would be pos­si­ble to make but­tons from shrink plas­tic, whether the colour would run in the wash. Appar­ent­ly it works beau­ti­ful­ly with the right kind of mark­ers, just look at these love­ly but­tons on Scis­sors Paper Work! With a tuto­r­i­al too! 


I’ve been try­ing dif­fer­ent meth­ods of paint/watercolour mask­ing, so this stick­er resist tuto­r­i­al from Paint Cut Paste caught my eye. Such a nice way to enjoy the flu­id­i­ty of water­colour and free-form colour-blend­ing while mak­ing some nice greet­ing cards at the same time. Love the sim­plic­i­ty and sharp­ness of the design.


I also like this stamped pat­tern on the tea tow­els — an excerpt tuto­r­i­al from the book 1, 2, 3 Sew on Indie Fixx. I love how the cir­cles are blend­ing togeth­er and I can total­ly see it on a t‑shirt! Must get myself some foam sten­cil brushes.


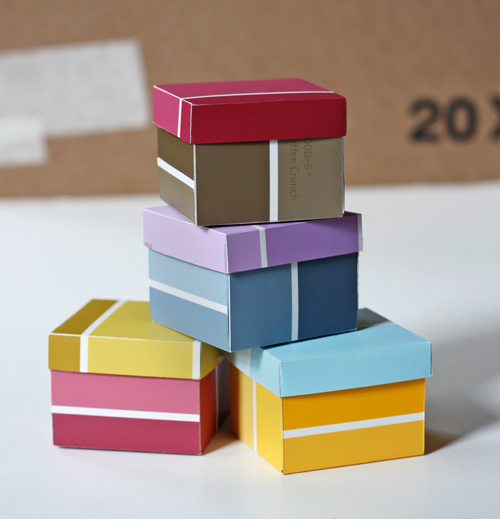
Some­times I feel bad tak­ing paint swatch­es from the hard­ware store, because they have such nice colours and are made of such nice, stur­dy paper. I also like to read all the names they give the colours. “This is for tak­ing, for free, for real?” I’d ask myself. Yes, they are. And one could make styl­ish gift box­es with them! :D How-to with awe­some fold­ing dia­gram on How About Orange.


Paint can planters — they can cheer up any tired old fence! How-to on Cent­sa­tion­al Girl.


Make can­dles with lemon peel! I won­der if they bright out a cit­rus scent. How-to on the Martha web­site (via Apart­ment Ther­a­py). Also check out the amaz­ing clemen­tine can­dle tuto­r­i­al - with the clemen­tine peel and oil, no wax or cot­ton wick! 


Instant noo­dles are one of my favourites. It’s kind of a com­fort food for me. Tonya’s Sewing Room has an awe­some step-by-step tuto­r­i­al for turn­ing noo­dle pack­ag­ing (or oth­er wrap­pers) into a zip­pered coin purse! Will have to give that a try!


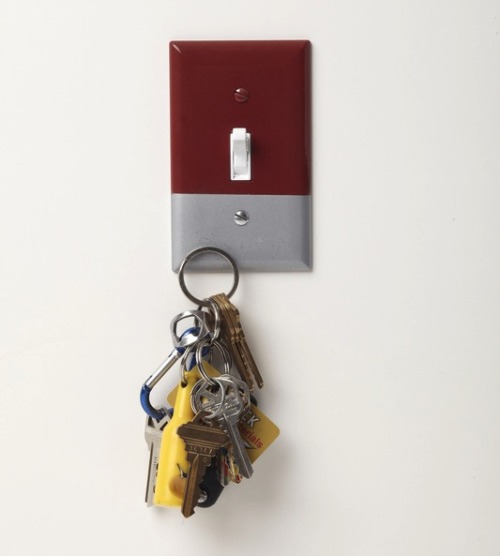
Mag­net­ic light switch cov­er — what a bril­liant idea! I won­der if I could make one with mag­net­ic paint. Via Inspire Me Now.


This. Is. Mag­nif­i­cent. From Nation­al Geo­graph­ic:  This image was tak­en in win­ter time in a arid area of the Cana­di­an Rock­ies. Tem­per­a­tures where below ‑30 degrees Cel­sius yet because there was no snow fall the sur­face of the lake was uncov­ered allow­ing me to see and cap­ture the bub­bles (gas release from lake bed) that were trapped in the frozen waters. 

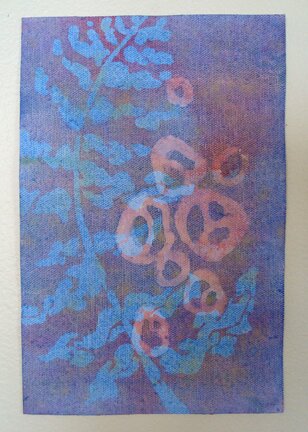
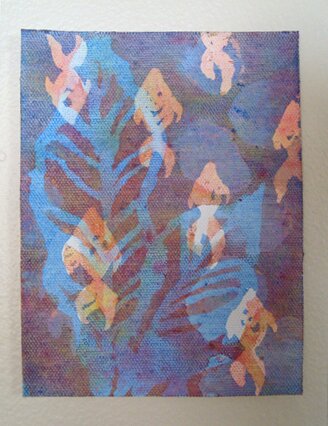
It reminds me of this paint­ing by Lau­ra Mil­lard, one of my teach­ers from col­lege, whose work I love.


And final­ly, the most awe­some thing I saw this week — Mis­ter Roger’s stat­ue on Pitts­burgh’s North Shore gets a cro­cheted red cardi­gan! Cre­at­ed by the inspir­ing Ali­cia of Cre­ate! 


Have a love­ly week­end, everyone!


twisty belt

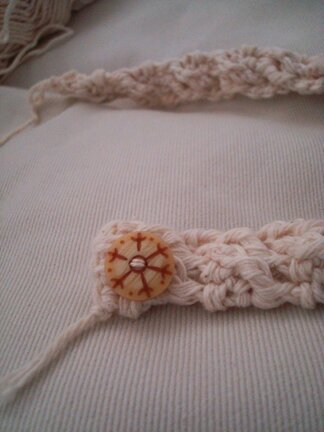
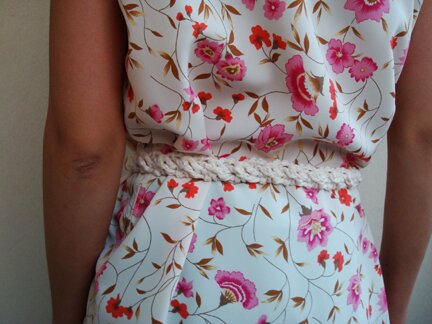
I want­ed to make a thin white belt to go with this dress I made (pic­tured, more on it lat­er :D). I saw peo­ple wear­ing these twist­ed leather belts and was won­der­ing if I could cro­chet one. Not going to look like leather, but twisty nonethe­less. I’m quite hap­py with how it turned out, so I thought I’d share it here :D

This pat­tern requires famil­iar­i­ty with basic cro­chet stitch­es (ch, sc, dc, tr) as well as some knowl­edge of cabling with front post cro­chet and back post cro­chet (fpdc, bpdc, fptr, bptr). I learned cabling while fol­low­ing this hat pat­tern (which has writ­ten tuto­r­i­al and pho­tos to explain the cabling action) and it’s actu­al­ly quite a lot of fun once I get the hang of it. 

If you’re inter­est­ed, here are videos for front post dou­ble cro­chet (fpdc), back post dou­ble cro­chet (bpdc). And here is a video for mak­ing a cro­chet cable worked over 4 stitch­es, which is basi­cal­ly what this belt pat­tern is about :D

And now, the belt.

I used a 3.75mm hook and a worsted weight cot­ton yarn. Plus a 5/8″ but­ton for clo­sure (just some­thing I found in my stash, you can use a larger/smaller but­ton if you like), and thread and nee­dle to sew on the button.

The belt is worked back and forth in short rows cross-wise until desired length.

Row 1: ch 6, dc in 4th ch from hook, 1 dc in each of next 2 dc, turn.

A foun­da­tion row of 4 dc is made (begin­ning ch counts as 1 dc). Now here’s how the cabling is going to go down…

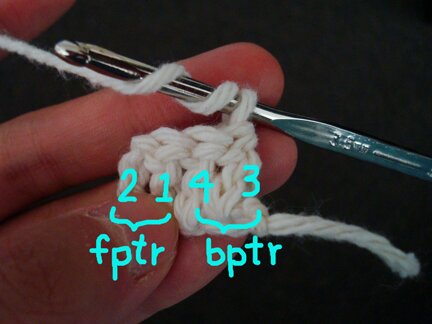
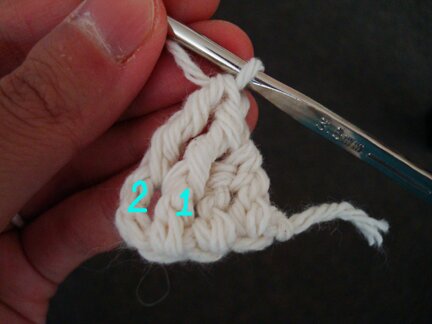
Row 2 (right side): Skip first 2 dc, fptr in next dc, fptr in begin­ning ch…

(Row 2 con’t) … bptr in first skipped dc, bptr in next skipped dc. 

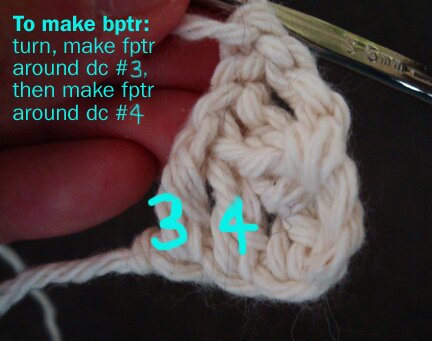
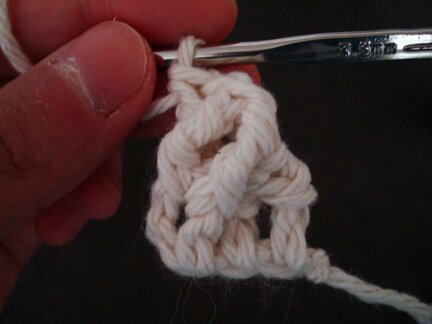
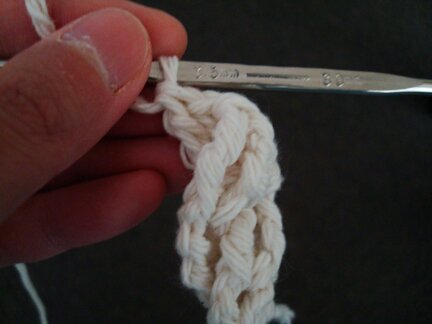
I find that an easy way to go back and do bptr in skipped stitch­es is to turn the work to the wrong side and make fptr in the skipped stitch­es, start­ing from the stitch in the far left. (pic­ture below is viewed from wrong side)

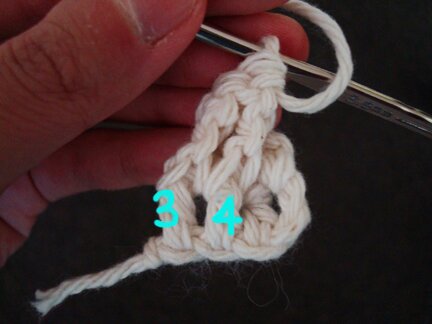
Viewed from the wrong side, 2 bptr are made.

Com­plet­ed row 2 viewed from the right side — one set of cable made. Turn.

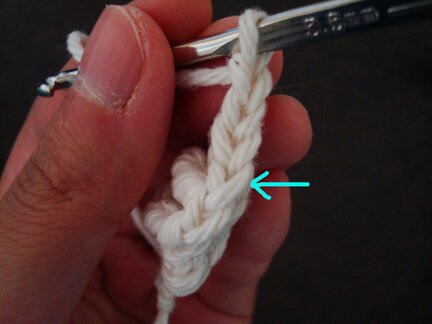
Row 3 (wrong side): ch 2, dc in next dc (the 4th stitch from hook, where the arrow is point­ing in the picture)…

(Row 3 con’t) 1 bpdc in each of the next two fpdc from pre­vi­ous row (the stitch­es are indi­cat­ed by the arrows. The pic­ture shows the work upside down because when one is hold­ing the work with the wrong side fac­ing this is what one would see).

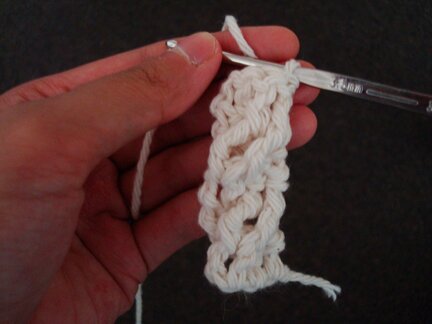
Turn. Viewed from the right side, row 3 completed.

Repeat row 2 (RS): Skip first dc, fptr in next dc, fptr in begin­ning ch… 


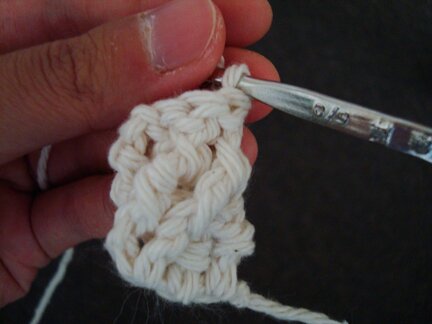
(Row 2 con’t) … bptr in first skipped dc, bptr in next skipped dc. (pic­ture below shows work viewed from right side)

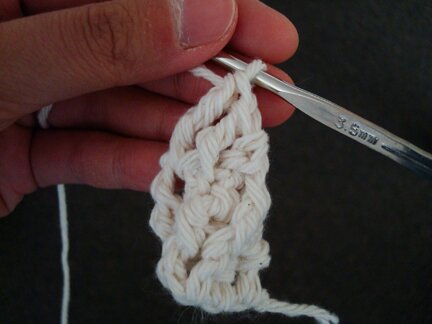
Repeat row 3 (WS): turn, ch 2, dc in next dc, 1 bpdc in each of the next 2 fpdc from pre­vi­ous row. Turn. (pic­ture below shows work viewed from right side)


Repeat rows 2 & 3 until the two ends of the belt almost reach each oth­er when wrapped around waist (with an approx. 1/2″ gap). End with row 3. Don’t fas­ten off.

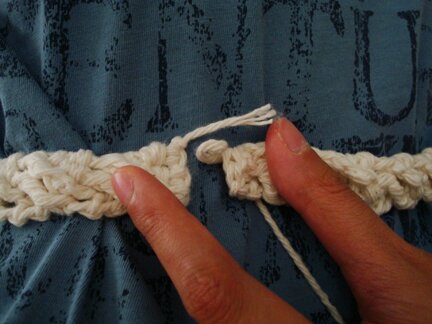
Sew a but­ton to the begin­ning end (not the end attached to the work­ing yarn). I used a bit of cro­chet thread to sew on the but­ton for stur­di­ness, and used this method to cre­ate a “shank” so that there will be enough space behind the but­ton for the cro­cheted but­ton loop.

Going back to the oth­er end, with the work­ing yarn, make a but­ton loop clo­sure as follows:

ch 1, skip first dc, sl st in next dc, ch 6 tight­ly, sl st in same dc, skip next dc, sl st in top of turn­ing ch. 

Don’t fas­ten off. Try on belt and adjust the num­ber of ch in the but­ton loop if necessary.

Fas­ten off, weave in ends, and wear with a breezy sum­mer top! :D


Note: The com­plet­ed belt will nat­u­ral­ly twist a bit so it’s not intend­ed to be worn loose­ly. It will lie flat if worn fit­ted to the body. 

Feel free to drop me a note if you have ques­tions or comments!


catching the bright things


I was begin­ning to won­der if this was maybe what strength was all about: not being the first, or the tallest, or the pret­ti­est. Being strong, I decid­ed, was about catch­ing the bright things that blow by every day, and know­ing when to let the garbage drift away.

– Lau­ren Kir­sh­n­er, Where We Have to Go 


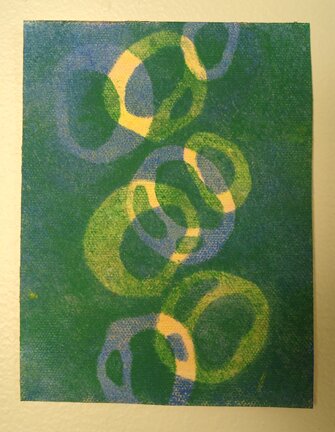
The paint­ing is a con­tin­u­a­tion of the mask­ing exper­i­ments I post­ed yes­ter­day. I cut sten­cils from foam pieces to masked shapes and then stip­pled paint on the canvas.

I recent­ly read Where We Have to Go and it has become one of my favourites. I thought the quote goes well with the paint­ing. I liked the book not only because of the way it’s writ­ten (and it’s set in Toron­to!), but most impor­tant­ly it’s because it reminds me so much of my own ado­les­cence. I felt very much con­nect­ed to the way the pro­tag­o­nist is think­ing and feeling.

So, about catch­ing the bright things. Much of Cana­da is cov­ered in, as the news reports call it, an “oppres­sive heat blan­ket” these days. I keep wait­ing for an epic thun­der­storm to lift this blan­ket of heat and haze and smog, and I’m still wait­ing :( Though this aggres­sive weath­er sys­tem has brought with it some incred­i­ble sun­sets. Look how red the sky is!


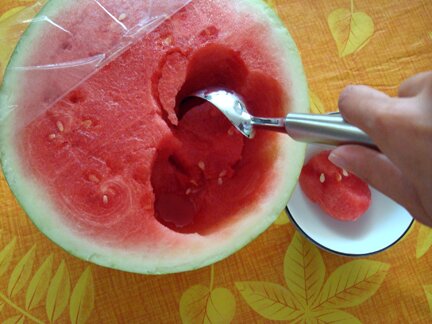
Ris­ing tem­per­a­ture in the apart­ment also makes cold water­mel­on so much more enjoy­able. I’m con­vinced that scoop­ing with an ice cream scoop is the most effi­cient way to eat water­mel­on. Unlike chop­ping the mel­on on a chop­ping board, how the juice splat­ters every­where with each chop, when scoop­ing out the flesh all the juice would be saved in the rind like a bowl, not one drop would be wast­ed. See?


Have a bright and beau­ti­ful Tuesday!


masking experiments

More paint­ing exper­i­ments with mask­ing flu­id (to see how mask­ing flu­id is used, watch this video), con­tin­u­ing from my last attempt with raw can­vas, which worked in the end but proved to be a pret­ty long and kind of frus­trat­ing process. 

So I tried using the mask­ing flu­id on primed can­vas. I bought a can­vas pad (like a pad of paper, except it’s a pad of 9x12” — it says on the cov­er — real primed can­vas!) and I was quite hap­py how it turned out :D So hap­py that I even gave them titles.


Sym­bi­ot­ic


Upstream


Mask­ing flu­id does its job beau­ti­ful­ly on primed can­vas, it peels right off. (It feels almost like peel­ing dried white glue off the fin­gers, very sat­is­fy­ing.) But then I did some Googling and real­ized that mask­ing flu­id is basi­cal­ly latex par­ti­cles float­ing in liq­uid ammo­nia :S That explains the pun­gent smell. And it would­n’t be good to use with a group, so I tried look­ing for an alter­na­tive and came across this white glue batik method, which works kind of like mask­ing flu­id on fab­ric. So I also tried mask­ing some of the shapes with white glue.

Two things I learned about mask­ing with white glue: 

1. White glue takes a lot longer than mask­ing flu­id to dry (mask­ing flu­id takes about 15min; white glue, more like sev­er­al hours).

2. It does­n’t peel off the can­vas very eas­i­ly if the glue is applied too thin­ly, so try­ing to short­en dry­ing time by apply­ing a thin­ner lay­er of glue does­n’t quite work.

BUT! White glue is a lot cheap­er. And if I have all day at home I would total­ly use it. But not with a group. So, more exper­i­ments ahead! :D

Have a great Mon­day, everyone!


p.s. I did­n’t explain the process of mak­ing those two paint­ings, because I think that would be kind of bor­ing to read. But if you have any ques­tion feel free to drop me a note! :D


Â