O fir tree

O Christmas tree


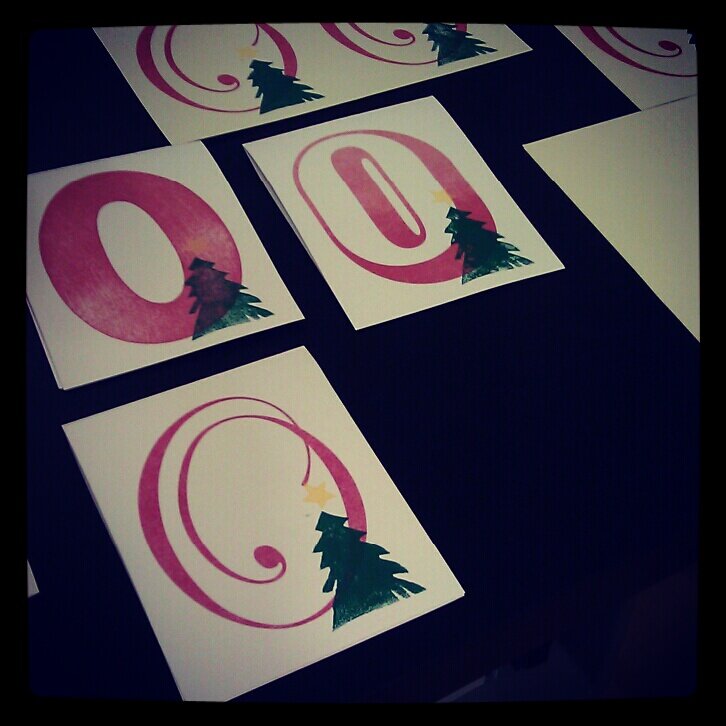
A snap­shot from our Christ­mas card pro­duc­tion this year. It’s one of the few (some­times the only) art projects that Mike and I col­lab­o­rate on every year. Mike set the O’s using a design pro­gram and I print­ed the Christ­mas trees and the stars with this fun foam stamp­ing method :D

This made me curi­ous about the ori­gin of the car­ol, O Christ­mas Tree. So I looked it up, and want­ed to share with you an excerpt of it on this Christ­mas day, trans­lat­ed from the orig­i­nal Ger­man song, O Tannenbaum.

O Fir Tree, O Fir Tree,
How stead­fast are your branch­es!
Your boughs are green in sum­mer’s clime
And through the snows of win­ter­time.
O Fir Tree, O Fir Tree,
How stead­fast are your branches!

O Fir Tree, O Fir Tree,
Your boughs can teach a les­son
That con­stant faith and hope sub­lime
Lend strength and com­fort through all time.
O Fir Tree, O Fir Tree,
Your boughs can teach a lesson.


I like using the words Fir Tree instead.

May good will, faith, hope, strength, com­fort, and peace fill our hearts not only dur­ing Christ­mas but through­out every sea­son this year.

Mer­ry Christ­mas, friends!


fun foam stamping

It was one of those exper­i­ments that went very smooth­ly and turned out amaz­ing­ly well, which does­n’t hap­pen too often for me but when it does, it’s super exciting!

Print­ing fab­ric with stamp made from craft foam (or, as adver­tised on the pack­age, “fun foam”)!

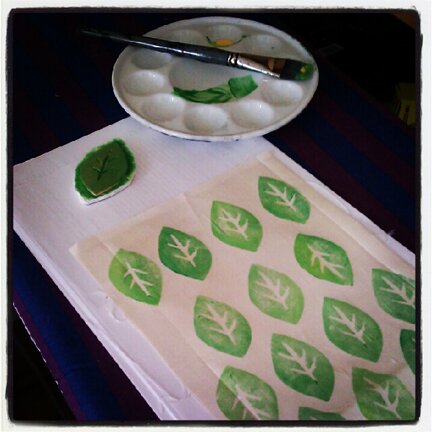
It’s REALLY easy. Every­thing about this project is encap­su­lat­ed in this photo.


I used:

Craft foam (it looks like this) that I bought from the dol­lar store (12 sheets for $1)

A piece of foam core that I found at work (it had an event poster mount­ed on it and they were throw­ing it out. But I’ve also seen foam core at the dol­lar store)

Acrylic paint and paint brush (from the dol­lar store, of course)

Glue stick (I found this amaz­ing Elmer glue at the dol­lar store! A bit of a theme going on here…)

A piece of fab­ric that was the rem­nant of a cur­tain that I was sewing for a friend. It feels like linen. Fab­ric with smooth tex­ture works best.

What I did:

1. Cut design out of craft foam. Exac­to knife works extreme­ly well with this stuff.

2. With Exac­to knife, Cut out a piece of foam core the same shape as the craft foam design but about 1/4″ larg­er all around.

3. With glue stick, apply a lib­er­al amount of glue on the foam core. Press craft foam design firm­ly onto where the glue is applied. Stamp is made! :D

Here’s a close­up of my leaf stamp, after it’s made a few prints…

4. Set stamp aside for a minute or two for the glue to dry. In the mean­while, mix a fun colour with acrylic paint, set out some scrap paper (paint will seep through fab­ric onto your work sur­face), and lay fab­ric on it.

5. Apply a thin lay­er of paint onto foam stamp with paint brush (not too much paint, but the stamp has to be wet). Test print on scrap paper.

6. Stamp away! The great thing about apply­ing paint with a brush is that you can have streaks of dif­fer­ent colours in one print! :D

7. If the fin­er details of the stamp starts to get gunked up with paint, use the cor­ner of the brush bris­tles to clean it out before mak­ing the next print.

8. Set fab­ric aside for a cou­ple of hours to dry. Place a tow­el on it, then iron at low heat to fix the colour.


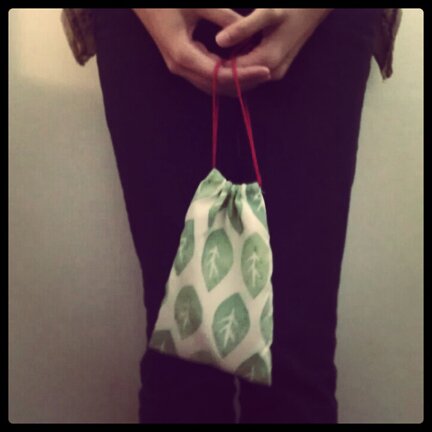
And now we have a love­ly piece of print­ed fab­ric to do what­ev­er our hearts desire :D I sewed mine into a sim­ple draw­string bag. (there are lots of nice draw­string bag tuto­ri­als out there, like these ones, so I won’t repeat what I did here)


Place­mats, shirts, skirts, eye­glass­es case… the pos­si­bil­i­ties are endless! 

Have a great start to the week, everyone!


super awesome week :D

Last week was the first week after school was done, I quick­ly filled it with trips to the craft/bead/fabric stores and a craft day with friends!

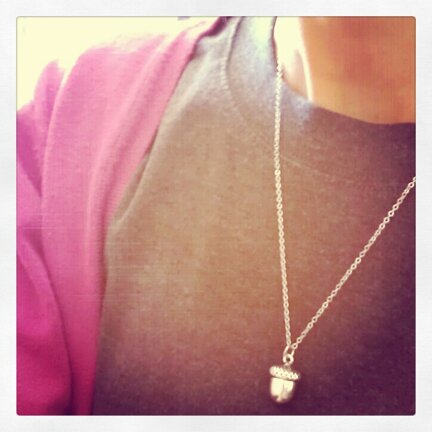
Found an acorn charm for 75ï¿  at the bead store :D It’s my new favourite neck­lace at the moment.


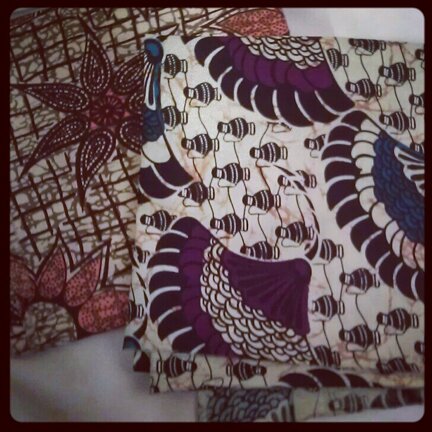
Then my friend and I went to the friend­ly fab­ric store down the street from the bead store, and African print cot­ton was on sale! Going to make more square blous­es (like the blue one in this post).


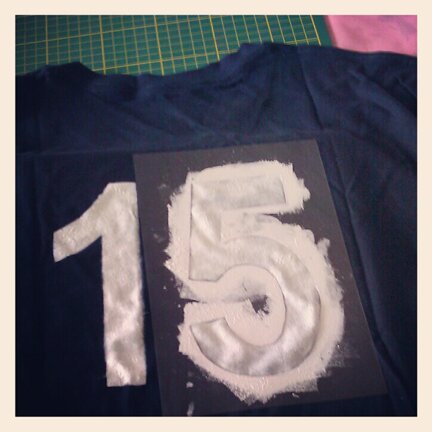
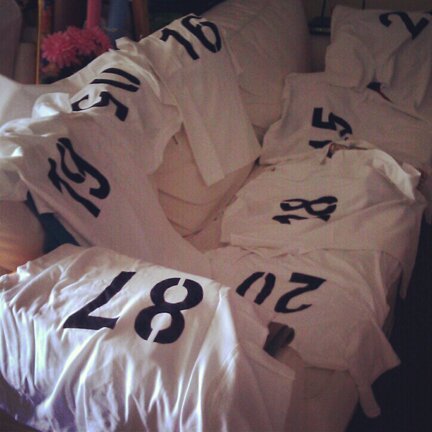
Lat­er in the week a friend came over to make uni­forms for her floor hock­ey team. We made sten­cils out of trans­paren­cy plas­tic (I hap­pen to have stacks of them at home) and applied fab­ric paint on the t‑shirts with a cut-up kitchen sponge.


We print­ed 22 shirts! One set of navy blue and one set of white. They were lying on the couch drying…


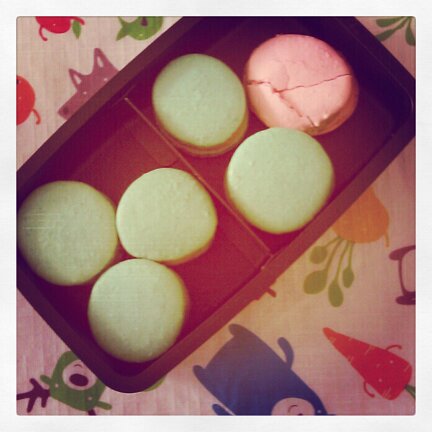
And my friend brought over home­made mac­arons! :D They were so good… felt so com­plete­ly spoiled!


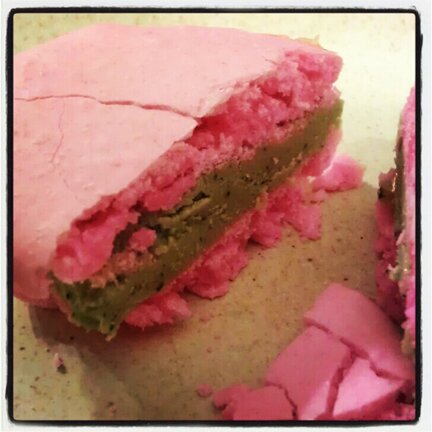
A very pret­ty pink one with green tea fill­ing :D


Have a great start to the week!


okra episode two!

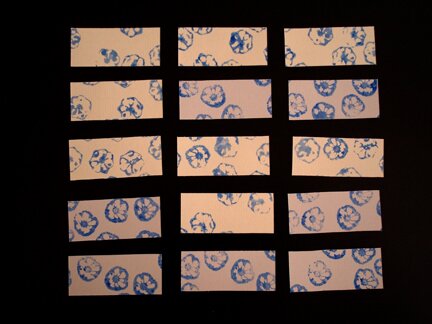
Remem­ber a while ago I made some okra prints? Well, I don’t blame you if you don’t remem­ber, because I’ve for­got­ten myself! But final­ly I remem­bered the prints last week­end, and fin­ished what I had intend­ed to do with them.

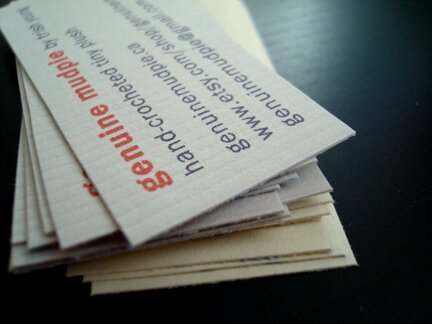
Make busi­ness cards! :D


A cou­ple of orders had come in through the shop and as I was pack­ing them I thought, would­n’t it be nice if I can throw in a cute busi­ness card with some con­tact information. 

So that was why I made the okra prints, to print my shop info on the back of them. I was real­ly look­ing for­ward to flip­ping them over and see the com­po­si­tion of the prints on each one after they’re cut.


I used beige and light grey card stock. And they’re MOO Card size. I kept see­ing busi­ness cards this size at craft shows and such and thought they looked real­ly cute.

Hope you’ve had an awe­some start to the week! 


okra is a thing of beauty


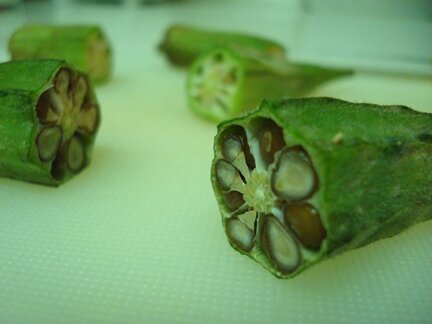
Final­ly got around to use the okra I bought a cou­ple of weeks ago. I was­n’t real­ly in the mood of mak­ing any­thing, but the okras were going slimy on the out­side :S They were going to be wast­ed if I don’t use them, so I forced myself to dig out the paint.

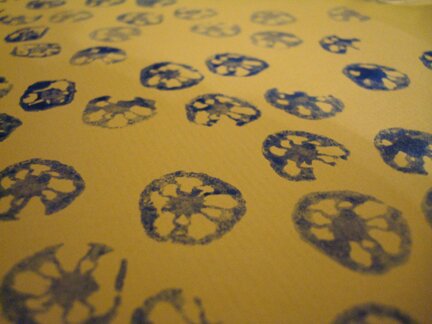
And it turned out to be quite an invig­o­rat­ing expe­ri­ence! (Mak­ing things always makes me feel bet­ter, it’s just a mat­ter of get­ting start­ed…) The pat­terns that the okras made were sim­ply delightful… 


They remind me of jel­ly­fish :D

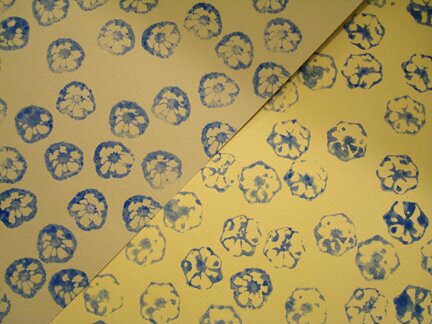
My first sheet of prints was a bit blotchy. The sec­ond sheet was a bit more consistent.


Then there were the more angu­lar prints of a dif­fer­ent okra, com­pared with the more round­ed ones.

I’m going to make some­thing with these lat­er… will keep you posted!

Have a hap­py Wednes­day! :D


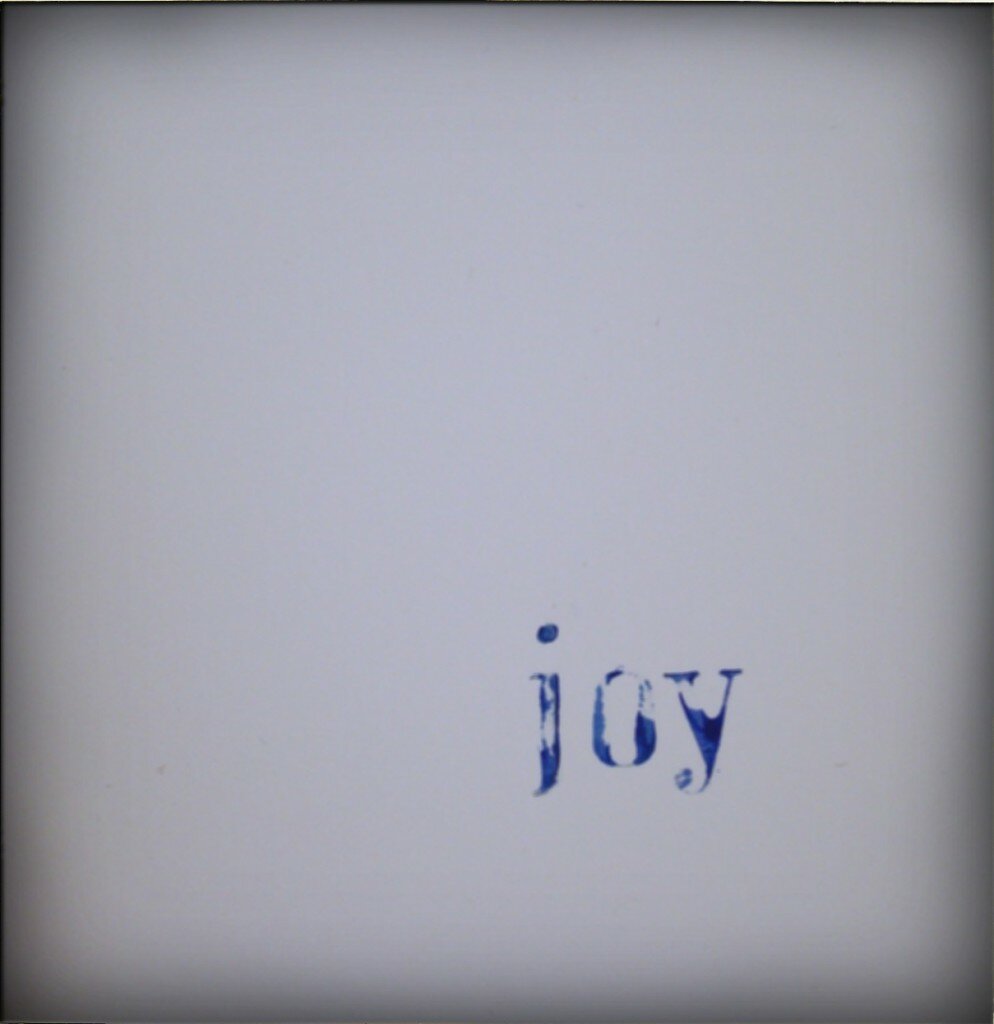
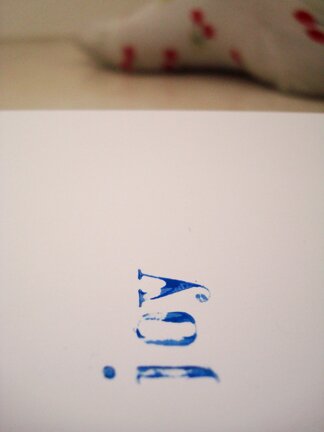
stamp a little joy

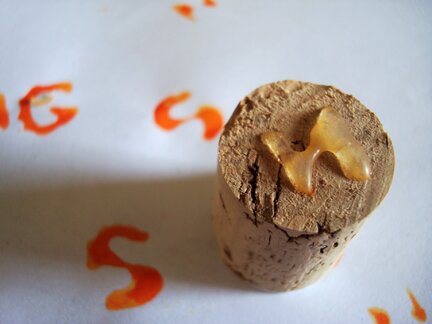
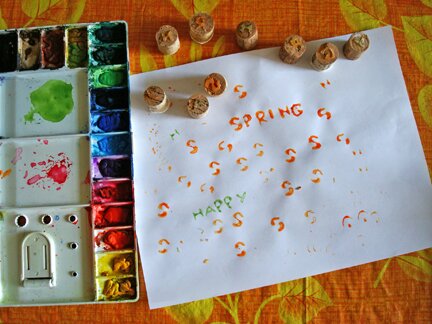
Last week I was mak­ing some greet­ing cards and thought they would look nice with some stamped let­ters. I don’t own any let­ter stamps, but I thought I could make just the let­ters I need­ed with my col­lec­tion of corks and a glue gun.


The stamps them­selves looked bet­ter than the imprints they made. It was just dif­fi­cult to get an even sur­face. Writ­ing with hot glue was hard­er than I thought! And the let­ters turned out rather squig­gly. It was alright, but not quite what I had in mind…


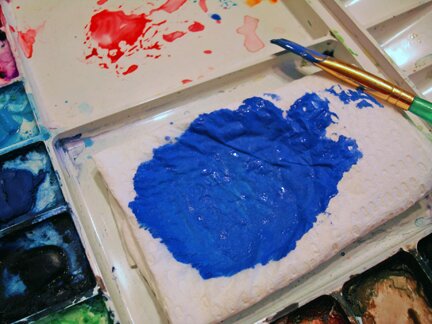
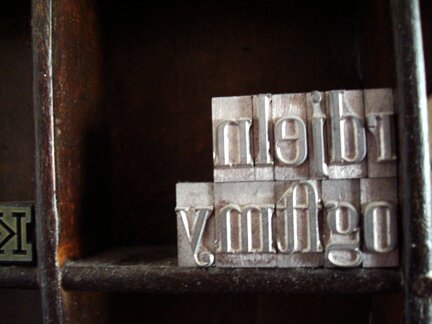
Then I remem­bered that Mike has a col­lec­tion of met­al types. To stamp these, I made a makeshift ink pad with a wad of paper tow­el and some acrylic paint.


But are there enough let­ters to make up a greet­ing phrase? Or even just a greet­ing word? It’s time to put my Scrab­ble skills into good use.


elm…
loft…
globe…
norm…

Ok, greet­ing words…

Aha.


The lit­tle joys in life, are stamp­ing let­ters and socks with cher­ries on them.


Have a hap­py Wednesday!


another rainy day at the print shop


Print shop à la mud­pie, that is. It’s an exper­i­ment. And it’s per­fect­ly accept­able to print in flan­nel pants.

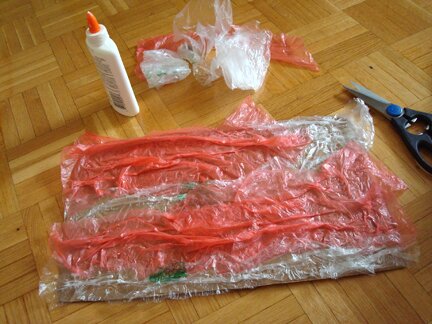
Unlike the Macken­zie’s print shop, there are no machines here. No press. Just me, some cut-up plas­tic bags, some torn up Sty­ro­foam trays (washed and san­i­tized), some card­boards, and the trusty PVA glue.


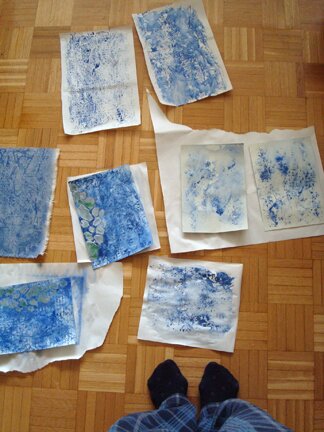
I was hop­ing to make a back­ground for the plarn bet­ta fish, and what would be bet­ter than mak­ing it with plas­tic bags? :D I’ve print­ed with bags before, at school, on a press. Actu­al­ly, print­ing with found mate­ri­als (i.e. things that peo­ple con­sid­er trash, like plas­tic bags, bread tags, and pop tabs) was my favourite thing to do in print­mak­ing class.

I don’t have any of that equip­ment at home, but I do have a plan. I start­ed by cut­ting up the bags and glu­ing them onto a piece of card­board. That’s plate #1.

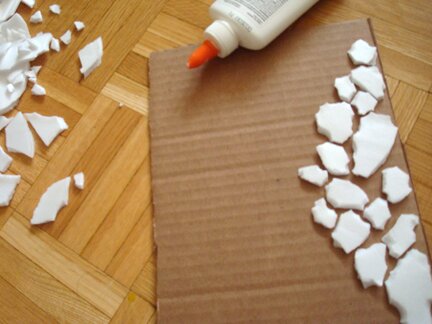
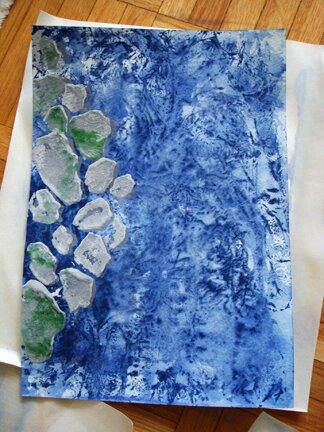
For plate #2, I tore up Sty­ro­foam trays (again, washed and san­i­tized) and glued them onto anoth­er piece of card­board, to resem­ble riv­er stones.


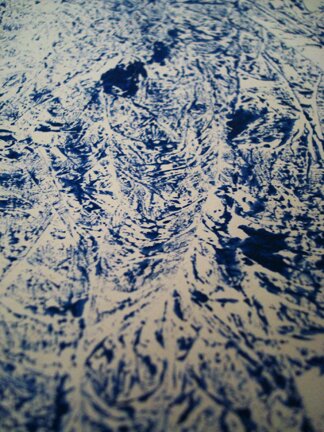
I don’t have block print­ing ink, but I thought acrylic would be fine. I brushed it on so it can get into all the crevices.
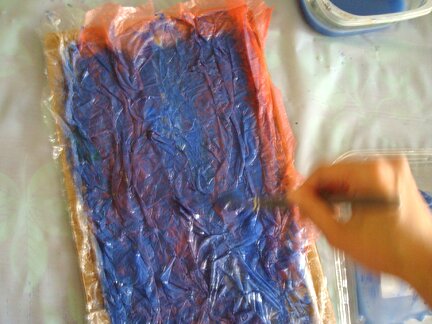
 

I always like the test prints on newsprint the best. The feath­ery details were mes­mer­iz­ing, like frost.

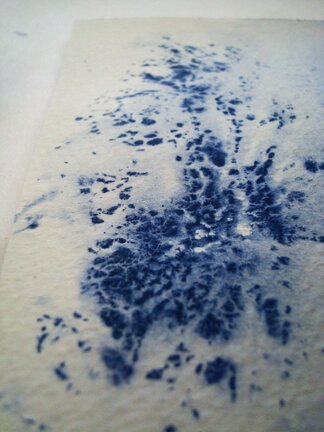
How­ev­er, this makes too busy of a back­ground for the del­i­cate plarn fish. So I sprayed water on it to dis­perse the paint a bit before it dries. But then I got car­ried away and it got too wet. So rather than patient­ly wait for it to dry, I laid anoth­er piece of paper on it, hop­ing that if it does­n’t make a half-inter­est­ing print, it would at least soak up the watery mess. Kind of like a ghost print, and out came this…
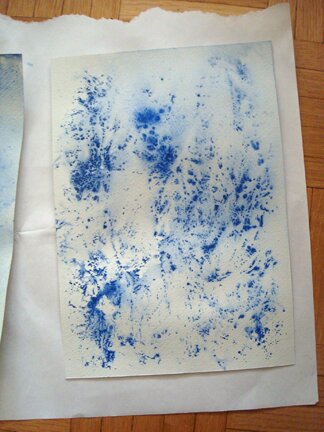
Isn’t that so love­ly? Well, at least I think so. Has a kind of smoky qual­i­ty to it. Reminds me of aquatint

The lay­ered prints did­n’t come out so great. But I did sal­vage this one after rework­ing it sev­er­al times.

I’m not in love with it. I thought it need­ed some red. So when it was all dried I added some watercolour…
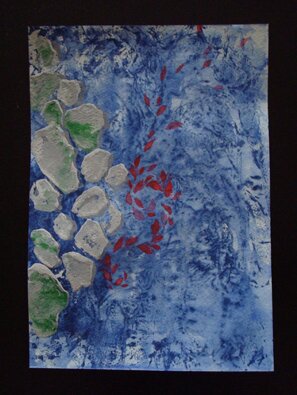
Like leaves car­ried by the cur­rent or a school of fish. Still not lik­ing it too much, to be hon­est, but I think it’s look­ing a bit better.

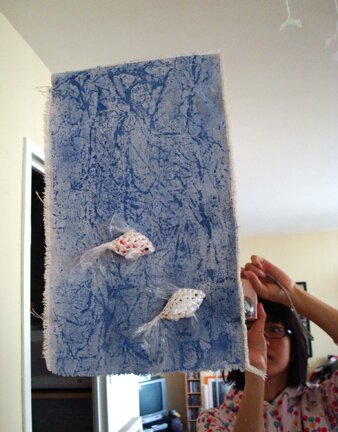
I end­ed up print­ing the back­ground for the fish on a piece of canvas.
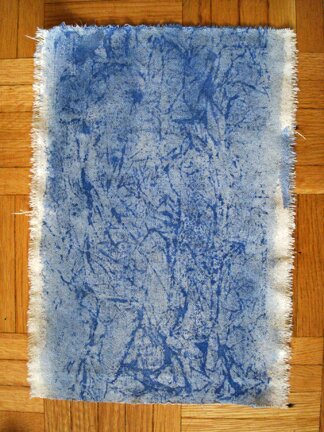
 

I trimmed it a bit, pinned on the fish (so I can move them to a new back­ground if I ever want to), and hot glued a strip of card­board on the back so it can stick on the mir­ror (because one large wall in our apart­ment is a mir­ror, and we’ve run out of reg­u­lar wall space).


Ta-da!

I hope they’re hap­py in their new habitat.

A cou­ple of things I learned from print­ing with recy­cled materials:

1) Must invest in block print­ing ink! I keep putting it off, but acrylic is real­ly too run­ny for printing.

2) Sty­ro­foam does not stick to white glue! The pieces kept falling off when I rolled paint on it. Next time I’ll use the glue gun.


Will def­i­nite­ly try doing this again. Thank you so much for stop­ping by!

favourite things of the week!

I’ve been see­ing a lot of things that I like via the Crafty Crow late­ly. It’s a chil­dren’s craft col­lec­tive, so I guess it appeals to my inner child. Or the child who is actu­al­ly me. Any­way. I love these plas­ticine stamps from Filth Wiz­ardry!
Christ­mas cards idea, per­haps! I think it’s per­fect with those chunks of plas­ticine that’s got so many colours mixed in them that they’ve become real­ly dull and nobody wants to use them and they just sit sad­ly in the bot­tom of the tub, just want­i­ng to be squeezed… but dull no more! It can bring out hun­dreds and thou­sands of won­der­ful pic­tures! I love how the blog own­er says that the process is so tem­po­rary and unex­pect­ed (because plas­ticine is pli­able and the shape of the stamp changes after a few prints). And if you scroll down on the post you’ll see all the dif­fer­ent impres­sions made with dif­fer­ent objects! I’m sooo going to try this out when I get my hands on some plasticine!
I think after mak­ing some plas­ticine prints I would also want to make this bril­liant art­work dis­play wall-hang­ing from This and That.

And maybe not only art­work, but also post­cards and pho­tos, and greet­ing cards, and coast­ers from pubs, and oth­er clip­pings of inspi­ra­tion, and paper cutouts? Like these paper cutouts?

Per­haps these paper cutouts are best on win­dows and cof­fee tables — but aren’t they love­ly? The tem­plates are from Zak­ka Life. I love the oak and gink­go ones, which are pictured.

And along the theme of dis­play and dec­o­ra­tion, I stum­bled upon this bril­liant idea via Whip Up.

They’re book­shelves! Lit­er­al­ly! :D I’d love it sim­ply because it’s a pun. But I dou­bly love it because it’s old books! Imag­ine dis­play­ing cro­cheted mush­rooms hous­es on them! The instruc­tion is avail­able on Real Sim­ple.

And there you have it, a week of favourite things! What are your favourite things? Feel free to share by leav­ing a com­ment! Hap­py Wednesday!

Favourite-things Friday!

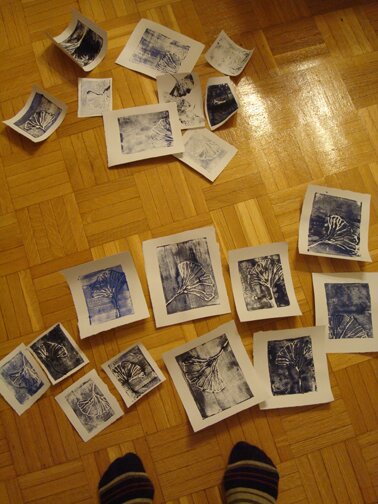
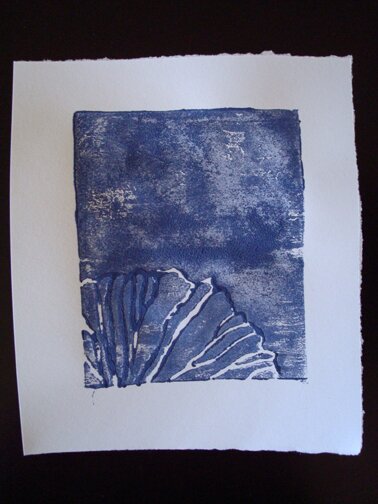
A few weeks ear­li­er I made a bunch of prints using Sty­ro­foam pieces, inspired by the tuto­r­i­al and love­ly images on Glit­ter­goods (you must scroll down on her page to look at the won­der­ful framed com­pos­ite of the kinder­gart­ners’ work! If I were a teacher I would total­ly be steal­ing that idea!). Print­mak­ing is my all-time favourite thing to do. It’s such a mag­i­cal process, because the print nev­er turns out exact­ly the way you thought it would.

Any­ways, when I saw the tuto­r­i­al I thought it would be love­ly to make a com­pos­ite of gink­go leaf prints. We have this large orange frame with a gener­ic pho­to poster in it and we (or I) have been want­i­ng to replace it with some­thing more per­son­al for some time. Gink­go trees are anoth­er one of my favourite things. Did you know that they are liv­ing fos­sils? I thought that’s very cool. There’s also a cer­tain ele­gance about them, the fan-like leaves flut­ter­ing in the wind.

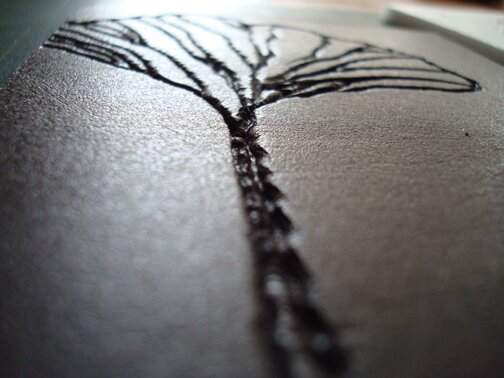
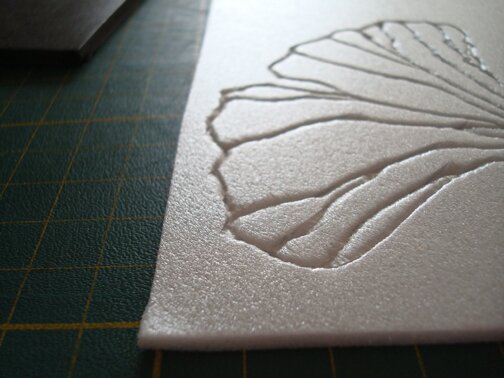
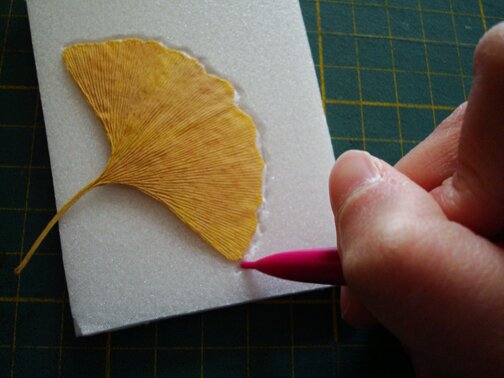
Any­how, this was a rather spon­ta­neous project so I just used what­ev­er I could find in the house. One could get foam pieces that are specif­i­cal­ly made for print­ing, but I just cut out rec­tan­gles from, um, meat trays. I know. I know it sounds gross. But I did wash the trays 5 mil­lion times with antibac­te­r­i­al dish deter­gent. And I thought, don’t we use the same sponge to wash the forks and the bowl that raw meat was mar­i­nat­ing in? I mean, we’re not going to eat the prints! Any­ways, I digress. So here’s how I scratched the foam with a lead­less mechan­i­cal pen­cil, using pressed gink­go leaves as a guide:

The foam plates are quite inter­est­ing in themselves.

I did­n’t have block print­ing ink (I should real­ly invest in some), so I used blue tem­pera paint mixed with a bit of black water­colour. I con­sid­ered using acrylic because it’s more tacky, but I did­n’t want it to dry and get stuck on the bray­er, because I only have one. I did try to use a bray­er to roll the paint on the plates ini­tial­ly and be all print­mak­er-like, but it did­n’t work out very well because the paint was too watery and slip­pery, so I used a paint brush instead. I think I might have impro­vised too much and used none of the prop­er tools, so half the prints did­n’t turn out. But then that almost always hap­pens with print­mak­ing. Well for me any­ways. So here I am con­tem­plat­ing my “keep pile” and “toss pile”.

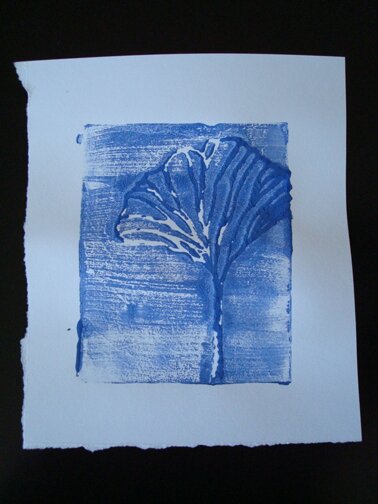
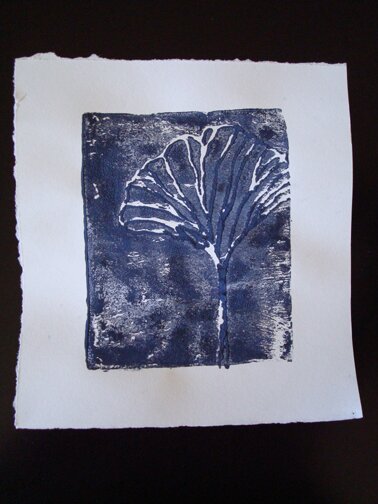
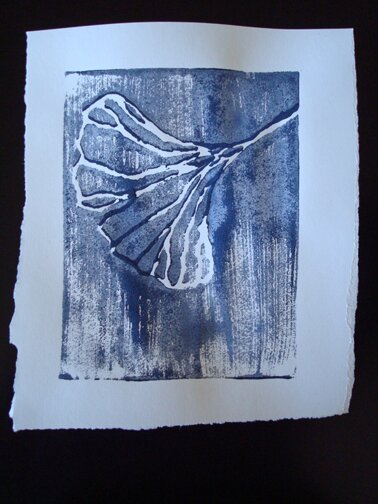
At the end of con­tem­pla­tion, here are some of my favourites. The brush marks actu­al­ly turned out quite interesting.

Here’s anoth­er print with the same plate.

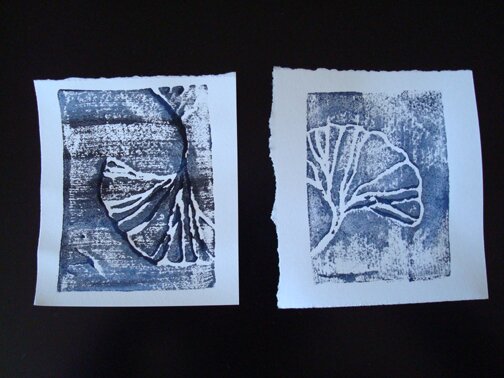
And some small­er ones.

Try­ing a dif­fer­ent view.

We decid­ed not to put these into the orange frame because we felt that the prints were bet­ter viewed indi­vid­u­al­ly than grouped. But we thought of anoth­er idea for mak­ing scratch foam prints for the frame, which I will sure­ly share when we get around to it :)

I still had a fab­u­lous time mak­ing them though. Espe­cial­ly the part where I don’t have to wor­ry about whether the plate is per­fect­ly cen­tered on the paper or whether the ink is rolled on even­ly or whether the paper is torn on a per­fect right angle or whether my fin­gers are per­fect­ly clean so I don’t leave fin­ger­prints on the paper.

I thought it would be fit­ting to end with this quote I saw on French Toast Girl’s Face­book page:

The prac­tice of art isn’t to make a liv­ing. It’s to make your soul grow.

- Kurt Vonnegut