Tiny and easy. Looks like I’ve got a bit of a theme going after the tiny donuts!
I have a couple of sweater patterns that I’ve been hoping to share, but I just haven’t had the time or energy to sit down and write it. So for now, tiny and easy it is :)
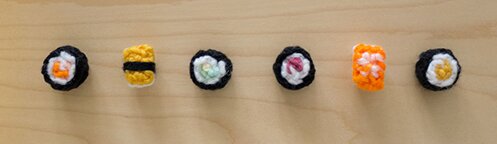
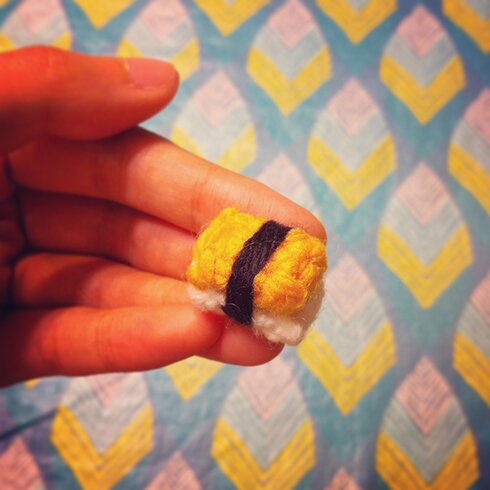
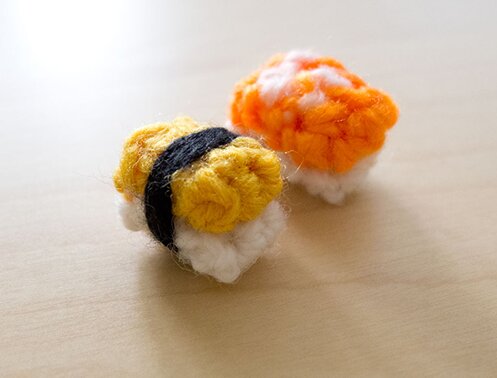
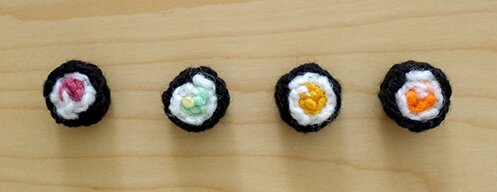
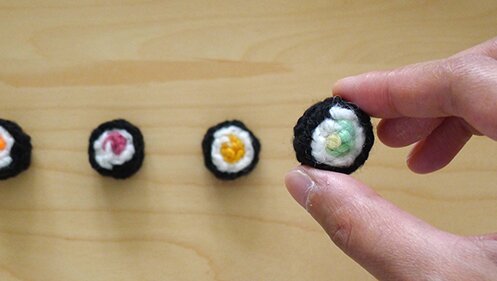
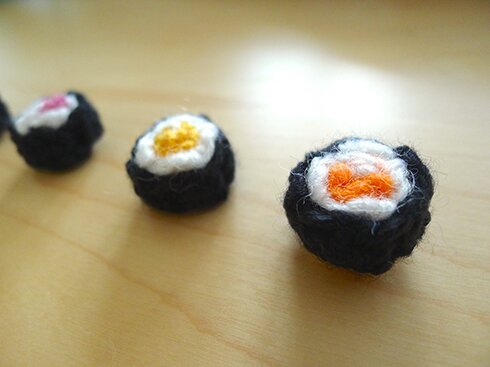
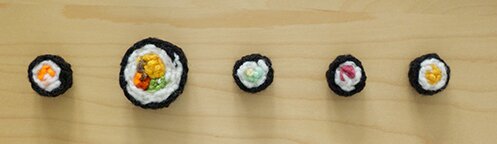
These are super quick to make! And they are very tiny. Here is my hand in the picture for scale. They’re about 7/8″ in diameter.
I just happen to have scraps of variegated green and orange yarn at home, they worked beautifully for avocado/cucumber and salmon.
The “pattern” is not at all original. A quick search on Ravelry would yield a couple of crochet sushi pattern made in the same method, like this one (ingenious! I actually made one for a sushi-loving friend years ago), and this one. But I suppose the stitch count that I came up with is particular to these tiny maki rolls, so I thought I’d share it. It’s also not so much a pattern but more like a recipe. One can easily adjust the length and width to include more fillings for the maki rolls.
I used:
tiny bits of black, white and other colours for desired fillings, in worsted or light worsted weight yarn.
3mm hook
tapestry needle
What I did:
Note: turning ch does not count as a stitch.
Row 1: Using filling colour yarn, ch 3, sc in 2nd ch from hook, sc in next ch, ch 1, turn.
Row 2: sc in each of next 2 sc, ch 1, turn.
Row 3: sc in each of next 2 sc, switch to white yarn, fasten off filling yarn, ch 1.
Rows 4 — 12 (9 rows): repeat row 2. At the end of row 12, switch to black yarn, fasten off white yarn, ch 1.
Rows 13 — 24 (12 rows): repeat row 2. Fasten off, leaving a 10″ tail for sewing. Weave in ends.
Assembly:
Starting from the end with the filling colour, roll up the strip tightly. Sew end of strip to the maki roll, then sew through the diameter of the maki roll in different directions a couple of times. Fasten off, weave in ends.
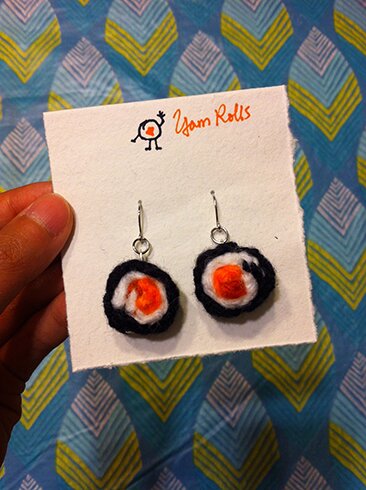
And we’re done! Easy, right? I found it pretty hard to stop making them :S But what can one do with so many tiny sushi rolls? They’re very light, so great for earrings! I’ve made these yam roll earrings for the shop :D
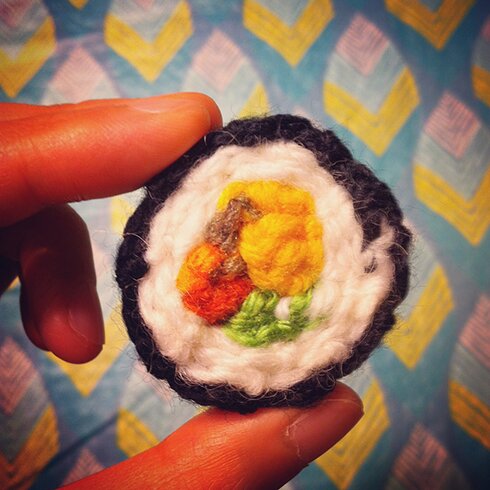
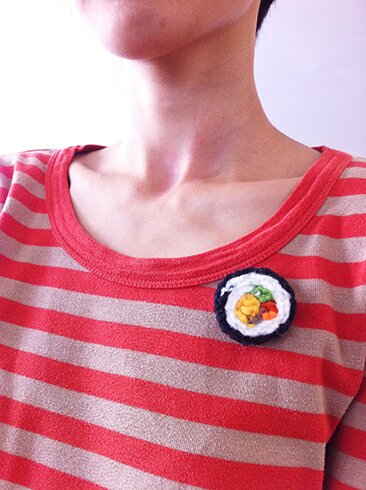
And I made a futomaki brooch sort of in a free-form style. It is listed in my Etsy shop — customizable and freshly made-to-order! :D
And here we have it, futomaki and friends :D
But wait, we’re not done with sushi making! In our next episode we will make easy nigiri! Stay tuned! :D