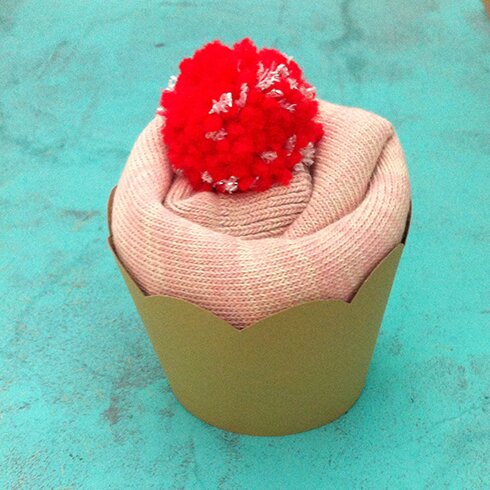
‘Tis the countdown to Christmas, I thought I’d share a most sincere idea for the most practical gift. Who doesn’t need an extra pair of socks? Great alternative to chocolate covered marshmallow Santas when you need to get an under $5 secret Santa gift.
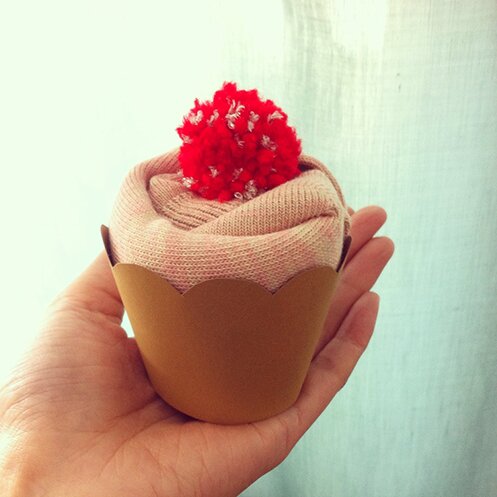
The pom pom on top is actually a fun festive hair tie! I’ll show you how I made that as well.
I got a pack of 5 reused yarn socks from MUJI, they’re soft and lovely (not to mention that it’s such a nice relaxing experiencing when browsing around at the MUJI store) and cost around $20 CAD, which rounds out to about $4 a pair.
This is super simple and involves things that you probably have stashed away at home if you’re a crafter:
- A new pair of socks in cupcake colour
- An elastic band
- Light card stock or scrapbooking paper (I bought a sheet of gold metallic paper from Michaels for 99 cents)
- Cupcake wrapper template (there are tons of printable templates out there, I can’t seem to find the one I used >_<, but this one seems just as great)
- Scissors
- Scotch tape
- Mug of tea (essential!)
Here we have our pair of socks, and the elastic band.
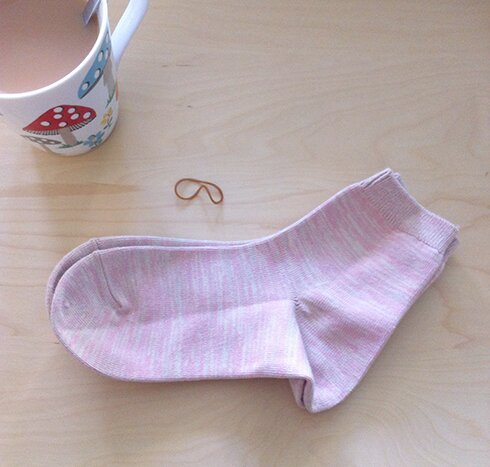
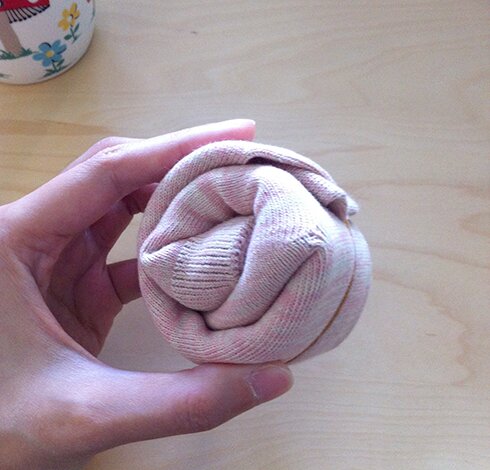
With the socks stacked together, fold them in half lengthwise. The heels will stick out but that’s ok.
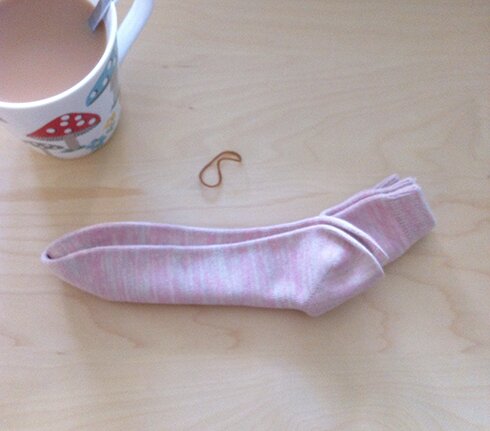
Starting from the cuff end, roll up the socks.
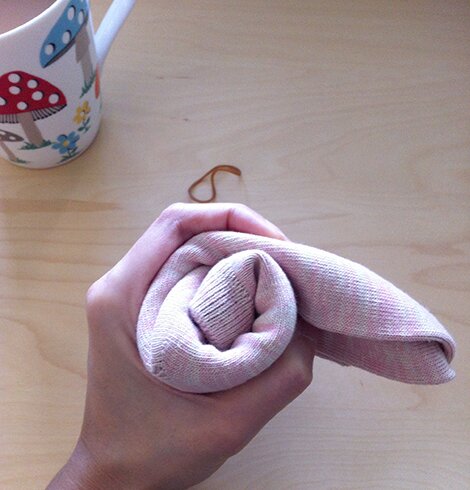
Secure the sock roll with elastic band.
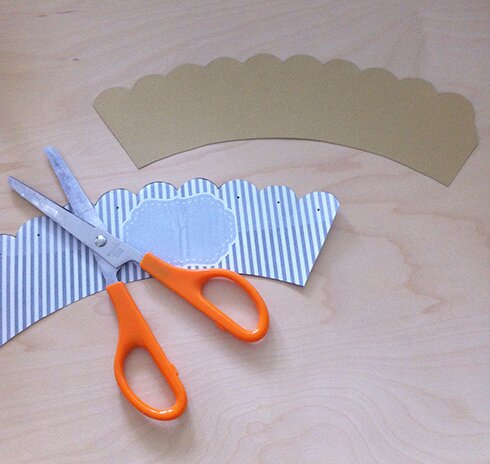
Have a sip of tea. Transfer cupcake wrapper pattern onto the back of card stock / scrapbooking paper, and cut out the pattern.
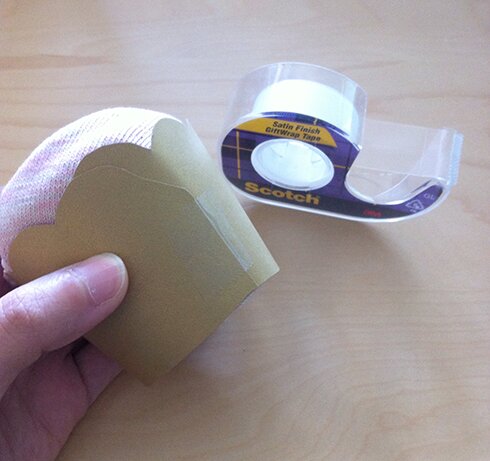
Wrap the wrapper around the sock roll, and secure with a piece of tape.
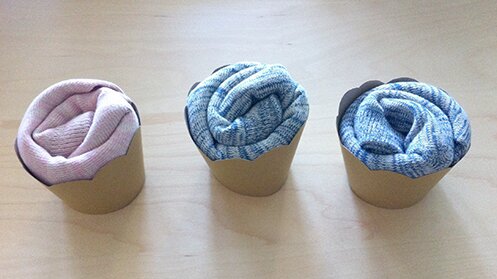
Repeat with all the pairs of socks you’ve got and set them aside.
Now we make the pom pom hair tie :D
I used:
- A fork
- Small amount of red worsted weight yarn
- Small amount of sparkly silver yarn (for a festive touch)
- Scissors
- Hair elastics
- Fabric glue (great to have, but not essential)
Using a fork to make small pom poms isn’t my original idea. There are a few tutorials out there, like this one from Eskimimi Makes.
Basically, you would wind the yarn around the prongs of the fork (as you can see I used two different yarns, and I cut off a length of the silver yarn for winding, rather than winding directly from the skein, to make things easier)…
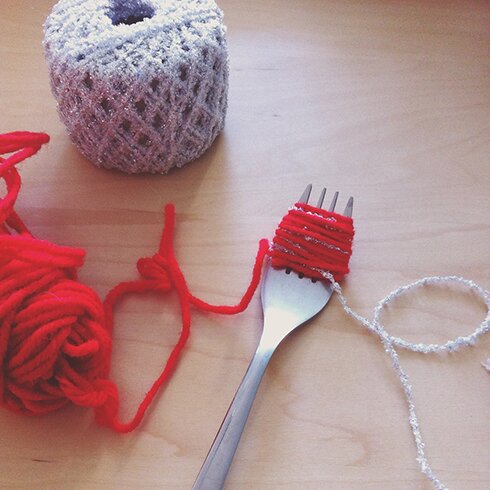
… after you’re done winding, cut yarn. Then cut a length of red yarn about 6 inches long, and tie the yarn around the middle by threading one yarn end through the base of the 2nd and 3rd prongs of the fork, and the other yarn end between the 2nd and 3rd prongs at the tip.
Trim the pom pom but leave the tying yarn long.
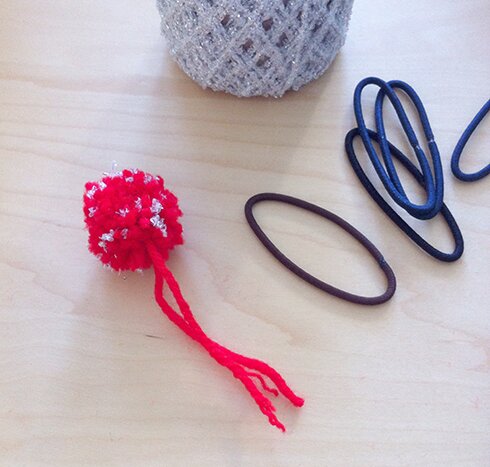
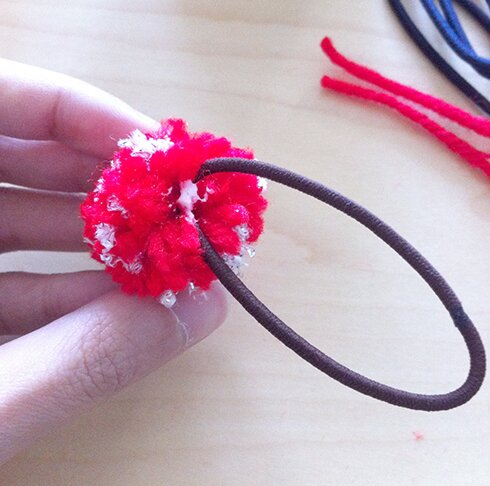
Using the tying yarn, tie the pom pom to the hair elastic with double knot. Apply a dab of fabric glue (if you have it) to the knot to extra secure it.
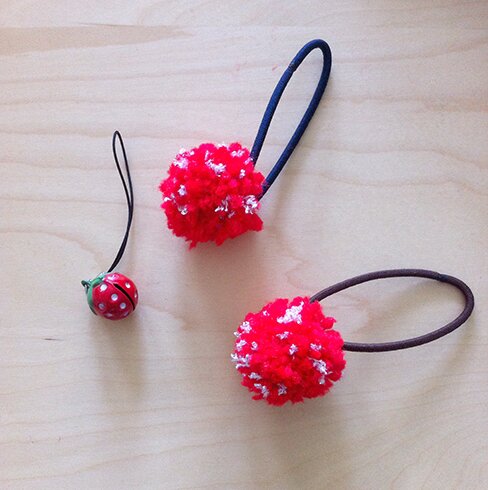
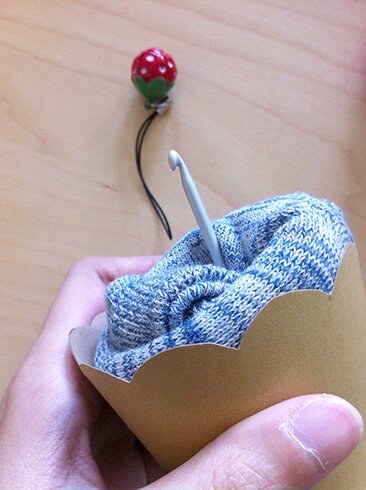
Here we have our cupcake toppings! I also bought these adorable strawberry bells from Etsy seller MimiLolo, I attached them to cell phone charm hangers (not sure if they’re called that, but you know what I mean), thought they’d make great zipper pull or festive backpack ornaments! :D
If you know that the gift recipient won’t like hair ties or zipper pulls, a simple Tootsie Pop might make the best alternative topping.
I pulled the hair elastic / cell phone charm hanger through the middle of the sock rolls using a crochet hook.
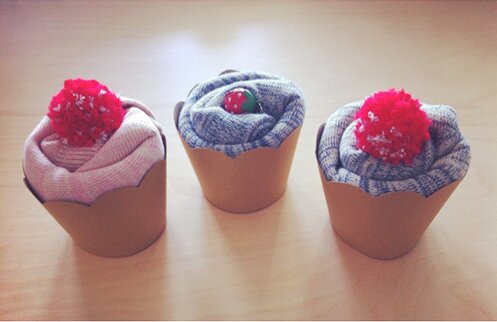
Ta-da! The most sincere socks of them all! Linus would be proud. (see It’s the Great Pumpkin, Charlie Brown)
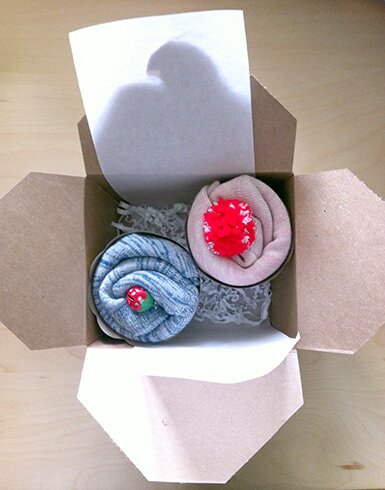
I put some of them in recycled packaging from gift soaps.
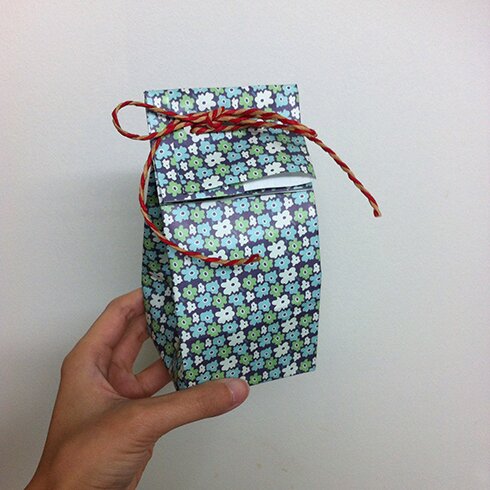
And I made a flat-bottom gift bag with wrapping paper following this tutorial. I then folded the top down, punched two holes at the top through all layers, threaded a fancy string through and tied a bow.
Have a sweet week, everyone!


/http://assets.curbly.com/photos/0000/0022/7745/IMG_1959.jpg)

