katsu, the ninja squirrel

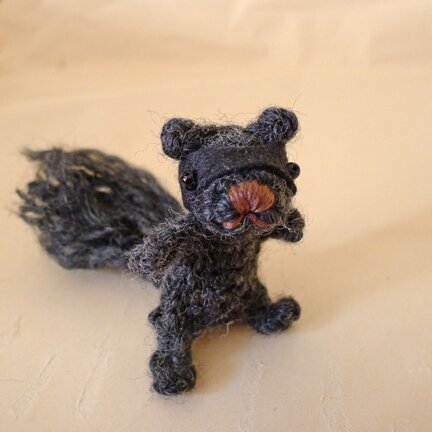
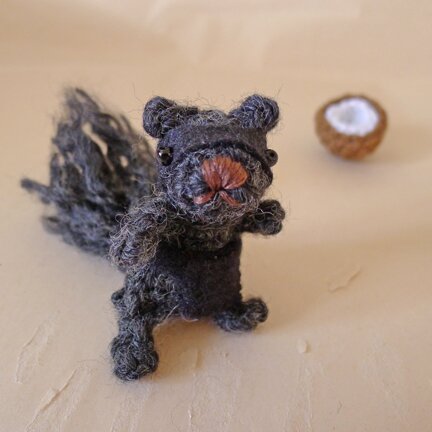
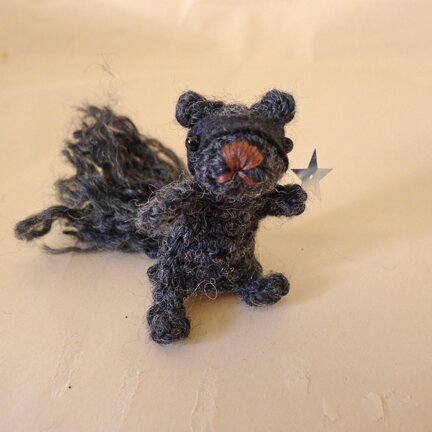
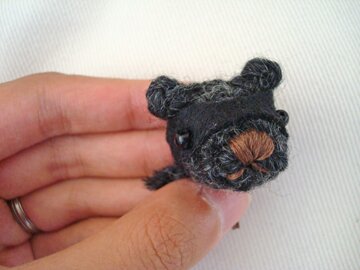
 Last week I men­tioned mak­ing a nin­ja squir­rle, Kat­su, for my sis­ter. Final­ly writ­ten up a pat­tern, so you can make your own nin­ja too! :D 

And unlike most squir­rel plush, Kat­su is grey. Because most squir­rels in Toron­to are actu­al­ly grey, char­coal, or black, (and on extreme­ly rare occa­sion, white!) but not brown.

Alright, here’s the pattern…

I used: 

Patons Shet­land Chunky — Charcoal

3.75mm hook

Bit of black craft felt — for the satchel

Two 4mm glass beads — for eyes

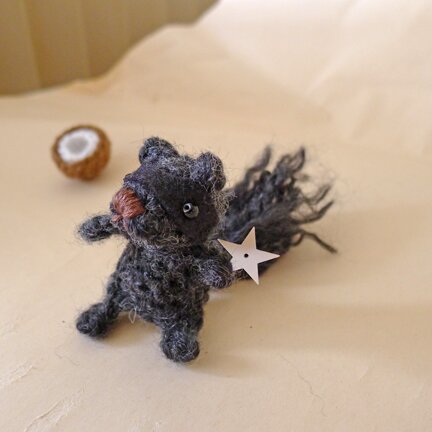
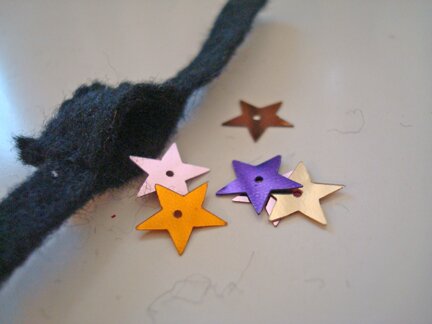
Star con­fet­ti — for nin­ja stars

Straight pins, tapes­try nee­dle, sewing nee­dle, black thread

Stuff­ing (I used bits of scrap yarn)

A note on yarn and hook: I used Shet­land Chunky because that’s what I have. Oth­er chunky or heavy worsted weight yarn would do. Or one could prob­a­bly sub­sti­tute with a worsted weight yarn, but may have to use a 3.5mm hook instead. I like to have a fair­ly tight gauge when cro­chet­ing plush, so it would keep its shape. 

A note on pat­tern: I like to cro­chet while watch­ing TV and I don’t like to count stitch­es. So what I start­ed to do is repeat­ing the same stitch (or set of stitch­es) around and around until the pieces gets to a cer­tain length. As such, the pat­tern is writ­ten in steps rather than in rows. I find that eas­i­er, and I hope it works for you too. But if you need clar­i­fi­ca­tion please feel free to leave a com­ment or con­tact me. I’d be more than hap­py to con­nect with you :D

Kat­su is very small (about 2.5 inch­es tall) so it helps if one is famil­iar with cro­chet­ing in the round on a small scale. The upside is, because he’s so small there are not very many stitch­es involved and so it does­n’t take very long :D

The stitch­es involved are:
chain (ch)
sc (sin­gle cro­chet)
sl st (slip stitch)
2 sc tog (work 2 sin­gle cro­chet stitch­es together)

Here it goes…

HEAD:

Step 1: ch 3, 5 sc in 3rd ch from hook, sl st in top of begin­ning ch.

Step 2: ch 1, [2 sc in next sc, sc in next sc] for 2 rounds. (So you’d see 3 rows of stitch­es alto­geth­er all around.)

Step 3: sc in each sc until piece mea­sures 1″ from beginning.

Step 4: 2 sc tog until there are 5 sc left, sl st in next sc, leav­ing a 6″ tail, fas­ten off.

Stuff head, weave tail in the 5 stitch­es around the open­ing and pull taunt, tie off.

*Head posi­tion: begin­ning of step 1 = nose, tie off = back of head

EARS:

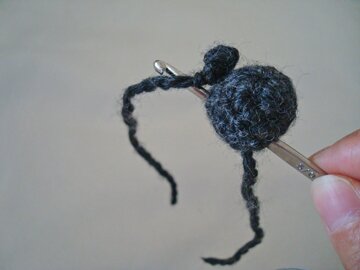
Leav­ing a 4″ tail, ch 3, sl st in 3rd ch from hook, leav­ing a 4″ tail, fas­ten off.

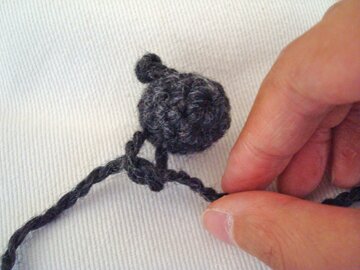
Posi­tion ears on head. Using cro­chet hook, pull tails, one at a time, through the head and out through adja­cent stitch­es at the bot­tom of the head.

Tie tails at the bot­tom of the head.

Repeat for the oth­er ear. 

MASK:

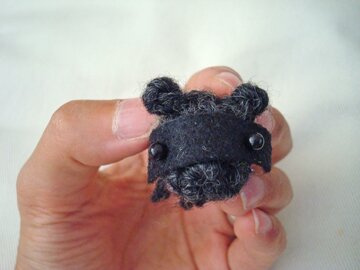
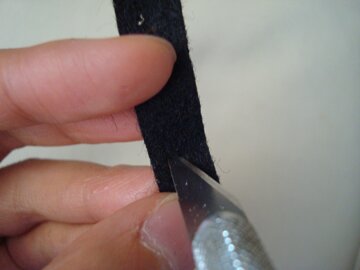
Cut a small strip of black felt and pin it to head with straight pins to deter­mine posi­tion of eyes. I hap­pen to have straight pins with black bead pin­heads, which make per­fect stand-ins for eyes.

Take mask off head. Note where the pin holes mark the eyes, and cut the holes big­ger with an Exac­to knife.

Trim the mask between the eyes and bot­tom left and right to cre­ate a more mask-like shape.


Sew mask to head, then sew on eyes and embroi­der nose/mouth. Head is com­plete! :D

 Now we move on to the body…

BODY, LEGS & ARMS: (all made in one piece)

Step 1: ch 10, sl st in 1st ch to form a ring. 1 sc in each ch around.

Step 2: sc in 1st sc, con­tin­ue to work 1 sc in each sc for 2 rounds. (So you’d see 3 rows of stitch­es altogether.)

Step 3: 2 sc in next sc, 1 sc in each of the next 4 sc, 2 sc in  next sc, then 1 sc in each sc until piece mea­sures 1 1/4″.

You’ll get a tube shape. Flat­ten the “tube” for the fol­low­ing steps.

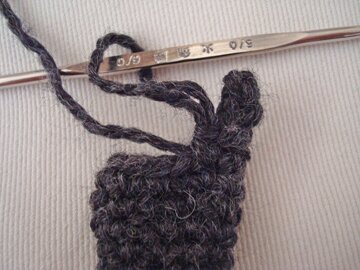
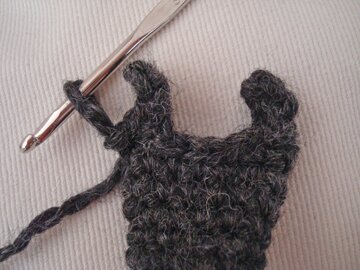
Step 4 (leg): ch 4, sc in 2nd st from hook, 1 sc in each of next 2 ch, sc in the stitch beside where the ch 4 of leg began.

Step 5: Cro­chet­ing through both front and back piece of body, sl st in each of the next 4 sc.

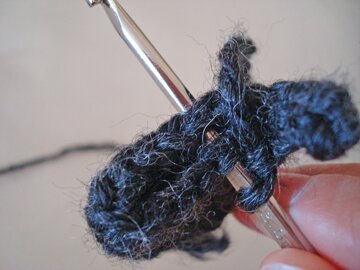
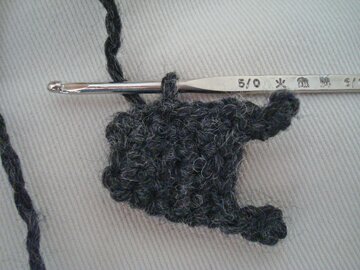
Step 6 (oth­er leg): ch 4, sc in 2nd ch from hook, 1 sc in each of the next 2 ch, sl st in next clos­est stitch of body.

Step 7: sl st up the side of body until 3rd last round before neck. 

(Begin arm) ch 4, sc in 2nd ch from hook, 1 sc in each of next 2 ch, sl st in next sc of body.

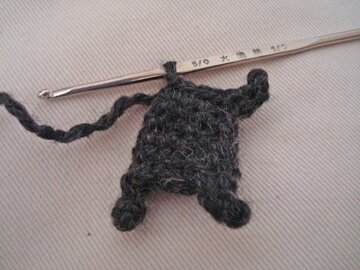
Step 8: sl st across neck open­ing in front lay­er ONLY. 

(Begin oth­er arm) ch 4, sc in 2nd ch from hook, 1 sc in each of next 2 ch, sl st in next sc of body. Sl st down the side of body until begin­ning of leg. Fas­ten off.

Stuff body through neck open­ing. Sew head to body.

Squir­rels can­not stand on their own with­out their big fluffy tails. To make tail:

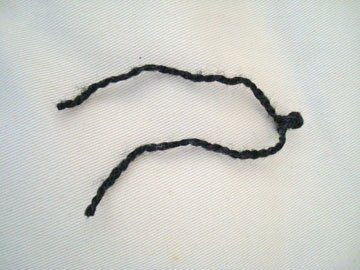
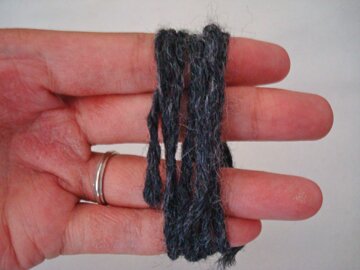
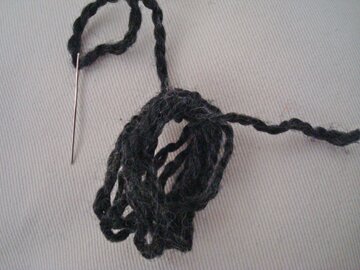
Wind yarn around 4 fin­gers 7 times.

Cut yarn. Take yarn loops off hand while keep the loops. Thread a nee­dle through one of the yarn tails while keep­ing the oth­er yarn tail free. Wrap yarn tail through the loops, like so…

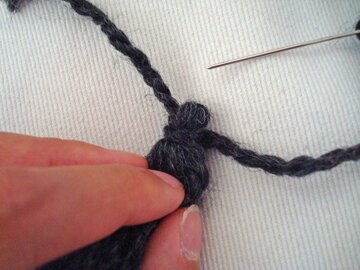
Bunch the loops togeth­er and wrap yarn tail around the bunch of yarn loops, like so…

Tie the two tails togeth­er. With the nee­dle still thread­ed, pin the tail to the squir­rel :D and secure with a few stitches.

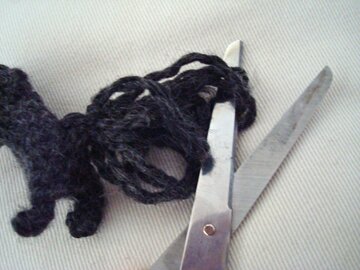
Cut all the yarn loops open. Fray the indi­vid­ual strands of yarn. Then gen­tly roll the tail between palms.

Tail com­plete! :D

To make Satchel, where nin­ja squir­rels keep their nin­ja stars:

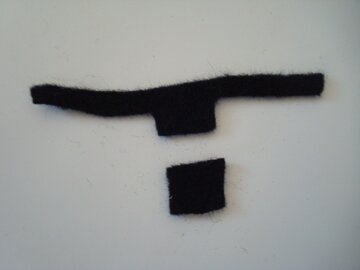
I cut from black felt these pieces…

Then I sewed 3 sides of the rec­tan­gle to the belt­ed part, leav­ing the top open. Then I just put it on Kat­su and pinned the back togeth­er with a tiny safe­ty pin.

Here’s Kat­su with his satchel…

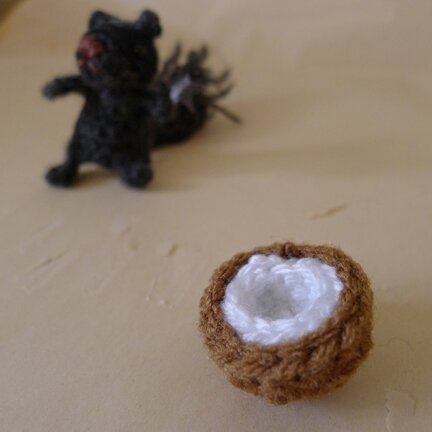
The pat­tern for the coconut, if you’re inter­est­ed, is part of the pina cola­da pat­tern. (Won­der what the coconut is doing here? Full sto­ry in last week’s post.)

Aim­ing at target…

Hi-YA!


today’s awesome finds!

Buttons! 

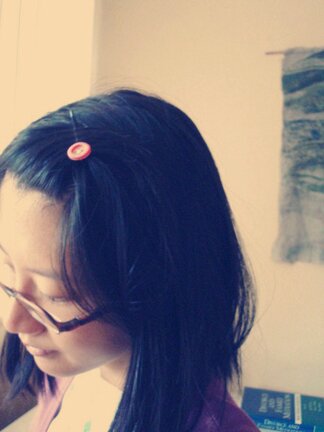
My mom gave me a box of craft sup­plies that some­one else gave to her, and in the large box of sup­plies there was a small box of but­tons. I just tucked the box of but­tons into my craft draw­er for the longest time and only today did I look through it. There were these deli­cious-look­ing green and pink but­tons just beg­ging to be made into some­thing, but I did­n’t know what… and then I went brows­ing on Pin­ter­est and guess what I found? This post on Home­mak­er’s Jour­nal about mak­ing but­toned bob­by pins! It’s such a sim­ple idea but it’s absolute­ly perfect.

I’m in the process of try­ing to grow out my bangs so I use bob­by pins to keep my hair out of my face, and hav­ing a nice but­toned bob­by pin rather than a plain old bob­by pin real­ly bright­ened my day. It’s the small things, you know? :D


Also in the box of but­tons was this antique Hong Kong $5 coin, from 1976!

It’s a decagon! (new word I learned today thanks to Google :D) Nowa­days $5 are round, I’ve nev­er seen a 10-sided $5 coin! And here’s the queen on the flip side, of course.


That was in the morn­ing. So then I thought, I must wear one of these pret­ty but­ton bob­by pins out some­where. I planned to vis­it the thrift store some­times this week for some back-to-school cloth­ing. I was debat­ing whether I should just take it easy at home or ven­ture out. The bob­by pin gave me the moti­va­tion to go out (it’s the small things, really).

And guess what?

The thrift store was hav­ing a one-day 50% off cloth­ing sale!

So with under $20 I got 4 dress shirts and a cardi­gan. I was real­ly hap­py with the dress shirts, which aren’t all that excit­ing but some­thing I need for work-relat­ed occa­sions (I’ve learned that adding a cardi­gan does­n’t real­ly make a graph­ic tee look more pro­fes­sion­al). But the cardi­gan need­ed some work, because it was too big. (I wish I had tak­en a “before” pho­to with me wear­ing it).

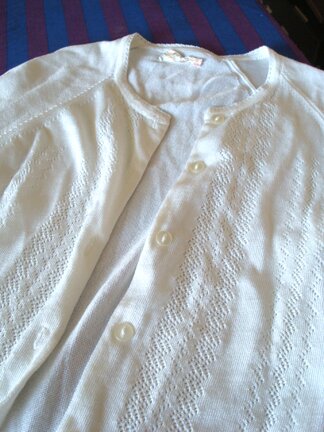
I want­ed a neu­tral colour cardi­gan for a cou­ple of upcom­ing wed­dings, and I do like this one because of its lace pat­tern and the del­i­cate-look­ing col­lar. It was a size-large.

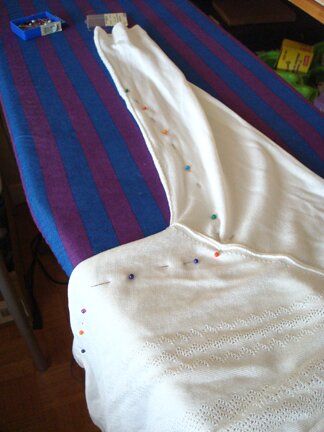
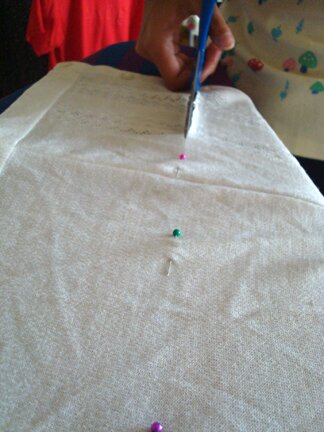
So I took in the sides and the sleeves…

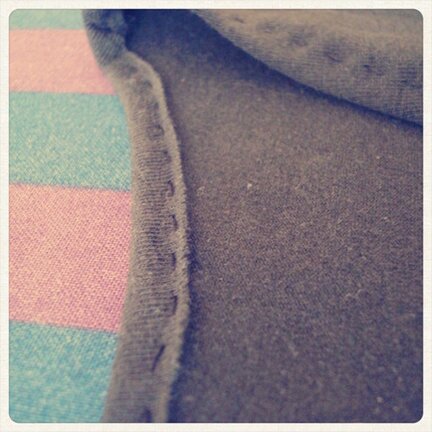
… and cut 5.5″ off the hem, and then re-hemmed it…

… and TA-DA! A cropped cardi­gan! :D


I’m quite hap­py with it, though I did­n’t know how it was going to turn out because I’ve nev­er sewn sweaters with the sewing machine before. I was a bit con­cerned that it would all stretch out. But over all it did­n’t stretch much. The cardi­gan was just kind of shaped fun­ny… it was kind of twist­ing (you might be able to see that a bit in the pic­ture) and would­n’t lie flat when I tried to line up the seams. But I think it looks alright! :D

Oooh, and check this out…

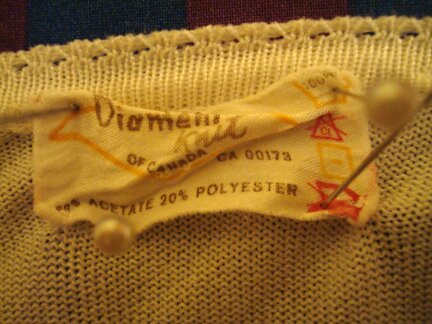
The tag on the cardi­gan was all bunched up so I had to stretch it out and pin it like a but­ter­fly spec­i­men to take a pho­to (because the tag says “no iron­ing”, I think). But can you see that it says it’s made of 20% poly­ester and 80% acetate? 

I did not know that one could make cloth­ing out of acetate. By acetate does it mean acrylic? Hmm. I won­der how old this sweater is…

Oth­er awe­some find today that’s not pic­tured: tik­ka masala chips! Mmm curry.

Have a won­der­ful day, friends!


weekend wonders

Sat­ur­day was a real­ly sun­ny day, and we were thrilled to see that the large red flow­ers in the park near our build­ing are once again in full bloom! Not sure what they’re called but they look like hibis­cus, which is a very com­mon flower in Hong Kong and are called 大紅花 in Chi­nese (direct trans­la­tion: big red flower. We Chi­nese are a very prac­ti­cal bunch when it comes to lan­guage. And oth­er things…). They are so HUGE! And made me so hap­py :D


Tonkot­su ramen! I was most impressed by the per­fect­ly boiled egg. I think it’s the best boiled egg I’ve had in a ramen. The broth was also excel­lent — good to the last drop :D I would total­ly rec­om­mend this place if you’re ever in town! 


Seeds (?) from the smoke trees, tum­bling down the streets like giant dan­de­lion seeds.


Sun­day after­noon we enjoyed some hand­made milk­shake — just cook­ie dough ice cream, milk, and ice all whirled togeth­er in the blender :D


Also spent the after­noon hand-sewing — more on that lat­er :D

Was a good week­end over all. Hope your week­end was love­ly — wish­ing you a great week ahead!


sunday video: lightning storm

Light­ning storm in my neigh­bour­hood this week! I was walk­ing home from the sub­way sta­tion just as it was start­ing — just light­ning across the sky and thun­der rolling in the dis­tant, but no rain. Every­one com­ing out of the sta­tion just put their heads down and walked as quick­ly as their legs could car­ry them. It was kind of scary. 

And so, now that the storm has come and gone, and I’m sit­ting down in the com­fort of my home, I can final­ly look at these light­ning bolts through my com­put­er screen and just mar­vel at the pow­er of nature. Look how it strikes the CN Tow­er! 

I hope the weath­er is nice wher­ev­er you are, and if there’s a storm you’re able to stay warm and dry!


favourite things friday

Such a sim­ple idea, but so mean­ing­ful, not to men­tion cute! A par­ent made these for tod­dlers to ease their first-day-of-school jit­ters. Hav­ing some­thing to hold and squish def­i­nite­ly helps ease anx­i­ety some­times. From Curly Birds.


Glit­ter and home­made play dough! Def­i­nite­ly adds anoth­er dimen­sion to plain old salt dough. How-to on Fairy Dust Teach­ing.


I know exact­ly who to give this to! Now they just need to come up with a new baby! :P I espe­cial­ly love the fish. I hope I can find a sim­i­lar fish… Tuto­r­i­al on how to make sushi with baby tow­els, one­sies, and socks from Cre­ative Dol­lar.


Baby food jars have a love­ly quaint qual­i­ty to them, I’ve used them in my art­work before, and I love to see herbs plant­ed in them. Here’s anoth­er clever use of baby food jars, and its shape works so well! Lego head con­tain­ers! Bril­liant! How-to on obSEUSSed.


I’ve been want­i­ng to make a hook case for a while. This one uses the love­ly star stitch (I made a belt with star stitch a while ago) and I love how sim­ply the hooks are held in place, no need to make com­part­ments. Fol­low Tan­gled Hap­py to see the pattern!


I saw rings with fab­ric flow­ers in a small shop in Hong Kong once. They were very pink and whim­si­cal. These from Martha remind me of the ones I saw. Would­n’t it be cool if the flow­ers were on met­al ring blanks? Might try that sometimes…


What do you think these love­ly ros­es are made from? Paper, of course. But what kind of paper? :D Any guess­es? Alright. It’s cof­fee fil­ters. Cof­fee fil­ters! Anoth­er excel­lent exam­ple of turn­ing some­thing ordi­nary and hum­ble into some­thing extra­or­di­nary. Total­ly fit for  a cen­ter­piece at par­ties… at a wed­ding even! :D No one would ever be able to tell that you’re dec­o­rat­ing the tables with cof­fee fil­ters. Unless of course you tell them. And telling them would be the best part! :D And the even bet­ter part? There is a How-to! From Kuch­nia Pel­na Cud­ow.  The blog is in Pol­ish but the pho­tos are pret­ty self-explanatory.


Also in Hong Kong I came across lots and lots of minia­ture food tuto­r­i­al books. But they all call for a kind of latex air-dry mod­el­ing clay mate­r­i­al that I’m cer­tain I won’t be able to find in Cana­da. But here is a tuto­r­i­al for minia­ture pas­tries using the hum­ble salt dough! :D From the­craftar­tykid on Instructa­bles.


Here is anoth­er tuto­r­i­al using air-dry clay, which can be bought in art sup­plies stores. I love that it incor­po­rates tex­tures of every­day things. (There are exam­ples of small wal­nut bowls and a wood grain plate as well.) From Fam­i­ly Cir­cle.


A bril­liant tuto­r­i­al on how to make foam­ing soap! It does require one to get a bot­tle of foam­ing soap first, because the foam­ing action comes from the mag­i­cal mech­a­nism of the bot­tle (I’m sure it’s not all that mag­i­cal, I just don’t know what it is and pre­fer to think of it as mag­i­cal). I’ve come to pre­fer the foam­ing soap rather than the straight liq­uid soap because the foam­ing stuff does­n’t leave as much residue on my hand, and there­fore does­n’t take a lot of time/water to rinse off and feels less dry­ing after­ward. (I suf­fer from dry, flak­ing hands all year long) And I think one real­ly does­n’t need that much soap when wash­ing hands. So this hand­made foam­ing soap would make soap last much longer! :D Give it a try if you like foam­ing soap too! From The Fru­gal Girls. 

Have a fab­u­lous week­end, every­one! :D


adventures in refashioning

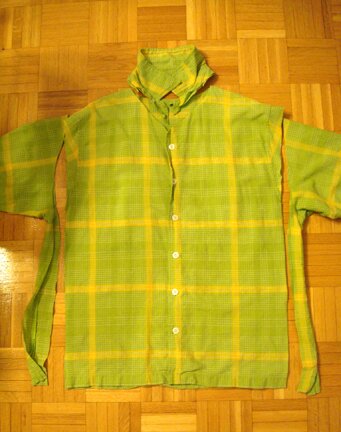
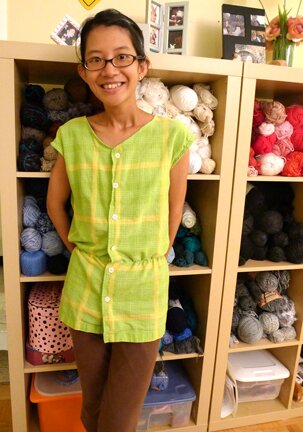
I’ve been see­ing a lot of tuto­ri­als on refash­ion­ing men’s shirt late­ly. They look pret­ty sim­ple so I thought I’d give it a try. Here’s one shirt that Mike does­n’t wear any­more and donat­ed to me. I basi­cal­ly just cut off the col­lar and made two straight cuts down the sides…


Ta-da! Not too shab­by, as Mike him­self would say! I just hemmed the neck­line by fold­ing the edge over twice and stitch­ing it. The sides and arm holes I sewed togeth­er like I did for the pil­low­case dress, to make fray-free seams. And for the elas­tic waist, I mea­sured and cut a piece of 1/4″ elas­tic by wrap­ping it around my waist with­out stretch­ing it, then sewed it direct­ly to the mid-sec­tion of the tunic by stretch­ing it slight­ly as I sewed. There must be a bet­ter way of doing that though, because it was real­ly hard to get it even all around… but it looked alright in the end.

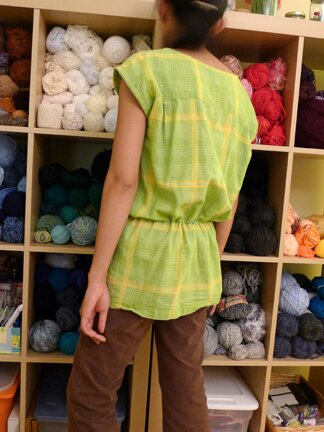
And the back…


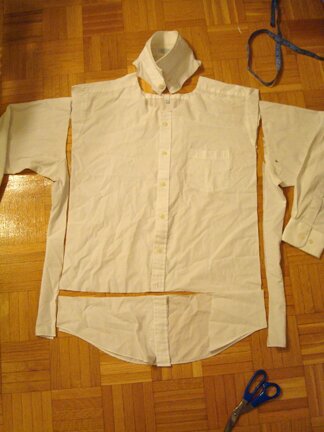
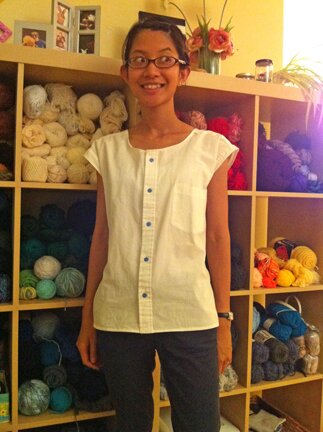
Here’s anoth­er refash­ion with Mike’s white dress shirt, inspired by this shirt refash­ion tuto­r­i­al. Again, cut­ting off the col­lar and the sides…


I had to cut off so much of the bot­tom as well because for rea­sons I don’t remem­ber I’ve cut of a rec­tan­gle of fab­ric from the hem of the shirt a while ago…

And I did­n’t roll up the sleeve cuff like it is in the tuto­r­i­al, because of my fray-free seams con­struc­tion, but I think it looks alright :D

Oh yes and I swapped the white but­tons for blue ones :D

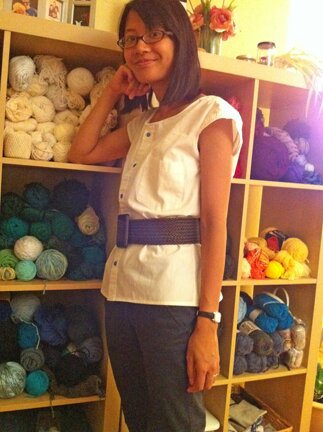
Also looks alright with a wide belt.


And as you can see, I’m still very much in love with the wall of yarn, even though I haven’t yet worked on a bet­ter solu­tion to con­tain the yarn — it makes a fun back­ground for photos!

Speak­ing of solu­tions for con­tain­ing the yarn — thank you so much for all your won­der­ful sug­ges­tions! I have a pret­ty good idea that I want to try and it real­ly came out of read­ing all of the com­ments left on the wall of yarn post. Thank you so much for shar­ing your great ideas and knowl­edge with me!

Have a love­ly evening, or morn­ing, or after­noon — wher­ev­er you may be! :D


ninja squirrel! (忍者松鼠!)

Meet Kat­su, the nin­ja squir­rel accom­pa­ny­ing my sis­ter to the land of cute things (aka Hong Kong)! 

My sis­ter is going to Hong Kong for a year to pur­sue a grad­u­ate degree in Eng­lish-Chi­nese trans­la­tion, which is why the title of this post is direct­ly trans­lat­ed to Chi­nese in hon­our of that :D

I decid­ed to make my sis­ter a gift to bring with her on her year-long jour­ney. One of the ways we con­nect, since she was born, is through mak­ing up sto­ries for our stuffed ani­mals. So I thought it would be fit­ting to make her a plush.

Kat­su’s sto­ry stems from some­thing that my sis­ter encoun­tered. My sis­ter would have been able to write this much more com­pelling­ly, since she has a degree in Eng­lish and cre­ative writ­ing, but my lit­tle descrip­tion here will have to do…

One day in the win­ter, my sis­ter came across some squir­rel tracks beside half a coconut shell in the snow. She found it strange but thought noth­ing of it until after school she took the bus home, and spot­ted through the bus win­dow some squir­rel tracks and half a coconut shell in the snow in a field just a block away from home.

Pret­ty eerie, she thought :S

That must have been a nin­ja squir­rel trav­el­ling with his coconut, I thought :D (“Shtealth!” the nin­ja squir­rel says, in my head)

I actu­al­ly did­n’t think of mak­ing a nin­ja squir­rel until one day I was hang­ing out in a park with two friends from school. We saw some dogs chas­ing a squir­rel and we joked that the dog would nev­er catch up to the squir­rel, and then spon­ta­neous­ly we start­ed tak­ing pho­tos of our­selves pos­ing as nin­ja squir­rels… (well, what do you expect from art therapists?)

One of the friends sug­gest­ed that a nin­ja squir­rel would car­ry his nin­ja stars in a satchel. The oth­er friend said that he should have a pouch like a kan­ga­roo. I think they would be hap­py to know that I’ve found a hap­py medi­um — a fan­ny pack! :D (I still call it a satchel though, because it’s one of my favourite words.)

I can’t find four-point nin­ja stars but I have star con­fet­ti. There’s even a pur­ple one — my sis­ter favourite colour :D I stuffed them all into the satchel and put it around Kat­su’s mid-section.

But you can see his agili­ty bet­ter with­out his satchel.

Fierce!

I’m pret­ty proud of Kat­su, so I’ve writ­ten down the pat­tern and will share that next week. But for now, I’m going to write about what I’ve learned from my sister.

Though I have to say, isn’t it kind of sad that I don’t reflect much on how much I admire the peo­ple around me until there comes a time when I would­n’t see them for a while. Good thing my sis­ter is only going to be away for a year.

But I must write this, about how awe­some my sis­ter is. Even though she’s much younger, she taught me many things. 

I learned from my sis­ter how she humbly accepts her mis­takes and short­com­ings. She humbly acknowl­edges that she could have done bet­ter and does­n’t give her­self excuses. 

I learned from my sis­ter how she serves and helps oth­ers in all the ways she can even with­out any kind of acknowl­edge­ment or reward. She spend hours and hours every week vol­un­teer­ing at dif­fer­ent places. She only shares what she learns and the peo­ple she meets and maybe the chal­lenges she was con­cerned about, but she nev­er com­plains about the amount of work she’s been asked to do for free. 

I learned from my sis­ter how she sim­ply accepts things the way they are, and not com­plain. Her com­mute to school was a whop­ping four hours on stinky Toron­to bus­es with con­stant delays and I nev­er hear her com­plain about it (and you can prob­a­bly guess how much I despise and there­fore com­plain about bus­es…) Her school’s admin­is­tra­tion is extra­or­di­nar­i­ly dis­or­ga­nized (as I’m expe­ri­enc­ing it now, start­ing at the same uni­ver­si­ty next month…) but my mom does­n’t remem­ber the last time she complained.

I learned from my sis­ter her courage and deter­mi­na­tion. From get­ting her dri­ver’s license to speak­ing a new lan­guage to decid­ing to stay a year in Hong Kong. Leav­ing her com­fort zone. Doing what she feels is right even though it also feels tremen­dous­ly scary.

I learned from my sis­ter how she tru­ly cares about every­one around her. From the bot­tom of her heart she tru­ly, tru­ly wants them to do well and be hap­py, and she’s reli­able and keeps her promis­es when her friends need help.

My sis­ter is some­one who would look past all of my mis­takes and short­com­ings and love me with all her heart. I must say, I was rather mis­er­able and deranged in my youth and I have done some pret­ty thought­less and mean things toward her. But still, she wept with me when my heart was bro­ken and cheered with sheer joy when I cel­e­brat­ed all my milestones.

So today I cel­e­brate my sis­ter’s mile­stone, a new chap­ter in life, as she heads toward the future (indeed, Hong Kong is 12 hours ahead of Toron­to!) and embarks on a new excit­ing adven­ture in just a few hours. I am cheer­ing with sheer joy but also feel­ing in my heart a sad, sad void as I think about not see­ing her for a whole year, which is kind of unimag­in­able, but I’m sure we’ll deal with it just fine. And I’ll try not to com­plain :P 

Cheers, Cil! May your jour­ney be safe, hap­py, and full of bless­ings! Know that I’m very, very proud of you.


weekend wonders

This past week­end we vis­it­ed my par­ents. My dear sis­ter is head­ing to grad school in Hong Kong (!) for a year and she is leav­ing lat­er this week, so it was good to spend the week­end with her.

But every­one was busy in the morn­ing so Mike and I went off to have Hong Kong din­er-style break­fast spe­cial, with real­ly run­ny eggs and extra strong tea. (Next time I’ll have to request that the eggs be more cooked :S)


Lat­er in the after­noon we picked heir­loom yel­low toma­toes from my par­ents’ toma­to bush. 

It took me a while to spot some in the bush, but they weren’t ripe.


My mom, on the oth­er hand, had found quite a few in a minute or two.


It’s real­ly not easy to spot the ripe toma­toes, giv­en the size of the toma­to bush. But I think Mike found one here.


Then we went to the Chi­nese mall to find Angry Birds cap­sule toy machine! :D


Cap­sule toy machines are def­i­nite­ly one of my favourite things!

Though I kind of cheat­ed here… Mike got the yel­low wood­peck­er from the machine and I got the white egg-shaped bird, but my very favourite was the blue ice birds. The shop that owns the cap­sule toy machines also sells the Angry Birds plush­es out of the machine, but charges a bit more, of course, for the con­ve­nience of choos­ing spe­cif­ic ones to buy. *sigh* I’m such a suck­er for plushes.


:D


Hap­py Mon­day, everyone!


sunday video: sky scarf

Sky scarf is a very neat project, part of the Con­cep­tu­al Knit­ting Project by Leaf­cut­ter Designs. (via WhipUp)

It doc­u­ments the weath­er by knit­ting a stripe that match­es the colour of the sky each day. Intrigued? Here’s a video with more details.


I love that one does­n’t have to spend a ton of time on it each day, but it still requires com­mit­ment and con­sis­ten­cy — com­mit­ment to do some­thing cre­ative each day. It even makes one look up at the sky once a day in the midst of busy­ness and appre­ci­ate it for what it is. A great project for the fall when school and work and every­thing else is start­ing up again!

There are Flickr and Rav­el­ry groups for the project as well — it would be fun to see all the dif­fer­ent weath­er pat­terns in dif­fer­ent cor­ners of the world!

Have a love­ly Sun­day, everyone.


favourite things friday


Time to plan the last blast of sum­mer par­ties before school begins! Martha offers this bril­liant idea of a fish bowl jel­lo treat, with Swedish fish! :D 


Then, if you’re look­ing for some par­ty favours, con­sid­er these fish-in-a-bag soap! I imag­ine the soap can be used by just cut­ting and peel­ing the bag off. And when the soap is all used up one gets a lit­tle fish! :D I love soap that comes with toys! How-to on Lit­tle Birdie Secrets.


More par­ty ideas — why not bring in some par­ty ani­mals, bear­ing can­dles? Instruc­tion on The Sweet­est Occa­sion.


Since we’re think­ing about going back to school / work busy­ness maybe it’s also a good time to plan some Christ­mas craft­ing. I so hope that this year my tree will be filled with Angry Birds. Even a few green pigs. Bril­liant­ly sim­ple to make with ready-made orna­ment orbs, from Obses­sive­ly Stitch­ing.


But maybe before we fast-for­ward too much to Christ­mas we can look for­ward to fall… I’d take these can­dy corn pump­kin over the carved ones any day. From Bet­ter Homes and Gar­dens.


Okra has got to be one of my least favourite foods (just can’t deal with the slime :S), but look at the beau­ti­ful imprints it makes! From Bloe­sem Kids.


Oooh, nifty! Knit­ting with a comb! Instruc­tion on Cut Out and Keep.


Love this bas­ketweave pat­tern, love­ly on a belt. Pat­tern on Chi­Cro­chet.


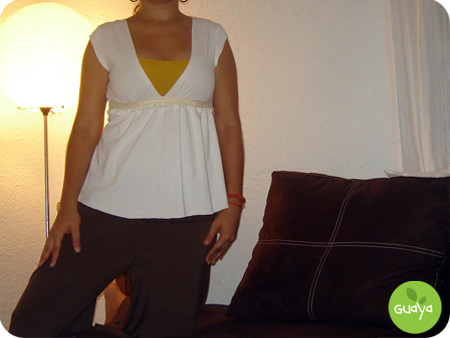
Turn a plain old tee into styl­ish empire waist blouse. I’ve attempt­ed some­thing sim­i­lar before but I kind of just pieced things togeth­er — I’d love to try it with this very easy to fol­low nifty dia­gram. From Guaya.


This is very clever. Per­fect to place by the door with keys and things. Spot­ted on Pin­ter­est.


Anoth­er clever use of a com­mon object! What a great way to start a seedling, then the whole pot can be plant­ed into the ground — no waste! From My Roman Apart­ment.


I’ve been con­tem­plat­ing attempt­ing a bird nest neck­lace for a while. I’ve come across quite a few tuto­ri­als but this one I like a lot. Unfor­tu­nate­ly the pho­to is small but I hope you can see — the wire is actu­al­ly very nest-like and messy, I think it’s the best part! From EEBeads.


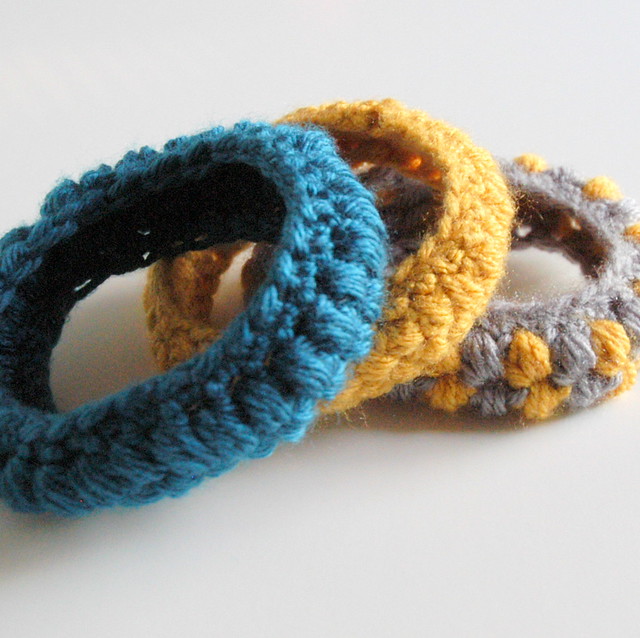
These are some awe­some-look­ing bracelets/bangles! Love the grey-yel­low one. Cro­chet pat­tern on The Boy Tri­fec­ta.


If made in red this could be anoth­er styl­ish ver­sion of the Kiki head­band :D How-to on Mom­tas­tic.


Have I told you that I’m a big fan of head­bands? Here’s anoth­er tuto­r­i­al for a dain­ty lace head­band. Would­n’t it look pret­ty with a big flower on the side too? Hmm… except I can’t put my hair up like that because it’s so straight and slip­pery… but I’m sure I can find a way to make it work if I ever make one :D From McLaugh­lin Design.


We have a type case and I would love it if one day it turns into a cof­fee table. Instruc­tion on Craft.


Pop­si­cle for break­fast? Yes please! :D Recipe on Jan­ice’s Mash-up.


Final­ly, some­thing ridicu­lous­ly awe­some and fun — check out this diary of Dai­ly Lev­i­ta­tion by Japan­ese pho­tog­ra­ph­er Nat­su­mi Hayashi. She takes pic­tures of her­self in which she appears to be hov­er­ing in air. The ones with the train are just incred­i­ble! Just how does she do it? A lot of per­se­ver­ance, it appears :)


Hope you enjoyed this week’s favourite things col­lec­tion! Have a great week­end! :D


Â