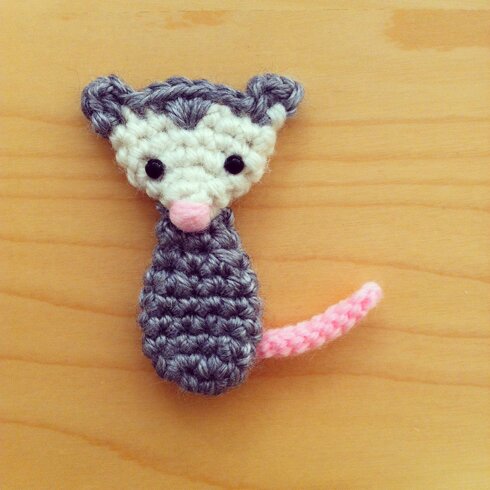
possum opossum

Opossum Blog

Do you say possum or opossum?

The ‘O’ is silent, I think,” suggests Mike.

Or we can say, “possum, o-possum” all poetic-like. Which reminds me of the wonderful voice-acting of William Shatner in Over the Hedge as Ozzie the possum, especially in the “Rosebud” scene.

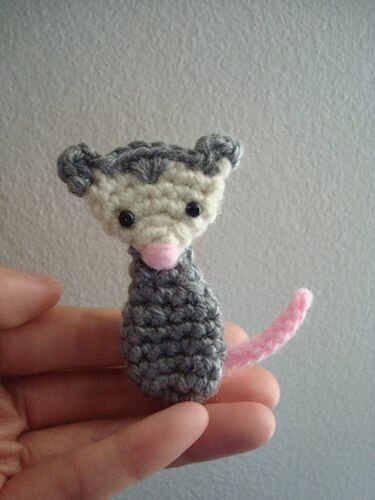
Here’s the 10th (!!) pattern of our 12 Days of Woodland Creatures project! A possum!

I used:

Worsted weight yarn in white, grey and pink

3.5 mm hook

2 small beads for eyes

Needle and thread for sewing and embroidering

Pattern

Head

Round 1: With white, 4 sc in magic ring, join in first sc.

Round 2: ch 1, *2 sc in next sc, 1 sc in next sc*, repeat from * to * around, join in first sc.

Round 3–4: repeat round 2.

Round 5–6: ch 1, 1 sc in each sc around, join in first sc.

Round 7 (ears):

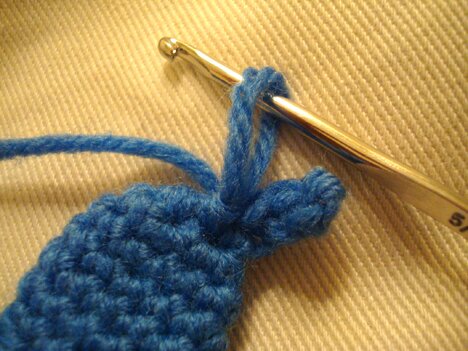
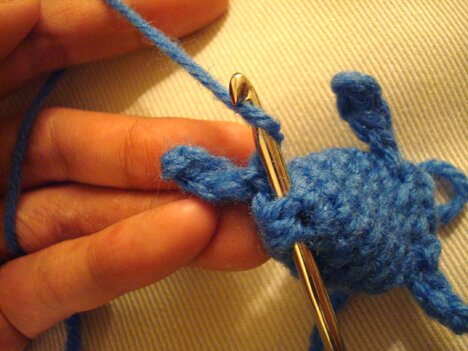
Change to grey, fasten off white, press head flat so that the working loop on the hook is on the right top corner of head. So there would be 1 stitch at each corner of head, and 6 stitches in between on both sides (14 stitches around altogether). Crochet through both layers of head.

ch 2, hdc in next sc through both layers, ch 2, sl st in same st as the hdc, sc in next sc, skip next sc, 3 sc in the stitch directly below next sc (in the row below), sc in next sc, sl st in next sc, ch 2, hdc in last sc, ch 2, sl st in last sc, fasten off, weave in ends.

Body

Round 1: With grey, 6 sc in magic ring, do not join.

Round 2: 2 sc in each sc around, do not join (12 sc).

Continue making 1 sc in each sc around until piece is 1″ tall.

Next row: *1 sc in next sc, 2 sc tog over next 2 sc*, repeat from * to * 3 more times.

1 sc in each sc around until piece is 1.75″ tall. Fasten off, leave tail for sewing.

Tail

With pink, ch 12, sl st in second ch from hook, sl st in each ch to end, fasten off, leave tail for sewing.

Assembly

Embroider nose with pink yarn. Sew on eyes. *Tip: insert sewing/embroidering needles from the lower (or chin) part in the back of the head and tie off threads/yarn there, because it will be covered by the neck part of the body when it’s attached to the head.

Attach body to lower part of the head on the back of the head.

Attach tail to lower bottom of body.


Possum is wishing everyone a very happy week! :D

Insta-possum-Blog


Tweet about this on TwitterShare on FacebookPin on PinterestShare on TumblrPrint this page

squinty fox


squinty fox

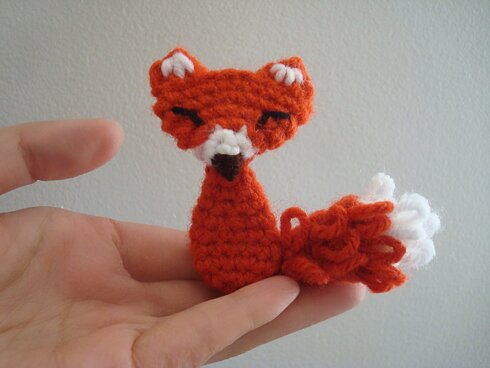
Presenting… squinty fox!

9th Pattern in the 12 Days of Woodland Creatures project :D

A very special thank-you to Kate of Signed with an Owl, who left a comment on the owl pattern post about using the loop stitch to make a squirrel’s tail, which gave me the idea to try the loop stitch for the fox’s tail. It makes it extra fluffy!

I used:

Worsted weight yarn in orange, white, black and brown

3.5 mm hook

Tapestry needle for embroidering and sewing

Pattern:

Head

Round 1: with white, 4 sc in magic ring, sl st in first sc to join.

Round 2: ch 1 (does not count as a stitch), *1 sc in next sc, 2 sc in next sc* around, sl st in first sc to join, switch to orange, fasten off white. (6 sc)

Round 3: ch 1, 2 sc in each sc around, sl st in first st to join. (12 sc)

Round 4: ch 1, *1 sc in next sc, 2 sc in next sc* around, sl st in first sc to join. (18 sc)

Round 5–6: ch 1, 1 sc in each sc around, sl st in first sc to join. (18 sc)

*Note: As I’ve mentioned in the first woodland creatures post, I’m making these animals for a baby mobile so I’m making them flat, but all of the patterns are designed with double layers for sturdiness, and you can always slightly stuff them so they’re a bit more 3-dimensional and plush-like. For the fox, now would be good time to stuff the head before the ear row.

Ears

Press the top opening of the head flat so that the stitch on the hook is on the top corner edge of the head. We’re now crocheting through both layers of the head.

ch 2, 2 dc tog over the next 2 sc, ch 1, sl st in top of 2-dc-tog just made, ch 2, sl st in the second st of the 2-dc-tog, sl st in next 4 sc, ch 2, 2 dc tog over next 2 sc, ch 1, sl st in top of 2-dc-tog just made, ch 2, sl st in last sc on the top corner edge of the head. Fasten off.

Body

Round 1: With orange, 6 sc in magic ring, do not join.

Round 2: 2 sc in each sc around, do not join (12 sc).

Continue making 1 sc in each sc around until piece is 1″ tall.

Next row: *1 sc in next sc, 2 sc tog over next 2 sc*, repeat from * to * 3 more times.

1 sc in each sc around until piece is 1.75″ tall. Now is a good time to stuff the body if you’d like.

Next row: *1 sc in next sc, 2 sc tog over next 2 sc* twice.

Last row: 1 sc in each sc around, fasten off, leave a tail for sewing.

Tail

*Note: Loop stitch is worked on both sides of the tail. Though all of the designs in this project are flat and can be used for applique, they are all designed to be viewed on both sides, so they will also work as ornaments :D

Tail is crocheted in rows.

With orange, leaving a 6″ tail for sewing, ch 3.

Row 1: sc in second ch from hook, sc in next sc, turn.

Row 2: ch 1 (does not count as a stitch), lp st (loop stitch) in each sc across, turn.

Row 3: repeat row 2.

Row 4: ch 1, lp st in first st, 2 lp st in next st, turn.

Row 5: repeat row 2.

Row 6: ch 1, lp st in first st, 2 lp st in next st, lp st in last st, turn.

Row 7: ch 1, lp st in first st, 2 lp st in next st, lp st in each st to end, turn.

Row 8: switch to white, ch 1, lp st in first st, skip next st, lp st in each st to end, turn.

Row 9–10: repeat row 8.

There will be 2 loop stitches in the end, fasten off, weave in all ends.

Assembly:

Embroider the white inner ears, nose, and eyes.

*Tip: Insert sewing needle into the white part of the head on the back when embroidering, and always tie off in that part, because it will be covered by the neck part of the body when attaching the body to head.

Attach body to head by sewing together the top row of the body to the first row of orange (after the white part) on the back of the head, sewing through all layers of the body to the head.

Attach tail to bottom of the back of the body.

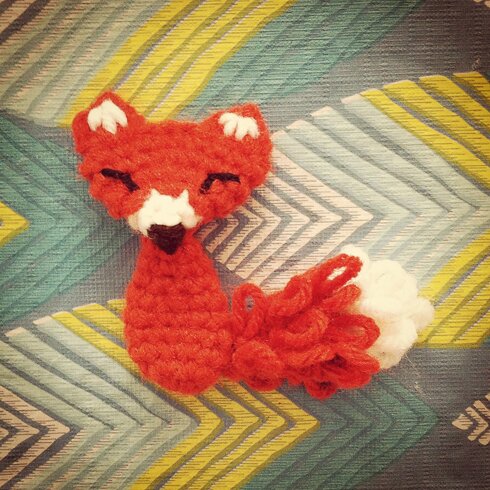
Mr. Fox is complete! :D

squinty fox 2 NEW


Have a wonderful Friday and weekend, everyone!

Tweet about this on TwitterShare on FacebookPin on PinterestShare on TumblrPrint this page

tiny wings

tiny wings

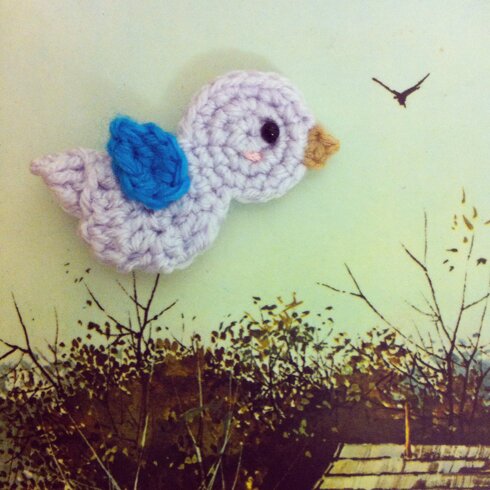
8th pattern in the 12 Days of Woodland Creatures (and Their Favourite Things) project!

When we have a bee, we must have a bird. The bird also shares the same wing pattern as the bee :D

I used:

Worsted weight yarn in lavender, blue and tan (or other colour combinations you like).

3.5 mm hook

2 small black beads for eyes

Pink embroidery thread for rosy cheeks

Needle and thread for sewing

Pattern:

Head and body (make 2)

Head is crocheted in rounds, while body is crocheted in rows.

Round 1: With main body colour, 6 sc in magic ring, do not join.

Round 2: 2 sc in each sc around (12 sc), do not join.

Round 3: *2 sc in next sc, sc in next sc*, repeat from * to * around (18 sc), do not join.

Now we start on the body.

Row 1: continuing from the head, 1 sc in each of next 3 sc, turn.

Row 2: ch 1 (does not count as a stitch), 2 sc in next sc, 1 sc in each of next two sc, turn.

Row 3: ch 1, 1 sc in each of next two sc, hdc in next sc, 2 dc in next sc, turn.

Row 4: ch 1, hdc in first dc, sc in each st across, turn.

Row 5: ch 1, sc in first sc, 2 sc in next sc, sc in next sc, hdc in next sc, dc in last st, turn.

Row 6: ch 1, 2 dc tog over next 2 st, 2 dc tog over next 2 st, hdc in next st, sc in last st, turn.

Row 7: ch 2, skip first sc, 2 dc tog over next 2 st, leave remaining st unworked, fasten off, leave a long tail for sewing.

Repeat pattern for the 2nd side of bird, but no need to leave long tail for sewing.

Wings (make 2)

With wing colour, 4 sc in magic ring, ch 2, work 2 dc tog by working 1 dc in magic ring and 1 dc in first sc, fasten off, leaving long tail for sewing when finishing one of the wings. Securely tie off the loose end of magic ring and weave in ends.

Assembly

Sew eye and embroider rosy cheeks to each side of the bird. Sew the 2 sides of bird together. Sew wings to body. Weave in ends.

Beak

Attach beak colour yarn to 5th stitch from the stitch where head and body meet, in the “chin” area of the bird.

Inserting hook through both layers of the bird, ch 1, 2 sc tog over same st where yarn is attached and next st, ch 1, sl st in the top of the 2-sc-tog just made, sl st in the 2nd sc of the 2-sc-tog. Fasten off, weave in ends.

Bird is ready to take flight!


Have a fantastic week ahead, everyone!


Tweet about this on TwitterShare on FacebookPin on PinterestShare on TumblrPrint this page

the long awaited mushroom workshop

So, the show that I prepared a long time for is cancelled today :( because of unstable weather (cold, windy, 40% chance of rain — it’s an outdoor market).

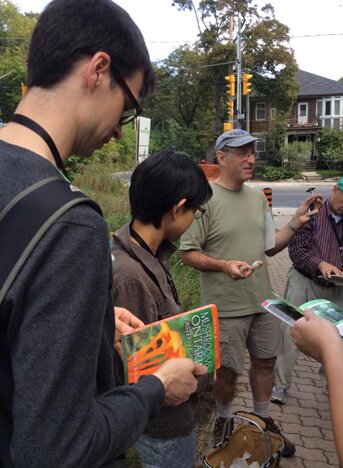
But I suppose it’s for the better, I’m really thankful for a day off after a busy week. AND! I now have time to show you pictures from the mushroom identification workshop that Mike and I attended last weekend! The workshop was put on by the High Park Nature Centre. I’ve been wanting to take the workshop for the past 2 years, but it was always during mid-term time. This is the first year in a long time that I don’t have papers to write on a weekend!

mushroom workshop

Our day started with an extremely informative and animated lecture from our friendly instructor, Richard Aaron (he does lots of mushroom/fungi workshops throughout Ontario and sometimes in the U.S. too, you can check out his website if you’re interested). It wasn’t a foraging workshop so we were not eating the specimen we found. Armed with hand magnifying glasses and field guides, we were ready to explore!

DSC03777

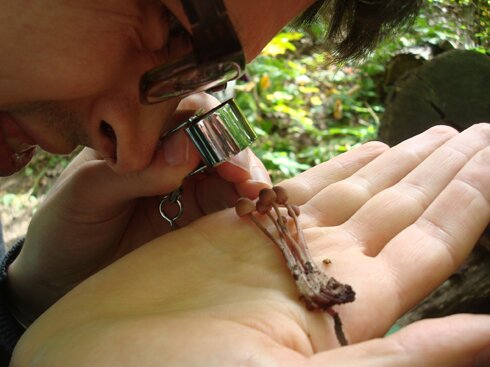
Mike examining some blood foot mycena, which have red liquid inside their stems.

DSC03765

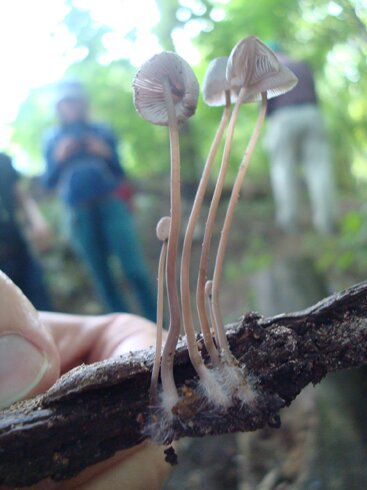
Found a piece of bark with the mycelium of the mushrooms exposed. I used to think that mycelium are like the roots of mushrooms but they’re actually the vegetative parts of fungi, like underground branches, I guess. And the mushrooms that are above ground are the fruits or “fruiting bodies” of fungi.

DSC03760

Like a sculpture. So beautiful.

DSC03779

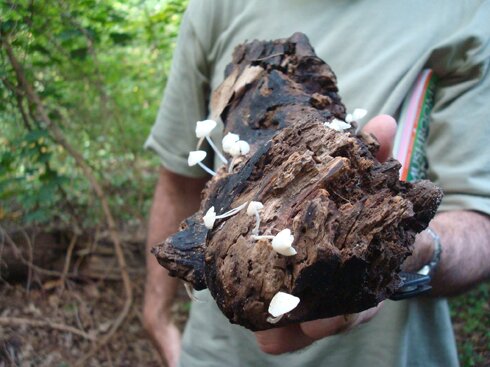
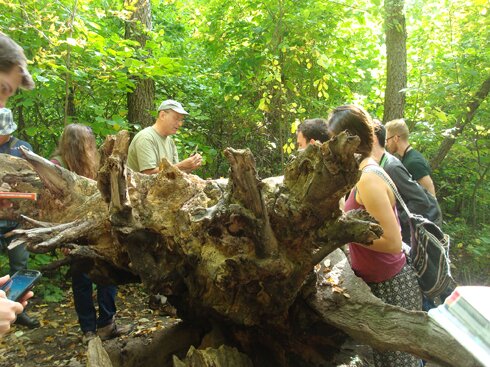
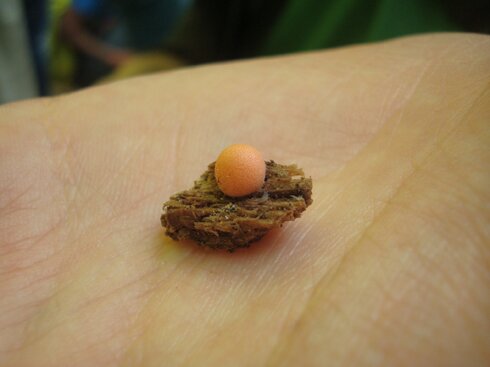
Our group gathering around a fallen tree. We could easily spend hours looking at all the different kinds of fungi growing in the nooks and crevices of the trunk. Like this slime mould here.

DSC03784
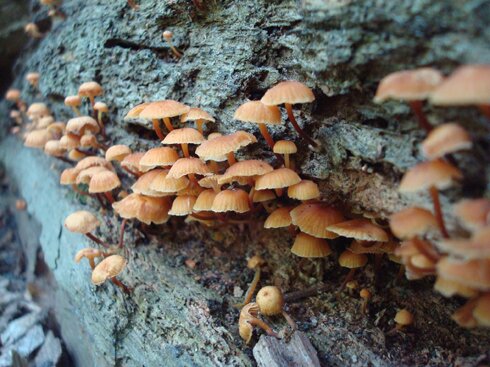
And this troop of fuzzy feet mushrooms.

DSC03788

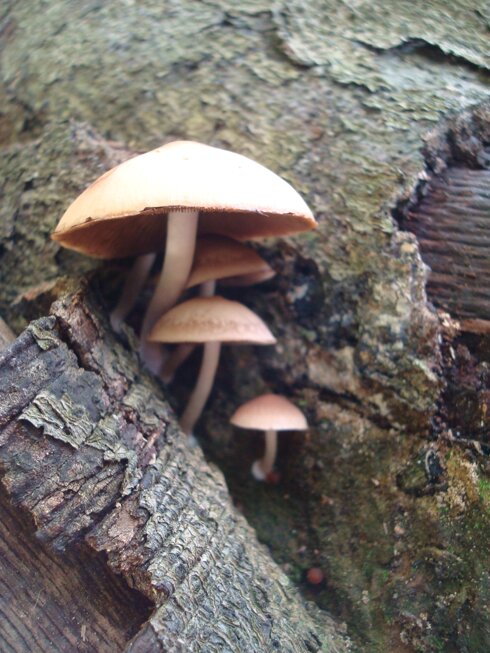
These are bioluminescent!

luminescent panellus

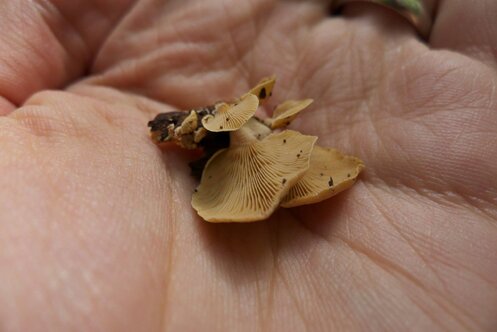
And I can’t remember what these ones are :S But they are beautiful nonetheless.

DSC03787


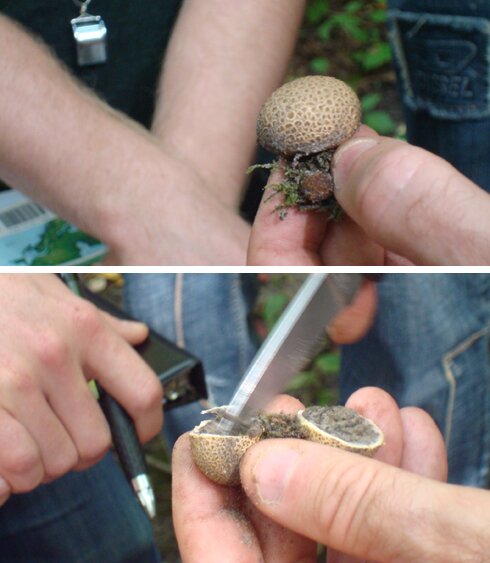
A pig skin puff ball. Unlike the edible giant puff ball mushrooms, this one is deadly poisonous, full of poisonous spores inside!

pork skin puff ball

Don’t eat it, bear! This one is definitely poisonous.

bear


Not sure if I can identify many mushrooms after the workshop, but it was a lot of fun! :D and I did learn that:

1) Mushrooms are a kind of fungi, but not all fungi are mushrooms.

2) Toadstools mean inedible mushrooms.

Hoping to get a mushroom field guide and do more exploring before snow starts to fall! Maybe in the meantime I’ll just download a mushroom identification app…

And if you live in the Toronto area, the High Park Nature Centre runs a lot of other workshops for adults and kids throughout the year. Check them out if you’re looking for a fun nature activity on a weekend or evening!

Hope you’re having a good weekend! We will return to our regular programming of 12 Days of Woodland Creatures next week, stay tuned! :D


Tweet about this on TwitterShare on FacebookPin on PinterestShare on TumblrPrint this page

buzzing around

bee 2

The 7th pattern in the 12 Days of Woodland Creatures (and Their Favourite Things) project!

It’s been a very busy week (hence the delay in posting this pattern, so sorry about that!). I’m frantically making as much stuff as possible for my booth at a show this weekend (more below!!), at the same time preparing for a research presentation and trying to meet other deadlines… *deep breath* so I thought a bee pattern would be a perfect representation of this busyness!

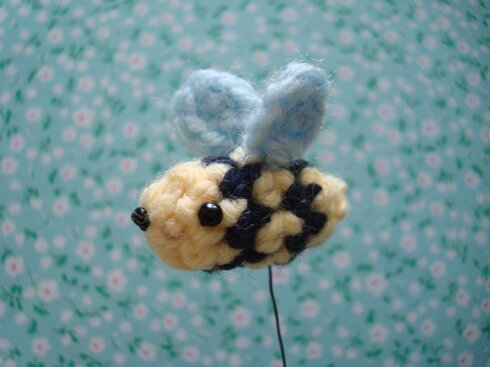
He’s very quick to make. The body consists of only 6 rows of 6 stitches around. But because of the colour change and his tiny size it can be a little tricky. The good thing is that because it’s such a small and quick pattern even if one has to start over it’s not such a big deal. It took me a couple of tries to get the joining seam neat and tight, so don’t be discouraged if your first try doesn’t go as smoothly as you’d like, the bee will come along with just a bit of practice :) Those tiny wings are pretty sweet, if I do say so myself.

I used:

Worsted weight yarn in yellow and black

Sport weight yarn in pale blue

3.5 mm hook (for body)

2.25mm hook (for wings — you can probably use a hook size from 2mm to 2.5mm, it doesn’t have to be exact)

2 small seed beads for eyes

Needle and thread for sewing and embroidering

Pink thread for embroidering mouth

Pattern:

Body (use 3.5mm hook)

Row 1: with yellow, 6 sc in magic ring, sl st in first sc to join.

Row 2: ch 1, 1 sc in each sc around, sl st in first sc to join, change to black yarn, carry yellow yarn up as you go.

Row 3: repeat row 2 with black, change to yellow, carry black yarn up as you go.

Row 4: repeat row 2 with yellow, change to black, carry yellow up as you go.

Row 5: repeat row 2 with black, change to yellow, fasten off black.

Stuff body with some scrap yarn.

Row 6: ch 1, *2 sc tog over next 2 sc*, repeat from * to * two more times, fasten off, leave a 6″ tail.

Weave yarn tail through the remaining 3 sc, pull tight, fasten off, weave in end.

Tiny wings (make 2, use 2.25mm hook)

With pale blue, 4 sc in magic ring, ch 2, 2 dc tog in magic ring and in first sc made in ring, fasten off, leave a 6″ tail.

Securely tie off the loose end of the magic ring, weave in and cut end.

Assembly

Tie both wings to one stitch at the top of body.

Sew on eyes and embroider mouth, hiding thread ends and knots in the black stripes at the back of the body.

And buzzzz!

bee 1

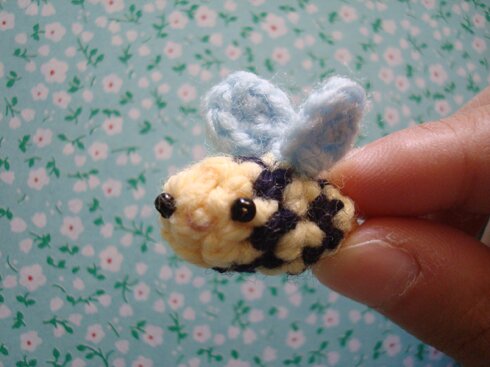
Here’s the bee with my fingers holding it as size reference.

AND if you’re in Toronto or nearby, and looking for fun things to do on the weekend, come by the Weekend Vendor’s Market! It’s at 1630 Dundas Street West.

I have a booth in the market tomorrow. It’s been a long time since I’ve done a booth so I wanted to make something new. And guess what, it’s woodland themed! :D

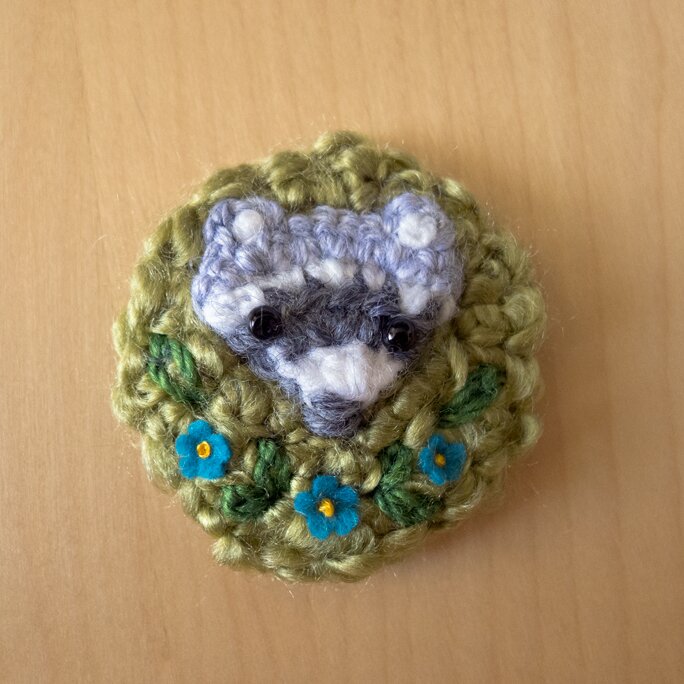
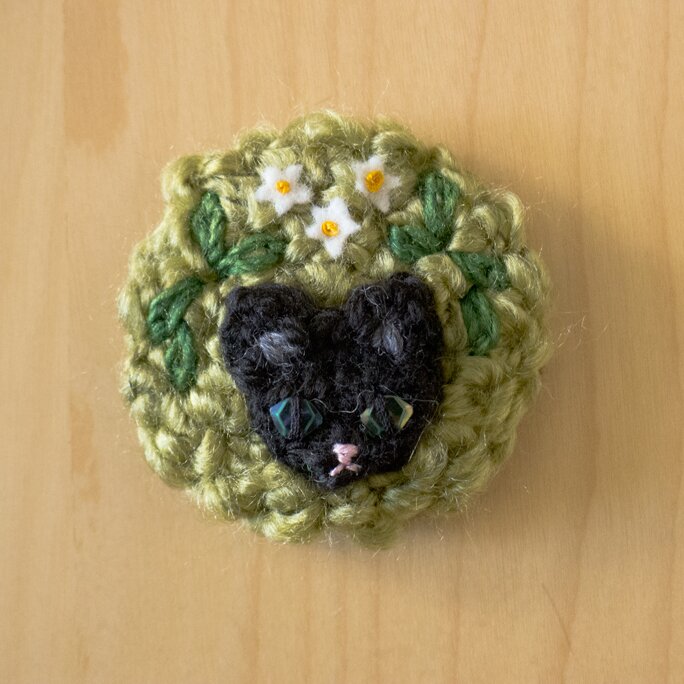
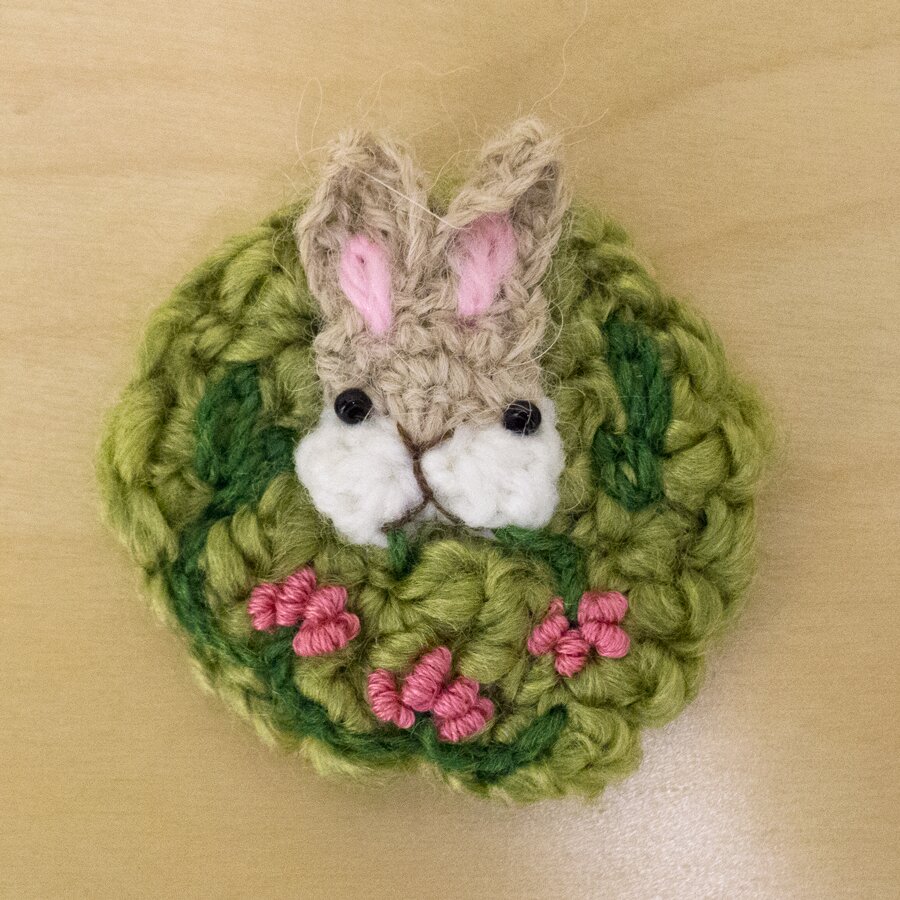
Here are my fancy stealthy friends: city bandit, ninja cat, garden rabbit, and white squirrel (not picture, because, stealth!)

banditninja catStealthy-Rabbit


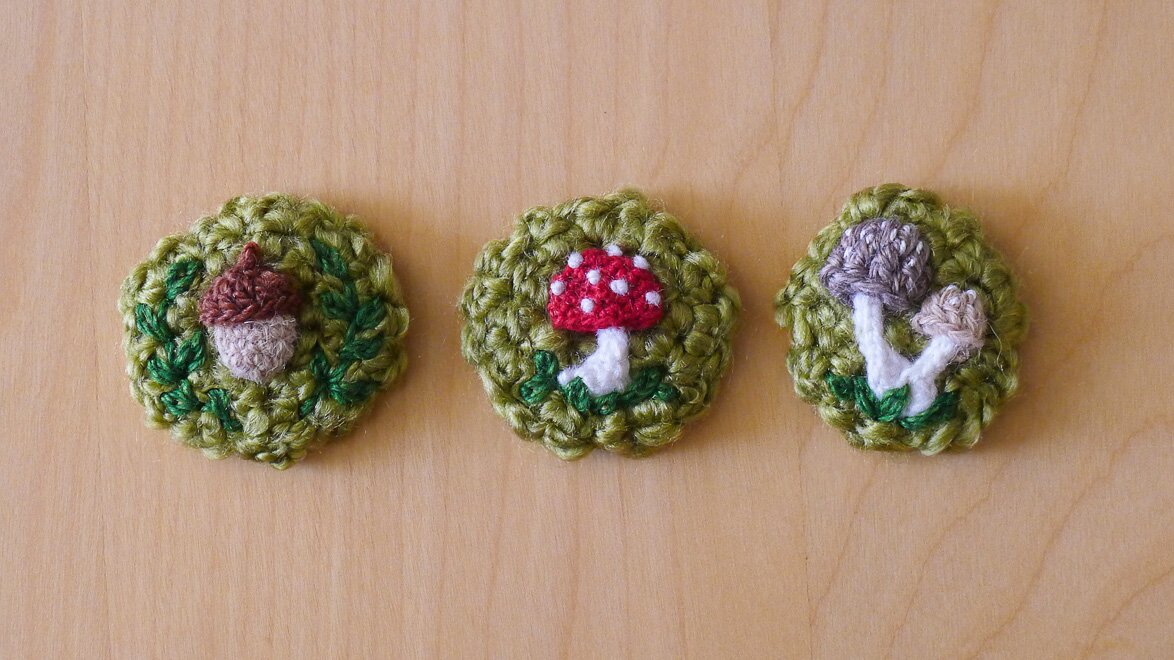
And an assortment of mushroom and acorn pins and magnets.

woodland pins


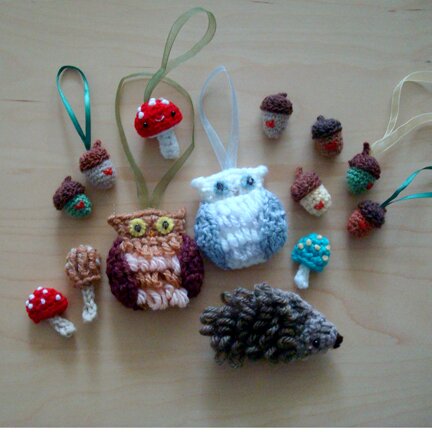
And as you may recognize, owls and hedgehogs too!

shop group


Plus! Mike has also made a series of delightful greeting cards! Would love to see you if you’re in the neighbourhood! :D

Nuit Blanche is also happening tomorrow evening so it’s a good time to come exploring in the city!

Wishing you a fabulous weekend of rest and fun!


Tweet about this on TwitterShare on FacebookPin on PinterestShare on TumblrPrint this page

wee bear

Photo 2014-09-29, 8 44 37 PM

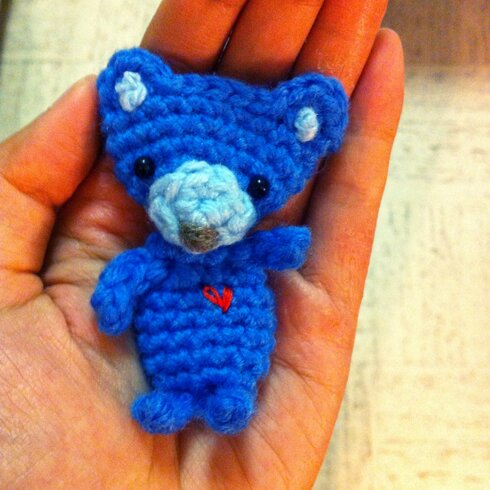
6th pattern in the 12 Days of Woodland Creatures (and Their Favourite Things) project. Can you believe we’re already half way done? Fun times go by fast :D

For this bear I used:

Worsted weight yarn in blue, light blue and brown

3.5 mm hook

Small black beads for eyes

Needle and thread for sewing and embroidering

Pattern:

Head

Round 1: With blue, 6 sc in magic ring, do not join.

Round 2: 2 sc in each sc around, do not join (12 sc).

Round 3: *1 sc in next sc, 2 sc in next sc*, repeat from * to * around, do not join (18 sc).

Continue working 1 sc in each sc around until piece is 1″ tall, ch 1.

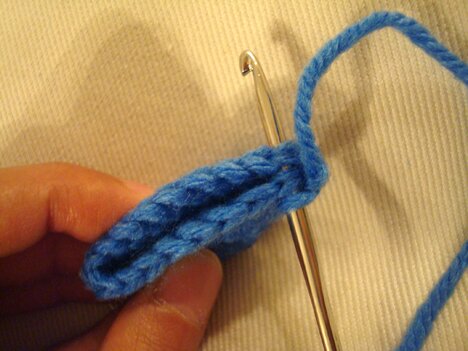
Now we make the ears. Press head flat, insert hook in next sc and the sc before the st on hook, like so…

DSC03808

Make 1 sc in these sc, then make 2 hdc and 1 sc in same sc, sl st in each of next 5 sc in both layers, ch 1, [1 sc, 2 hdc, 1 sc] in next sc, sl st in last sc on the edge, fasten off. Weave in end.

Snout

Row 1: With light blue, 3 sc in magic ring, turn.

Row 2: ch 1, sc in first sc, 2 sc in next sc, sc in last sc, sl st in magic ring, fasten off, leaving a long tail for sewing.

Embroider nose on snout with brown yarn.

Face

Sew snout to head. Sew on eyes. Sew french knots on the ears with light blue yarn.

Body

Round 1: With blue, 6 sc in magic ring, do not join.

Round 2: 2 sc in each sc around, do not join (12 sc).

Continue making 1 sc in each sc around until piece is 1″ tall.

Second last row: *1 sc in next sc, 2 sc tog over next 2 sc*, repeat from * to * 3 more times.

Last row: 1 sc in each sc around. Fasten off, leaving long tail for sewing.

Arms and legs

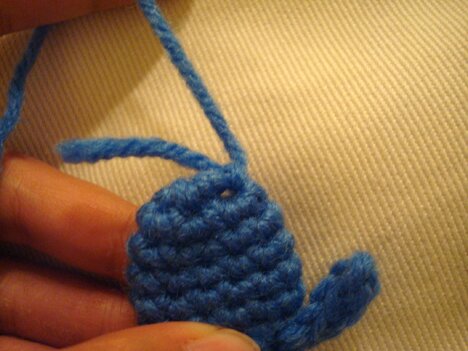
Arms are attached between first and second rows from the top of body, and legs are attached between last and second last row of body.

Attach yarn to the st where the arm/leg would be, like so.

DSC03809

Draw up a loop, ch 4, sc in 2nd ch from hook, sc in each of next 2 sc, sl st in the st where the yarn is attached, pulling up a length of yarn about 24″ long as you complete the sl st…

DSC03810


Cut yarn. Insert hook through the stitch where the 2nd leg will be AND the stitch where the first leg is attached, and pull the yarn through.

DSC03811

Insert hook in the stitch where the 2nd leg starts and make 1 sc in the stitch. ch 4, sc in 2nd ch from hook, sc in each of next 2 ch, sl st in the st where the leg is attached, fasten off, weave in ends.

Do the same for the arms, except use sl st instead of sc when crocheting down the arms.

Using long tail from body, sew body to head. I also made a french knot for a tiny tail.

And we have a bear! :D

Have a happy rest of the week!


Tweet about this on TwitterShare on FacebookPin on PinterestShare on TumblrPrint this page

mushroom 2 ways

5th pattern in the 12 Days of Woodland Creatures (& Their Favourite Things) project!

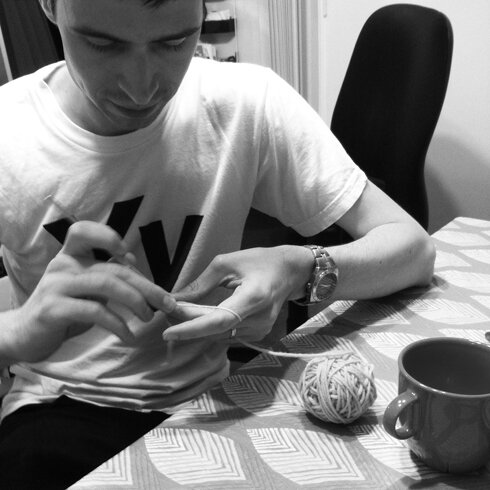
So, we’re going to a mushroom identification workshop at High Park tomorrow, and Mike thought it would be a really great idea to make a mushroom pin on his own for the occasion. And so I thought it would be the perfect opportunity to make up the mushroom pattern while teaching him how to crochet :D

Apparently, hedgehogs really like mushrooms. So do Hobbits — “It is said that Hobbits have a passion for mushrooms, surpassing even the greediest likings of Big People” (source). Anyway, I digress.

Here’s Mike working hard to master the ch, sc, hdc…

Photo 2014-09-25, 9 17 29 PM


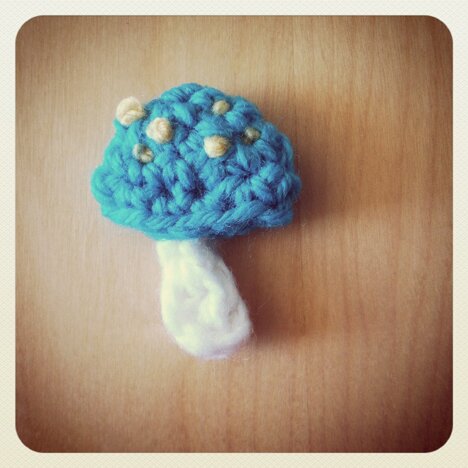
And here’s what he made :D I love the whimsical different sizes spots on it.

Photo 2014-09-26, 2 58 25 PM

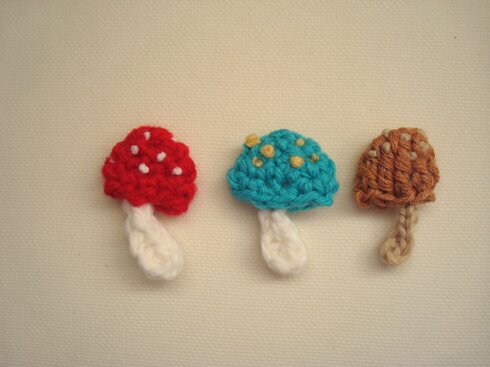
And here it is with the other two I made.

DSC03713

These mushrooms are flat, great for applique, brooches and ornaments.

There are probably dozens of mushroom applique patterns written already. But I thought what I can offer is two super quick, super easy ways of making mushrooms — a rounder, more plump one (red and blue) and a narrower one with vertical texture (brown).

Materials:

We used chunky weight yarn for the red and blue mushrooms, with a 5 mm hook, because Mike wanted to use a specific colour of yarn and I only have it in chunky weight. But worsted weight yarn and a 3.5 mm hook will also work well.

Also, tapestry needle for sewing and embroidering.

Patterns:

Round mushroom cap

ch 2, 6 sc in 2nd st from hook, do not join.

*2 sc in next sc, sc in next sc*, repeat from * to * two more times, do not join (9 sc in round).

Continue in rounds working 1 sc in each sc until mushroom cap is about 1″ tall. Fasten off, leave tail for sewing.

Stem

ch 6, hdc in 2nd ch from hook, sc in next ch, sl st in each of remaining ch. Fasten off.

Assembly

Embroider spots on mushroom cap with french knots.

Place the narrow end of the stem into mushroom cap. Using yarn tail from mushroom cap, sew the opening of the mushroom cap together along its width, sewing through the stem when you come upon it.

Narrow mushroom cap

Make a magic ring, ch 4, 8 dtr (double triple stitch) in magic ring, sl st in the top of beginning ch 4. Fasten off, leave tail for sewing.

*the dtr may take some practice to master as it has a tendency to become loose between stitches, but once you’ve done all eight of them then that’s it! You’ve finished the mushroom cap!

Stem

ch 8, hdc in 2nd ch from hook, sc in next ch, sl st in each of remaining ch, fasten off.

Assembly

Same as round mushroom.

There will be big gaps between the long dtr stitches, but embroidering on the spots and sewing the opening of the mushroom cap closed will help keep it in shape.


Hope you enjoy the mushroom patterns!

Also want to give you a heads up that the next couple of patterns for the 12 Days of Woodland Creatures project may get delayed a bit. Things are becoming busier than I have anticipated. I’m making stuff for a craft sale next weekend, and then several school/work related meetings and deadlines also suddenly got scheduled for this coming week… here’s a look at my couch, in the midst of pre-sale rush, with Filbert the cat looking on, full of concerns…

Photo 2014-09-26, 3 07 13 PM


But it’s exciting! The coming week is full of exciting opportunities. It just took me by surprise, that is all.

I had planned on posting a pattern every 2–3 days, and I will still try to do that, but if the next one comes out a day or so later, please bear with me >_<

Have a wonderful weekend, everyone!!


Tweet about this on TwitterShare on FacebookPin on PinterestShare on TumblrPrint this page

hoot!


owl

Took a while to figure this one out. I initially just wanted to make a flat owl shape, but thought it would be nice to give it some texture. I tried incorporating the v-stitch but it didn’t look quite right… so I thought I’d try the loop stitch again and I think it looks rather fluffy and cute! It looks like the loop stitch is becoming one of my favourites (I’ll have to show you a larger scale project that I just finished, involving hundreds of loop stitches). Hope you like it as much as I do!

By the way, I found a slightly different way of making the loop stitch on We are Knitters, which seems a bit more secure. The video tutorial can be viewed here (nice music too!).

So! The pattern!

I used:

Worsted weight yarn in 2 shades of yellow and blue

3.5 mm hook

Needles for sewing and embroidering

Blue and orange thread for embroidering beak and eyes

A bit of white felt for eyes

Two black round beads for eyes and black thread for sewing on eyes

Body front:

Notes: it’s worked from top to bottom to accommodate the direction of the loops, then reattach yarn to crochet the head. For the 2 different shades in the body, MC is main colour and CC is contrasting colour. Carry the colour that is not in use up the rows when switching colours.

With MC, ch 8

Row 1: sc in 2nd ch from hook, sc in each ch across, turn.

Row 2: ch 1 (turning ch 1 does not count as a st), lp st (loop stitch) in each sc across, turn.

Row 3: change to CC, ch 1, 2 sc in first st, sc in each st across until second last st, 2 sc in last sc, turn.

Row 4: ch 1, lp st in each sc across, turn.

Row 5: change to MC, ch 1, 1 sc in each st across, turn.

Row 6: ch 1, lp st in each sc across, turn.

Row 7: change to CC, ch 1, 2 sc tog over first 2 st, 1 sc in each st across until last 2 st, 2 sc tog over next 2 st, turn.

Row 8: ch 1, lp st in each sc across, turn.

Row 9: change to MC, ch 1, 2 sc tog over first 2 sc, 1 sc in each st across until last 2 st, 2 sc tog over next 2 sc, turn.

Row 10: ch 1, 1 sc in each sc across, fasten off.

Now we make the head.

With MC and wrong side facing you, attach yarn to the first row of body.

Row 1: ch 1, 1 sc in each st across, turn.

Row 2: ch 2, sl st in 2nd ch from hook, 1 sc in each of the next 3 sc across, 3 sc in next sc, 1 sc in each of the next 3 sc across, ch 2, sl st in 2nd ch from hook, sl st in the bottom of last sc just made (i.e. in the first sc of previous row), fasten off.

Back:

Note: back is worked from bottom to top in one piece and with MC only.

ch 7

Row 1: ch 1, 1 sc in each ch across, turn.

Row 2: ch 1, 2 sc in first sc, 1 sc in each sc across until second last sc, 2 sc in last sc, turn.

Row 3: ch 1, 1 sc in each sc across, turn.

Row 4: Repeat row 2.

Row 5–7: Repeat row 3 (i.e. work even).

Row 8: ch 1, 2 sc tog over first 2 sc, 1 sc in each sc across until last 2 sc, 2 sc tog over last 2 sc, turn.

Row 9: ch 1, 1 sc in each sc across, turn.

Row 10: work even.

Row 11–12: Repeat rows 1–2 of head. Fasten off, leave long tail for sewing.

Wings (make 2):

Leave 3–4 inches of tail for sewing, ch 4

Row 1: 2 dc in 4th ch from hook, turn.

Row 2: ch 3 (turning ch 3 counts as a stitch), 2 dc in next dc, dc in top of beginning ch 3, turn.

Row 3: ch 3, 3 dc tog over next 2 dc and top of turning ch 3. Fasten off, leave 3–4″ of tail for sewing.

Assembly:

Cut 2 circles for eyes. I cut mine about 1/2″ wide, but you can make them smaller or larger if you like. Owl plushes with giant eyes are very cool-looking too.

Sew eyes on the head of owl with blue embroider thread, if you like that look.

Embroider beak.

Sew on black beads to complete eyes.

Sew front and back together. I made two small loops at each ear while sewing but that’s optional. If you’re making an ornament you may also want to make a loop with a ribbon and sandwich it between the front and back and sew it all together.

Attach the wings by tying the yarn tail at the top of wings to the top corners of the first row of loop stitch, and the bottom of the wing to the bottom corners of the last row of body. This sounds more complicated than it is — you will easily get it by looking at the picture :)

And we’re done!

Here’s the owl and me with an owl shirt on :D
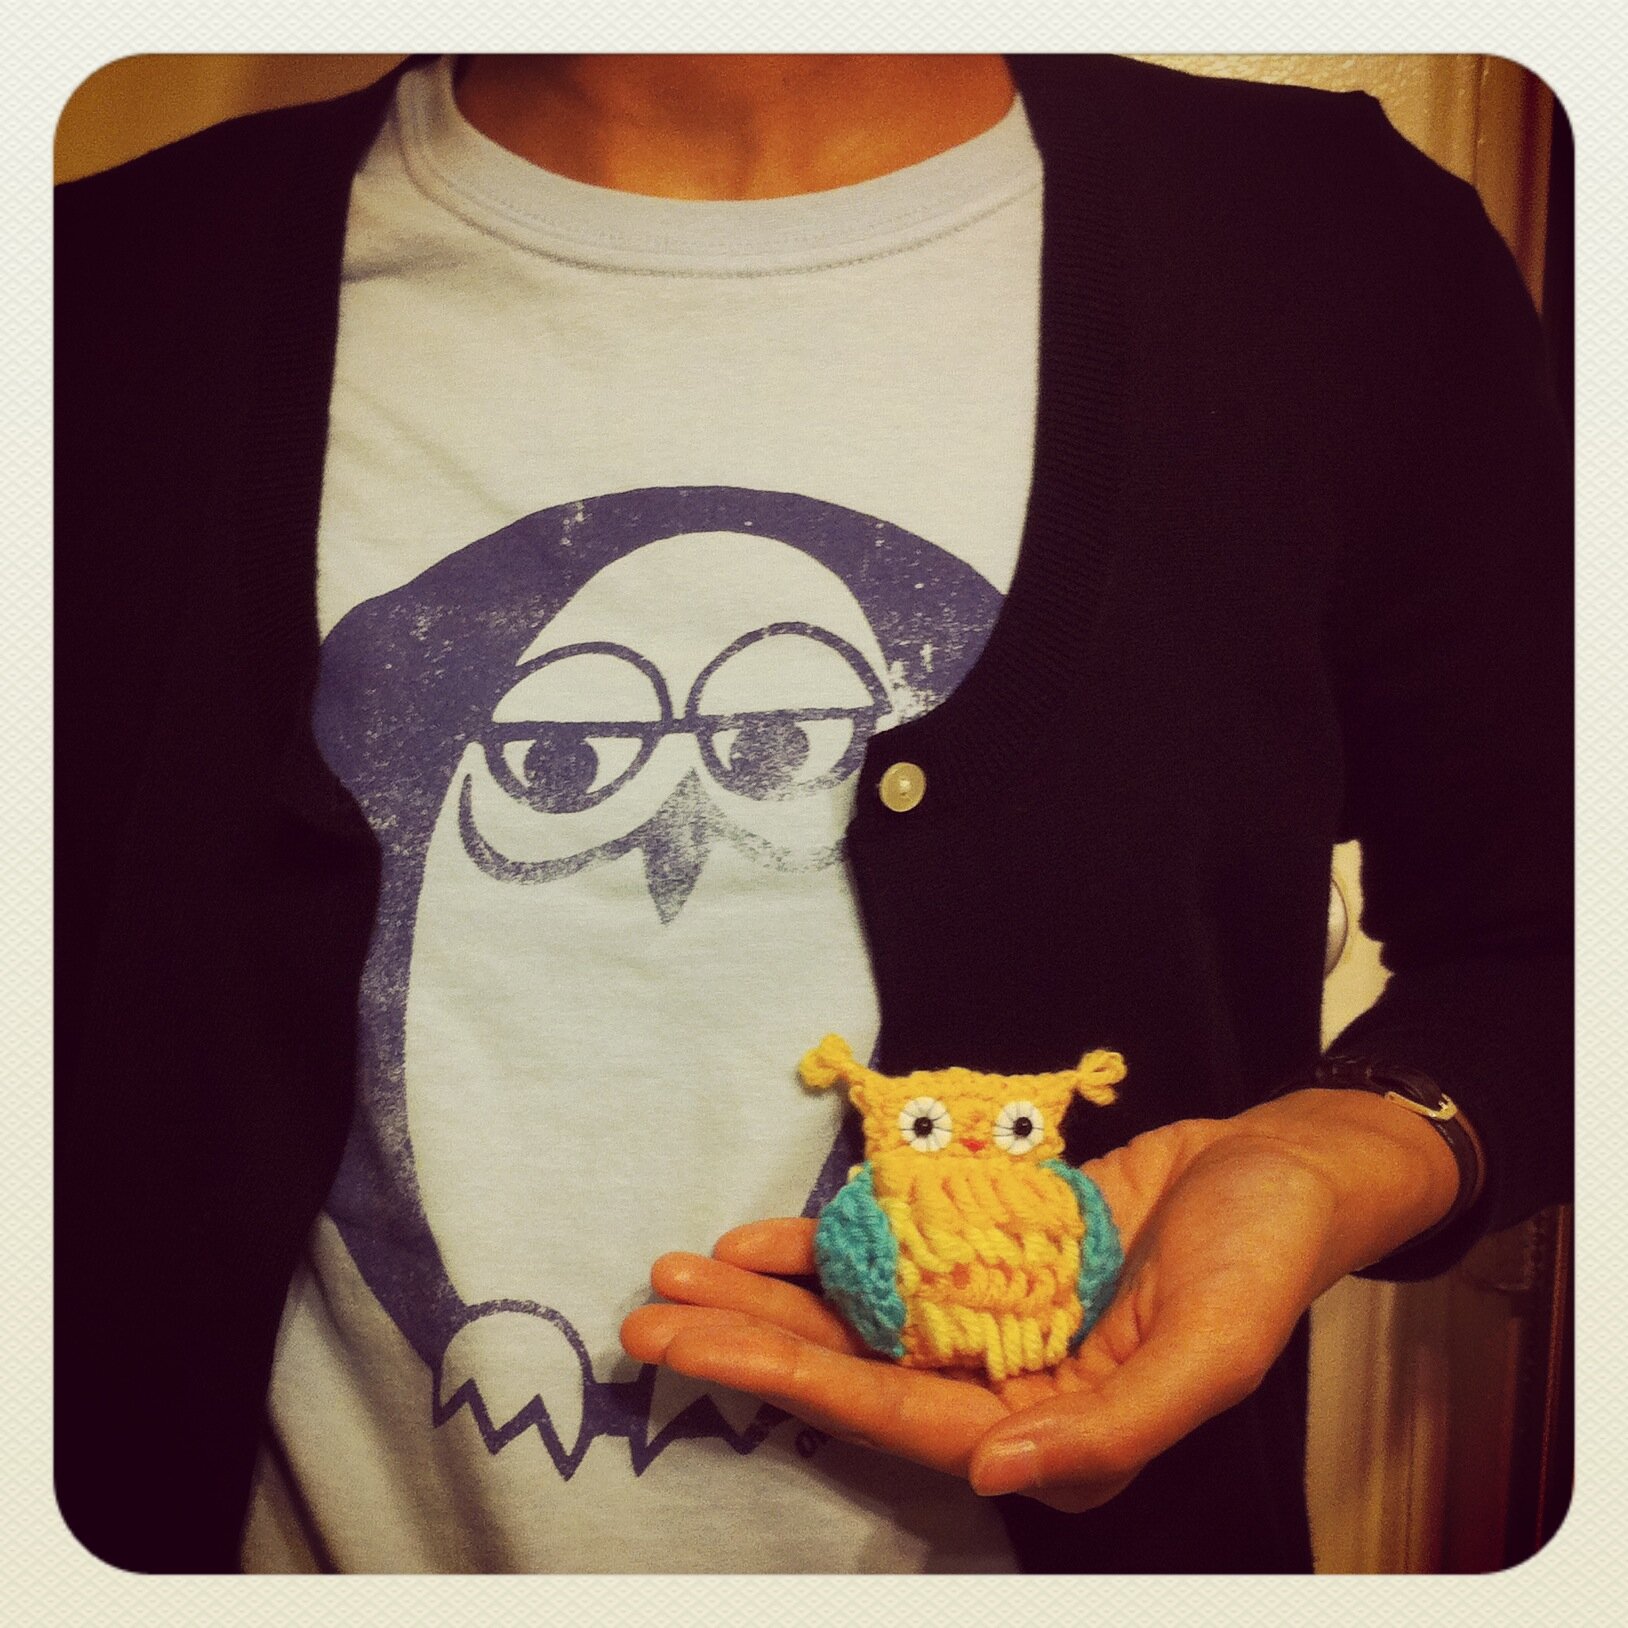
Photo 2014-09-23, 10 18 31 PM

I love how fluffy he is :D

Would be fun to make it with different colour combinations. And if I were to make another, I would probably try to make the loops a bit smaller.

It would be so exciting to see the different owls everyone makes!

Until next time — happy crafting!
 

Tweet about this on TwitterShare on FacebookPin on PinterestShare on TumblrPrint this page

mighty acorn

acorn 5

Today’s mighty oak is just yesterday’s nut that held its ground.” ― David Icke

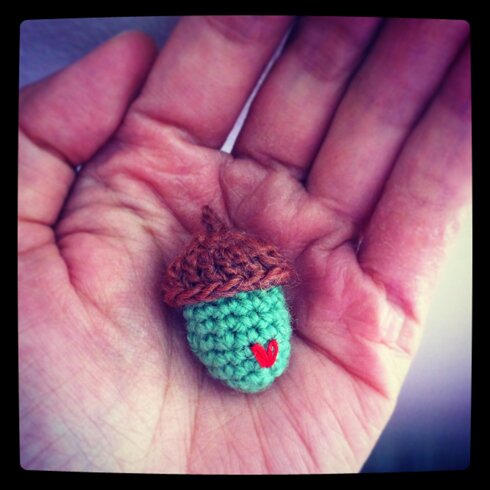
(and yikes, I have really dry hands…)


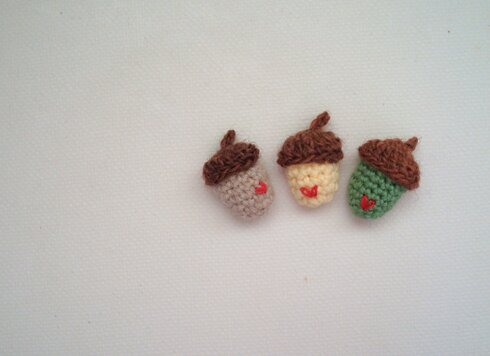
3rd pattern in the 12 Days of Woodland Creatures (and Their Favourite Things)! Today we have the squirrels’ favourite things — Acorns!

The mighty acorn would make a mighty oak, or a mighty good snack for the woodland creatures. Either way it’s going to do good :D

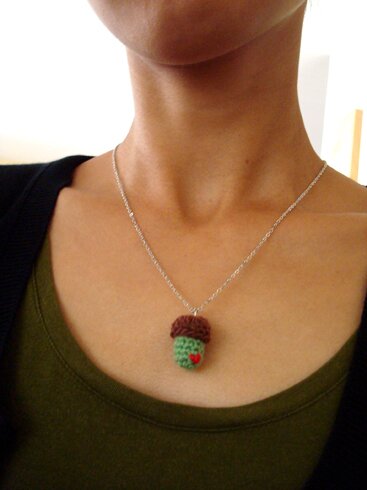
An extra small acorn makes a wonderful necklace. Simply attach a jump ring at the top and put a chain through — voila!

acorn 1


Fun~ So I thought I would write the pattern for both the mini acorn and the regular acorn. They’re very similar, just slightly different stitch counts.

For the acorns I wanted to use a sock weight yarn in my stash that has very rich shades of brown, so I’ve used smaller hooks. But if you’re using worsted weight yarn you can just use the 3.5 mm hook as usual, and you would end up with a slightly larger acorn.

I used:

Sock weight yarn in brown and green

2.25 mm hook

Scrap yarn for stuffing

Red embroidery thread (optional)

Needle for sewing and embroidering

Pattern:

Note: instructions are for mini acorn [regular acorn in square brackets]

Cap:

Round 1: ch 4, sl st in 2nd ch from hook, sl st in next ch (you’ve just made the stem), ch 1, 8 [10] sc in next ch, sl st in first sc to join.

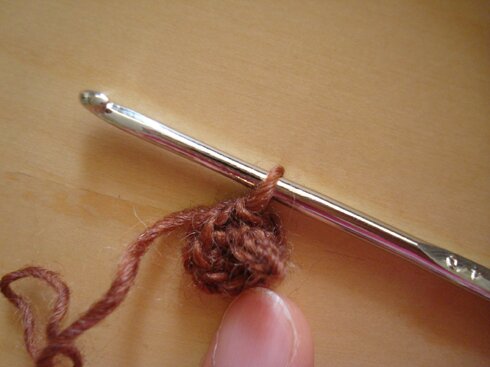
We’re basically crocheting a circle with the stem in the centre, so when joining you will have to go behind/around the stem, like so…

acorn 3


Round 2: ch 2, dc in same sc as starting ch, *dc in next sc, 2 dc in next sc*, repeat from * to * to end, sl st in top of turning ch 2 to join. Fasten off and leave a long tail for sewing.

Nut:

6 sc in magic ring, do not join.

sc in first sc, *2 sc in next sc, sc in next sc*, repeat from * to * 2 [5] more times.

sc in each sc until piece is 3/4″ tall. Fasten off, weave in end.

Assembly:

If you’d like, embroider a heart on the acorn by making two lazy daisy stitch (here’s a great tutorial for it). But the acorn would be just as awesome if you leave it plain.

Stuff the acorn with scrap yarn. Sew the cap on the nut using the long tail left on the cap. Because it’s so small I just sew right through the acorn in a cross-manner all around, sewing through the bottom edge of the cap and top edge of the nut, being careful not to pull too tight so the acorn would keep its plump shape.

And here we are! I made different colours :D

acorn 4


They would make great pins with mini pin backs attached on the back. I think they would also make great hanging ornaments on the tree or by the window. You can also skip stuffing the acorn nut, squash the cap and acorn flat, then sew them together to make an applique.

Hope you enjoy the acorn pattern! Happy Monday! :D


Tweet about this on TwitterShare on FacebookPin on PinterestShare on TumblrPrint this page

saturday is white squirrel day!

white squirrel

Well, at least on this blog anyway ;)

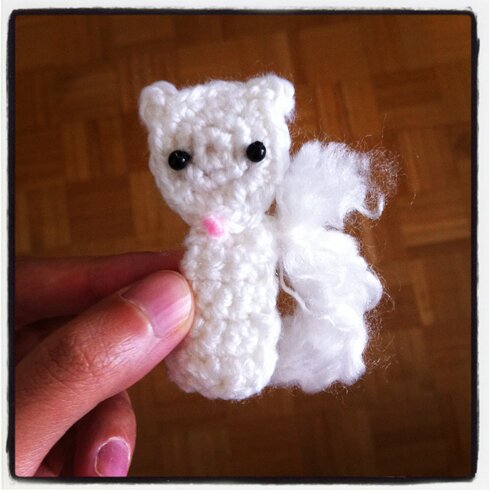
Here comes the second pattern for the 12 Days of Woodland Creatures (and Their Favourite Things)! To the awesome visitors who have commented on my last post — thanks SO much for joining me in the crochet-along! And to everyone — it is never too late to join in the fun (details here)! You can make all or a few or just one of the 12 creatures you like. It would be really great to see what everyone has created at the end!
AND! I’ve created a Ravelry group! I thought maybe it will make it easier to share pictures. Please feel free to join if you use Ravelry! I’ve never made a Rav group before, barely participated in one and not so sure about how they run… so we’ll see how it goes! :D

So, anyhoo, the elusive white squirrels are legendary creatures in Toronto’s Trinity Bellwoods Park (though I’m very sad :’( to find out that we just lost one recently). There is a street and a coffee shop in the neighbourhood named after the white squirrel. I have yet to encounter a real one, so I just keep making crocheted ones. Apparently there are also white squirrels in Exeter, Ontario, which are not albino with red eyes, like the Trinity Bellwoods squirrels, but just have white fur instead of the more common grey or black fur. So I suppose the white squirrel we’re making here today can be a variety of the Exeter squirrels. Actually, I chose to give the squirrel the regular black eyes because I’m making it for a baby mobile, and the thought of tiny red eyes staring down at the baby is just… a bit strange.

I think the white squirrel also makes a nice tree ornament! :D

The construction of this squirrel is rather simple. It’s made out of 4 pieces: 2 head pieces and 2 body pieces. Oh and a fluffy tail.

I used, as usual:

Worsted weight white yarn

3.5 mm hook

Black beads for eyes

Needle and thread for sewing and embroidering

A bit of pink yarn for embroidering the nose

A bit of fluffy white yarn for tail (like Bernat Boucle or Lion Brand Homespun)

Pattern:

Head (make 2) — crocheted in rounds

Round 1: 6 sc in magic ring, sl st in first sc to join.

Round 2: ch 1 (does not count as a stitch), 2 sc in each sc around, sl st in first sc to join.

Round 3: 1 sc in each of first 3 sc, sc in next sc, ch 3 (this is an ear), sc in same sc, 1 sc in each of next 3 sc, sc in next sc, ch 3 (this is another ear), sc in same sc, 1 sc in each of next 2 sc, 2 sc in next sc, 2 dc tog over next 2 sc (this is the nose), ch 2, sc in the same st as first sc of the round, sl st in next sc, fasten off, weave in ends.

*When finishing the 2nd head shape, leave a long tail for sewing.

Body (make 2) — crocheted in rows

ch 4

Row 1: sc in 2nd st from hook, 1 sc in each of next 2 sc, turn (3 sc).

Row 2: ch 1 (does not count as a stitch), sc in each sc across, turn (3 sc).

Row 3: repeat row 2.

Row 4: ch 1, sc in first sc, 2 sc in next sc, sc in last sc, turn (4 sc).

Row 5: ch 1, sc in each sc across, turn (4 sc).

Row 6: ch 1, sc in each of next 2 sc, 2 sc in next sc, sc in last sc, turn (5 sc).

Row 7: ch 1, sc in each of next 3 sc, 2 sc in next sc, sc in last sc, turn (6 sc).

Row 8: ch 1, 2 sc tog 3 times, fasten off, weave in ends.

*When finishing the 2nd body shape, leave a long tail for sewing.

Attaching tail:

1. Cut 6 pieces of the fluffy white yarn, each about 5–6 inches long.

2. Find a gap between stitches in the lower centre of the squirrel body.

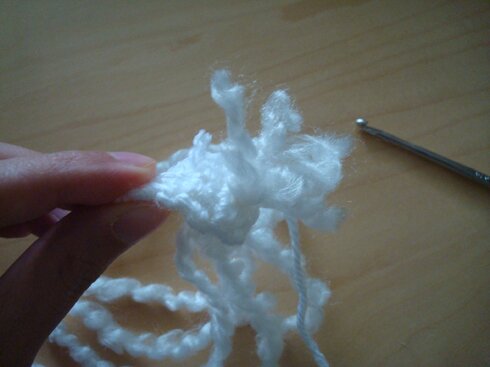
3. With crochet hook, pull each piece of the fluffy white yarn, one by one, through the same gap, leaving the long tails on one side of the body piece and short ends on the other side, like so… (I hope you can see it alright… white yarn is a bit difficult to photograph…)

DSC03670


4. Tie the short ends together by pairing them up and tying each pair in double knots.

Assembling body and head:

1. With all the short ends of the tail inside, sew the 2 pieces of body together.

2. Sew eyes and embroider nose on one head piece (I made a giant french knot with pink yarn for the nose).

3. Position the head pieces so that they sandwich the body, with the nose covering the top row (neck) of the body. Sew head together, and sewing through all head and body layers when you get to the neck/nose area.

(If you’re making an ornament, you can make a loop with a piece of ribbon and sandwich it between the 2 head pieces at the top of the head before sewing the head together).

Positioning the tail:

Curl the tail up in a position that you like on the side of the body. Take one piece of yarn from the tail and pull it through a stitch on the edge of the body through the front, where the head and body meet, then take the same piece of yarn and wrap it loosely but securely around the entire tail once, then pull it through the same stitch on the body through the front again, and tie a knot at the stitch on the back to secure.

Trim tail to the length you like.

And the squirrel is done! :D


Happy weekend, everyone!


Tweet about this on TwitterShare on FacebookPin on PinterestShare on TumblrPrint this page