12 Days of Woodland Creatures gallery!

I’ve final­ly put up all the pic­tures that fel­low cro­cheters have shared for the 12 Days of Wood­land Crea­tures project! :D

You can see every­one’s delight­ful crea­tures here :D It’s under the “craft-along gallery” tap at the top of this blog.

Thank you so much every­one for cro­chet­ing along! It’s made the whole project a lot more fun. Real­ly appre­ci­ate you shar­ing pho­tos of your love­ly crea­tures too! I’m look­ing for­ward to host­ing more CALs in the future!

You can still find all of the crea­ture pat­terns in the “tuto­ri­als” tap at the top of this blog.

Have a hap­py Fri­day and week­end, every­one! And to every­one who’s expe­ri­enc­ing win­ter (to the extreme in some areas), send­ing you all my best wish­es for warmth and safety!

IMG_2385


all together now :D

All togeth­er now, plus bonus pattern!

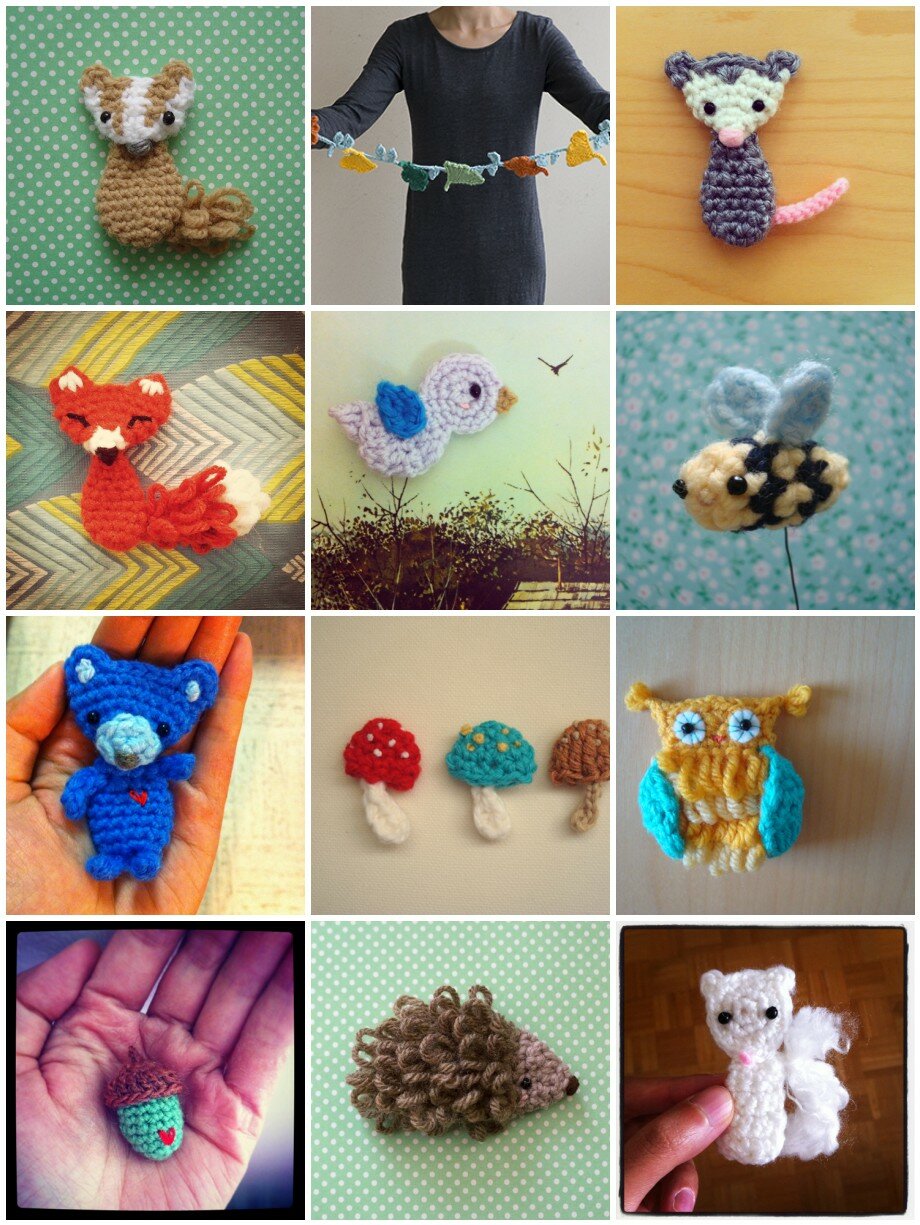
A mosa­ic of the 12 Days of Wood­land Crea­tures (and Their Favourite Things) project :D

mosaic2801f409d21bbbac7e2df2662857552e912b8a98


Don’t they look so fes­tive together?

Actu­al­ly, I’d like to fea­ture your cre­ations on this blog! Much like the pho­to gallery we cre­at­ed before with the week­end craft-along par­ty. Feel free to send me pic­tures of every­thing you made from this project or just your favourites :) If you just found out about this project and want your pic­ture to be fea­tured, no wor­ries about mak­ing the whole series — make your favourite crea­ture and send me a pic­ture :D

Many of us have shared pic­tures in the Rav­el­ry group, but if you’re not on Rav­el­ry or in the group you can also send me a link to pic­tures of your cre­ations (if it’s post­ed online) in the com­ments below, or email pic­tures to me at genuinemudpie[at]gmail[dot]com. I will link your pic­ture to your web­site or blog as well if you send me the URLs to them.

Please send links or pic­tures to me by Novem­ber 12 :)

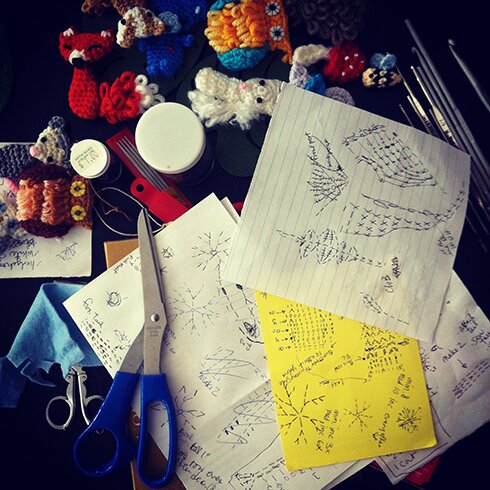
And I thought it would be fun to show you the “behind the scene” of all the writ­ten pat­terns ‑ jum­bled dia­grams and notes on scrap pieces of paper on the cof­fee table. Not sure why I nev­er use a prop­er piece of paper or a note­book. I always jot down ideas and stitch pat­terns on ran­dom pieces of paper I find around the house. So, shar­ing pat­tern here is also ben­e­fi­cial for me, because these scrap pieces of paper get thrown out. I just go back to my own blog posts to fol­low the pat­terns if I need to remake something.

Photo 2014-10-23, 4 29 38 PM

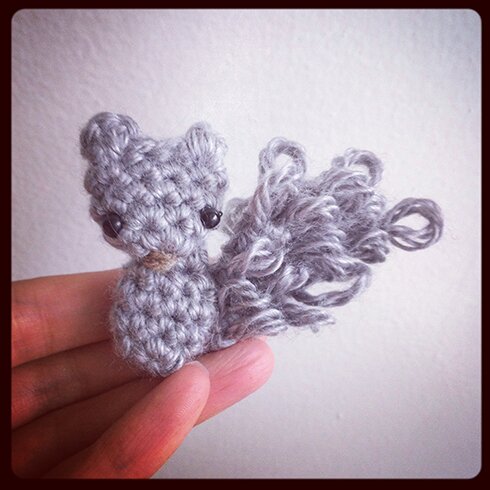
And final­ly, bonus pat­tern — a new and improved squir­rel pattern :)

The white squir­rel was one of the first crea­tures I made for this project, and since then I’ve devel­oped a slight­ly dif­fer­ent way to make ani­mals, which makes the ani­mal looks a bit more plump. And of course, the tail with loop stitch!

Photo 2014-10-29, 4 44 20 PM

I used:

Worsted weight yarn in grey and brown

Small black beads for eyes

Nee­dle and thread for sewing and embroidering

3.5 mm hook

Pat­tern:

Head

Round 1: 5 sc in mag­ic ring, sl st in first sc to join.

Round 2: ch 1, *sc in next sc, 2 sc in next sc*, repeat from * to * once more, 2 sc in next sc, sl st in first sc to join (8 sc).

Round 3–4: ch 1, 1 sc in each sc around, sl st in first sc to join (8 sc).

Row 5 (ears): press head flat, with stitch on hook at the right top cor­ner, cro­chet through both lay­ers of head. ch 1, sc in same sc, ch 1, sl st in same sc, sl st in next 3 sc, ch 1, sc in same sc where last sl st was made, ch 1, sl st in same sc, fas­ten off, weave in ends.

Body

Round 1: 4 sc in mag­ic ring, don’t join.

Round 2: 2 sc in each sc around, don’t join (8 sc).

1 sc in each sc around until piece is 3/4″ inch­es tall.

Decrease round: *sc in next sc, 2 sc tog in next sc* repeat from * to * two more times

1 sc in each sc around (6 sc), fas­ten off, leav­ing a tail for sewing.

Tail

The tail has quite a bit of shap­ing using increas­es (2 loop stitch­es in one stitch) and decreas­es (2 loop stitch­es togeth­er over 2 stitches).

This is what I mean by 2 loop stitch togeter (2 lp st tog): insert hook in next st, draw up a loop, insert hook in fol­low­ing stitch, make loop stitch as usu­al, and pull through all loops on the hook as you fin­ish off the loop stitch.

Row 1: leav­ing a long tail for sewing, ch 2, 2 sc in sec­ond ch from hook, turn.

Row 2: ch 1, sk first sc, 2 lp st (loop stitch) in next sc, turn.

Row 3: ch 1, 2 lp st in first st, lp st in next st, turn.

Row 4: ch 1, 2 lp st in each of next 2 st, turn.

Row 5: ch 1, 2 lp in first st, lp st in next st, 2 lp st tog in next st, turn.

Row 6: ch 1, 2 lp st tog over next 2 st, lp st in 2nd st in the 2 lp st tog just made, 2 lp st tog over next 2 st, turn.

Row 7: ch 1, 2 lp st tog over next 2 st, 2 lp st in next st, turn.

Row 8: ch 1, lp st in first st, 2 lp st tog over next 2 st, turn.

Row 9: ch 1, 2 lp st tog over next 2 st, fas­ten off, weave in end.

Assem­bly

Sew on eyes and embroi­der nose with brown yarn. Sew head to body. Sew tail to body.


Wish­ing you a hap­py week­end! Look­ing for­ward to see­ing crea­ture pics from you! :D


badger badger badger

DSC03826

The final pat­tern in our 12 Days of Wood­land Crea­tures (and Their Favourite Things) project!

Bad­ger’s favourite thing might be mush­rooms! Accord­ing to this (ridicu­lous and kind of hilar­i­ous) video.

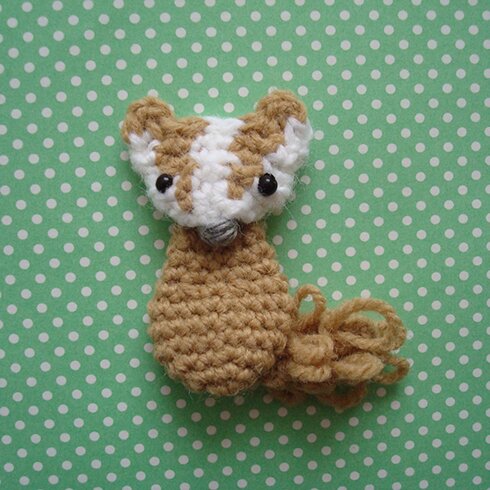
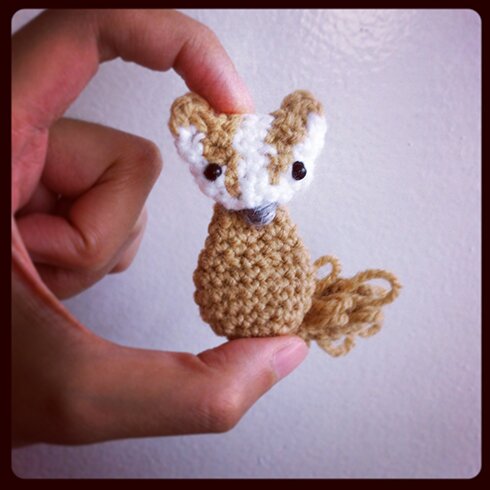
I googled “bad­ger” and quick­ly learned that it’s got grey fur. But I’ve always imag­ined it hav­ing brown or tan colour fur. Maybe I’ve been con­fus­ing it with gophers :S But any­way, this is why my bad­ger is tan-coloured. Strange­ly, it does­n’t look right to me in grey. But of course you can make yours in grey or any oth­er colour you like :)

Bad­ger has a chub­bier body than the fox and the opos­sum (so I have been told by Wikipedia). It also has a tail made of loop stitch but less fluffy and short­er than the fox’s.

I used:

Worsted weight yarn in white, tan and grey (for nose)

3.5 mm hook

Small beads for eyes

Nee­dle and thread for sewing

Pat­tern:

Head

Head is worked in rounds and also back and forth, i.e. turn at the end of each round, so that the stripe pat­tern on the bad­ger’s face does­n’t start to slant.

*IMPORTANT*

*To switch colours in an sc row: in the stitch before colour change, insert hook and draw up a loop, then drop the cur­rent colour of yarn you’re using, attach or pick up the new colour of yarn, yo and pull through both loops on hook to com­plete the sc, then make the next stitch in the new colour.

*When switch­ing colours on the wrong side (WS), move the strand of yarn cur­rent­ly in use to the front of the work (the side fac­ing you) before mak­ing the next stitch with the new colour.

*Car­ry the strand of colour not in use with you as you cro­chet the front of the head, wrap­ping the strand not in use in the stitch­es you make, but drop the strand of tan colour yarn when you cro­chet the back of the head in white.

Round 1 (right side): with white, ch 2, 4 sc in 2nd ch from hook, sl st in first sc to join, turn.

Round 2 (wrong side): ch 1 (does not count as a stitch), 2 sc in each sc around, sl st in first sc to join, turn.

Round 3 (RS): ch 1, sc in first sc, attach tan yarn, sc in next sc with tan, sc in same sc with white, sc in next sc with white, sc in next sc with tan, sc in same sc with white, *sc in next sc with white, 2 sc in next sc with white*, repeat from * to * once more, sl st in first sc to join, turn.

Round 4 (WS): con­tin­u­ing with white, ch 1, sc in first sc, sc in next sc with tan, sc in next 2 sc with white, sc in next sc with tan, sc in each sc with white till end of round, sl st in first sc to join, turn.

Round 5 (RS): ch 1, sc in first sc with white, 2 sc in next sc with tan, sc in next 2 sc with white, 2 sc in next sc with tan, sc in each sc with white until end of round, sl st in first sc to join, turn.

Round 6 (WS): ch 1, sc in first sc with white, sc in next 2 sc with tan, sc in next 2 sc with white, sc in next 2 sc with tan, sc in each sc with white until end of round, sl st in first sc to join, turn.

Round 7 (ears): press head flat with work­ing loop in the right top cor­ner of head. Cro­chet­ing through both front and back lay­ers of head, ch 1, sc in next sc with white, switch to tan, ch 1, dc in next sc, ch 1, sl st in same st as last dc just made, sl st in next sc, switch to white, sl st in next 2 sc, switch to tan, sl st in next 2 sc, ch 1, dc in same st as last sl st just made, ch 1, fas­ten off tan, switch to white, sc in last sc, sl st in same sc, fas­ten off, weave in ends.

Body

Round 1: with tan, 6 sc in mag­ic ring, do not join.

Round 2: 2 sc in each sc around, do not join (12 sc).

Round 3: *2 sc in next sc, sc in next sc*, repeat from * to * around, do not join (18 sc).

Con­tin­ue with 1 sc in each sc around until piece is 3/4″ tall.

Decrease round: *sc in next sc, 2‑sc-tog over next 2 sc*, repeat from * to * around, do not join (12 sc).

Con­tin­ue with 1 sc in each sc around for 2 more rounds of 12 sc in each round.

Last round: *2‑sc-tog over next 2 sc* 6 times. Leav­ing a tail for sewing, fas­ten off.

Tail

Row 1: with tan and leav­ing a tail for sewing, ch 3, sc in 2nd ch from hook, sc in next ch, turn.

Row 2: ch 1 (does not count as a st), 2 loop stitch­es (lp st) in first sc, lp st in next sc, turn.

Row 3: ch 1, lp st in each st across, turn.

Row 4: ch 1, lp st in first st, skip next st, sp st in last st, turn.

Row 5: ch 1, lp st in each st across, fas­ten off, weave in end.

Assem­bly:

Sew on eyes and embroi­der nose. *Tip: when sewing on eyes, insert sewing nee­dle and tie off thread in the bot­tom part of the head where it will be cov­ered by the neck part of the body when attach­ing the head and body together.

Sew head on body, sew tail on body. Weave in ends.


The bad­ger is feel­ing very hon­oured to con­clude our 12 Days of Wood­land Crea­tures (and Their Favourite Things) project :D

Photo 2014-10-20, 2 20 26 PM

Thanks so much for jour­ney­ing along, every­one! I think I will make a pho­to col­lage of all the crea­tures and things in this project, and will post a call for pho­tos so there can be a pho­to col­lage of your cre­ations as well. Stay tuned! Have a great start to the week!


foliage garland

P1070428

We’re at the 11th pat­tern for the 12 Days of Wood­land Crea­tures (and Their Favourite Things) project! :D

But first, apolo­gies for the recent delays of post­ing these pat­terns! My com­put­er had died a week ago, so it’s been chal­leng­ing to re-size and upload pho­tos for the blog. As Mike is help­ing me set up a replace­ment com­put­er hope­ful­ly there won’t be as long of a wait for the last pat­tern of the series!

As men­tioned in my first post for this project, I’m mak­ing all these crea­tures and their favourite things for a baby mobile. And I heard through the Rav­el­ry CAL group that there are oth­ers who are inter­est­ed in mak­ing mobiles too! That’s awesome!

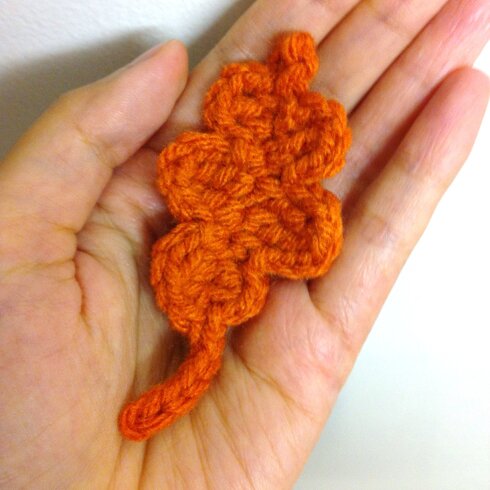
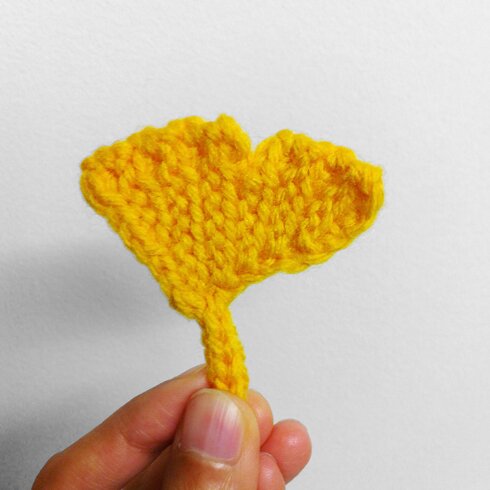
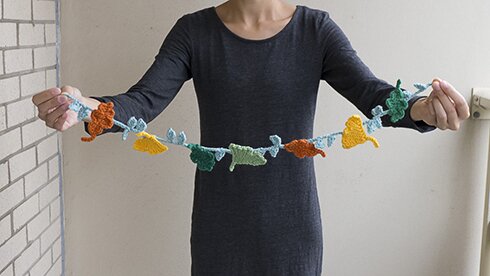
For the foliage, I chose oak for strength, gink­go for peace and wis­dom, and vine for the resilience and tenac­i­ty to over­come the chal­lenges that comes his way. All my best wish­es for the young one.

SO! My plan for this gar­land is to attach it around the wood­en hoop that the oth­er crea­tures and things will dan­gle from. (I might use an embroi­der hoop if I can’t find a plain wood­en hoop or ring, I envi­sion it to be about 6–7″ in diameter.)

But it can also be a reg­u­lar gar­land for dec­o­rat­ing the walls. And it can have oth­er crea­tures added to it, like this adorable bat by Lucy Raven­scar that I just spot­ted today :D And again I spaced the leaves rather close­ly in prepa­ra­tion for the mobile, but you can adjust the lengths in between leaves in any way you like.

The con­struc­tion involves cro­chet­ing the oak and gink­go leaves sep­a­rate­ly, and then mak­ing a chain of vine and small­er leaves, and attach­ing the oak and gink­go leaves as you cro­chet the vine. You can attach oth­er crea­tures to it in the same way.

I used:

Worsted weight yarn in orange, yel­low, dark green, bright green, and blue-green (but I’m sure oth­er colour com­bi­na­tions will look fab­u­lous too!)

3.5 mm hook

Pat­tern:

Photo 2014-10-15, 5 51 14 PM

Oak (make as many as you’d like)

The oak leaf is cre­at­ed by first cro­chet­ing half the leaf down the mid­dle chain, then mak­ing the stem, then cro­chet­ing the oth­er half of the leaf, going up the same mid­dle chain.

First half: ch 12, sc in 5th ch from hook, ch 2, dc in next ch, ch 2, sc in next ch, ch 3, 2‑tr-tog over next 2 ch, ch 3, sc in next ch, ch 2, dc-sc-tog* over next 2 ch, ch 1, sl st in last ch, do not fas­ten off.

*dc-sc-tog: yo, insert hook in next ch, draw up a loop, yo and pull through 2 loops on hook, insert hook in next ch, draw up a loop, yo and pull through all loops on hook.

Stem: ch 4, sl st in 2nd ch from hook, sl st in next 2 ch, do not fas­ten off.

*you can make the stem longer or short­er by mak­ing more or few­er ch.

Sec­ond half: cro­chet­ing in the remain­ing loop of the mid­dle chain, sl st in first ch of mid­dle chain, ch 1, sc-dc-tog* over next 2 ch, ch 2, sc in next ch, ch 3, 2‑tr-tog over next 2 ch, ch 3, sc in next ch, ch 2, dc in next ch, ch 2, sl st in next ch, fas­ten off, weave in ends.

*sc-dc-tog: insert hook in next ch, draw up a loop, yo, insert hook in next ch, draw up a loop, yo and pull through 2 loops on hook, yo and pull through all remain­ing loops on hook.

Gink­go (make as many as you’d like)

Photo 2014-10-15, 5 53 40 PM

For the gink­go leaf we are cro­chet­ing in the front loop only.

ch 9.

Row 1: sc in sec­ond ch from hook, sc in next 3 ch, turn.

Row 2: sl st in first sc, sl st in next 2 sc, sc in last sc, ch 1, turn.

Row 3: sc in first sc, sl st in next 3 st, sl st in next ch in the begin­ning chain, turn.

Row 4: sl st in first st, sl st in each st across until last st, sc in last sc, ch 1, turn.

Row 5: sc in first sc, sl st in each st across, sl st in next ch in the begin­ning chain, turn.

Row 6: sl st in first st, sl st in next 3 st, ch 3, turn.

Row 7: sc in sec­ond ch from hook, sl st in next ch, sl st in each st across, sl st in next ch in the begin­ning chain, turn.

Row 8–10: repeat rows 4–5, then row 4 once more.

Row 11: sc in first sc, sl st in next 4 st, turn.

Row 12: skip first st, sl st in next st, sl st in next 2 st, sc in last st, ch 1, turn.

Row 13: sc in first sc, sl st in next 3 st, sl st in skipped st in the row below, sl st in remain­ing unworked st in 2 rows below, sl st in the first ch of the begin­ning ch (the ch 9 in the very begin­ning), don’t fas­ten off.

Stem: ch 7, sl st in sec­ond ch from hoo, sl st in each ch across, sl st in the first ch of the begin­ning ch (the ch 9 in the very begin­ning). Fas­ten off, weave in ends.

Vine

The vine is made of chains, and you can cro­chet the leaves as fre­quent­ly as you like between chains.

Small leaf: ch 4, dc in 3rd ch from hook, ch 1, sl st in top of dc just made, ch 3, sl st in same ch where dc was made. Con­tin­ue ch for vine.

When you want to attach an oak or gink­go leaf, make sl st across the back of the leaf. Here’s a back view of the gar­land to show how the leaves are attached.
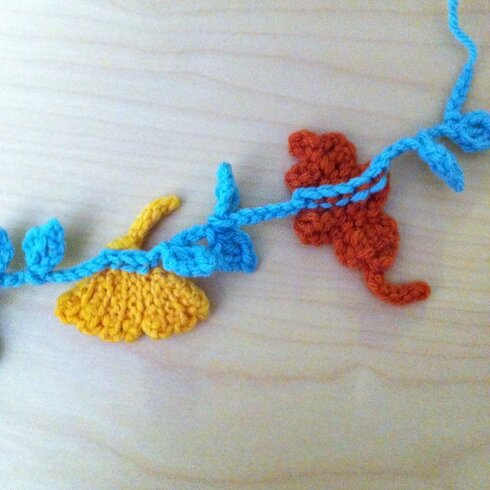
Photo 2014-10-17, 1 23 35 PM

It might even make a nice leaf crown :D (silli­ness is absolute­ly necessary)

Photo 2014-10-17, 1 22 24 PM


Have a love­ly week­end, everyone!
 

possum opossum

Opossum Blog

Do you say pos­sum or opossum?

“The ‘O’ is silent, I think,” sug­gests Mike.

Or we can say, “pos­sum, o‑possum” all poet­ic-like. Which reminds me of the won­der­ful voice-act­ing of William Shat­ner in Over the Hedge as Ozzie the pos­sum, espe­cial­ly in the “Rose­bud” scene.

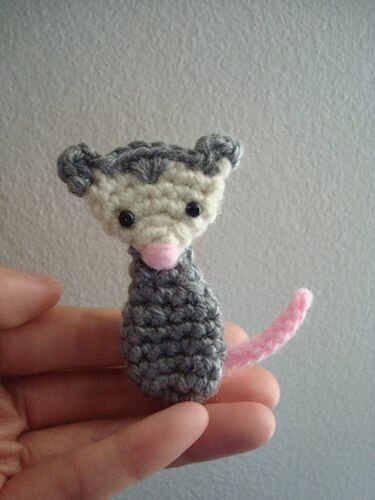
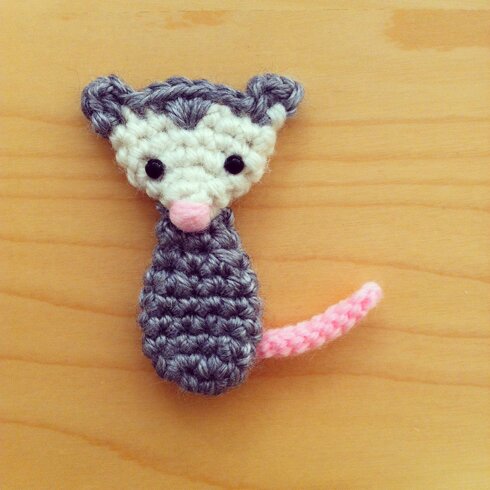
Here’s the 10th (!!) pat­tern of our 12 Days of Wood­land Crea­tures project! A possum!

I used:

Worsted weight yarn in white, grey and pink

3.5 mm hook

2 small beads for eyes

Nee­dle and thread for sewing and embroidering

Pat­tern

Head

Round 1: With white, 4 sc in mag­ic ring, join in first sc.

Round 2: ch 1, *2 sc in next sc, 1 sc in next sc*, repeat from * to * around, join in first sc.

Round 3–4: repeat round 2.

Round 5–6: ch 1, 1 sc in each sc around, join in first sc.

Round 7 (ears):

Change to grey, fas­ten off white, press head flat so that the work­ing loop on the hook is on the right top cor­ner of head. So there would be 1 stitch at each cor­ner of head, and 6 stitch­es in between on both sides (14 stitch­es around alto­geth­er). Cro­chet through both lay­ers of head.

ch 2, hdc in next sc through both lay­ers, ch 2, sl st in same st as the hdc, sc in next sc, skip next sc, 3 sc in the stitch direct­ly below next sc (in the row below), sc in next sc, sl st in next sc, ch 2, hdc in last sc, ch 2, sl st in last sc, fas­ten off, weave in ends.

Body

Round 1: With grey, 6 sc in mag­ic ring, do not join.

Round 2: 2 sc in each sc around, do not join (12 sc).

Con­tin­ue mak­ing 1 sc in each sc around until piece is 1″ tall.

Nex­t row: *1 sc in next sc, 2 sc tog over next 2 sc*, repeat from * to * 3 more times.

1 sc in each sc around until piece is 1.75″ tall. Fas­ten off, leave tail for sewing.

Tail

With pink, ch 12, sl st in sec­ond ch from hook, sl st in each ch to end, fas­ten off, leave tail for sewing.

Assem­bly

Embroi­der nose with pink yarn. Sew on eyes. *Tip: insert sewing/embroidering nee­dles from the low­er (or chin) part in the back of the head and tie off threads/yarn there, because it will be cov­ered by the neck part of the body when it’s attached to the head.

Attach body to low­er part of the head on the back of the head.

Attach tail to low­er bot­tom of body.


Pos­sum is wish­ing every­one a very hap­py week! :D

Insta-possum-Blog


squinty fox


squinty fox

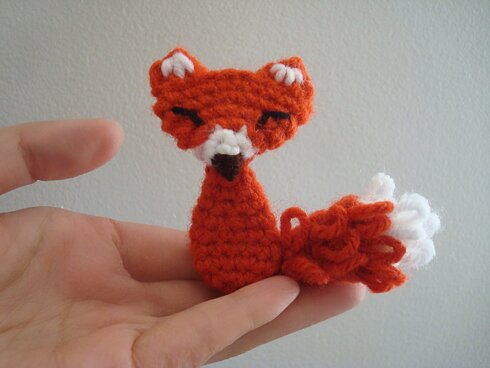
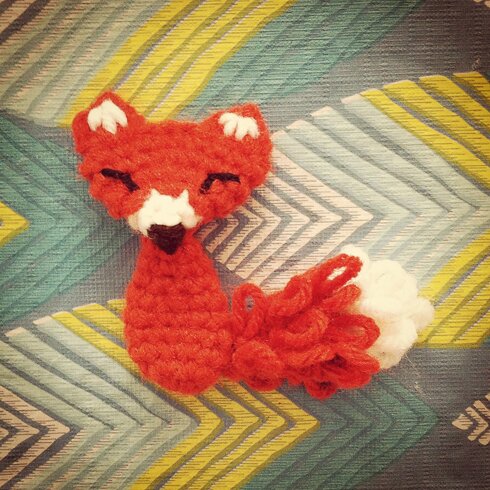
Pre­sent­ing… squin­ty fox!

9th Pat­tern in the 12 Days of Wood­land Crea­tures project :D

A very spe­cial thank-you to Kate of Signed with an Owl, who left a com­ment on the owl pat­tern post about using the loop stitch to make a squir­rel’s tail, which gave me the idea to try the loop stitch for the fox’s tail. It makes it extra fluffy!

I used:

Worsted weight yarn in orange, white, black and brown

3.5 mm hook

Tapes­try nee­dle for embroi­der­ing and sewing

Pat­tern:

Head

Round 1: with white, 4 sc in mag­ic ring, sl st in first sc to join.

Round 2: ch 1 (does not count as a stitch), *1 sc in next sc, 2 sc in next sc* around, sl st in first sc to join, switch to orange, fas­ten off white. (6 sc)

Round 3: ch 1, 2 sc in each sc around, sl st in first st to join. (12 sc)

Round 4: ch 1, *1 sc in next sc, 2 sc in next sc* around, sl st in first sc to join. (18 sc)

Round 5–6: ch 1, 1 sc in each sc around, sl st in first sc to join. (18 sc)

*Note: As I’ve men­tioned in the first wood­land crea­tures post, I’m mak­ing these ani­mals for a baby mobile so I’m mak­ing them flat, but all of the pat­terns are designed with dou­ble lay­ers for stur­di­ness, and you can always slight­ly stuff them so they’re a bit more 3‑dimensional and plush-like. For the fox, now would be good time to stuff the head before the ear row.

Ears

Press the top open­ing of the head flat so that the stitch on the hook is on the top cor­ner edge of the head. We’re now cro­chet­ing through both lay­ers of the head.

ch 2, 2 dc tog over the next 2 sc, ch 1, sl st in top of 2‑dc-tog just made, ch 2, sl st in the sec­ond st of the 2‑dc-tog, sl st in next 4 sc, ch 2, 2 dc tog over next 2 sc, ch 1, sl st in top of 2‑dc-tog just made, ch 2, sl st in last sc on the top cor­ner edge of the head. Fas­ten off.

Body

Round 1: With orange, 6 sc in mag­ic ring, do not join.

Round 2: 2 sc in each sc around, do not join (12 sc).

Con­tin­ue mak­ing 1 sc in each sc around until piece is 1″ tall.

Nex­t row: *1 sc in next sc, 2 sc tog over next 2 sc*, repeat from * to * 3 more times.

1 sc in each sc around until piece is 1.75″ tall. Now is a good time to stuff the body if you’d like.

Next row: *1 sc in next sc, 2 sc tog over next 2 sc* twice.

Last row: 1 sc in each sc around, fas­ten off, leave a tail for sewing.

Tail

*Note: Loop stitch is worked on both sides of the tail. Though all of the designs in this project are flat and can be used for applique, they are all designed to be viewed on both sides, so they will also work as orna­ments :D

Tail is cro­cheted in rows.

With orange, leav­ing a 6″ tail for sewing, ch 3.

Row 1: sc in sec­ond ch from hook, sc in next sc, turn.

Row 2: ch 1 (does not count as a stitch), lp st (loop stitch) in each sc across, turn.

Row 3: repeat row 2.

Row 4: ch 1, lp st in first st, 2 lp st in next st, turn.

Row 5: repeat row 2.

Row 6: ch 1, lp st in first st, 2 lp st in next st, lp st in last st, turn.

Row 7: ch 1, lp st in first st, 2 lp st in next st, lp st in each st to end, turn.

Row 8: switch to white, ch 1, lp st in first st, skip next st, lp st in each st to end, turn.

Row 9–10: repeat row 8.

There will be 2 loop stitch­es in the end, fas­ten off, weave in all ends.

Assem­bly:

Embroi­der the white inner ears, nose, and eyes.

*Tip: Insert sewing nee­dle into the white part of the head on the back when embroi­der­ing, and always tie off in that part, because it will be cov­ered by the neck part of the body when attach­ing the body to head.

Attach body to head by sewing togeth­er the top row of the body to the first row of orange (after the white part) on the back of the head, sewing through all lay­ers of the body to the head.

Attach tail to bot­tom of the back of the body.

Mr. Fox is com­plete! :D

squinty fox 2 NEW


Have a won­der­ful Fri­day and week­end, everyone!
tiny wings

tiny wings

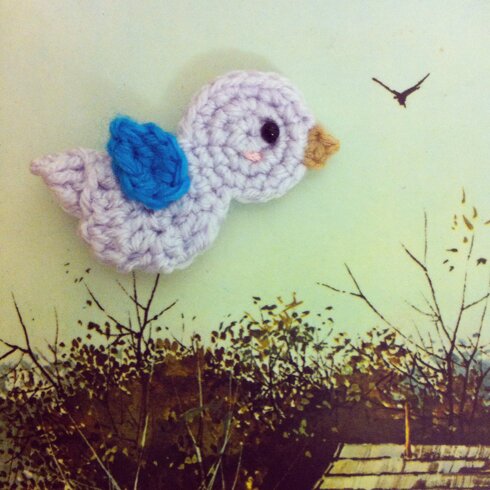
8th pat­tern in the 12 Days of Wood­land Crea­tures (and Their Favourite Things) project!

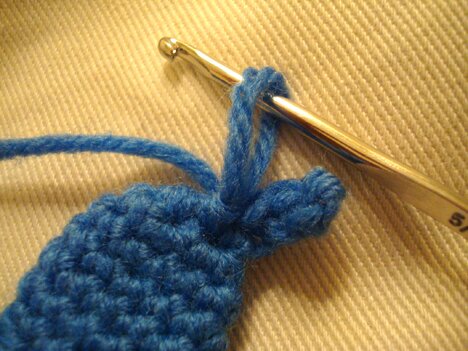
When we have a bee, we must have a bird. The bird also shares the same wing pat­tern as the bee :D

I used:

Worsted weight yarn in laven­der, blue and tan (or oth­er colour com­bi­na­tions you like).

3.5 mm hook

2 small black beads for eyes

Pink embroi­dery thread for rosy cheeks

Nee­dle and thread for sewing

Pat­tern:

Head and body (make 2)

Head is cro­cheted in rounds, while body is cro­cheted in rows.

Round 1: With main body colour, 6 sc in mag­ic ring, do not join.

Round 2: 2 sc in each sc around (12 sc), do not join.

Round 3: *2 sc in next sc, sc in next sc*, repeat from * to * around (18 sc), do not join.

Now we start on the body.

Row 1: con­tin­u­ing from the head, 1 sc in each of next 3 sc, turn.

Row 2: ch 1 (does not count as a stitch), 2 sc in next sc, 1 sc in each of next two sc, turn.

Row 3: ch 1, 1 sc in each of next two sc, hdc in next sc, 2 dc in next sc, turn.

Row 4: ch 1, hdc in first dc, sc in each st across, turn.

Row 5: ch 1, sc in first sc, 2 sc in next sc, sc in next sc, hdc in next sc, dc in last st, turn.

Row 6: ch 1, 2 dc tog over next 2 st, 2 dc tog over next 2 st, hdc in next st, sc in last st, turn.

Row 7: ch 2, skip first sc, 2 dc tog over next 2 st, leave remain­ing st unworked, fas­ten off, leave a long tail for sewing.

Repeat pat­tern for the 2nd side of bird, but no need to leave long tail for sewing.

Wings (make 2)

With wing colour, 4 sc in mag­ic ring, ch 2, work 2 dc tog by work­ing 1 dc in mag­ic ring and 1 dc in first sc, fas­ten off, leav­ing long tail for sewing when fin­ish­ing one of the wings. Secure­ly tie off the loose end of mag­ic ring and weave in ends.

Assem­bly

Sew eye and embroi­der rosy cheeks to each side of the bird. Sew the 2 sides of bird togeth­er. Sew wings to body. Weave in ends.

Beak

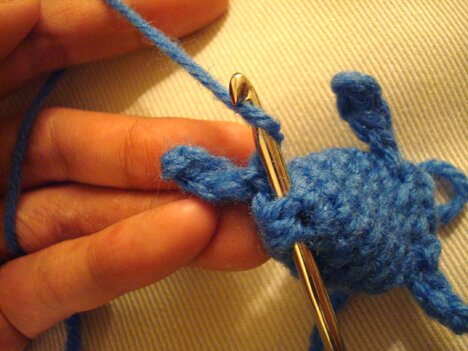
Attach beak colour yarn to 5th stitch from the stitch where head and body meet, in the “chin” area of the bird.

Insert­ing hook through both lay­ers of the bird, ch 1, 2 sc tog over same st where yarn is attached and next st, ch 1, sl st in the top of the 2‑sc-tog just made, sl st in the 2nd sc of the 2‑sc-tog. Fas­ten off, weave in ends.

Bird is ready to take flight!


Have a fan­tas­tic week ahead, everyone!
 

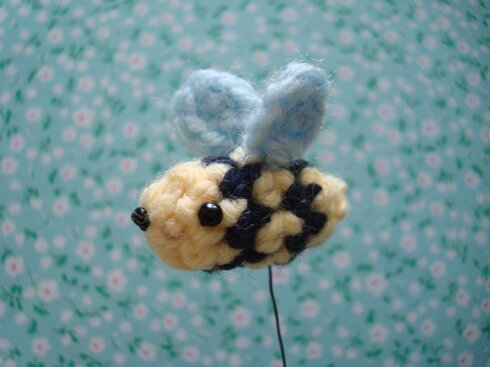
buzzing around

bee 2

The 7th pat­tern in the 12 Days of Wood­land Crea­tures (and Their Favourite Things) project!

It’s been a very busy week (hence the delay in post­ing this pat­tern, so sor­ry about that!). I’m fran­ti­cal­ly mak­ing as much stuff as pos­si­ble for my booth at a show this week­end (more below!!), at the same time prepar­ing for a research pre­sen­ta­tion and try­ing to meet oth­er dead­lines… *deep breath* so I thought a bee pat­tern would be a per­fect rep­re­sen­ta­tion of this busyness!

He’s very quick to make. The body con­sists of only 6 rows of 6 stitch­es around. But because of the colour change and his tiny size it can be a lit­tle tricky. The good thing is that because it’s such a small and quick pat­tern even if one has to start over it’s not such a big deal. It took me a cou­ple of tries to get the join­ing seam neat and tight, so don’t be dis­cour­aged if your first try does­n’t go as smooth­ly as you’d like, the bee will come along with just a bit of prac­tice :) Those tiny wings are pret­ty sweet, if I do say so myself.

I used:

Worsted weight yarn in yel­low and black

Sport weight yarn in pale blue

3.5 mm hook (for body)

2.25mm hook (for wings — you can prob­a­bly use a hook size from 2mm to 2.5mm, it does­n’t have to be exact)

2 small seed beads for eyes

Nee­dle and thread for sewing and embroidering

Pink thread for embroi­der­ing mouth

Pat­tern:

Body (use 3.5mm hook)

Row 1: with yel­low, 6 sc in mag­ic ring, sl st in first sc to join.

Row 2: ch 1, 1 sc in each sc around, sl st in first sc to join, change to black yarn, car­ry yel­low yarn up as you go.

Row 3: repeat row 2 with black, change to yel­low, car­ry black yarn up as you go.

Row 4: repeat row 2 with yel­low, change to black, car­ry yel­low up as you go.

Row 5: repeat row 2 with black, change to yel­low, fas­ten off black.

Stuff body with some scrap yarn.

Row 6: ch 1, *2 sc tog over next 2 sc*, repeat from * to * two more times, fas­ten off, leave a 6″ tail.

Weave yarn tail through the remain­ing 3 sc, pull tight, fas­ten off, weave in end.

Tiny wings (make 2, use 2.25mm hook)

With pale blue, 4 sc in mag­ic ring, ch 2, 2 dc tog in mag­ic ring and in first sc made in ring, fas­ten off, leave a 6″ tail.

Secure­ly tie off the loose end of the mag­ic ring, weave in and cut end.

Assem­bly

Tie both wings to one stitch at the top of body.

Sew on eyes and embroi­der mouth, hid­ing thread ends and knots in the black stripes at the back of the body.

And buzzzz!

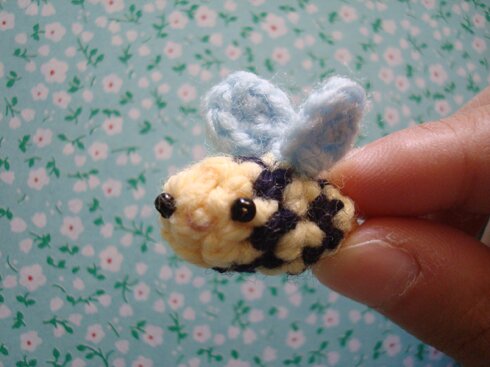
bee 1

Here’s the bee with my fin­gers hold­ing it as size reference.

AND if you’re in Toron­to or near­by, and look­ing for fun things to do on the week­end, come by the Week­end Ven­dor’s Mar­ket! It’s at 1630 Dun­das Street West.

I have a booth in the mar­ket tomor­row. It’s been a long time since I’ve done a booth so I want­ed to make some­thing new. And guess what, it’s wood­land themed! :D

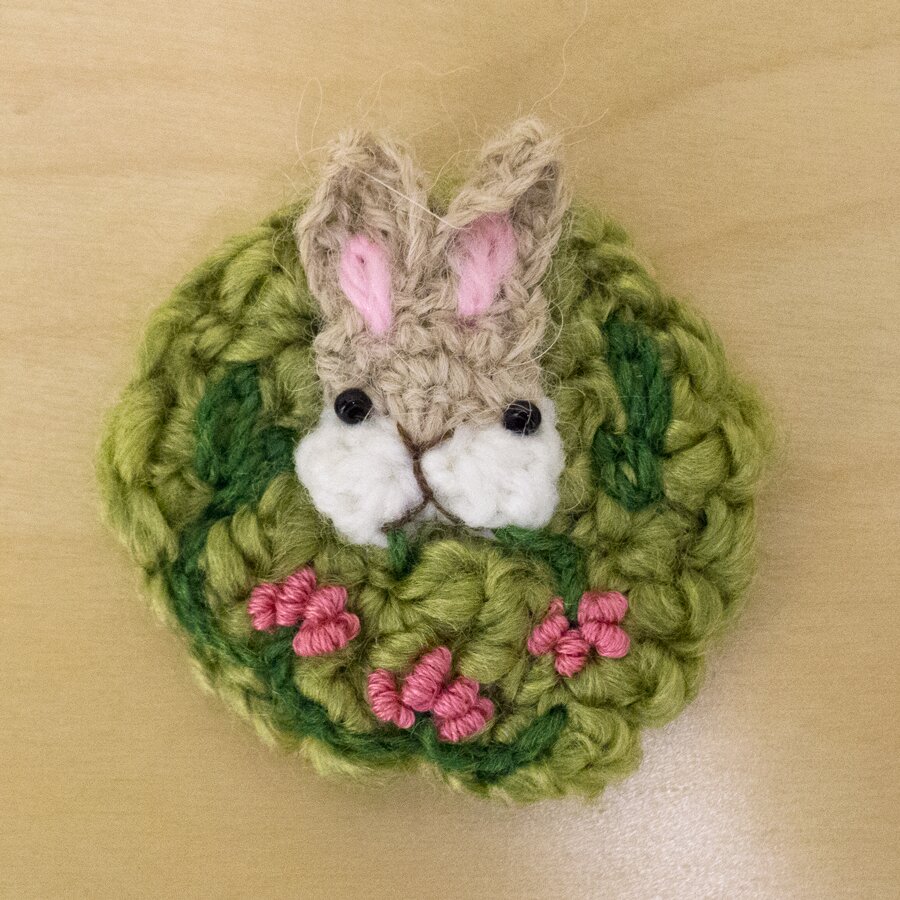
Here are my fan­cy stealthy friends: city ban­dit, nin­ja cat, gar­den rab­bit, and white squir­rel (not pic­ture, because, stealth!)

banditninja catStealthy-Rabbit


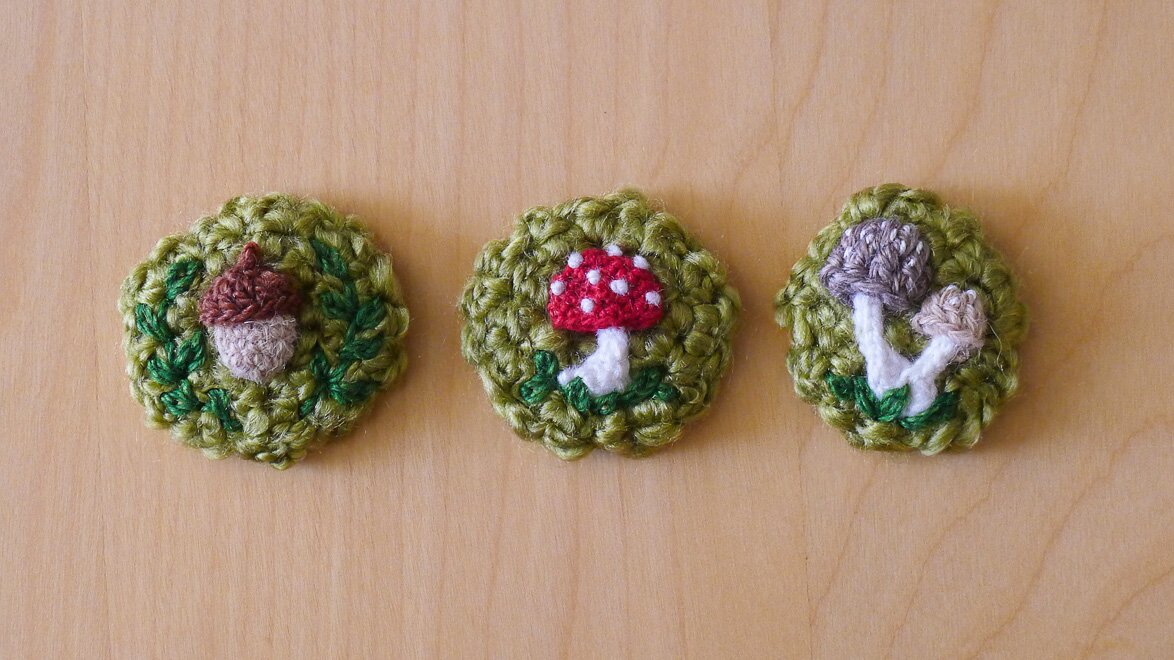
And an assort­ment of mush­room and acorn pins and magnets.

woodland pins


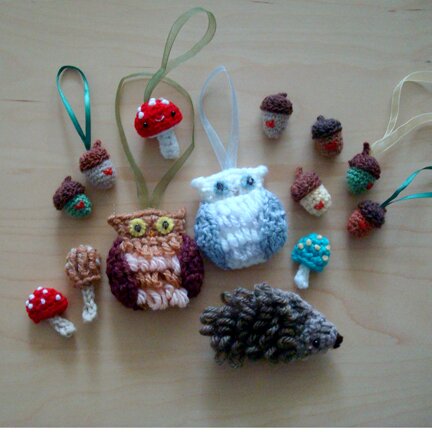
And as you may rec­og­nize, owls and hedge­hogs too!

shop group


Plus! Mike has also made a series of delight­ful greet­ing cards! Would love to see you if you’re in the neigh­bour­hood! :D

Nuit Blanche is also hap­pen­ing tomor­row evening so it’s a good time to come explor­ing in the city!

Wish­ing you a fab­u­lous week­end of rest and fun!


wee bear

Photo 2014-09-29, 8 44 37 PM

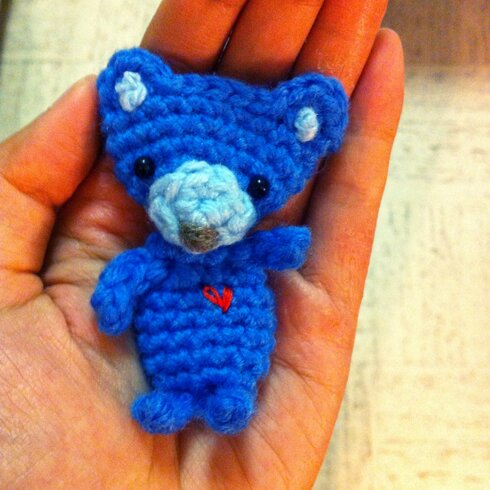
6th pat­tern in the 12 Days of Wood­land Crea­tures (and Their Favourite Things) project. Can you believe we’re already half way done? Fun times go by fast :D

For this bear I used:

Worsted weight yarn in blue, light blue and brown

3.5 mm hook

Small black beads for eyes

Nee­dle and thread for sewing and embroidering

Pat­tern:

Head

Round 1: With blue, 6 sc in mag­ic ring, do not join.

Round 2: 2 sc in each sc around, do not join (12 sc).

Round 3: *1 sc in next sc, 2 sc in next sc*, repeat from * to * around, do not join (18 sc).

Con­tin­ue work­ing 1 sc in each sc around until piece is 1″ tall, ch 1.

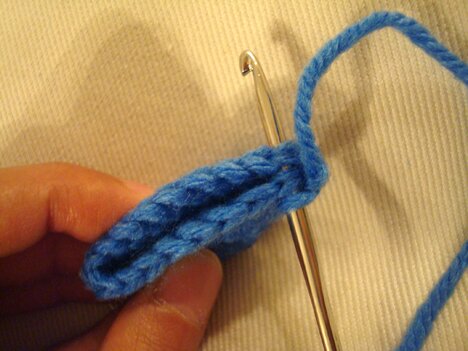
Now we make the ears. Press head flat, insert hook in next sc and the sc before the st on hook, like so…

DSC03808

Make 1 sc in these sc, then make 2 hdc and 1 sc in same sc, sl st in each of next 5 sc in both lay­ers, ch 1, [1 sc, 2 hdc, 1 sc] in next sc, sl st in last sc on the edge, fas­ten off. Weave in end.

Snout

Row 1: With light blue, 3 sc in mag­ic ring, turn.

Row 2: ch 1, sc in first sc, 2 sc in next sc, sc in last sc, sl st in mag­ic ring, fas­ten off, leav­ing a long tail for sewing.

Embroi­der nose on snout with brown yarn.

Face

Sew snout to head. Sew on eyes. Sew french knots on the ears with light blue yarn.

Body

Round 1: With blue, 6 sc in mag­ic ring, do not join.

Round 2: 2 sc in each sc around, do not join (12 sc).

Con­tin­ue mak­ing 1 sc in each sc around until piece is 1″ tall.

Sec­ond last row: *1 sc in next sc, 2 sc tog over next 2 sc*, repeat from * to * 3 more times.

Last row: 1 sc in each sc around. Fas­ten off, leav­ing long tail for sewing.

Arms and legs

Arms are attached between first and sec­ond rows from the top of body, and legs are attached between last and sec­ond last row of body.

Attach yarn to the st where the arm/leg would be, like so.

DSC03809

Draw up a loop, ch 4, sc in 2nd ch from hook, sc in each of next 2 sc, sl st in the st where the yarn is attached, pulling up a length of yarn about 24″ long as you com­plete the sl st…

DSC03810


Cut yarn. Insert hook through the stitch where the 2nd leg will be AND the stitch where the first leg is attached, and pull the yarn through.

DSC03811

Insert hook in the stitch where the 2nd leg start­s and make 1 sc in the stitch. ch 4, sc in 2nd ch from hook, sc in each of next 2 ch, sl st in the st where the leg is attached, fas­ten off, weave in ends.

Do the same for the arms, except use sl st instead of sc when cro­chet­ing down the arms.

Using long tail from body, sew body to head. I also made a french knot for a tiny tail.

And we have a bear! :D

Have a hap­py rest of the week!


mushroom 2 ways

5th pat­tern in the 12 Days of Wood­land Crea­tures (& Their Favourite Things) project!

So, we’re going to a mush­room iden­ti­fi­ca­tion work­shop at High Park tomor­row, and Mike thought it would be a real­ly great idea to make a mush­room pin on his own for the occa­sion. And so I thought it would be the per­fect oppor­tu­ni­ty to make up the mush­room pat­tern while teach­ing him how to cro­chet :D

Appar­ent­ly, hedge­hogs real­ly like mush­rooms. So do Hob­bits — “It is said that Hob­bits have a pas­sion for mush­rooms, sur­pass­ing even the greed­i­est lik­ings of Big Peo­ple” (source). Any­way, I digress.

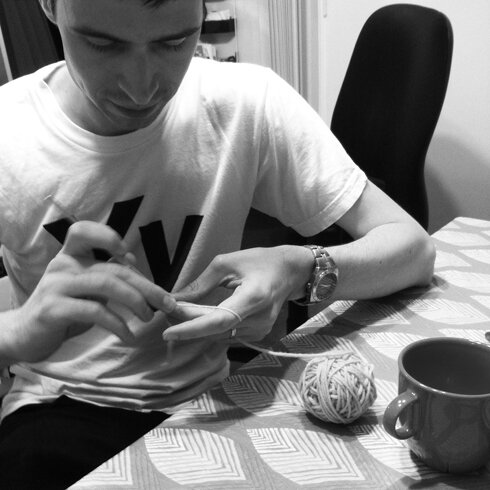
Here’s Mike work­ing hard to mas­ter the ch, sc, hdc…

Photo 2014-09-25, 9 17 29 PM


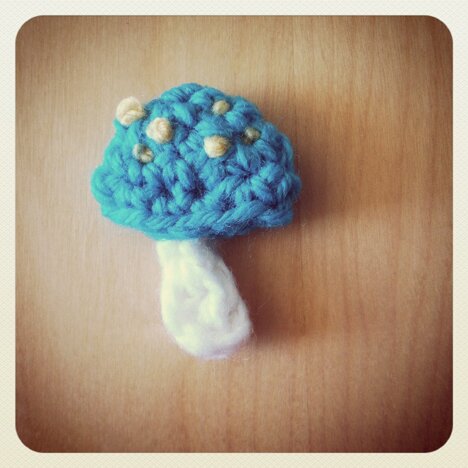
And here’s what he made :D I love the whim­si­cal dif­fer­ent sizes spots on it.

Photo 2014-09-26, 2 58 25 PM

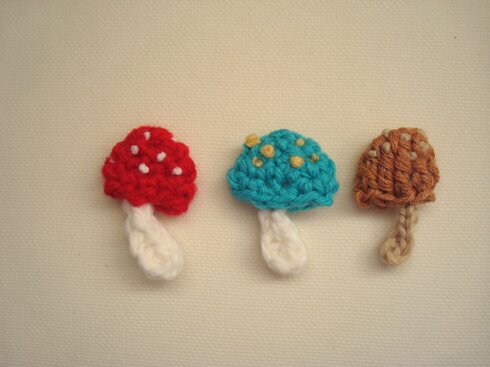
And here it is with the oth­er two I made.

DSC03713

These mush­rooms are flat, great for applique, brooches and ornaments.

There are prob­a­bly dozens of mush­room applique pat­terns writ­ten already. But I thought what I can offer is two super quick, super easy ways of mak­ing mush­rooms — a rounder, more plump one (red and blue) and a nar­row­er one with ver­ti­cal tex­ture (brown).

Mate­ri­als:

We used chunky weight yarn for the red and blue mush­rooms, with a 5 mm hook, because Mike want­ed to use a spe­cif­ic colour of yarn and I only have it in chunky weight. But worsted weight yarn and a 3.5 mm hook will also work well.

Also, tapes­try nee­dle for sewing and embroidering.

Pat­terns:

Round mush­room cap

ch 2, 6 sc in 2nd st from hook, do not join.

*2 sc in next sc, sc in next sc*, repeat from * to * two more times, do not join (9 sc in round).

Con­tin­ue in rounds work­ing 1 sc in each sc until mush­room cap is about 1″ tall. Fas­ten off, leave tail for sewing.

Stem

ch 6, hdc in 2nd ch from hook, sc in next ch, sl st in each of remain­ing ch. Fas­ten off.

Assem­bly

Embroi­der spots on mush­room cap with french knots.

Place the nar­row end of the stem into mush­room cap. Using yarn tail from mush­room cap, sew the open­ing of the mush­room cap togeth­er along its width, sewing through the stem when you come upon it.

Nar­row mush­room cap

Make a mag­ic ring, ch 4, 8 dtr (dou­ble triple stitch) in mag­ic ring, sl st in the top of begin­ning ch 4. Fas­ten off, leave tail for sewing.

*the dtr may take some prac­tice to mas­ter as it has a ten­den­cy to become loose between stitch­es, but once you’ve done all eight of them then that’s it! You’ve fin­ished the mush­room cap!

Stem

ch 8, hdc in 2nd ch from hook, sc in next ch, sl st in each of remain­ing ch, fas­ten off.

Assem­bly

Same as round mushroom.

There will be big gaps between the long dtr stitch­es, but embroi­der­ing on the spots and sewing the open­ing of the mush­room cap closed will help keep it in shape.


Hope you enjoy the mush­room patterns!

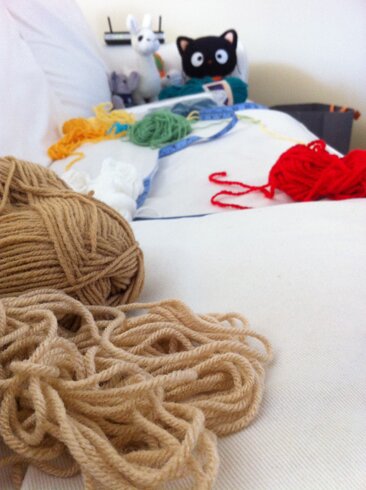
Also want to give you a heads up that the next cou­ple of pat­terns for the 12 Days of Wood­land Crea­tures project may get delayed a bit. Things are becom­ing busier than I have antic­i­pat­ed. I’m mak­ing stuff for a craft sale next week­end, and then sev­er­al school/work relat­ed meet­ings and dead­lines also sud­den­ly got sched­uled for this com­ing week… here’s a look at my couch, in the midst of pre-sale rush, with Fil­bert the cat look­ing on, full of concerns…

Photo 2014-09-26, 3 07 13 PM


But it’s excit­ing! The com­ing week is full of excit­ing oppor­tu­ni­ties. It just took me by sur­prise, that is all.

I had planned on post­ing a pat­tern every 2–3 days, and I will still try to do that, but if the next one comes out a day or so lat­er, please bear with me >_<

Have a won­der­ful week­end, everyone!!