this week’s awesome finds

In case you’re looking for costume ideas… for Halloween, or costume parties any day :D

Spotted this on Make. I have a soft spot for jelly fish, but wouldn’t you say this is the cutest ever?


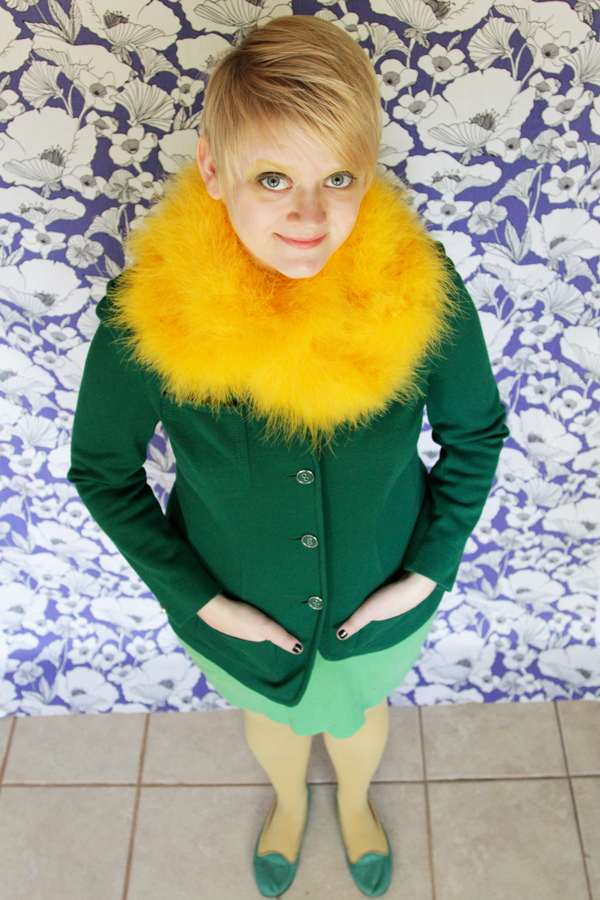
Last minute dandelion, creative, fashionable and brilliant! From Hands Occupied.


This is a bit more involved, but totally worth the time! Especially with the donut hole bucket! (we call them Tim bits around here…) From Studio DIY.


This is not really a costume, but I love the eye ball pom poms! From Mr. Printables.


And why not dress up a cake as ramen? No joke, it’s linked to a video that shows you how to make a ramen cake. Actually seems doable. And I love that the “broth” part of it is made out of tea jello. Check it out on Kotaku!


Finally, Mike highly recommends the tea bag costume (watch for it in this awesome video!).


Have an awesome week! :D


Tweet about this on TwitterShare on FacebookPin on PinterestShare on TumblrPrint this page

trip to the capital city

P1060054

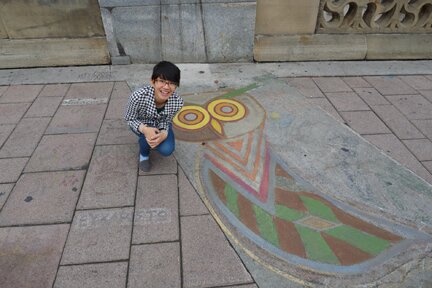
Two weeks ago we went to Ottawa for my cousin’s wedding. It was a rather short trip but we got to visit the Rideau Canal before heading home. The fall colours were lovely. And I found an owl! :D

P1060056


The wedding was held at this castle-like hotel. It was one of the most glamorous weddings I’ve ever been invited to, and so very happy to see my cousin marrying her true love! :D

IMG_1300


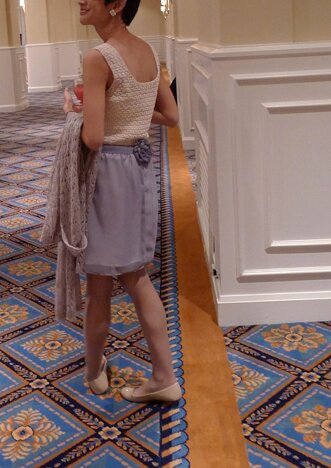
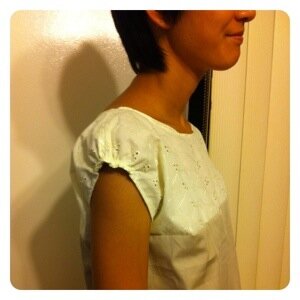
So throughout the summer I worked on adding a sash to this dress so it looks a bit more formal for the occasion…

P1050958


… and I clipped this fabric flower I made on the back. I also bought this vintage porcelain rose earring and necklace set from a very friendly shop owner on Etsy. I thought it matched my dress well :) 

P1050963


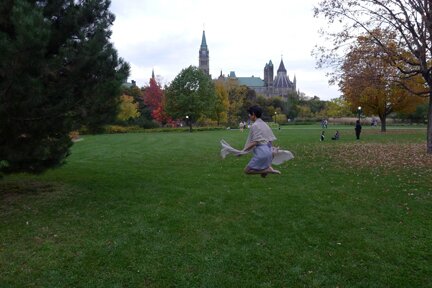
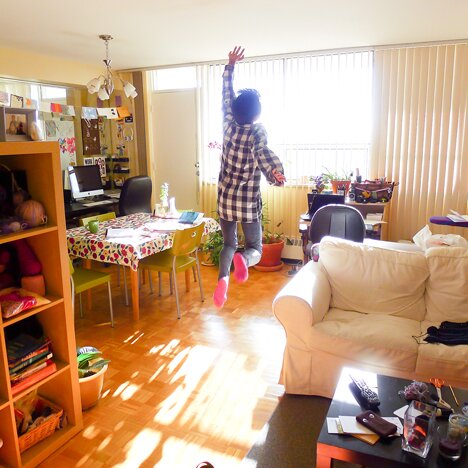
The hotel was right next door to Parliament Hill. A levitating photo is in order.

P1050986


Hope everyone’s having a good weekend! 


Tweet about this on TwitterShare on FacebookPin on PinterestShare on TumblrPrint this page

the cranes of double happiness

Update — May 6, 2015:

I’ve just received a comment from origami book author, Mr. Didier Boursin, informing me that the origami crane card model comes from one of his books (his comment can be found below).

I want to clarify that in the original post (see below), I have clearly stated that I did not invent the origami crane greeting card instructions. I have in all honesty forgotten where I’ve learned it. I was an avid folder in my teenage years, and have pored over probably over a hundred origami books from the library. I have been folding this diagram from memory for many years, but I do not own the book that contains this diagram, nor do I remember which book contains this diagram. With some experimentation I came up with this double crane version, and thought I would share it in case others would also find it useful. 

From his list of publications it is evident that Mr. Boursin is a prolific origami designer and author, and so it is likely that I’ve come across this crane greeting card model in one of his books, or a book that includes his diagram, as he has suggested in his comment. However, it was never my intent to deceive the readers or disrespect Mr. Boursin and other origami designers. I apologize for not remembering where I initially learned this pattern and therefore could not properly cite it when I wrote this post. And so, since now we know where the pattern comes from, out of respect, I am taking down the rest of the instruction on this post. 

If anyone is interested in folding this model, please consult Mr. Boursin’s list of origami books

Thank you for reading,
Trish


IMG_1285


Last week I mentioned that I was going to a wedding (photos to come! :D). I decided to experiment on a variation of my usual origami crane greeting card, which has only one crane, and make a double-crane version. I was quite proud that it worked out! So I thought I’d share the folding instructions here, in case it will come in handy for you some day too :D

I must say, though, that I didn’t invent the origami crane greeting card instructions myself. I learned it from a book, but I forget what that book is… there might also be instructions of it floating around on the interweb somewhere. If you’re not familiar with making origami cranes, it might be helpful to first try your hands on the original origami crane to get a feel of how some of the folds work (video here).


Tweet about this on TwitterShare on FacebookPin on PinterestShare on TumblrPrint this page

this week’s awesome finds

Anyone want to attempt this life size Totoro costume this coming Halloween? Pretty amazing! Step by step photos of how it was built on Imgur.


Very neat braided cotton belt from How did you make this?


So very pretty. plaster-dipped flower votives from Design Mom.


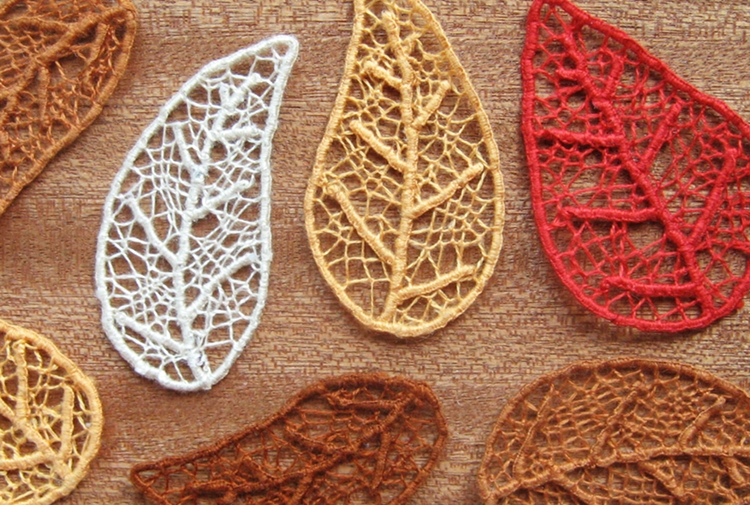
These lace leaves would make such beautiful pendants or earrings. Such detailed tutorial too. Also from How did you make this? (such an amazing blog!)


A super awesome knitted octopus! Follow the link on Make for the pattern!


One lovely barn owl. Pattern on Great Grey Crochet.


I love these twine coasters. Perfect for fall. Pattern by Melmaria on Ravelry. If you don’t know how to crochet, she sells these in her Etsy shop too :D


I’m heading to a wedding in a castle! Woohoo!! Hope to bring back photos, especially levitating ones :D Have a happy weekend, everyone!


Tweet about this on TwitterShare on FacebookPin on PinterestShare on TumblrPrint this page

still here…

… and still levitating!

Levitate-stretch


It’s been another long stretch of time since I’ve written. Have been really busy with reading and assignments. But one’s got to stretch between pages (it actually helped with the stiffness in the legs after sitting for hours).

I’m actually working really slowly on a crochet pattern that I want to share. I’ve been reading so much and trying to wrap my head around different things that my brain hurts. But crocheting helps. So does the new Plants vs Zombies :D (brrrraaaainnnsssss.….) I’m running off to to either one of those things right after I’m finished writing here…

So I hope to share the pattern with you soon! 

And I hope you have an excellent start to the week!


Tweet about this on TwitterShare on FacebookPin on PinterestShare on TumblrPrint this page

happy mid-autumn festival! :D

It’s been a while since I last wrote, I’m feeling quite sad about it. But the reality is that the new school year comes with so much work that I barely have time to do anything else.

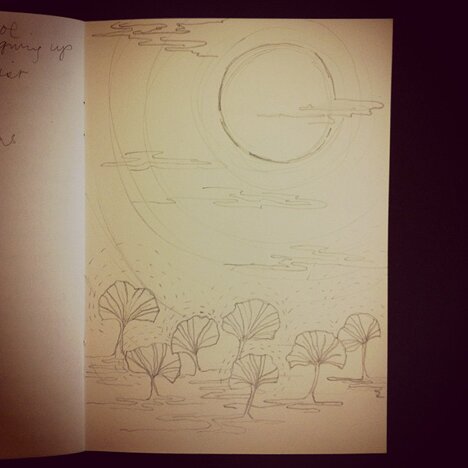
But today is Mid Autumn Festival. I thought I should take some time to celebrate. So with a hot cup of tea sitting on the table beside my notebook, I made a drawing.

mid autumn

Because of class schedule I’m not able to go home for a family gathering today. But as I was drawing I thought about how part of the tradition of the Mid-Autumn Festival reminds us that (at least how I understand it) even if we can’t physically be together with our loved ones, we know that on this day, when the moon is the fullest and brightest, we are all gazing at and appreciating the same moon as our loved ones over the mountains and across the seas. 

And so as I was drawing I was thinking about my family and loved ones gazing at the same moon. And I thought about the bioluminescent mushrooms that we saw at an exhibit in Chicago. I don’t think bioluminescent mushrooms usually need moonlight to glow, but in my drawing I was kind of imagining a relationship between the mushrooms and the moon, where the moon gives the mushrooms the light energy so that they, too, can glow and shine. And I’m reminded of this passage:

We love because He first loved us.
1 John 4:19


Wishing you a splendid, blessed fall season of harvest.


Tweet about this on TwitterShare on FacebookPin on PinterestShare on TumblrPrint this page

this week’s awesome finds

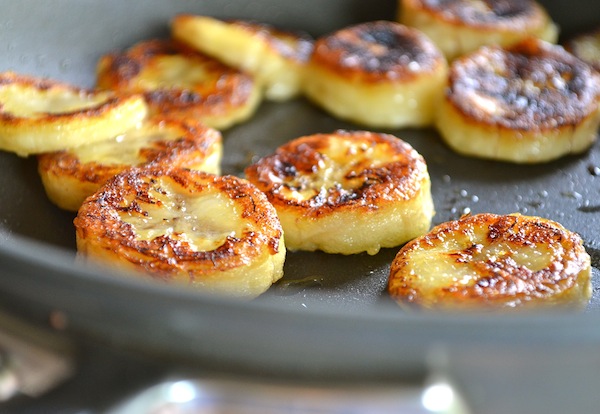
Fried honey bananas — such simple ingredients, and they look so good! Recipe by Rachel Schultz


Polka dots with corks. I love the subtle textures that the corks make. From Maria João.


So grumpy, and soooo adorable! Grumpy octopus coffee cup sleeve pattern by Twinkie Chan.


:D Cat shoes!! How-to found on Kittenhood (fittingly so).


Cutest knitted bunny ever! Free Ravelry download by designer Sara Elizabeth Kellner.


Ok, now all these cute animal patterns are making me want to learn to knit with tiny needles in the round, which I currently suck at. But look at the whole gang of them! With scarves!! Spotted on Ravelry, by designer Barbara Prime.


Also from Ravelry, an absolutely gorgeous lace collar by designer Melody Maria Fulone. I might have posted this in another awesome finds post before, but I follow Melody’s blog and saw the photo again and thought I MUST sharing it. This will make any plain old shirt fitting for fancy tea parties :D


And finally, ohmygoodness, A SUSHI ROLL PENCIL CASE!!! (I know all-caps get overused but I’m very careful about all-cap use and know that when I use all-caps, I’m screaming like a fan girl on the inside). So grateful for the pattern shared on Green, Broke & Living in Kits!


Have an awesomely inspired crafty week! :D


Tweet about this on TwitterShare on FacebookPin on PinterestShare on TumblrPrint this page

one more day

School starts this week but I don’t have classes on Mondays. So that gives me one more day with no school assignments burning in the back of my mind. One more day of writing in this blog before I’m knee-deep in paper-writing.

:S

This is where I’m reminded of something my brother-in-law (who is one of the smartest people I know) said once, which has stuck with me ever since, “yes I’m busy, but I’m doing what I want to be doing so I’m happy to be doing it.” (or something along that line. I know I’ve gotten the gist of it but I wouldn’t count on my own memory to quote anyone verbatim. This is why I’m so bad at retelling jokes. Anyway, I digress.)

I’m truly thankful for the opportunity to go to school, learning what I want to learn. It is truly a privilege. I need to rest in the joy of that.

But before we head forward, I want to show you (it is long overdue!) pictures from our final summer trip to Rock Glen Conservation Area. It is extra special because it’s near Mike’s hometown and that’s where his grandparents would take their kids, and later, grandkids, on day trips.

It has a waterfalls! :D

DSC03045

Isn’t it beautiful? :D

We then crossed a very picturesque bridge…

DSC03052

… and followed a very, very long staircase into the woods…

DSC03060

… arriving at the river bank. 

DSC03057

I can listen to the bubbling water all day.

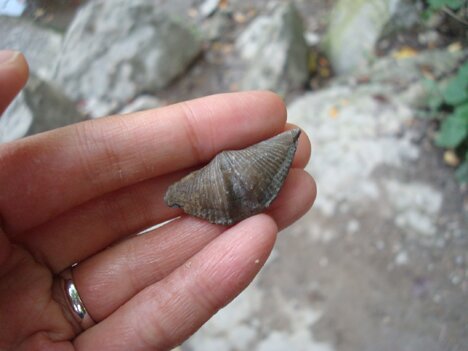
Rock Glen is famous for its abundance of fossil specimens. It didn’t take very long for us to find a brachiopod.

DSC03041

We also spotted quite a few of these spotted, the fuzziest caterpillars. I told it to hurry into a bush before a bird saw it.

DSC03050


And here we are, back to the city. Last night we walked passed a shrub with these sweet pink flowers. Summer’s last blooms.

Photo 2013-09-08


But it doesn’t mean that the fun is over. I’m counting down to Mid Autumn Festival when the moon is bright and full.

Photo 8 34 13


Wishing you an energized and inspired fall season!


Tweet about this on TwitterShare on FacebookPin on PinterestShare on TumblrPrint this page

what to do with a too-wide collar

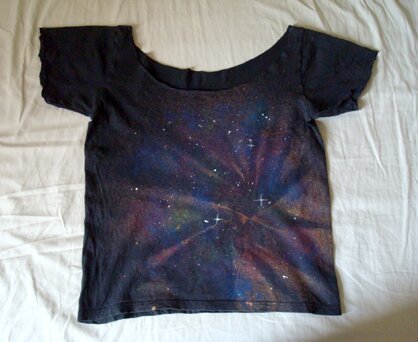
I have a t-shirt that has gone through a couple of refashions, and to refashion it again I had to cut more off the collar, resulting in a neckline that was way too wide (it was a shirt that was big on me to start with). It was practically falling off my shoulders and I couldn’t wear it :(

It was still a perfectly good shirt so I was determined to make it wearable. 
DSC03014


And after some experimentation, it transformed into a tank top :D totally wearable!

DSC03024

I should also mention that I gave it a bit of galaxy treatment before the refashion. (There are many galaxy shirt tutorials in the blogosphere, but if you’re interested in what I did, it was sort of a combination of this and this.)

I thought I’d share the refashion process here, in case you, too, have a shirt with a too-wide collar, or if you have a t-shirt that is asking to be transformed into a tank top :D

In the latter case, you can start by cutting around the collar of a t-shirt to make a wider neckline. On my shirt I have about 1.5 inches left between the neckline and the shoulder seam. You can cut the cuffs off the sleeves as well.

And now the t-shirt is ready for transformation! :D

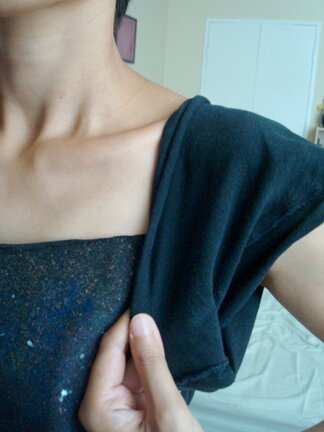
1. First, I put on the t-shirt. I then flip one sleeve up and inside out, so that the edge of the sleeve meets the top of my shoulder. Fold the sleeve inside out all the way around, including under the arm. I had to kept pulling and adjusting here and there to make sure that the front of the shirt is not sagging. Repeat with the other sleeve. 
DSC03017


2. Pin the sleeve to the shirt in the front and underarm, as follows… (the shirt is still on me at this point… my phone camera just did a weird thing with the white balance which made my skin look all washed out)
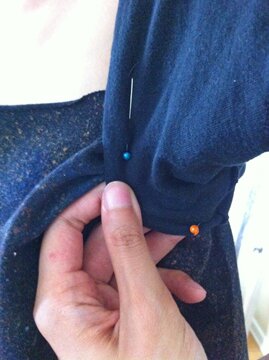
Photo 121438


3. Very carefully (to avoid being pricked by the pins) take off the shirt, and pin the sleeves on the back.

Photo 121835


4. And now very carefully put the shirt back on again. Take the outer edge of the now folded sleeve and fold it in half, up to the shoulder and all the way around. 
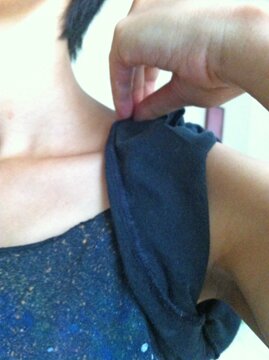
Photo 122309


5. Then tuck any excess material under, like so…
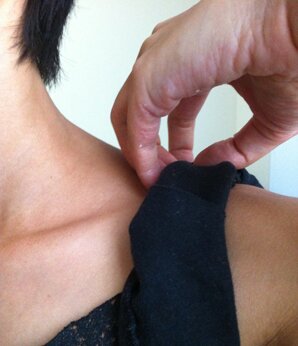
Photo 122514


6. Pin the newly formed shoulder strap through all the layers. Repeat steps 4–6 with the other sleeve.
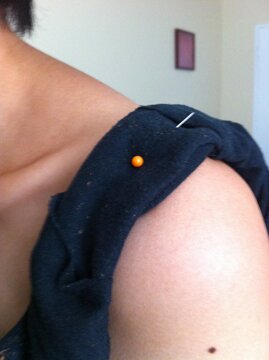
Photo 122722


7. Very carefully take off the shirt, and re-pin around the armholes to secure the folds made in step 4. 
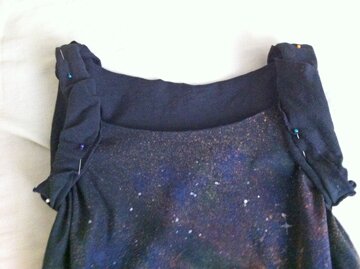
 

Photo 123231

Here you can adjust the folds to make them more neat, then pin them down. Try to place the pins so that they look symmetrical on the shirt. I placed the pins in the underarms, top of shoulders, mid-front, and mid-back.

Photo 123158


8. Finally, with doubled thread, sew through all layers for two inches or so where the pins are placed. I hid my stitches by sewing along old serged seams where possible. I used black thread to match the shirt so you can’t see my stitches, but I drew a zigzag line to show you what I mean…
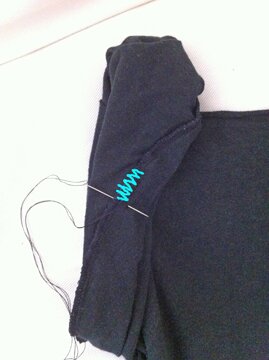
Photo 12456


Ta-da! A new shirt! :D

DSC03032


Perfect for soaking up the last bit of glorious summer before fall arrives :D

May your weekend be filled with awesomeness!


Tweet about this on TwitterShare on FacebookPin on PinterestShare on TumblrPrint this page