this week’s awesome finds

One of my favourite cartoons! :D Hamtaro crochet pattern in both Spanish and English from Mi Pequeno Mundo Rosa.


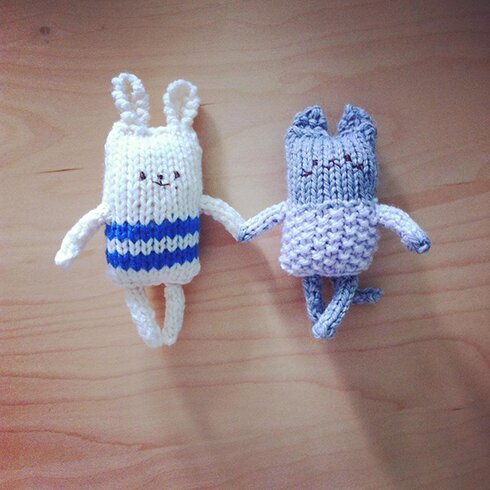
I love these Anything Animals by Melissa Wastney. The animals’ textured sweaters are so lovely.


Have always loved the wooden yarn bowls. Maybe this can be made in wood colours. From Seven Thirty Three.


Ingenious origami cardigan, on my to-make list! I don’t think there’s a pattern that I don’t like from the Purl Bee.


Excellent way to revive a tired old t-shirt, with cats! :D from Tata Cousette.


I love the way the light shines through the sea glass. Would make a lovely travel souvenir too, from a sea or lake-side destination. From Lovely Greens.


This is the best — a pineapple purse! I want to make one for myself and everyone I know :D From Craft Ideas.


Quilting is one craft that I’m not too interested in at the moment but I would love to make one of these super cute mushroom squares. From Sew Scatterbrained.


Have an awesome weekend, everyone! :D


Tweet about this on TwitterShare on FacebookPin on PinterestShare on TumblrPrint this page

underwood 315

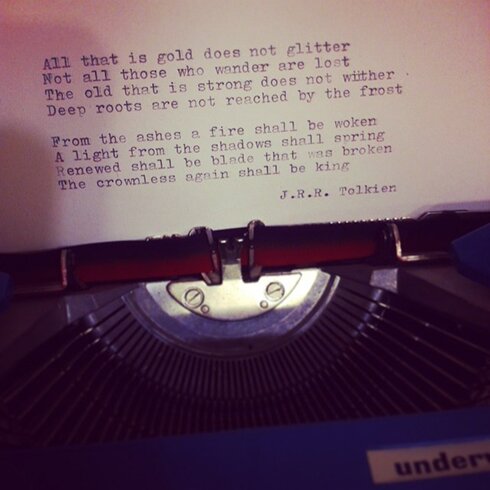
Came across a good quote that I wanted to display at my desk at work. Thought about handwriting it, or finding a good type face for it and printing it out, but then remembered that we’ve inherited Mike’s grandmother’s Underwood 315.

tolkien


It took us a while to get the imprints looking right. At first we thought the ribbon was out of ink. After all, Mike remembered that the last time he saw it used was in the 80s. But then we tried to adjust a number of things, and eventually we were actually able to get a dark enough imprint.

I typed the quote 3 times over to end up with one that doesn’t have typos — proof that I’m far too used to typing on the computer and being able to easily erase mistakes. The first time I ever typed was on a computer keyboard; this is actually the first time I’ve used the typewriter. And how did people use their pinkies on the typewriter? The keys require quite a force to make an imprint on the paper. I imagine getting callouses on the fingertips, much like playing the guitar. But I find it to be quite a rewarding experience! To practice and practice and finally get it right :)

And it reminds me so much of printmaking. Especially with the two-colour ribbon. One just wouldn’t know exactly how the words will appear, there are always slight variations even if the letters are the same. Maybe I will try to make more things with it :D

Have a wonderful start to the week, everyone!


Tweet about this on TwitterShare on FacebookPin on PinterestShare on TumblrPrint this page

in the shadow of Mt. Vesuvius

It’s become a bit of a summer tradition now, my sister and I going to the ROM :)

This year the feature exhibit is Pompeii. I loved learning about Pompeii when I was a kid! :D (and had dreams about becoming an archaeologist or a paleontologist, and once in a while I wonder about what my life would be like now if I had followed my dreams… anyway, I digress)

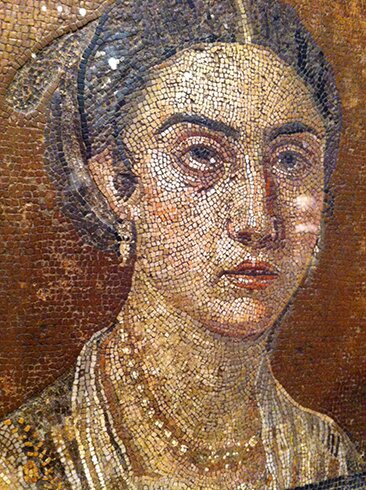
Usually when I hear about Pompeii the images of the body casts come to mind. And there were casts of the body casts in the exhibit too. But I found myself more attracted to marvelous mosaics, made of tiny, probably 1mm x 1mm pieces of clay. I’m quite surprised by how well these were preserved, despite the fire and the heat of the volcano eruption.

Photo 2015-08-03, 11 55 57 AM

I imagine the artisan’s hand, placing these clay chips one by one carefully onto wet grout, tracing the lines on the face, the subtle tonal variations of the skin.

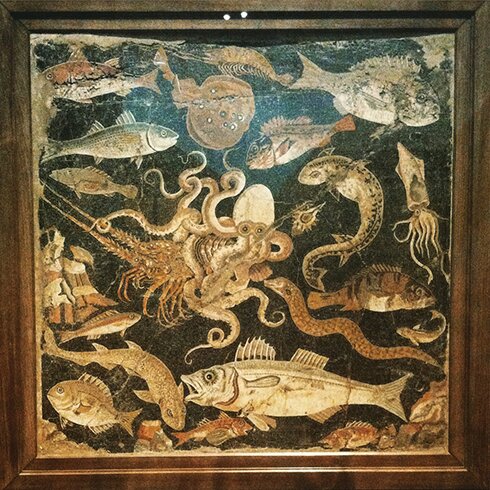
And this is my favourite in the exhibit, the spectacular sea life mosaic.

Photo 2015-08-03, 12 09 10 PM

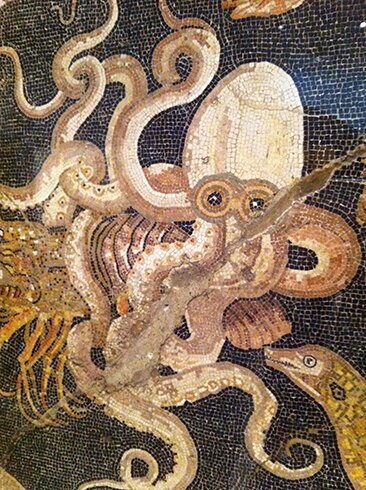
The phone photo really doesn’t do it justice. It is quite large in person. Looks like the octopus is battling a lobster-like creature. Here’s a close up of the octopus, made of many tiny tiles.

Photo 2015-08-03, 12 07 35 PM

This must have taken a long, long time to make. I imagine the artisan(s) taking a step back after the last tile was put into place, and feeling incredible joy and satisfaction when they saw what they have created.

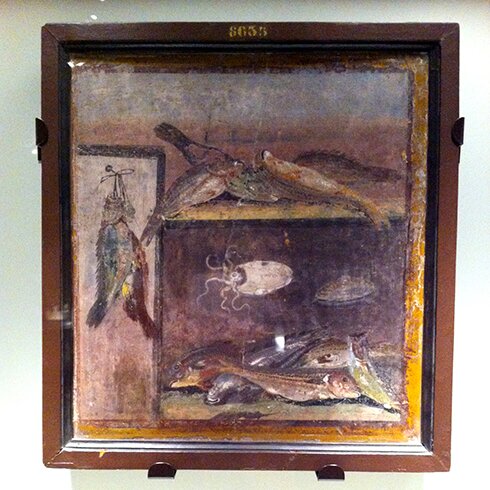
I was also surprised by the survival of the many frescoes, like this one, of seafood.

Photo 2015-08-03, 12 11 44 PM

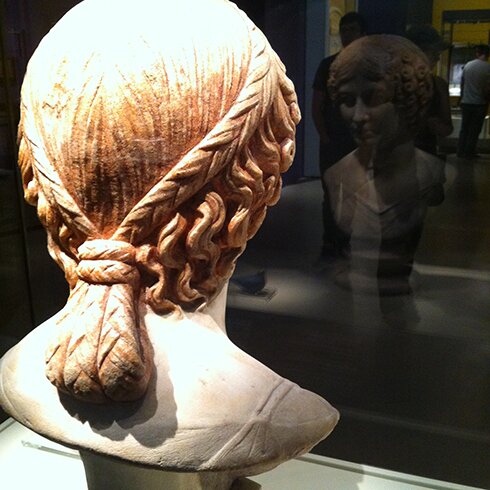
Intrigued by the sculpture’s very intricate hairstyle.

Photo 2015-08-03, 12 16 37 PM


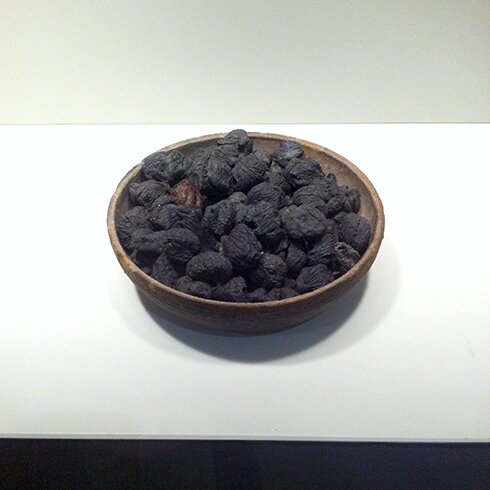
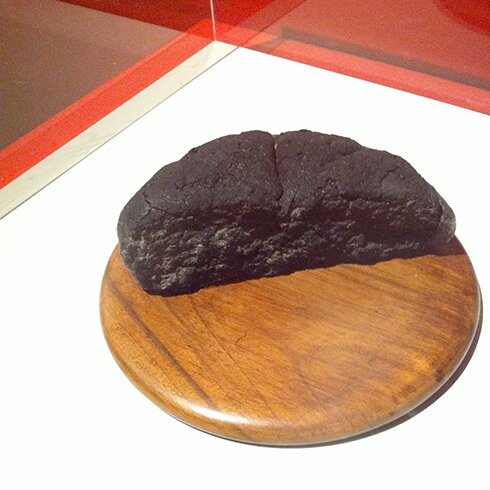
Figs and bread carbonized in the eruption.

Photo 2015-08-03, 12 10 34 PM

Photo 2015-08-03, 11 54 19 AM

There was also a video projection showing the eruption, with this wide-eyed statue in front of it. Looked to me like it was frozen in terror.

Photo 2015-08-03, 12 26 26 PM


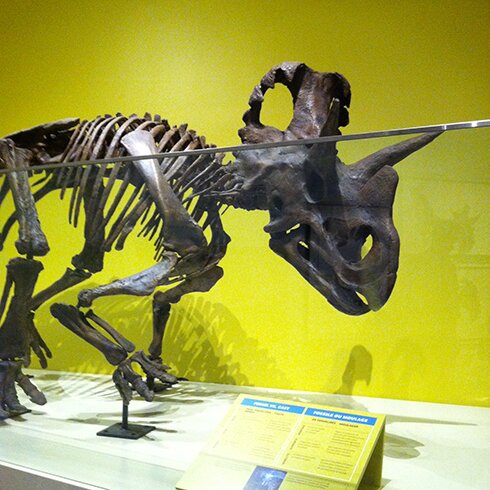
Mike went on this trip with my sister and me, and he hadn’t been to other parts of the museum for a while, so we also toured the dinosaur galleries and the biodiversity gallery. There was an exhibit of the new dinosaur discovery! And! This is a 3-D printed model!

Photo 2015-08-03, 1 33 00 PM

Wendiceratops pinhornensis, named after the Canadian fossil hunter, Wendy Sloboda, who discovered it in Alberta, Canada :)

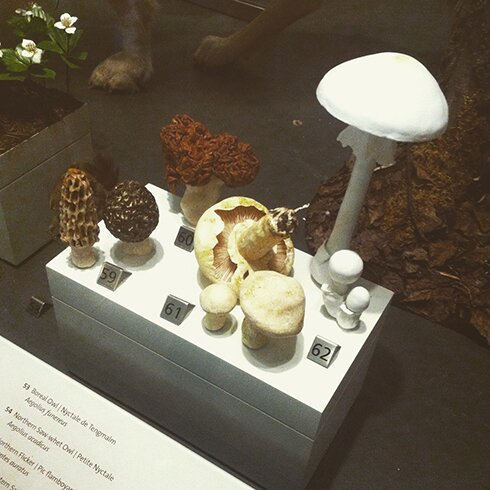
In the biodiversity gallery I was hoping to find a display of fungi. I’ve been to this part of the museum many times, but I thought maybe I’ve always missed it. Finally I found it, replicas in the Boreal Forest section, I think, as well as a drawer of dried mushrooms that were difficult to tell what they actually looked like before they were picked. I was a bit disappointed that there wasn’t a larger display of more species of fungi and mushrooms, but this is still nice :)

Photo 2015-08-03, 2 17 52 PM

So that was the end of our adventure to the ROM. I hope you will get a chance to visit if you’re ever in the neighbourhood! :D I’m looking forward to finding out what next summer’s feature exhibition will be! Maybe it will be on the diversity of mushrooms and fungi! :D One can always dream… (I once saw a course at a local university titled “Mushrooms: Lords of the Dark Earth”. I so wanted to take the course but it wasn’t being offered anymore… anyway.)

Hope everyone is having a good week!


Tweet about this on TwitterShare on FacebookPin on PinterestShare on TumblrPrint this page

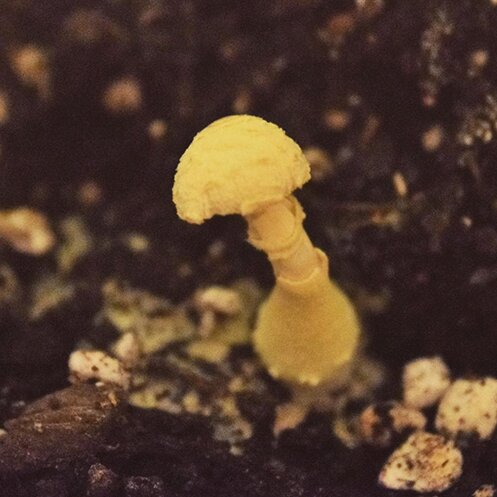
leucocoprinus birnbaumii

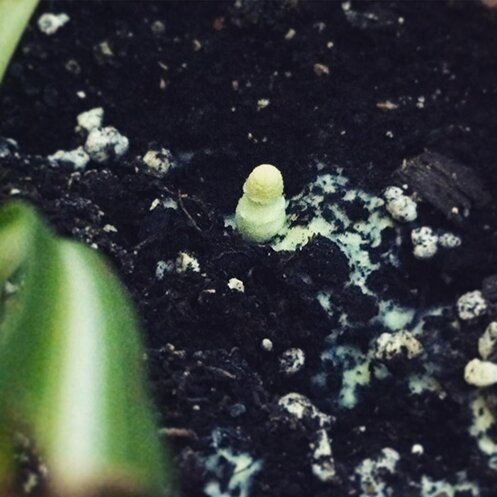
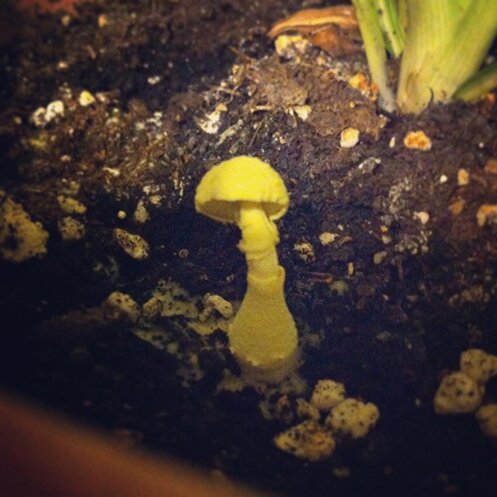
That is the very uncommon name of a very common yellow houseplant mushroom :D

According to Wiki, it is also called “flowerpot parasol” or “plantpot dapperling”. Very pretty names. One started growing in our spider plant!

11356728_445742315634070_829818577_n

When we first spotted it it was very tiny, maybe quarter of an inch tall.

Then a few days later we noticed the cap completely open. It was still tiny, about half an inch tall.

11363917_1585790938351656_989640558_n

This is a better picture from Mike.

11782512_10155878672605228_2763073460217227119_o

We took these pictures at night. The next morning we found the mushroom already wilted :(

Have you had these mushrooms in your plants? According to this helpful site, it does not hurt the houseplants, and it’s not harmful they’re eaten. So maybe not so great when there are young children and pets.

Which reminds me, maybe some mushrooms are out already in the park. I should go out for walks sometimes and start looking :D

Hope you have a happy Sunday and a good week!


Tweet about this on TwitterShare on FacebookPin on PinterestShare on TumblrPrint this page

water’s edge, a remake


2015-07-25 00.04.34

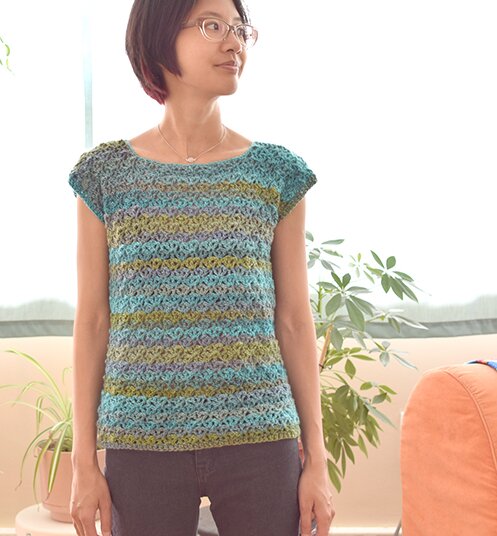
A remake of the Pastel dress, with a yarn that reminds me of the seashore — the different shades of blue in the distance, the greens of algae and seaweed washed up on the rocks.

Similar to the remake of the Ginkgo top, this sweater uses the same lace pattern as the top of the Pastel dress (which was a variation of the Ginkgo lace pattern), minus the armhole shaping and with a simpler boat neck shaping.
2015-07-25 00.08.50


The yarn I used was Mary Maxim Prism in Still Waters. I love this yarn. It’s affordable, super washable, the colours are amazing, has a nice drape. I wish there is a Mary Maxim closer to where I live… *sigh*

It has a very simple shape and stitch pattern, so I imagine it would look nice with a variegated yarn like Noro, or a sparkly yarn for fancier occasions :)

I used:

Light worsted weight yarn, approx. 700 yards

5 mm and 4.5 mm hooks

Tapestry needle for sewing

Sweater measures: 34″ around, 19.5″ in length

Length is easily adjustable by working more or fewer rows. Width can be adjusted by adding or subtracting stitches in the foundation ch by multiples of 6.

6 stitches = 1 3/8”

Pattern:

Stitch pattern:
Fan = [dc, 2 ch, dc, 2 ch, dc] in same space

Front: 

With 5 mm hook, ch 85.

Row 1: dc in 6th ch from hook, skip next 2 ch, dc in next ch, [skip next 2 ch, fan in next ch, skip next 2 ch, dc in next ch] to end, [dc, ch 2, dc] in last ch, turn.

Row 2: ch 3, skip first dc, fan in dc between fans, [dc in 2nd dc of next fan, fan in next dc between fans] to end, dc in 3rd ch of turning ch, turn.

Row 3: ch 5, dc in 1st dc, dc in 2nd dc of next fan, [fan in next dc between fans, dc in 2nd dc of next fan] to end, [dc, ch 2, dc] in turning ch, turn.

Repeat rows 2 & 3 until there are 34 rows altogether, ending with row 2.

Neck shaping:

Row 35: work in pattern to the 4th fan of the row, dc in 2nd dc of the 4th fan, dc in next dc between fans, turn.

Row 36: ch 5, dc in next dc, dc in the 2nd dc of next fan, work in pattern till end, turn.

Row 37–38: work in pattern. Fasten off.

Attach yarn to the other corner of row 34, repeat rows 35–38.

Back:

Repeat pattern for front until neck shaping. Work 2 more rows so that there are 36 rows altogether, ending with row 2.

Neck shaping:

Row 37–38: repeat rows 35 and 36 of front. Fasten off.

Attach yarn to the other corner of row 36, repeat rows 37–38.

Assembly:

With right sides together and wrong sides facing, sew shoulder seams together.

With right sides together and wrong sides facing, sew side seams together, starting at the top of the 11th row from the top of the sweater.

Turn sweater right side out.

Edging: with 4.5 mm hook

Neckline: attach yarn to a dc (not part of a fan) on the back of neck. ch 1, sc in same dc, [sc in 1st dc of fan, sc in next ch 2 sp, skip 2nd dc of fan, sc in next ch 2 sp, sc in 3rd dc of fan, sc in next dc] around, sl st in beginning sc of found, fasten off.

Armholes: attach yarn to any space on the armhole. We will be crocheting into the side of the rows, or what I call “row-ends”. ch 3, work 2 dc in each row-end around, sl st in top of beginning ch 3, fasten off. Repeat for the other armhole.

Bottom edge: attach yarn to any ch 2 space, ch 3, work 1 dc in every ch 2 space, every base of a fan, and every base of a dc, sl st in top of beginning ch 3, fasten off.

Weave in all ends.

And it’s done! :D

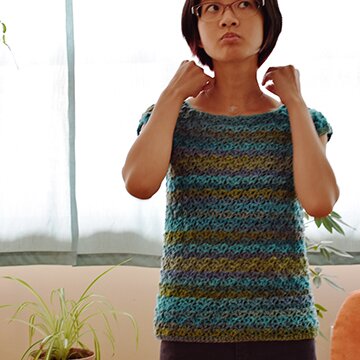
Here’s an in-between shot in which I was caught adjusting the necklace, which I thought turned out kind of cool and stylish :D
2015-07-25 00.08.06


Hope you enjoy the remake! Have a happy Saturday! :D
 

Tweet about this on TwitterShare on FacebookPin on PinterestShare on TumblrPrint this page

lately

I recently received a lovely email from a friendly staff person at Warby Parker inviting me to write a post about my summer moments and to pick some of their sunglasses to go with them, for their #seesummerbetter campaign. While I’m not receiving any material or monetary compensation for writing this post, except perhaps friendly shout-outs from the Warby blog, I’m still feeling rather flattered that there is interest in this blog, especially since Mike just got a pair of glasses from them and he quite liked them, and had been telling me good things about the company, including friendly and approachable customer service :) Another thing that attracted Mike to shop from them is their Buy a Pair, Give a Pair program, which doesn’t only create access to affordable glasses, but also opportunities for skill-building and employment.

So I was happy about writing this post. But there is one problem: I don’t usually wear sunglasses. It’s kind of a foreign topic to me and I don’t really know what to write about.

Not that I don’t like wearing sunglasses. I think they’re very important for eye health. I’m just rather utilitarian about it (among many other things). I used to own a pair of sunglasses that I bought from the drug store, they go over my regular glasses (as in wearing two pairs of glasses at the same time). But then I got new glasses that are a lot wider than my old pair and the sunglasses can’t fit over them. And I never bothered to get a pair of prescription sunglasses. So I haven’t been wearing sunglasses for a few years now. Probably not good for my eyes, especially in the summer. The invitation to write this post might actually be a good reminder that I need to get myself a pair of prescription sunglasses soon… and maybe I’ll think a bit more about style rather just utilitarian this time (sunglasses that go over regular glasses aren’t the most stylish ever :S).

So I sort of interpreted the invitation to write this post as: if you were to buy a pair of sunglasses from our shop, which ones would you consider?

It’s always fun to window shop :)

11411984_10155830599505581_7372180122006906792_o

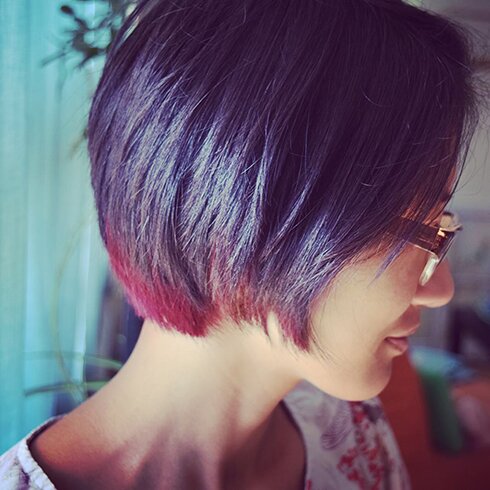
Last week I got my hair cut and coloured :D I’m quite happy with the vibrant but not too bright colour showing from underneath. I have an affinity for grey glasses, so I think the new hair would look great with these :D And with a beautiful name like Luna Fade it’s hard to not like them.


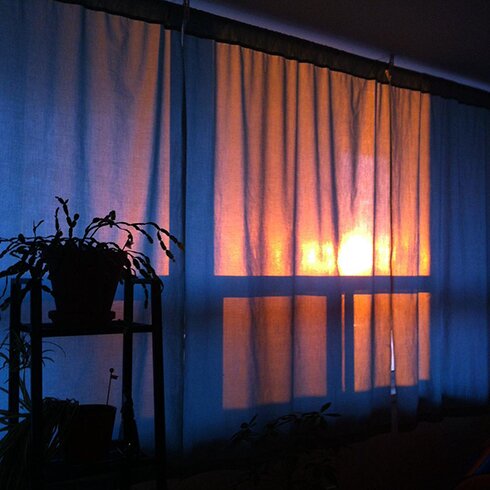
Have I ever shared pictures of the curtains I finally sewed and put up? It’s only taken me 8 months! :S For the longest time we had disposable plastic table cloths taped to the window… but now we have these sea glass coloured curtains! :D And look at the glorious blazing summer sunset shining through.

11731742_10155831379055581_7871834411522259041_o


I like sea glass… or is it seafoam? Anyway, I like these, because they’re sea glass coloured… and they are indeed named Beach Glass! :D


And today we had the perfect summer evening — sandals, cotton-candy-colour pants, trip to the library at 8pm in daylight!

Photo 2015-07-23, 8 24 27 PM

Today’s awesome finds for summer reading/viewing — Muppets Most Wanted, Amigurumi at Home, and Life After Life :)

And what goes well with cotton-candy-coloured pants?

I love these… and they’re beautifully named Moonstone! (As you may notice I’m a sucker for nice product names.)

Thanks for window shopping with me! :D Hope everyone has a fun and sun-filled weekend!


Tweet about this on TwitterShare on FacebookPin on PinterestShare on TumblrPrint this page

this week’s awesome finds

Woohoo! Balloon ice creams, perfect photo booth prop for summer parties :D From my favourite party blog Oh Happy Day.
 

A friend pointed me to this cute knitted snail from Hobby Craft.


Lovely gold twig hair pins from Love Maegan.


Clever, simple and super cute pom pom cactus, from Pinch Me Beautiful.


Hop to Wool and the Gang for this adorable knitted bee pattern and learn more about saving the bees!


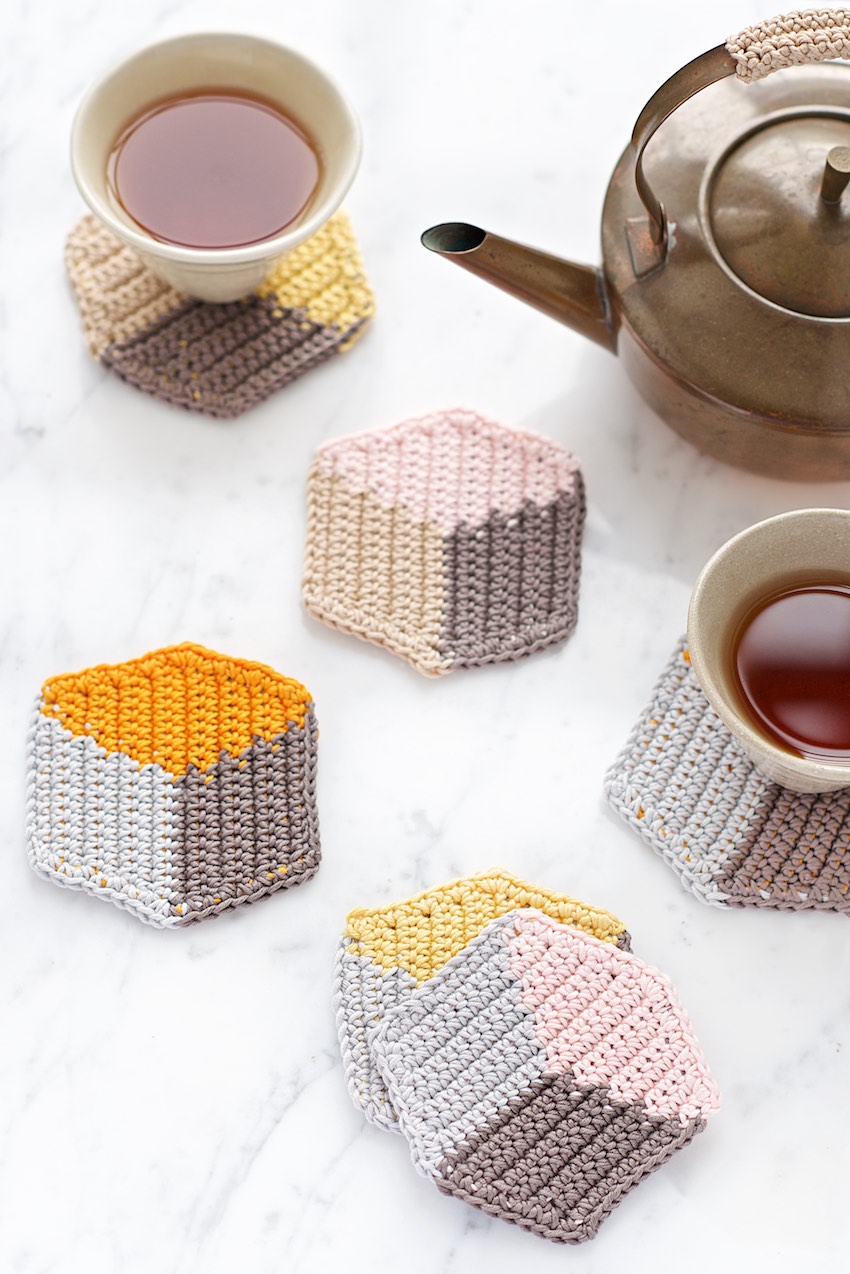
Something very stylish about these coasters. From Lebenslustiger.


A floor pouf! I’ve always liked the idea but didn’t feel like buying a ton of Polyfil. This one doubles as a secret storage — how smart! For pillows and extra blankets and such! From Chaleur Life.


Beautiful summery tote, by Aunt Peaches on I Love to Create.

Have a lovely weekend, friends!


Tweet about this on TwitterShare on FacebookPin on PinterestShare on TumblrPrint this page

lately

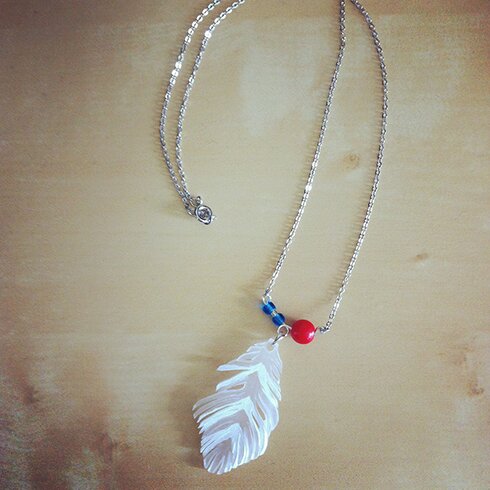
Made a necklace for the shop this week. Probably the most elaborate jewelry piece I’ve made so far. Quite proud of it :D

Photo 2015-07-05, 4 43 38 PM

The feather was made with shrink plastic. I might make more of these, maybe with different colour chevron stripes!

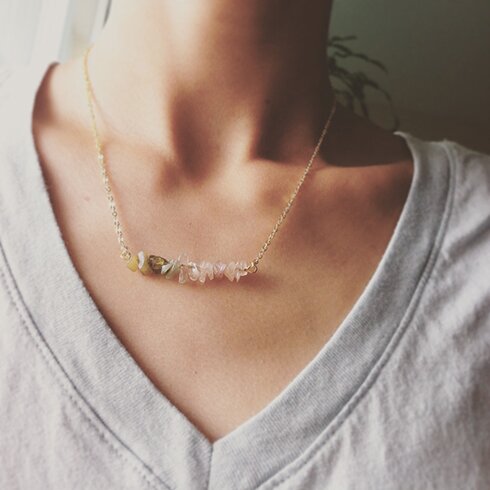
And then I made this.

Photo 2015-07-06, 6 47 12 PM

The stones were gifts from a friend so this is definitely not going to the shop. But this was the first time I tried making this style of necklace and I think it worked out well, so I might make more of this too if I can find similar drilled stone chips (not sure if that’s what they’re called :S).

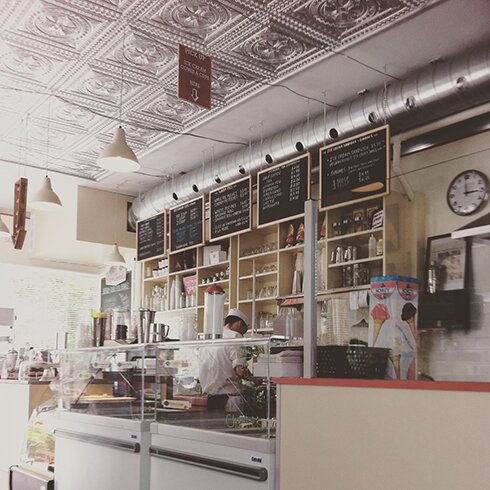
Also want to mention that last weekend we went to a new retro malt shop downtown! :D

Photo 2015-07-04, 2 59 40 PM

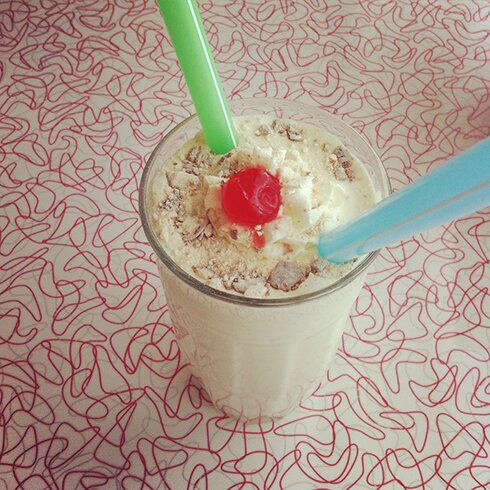
Bean and Baker! We had a vanilla malt shake, which was dreamy. They also have pies of both sweet and savory varieties, and handcrafted sodas!

Photo 2015-07-04, 2 55 30 PM

I highly recommend a visit if you’re in the neighbourhood!

This is not lately, we went there back in May, but haven’t had a chance to post these photos.

Photo 2015-05-23, 6 50 49 PM

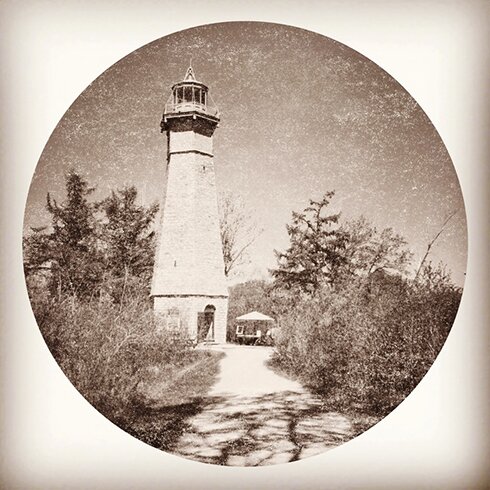
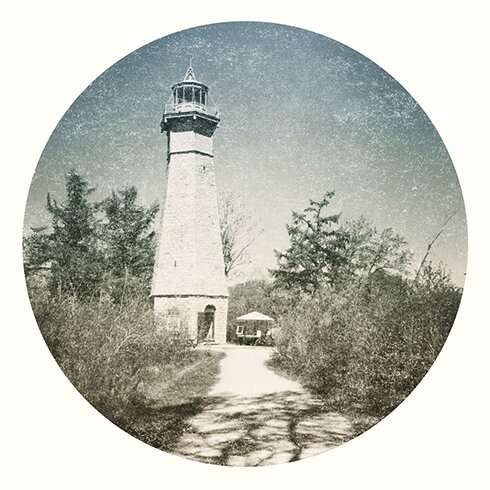
During Doors Open Toronto we went to the Gibraltar Point Lighthouse on the Toronto Islands, which is the oldest lighthouse of the Great Lakes! (Also supposedly haunted :S) I followed the Roundograph tutorial by Photojojo to mimic photos taken by the Kodak No. 1 in the 1890s.

Here’s one with a different filter, which I also like very much.

Photo 2015-05-23, 6 59 19 PM

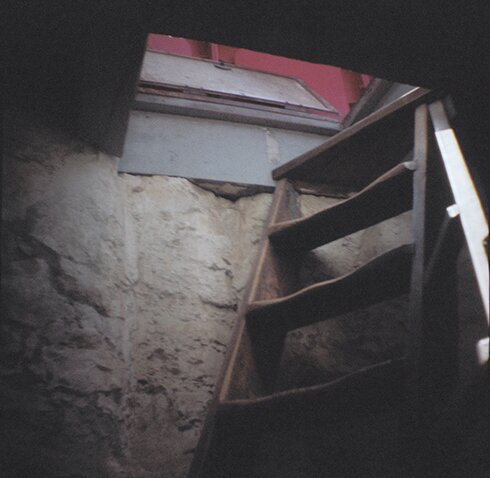
I also took the Diana to the lighthouse. Here is the ladder leading to the top of the lighthouse. It’s my favourite picture of the batch.

07070030

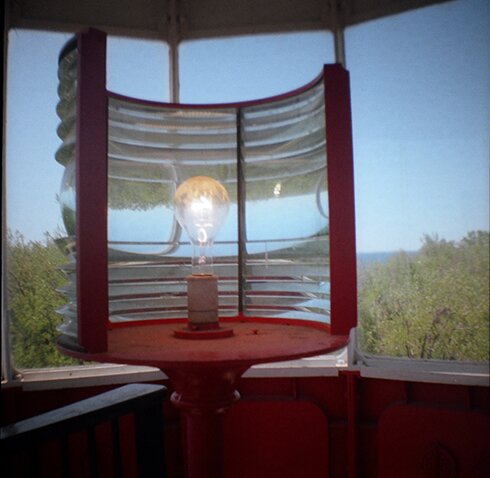
And we reached the light of the lighthouse! :D

07070031

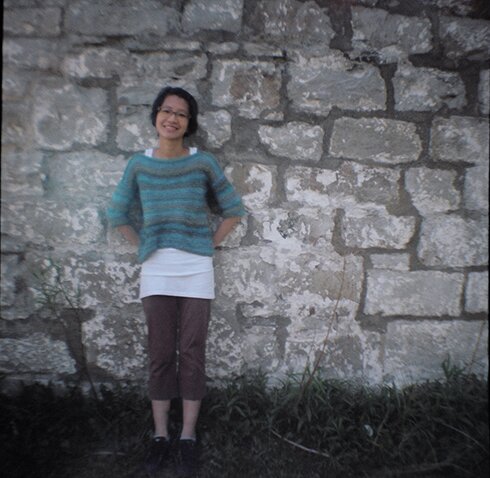
Me at the foot of the lighthouse.

07070034

And on the ferry between the island and the city.

07070026


Happy Friday everyone! :D

Tweet about this on TwitterShare on FacebookPin on PinterestShare on TumblrPrint this page

remake! ginkgo shrug

DSC_0003

This shrug uses the same lace pattern as the ginkgo top (and almost the same stitch count!), but with much heavier yarn and larger hooks. Basically, a blown up version of the ginkgo lace pattern. And no neck shaping! Isn’t that nice? :D Such is the beauty of shrugs.

I thought it would make a nice piece for late summer nights easing into fall.

DSC_0004

The shrug measures 38.5″ from cuff to cuff, and 20″ from neckline to bottom edge. It’s a very quick make, took me 2 evenings to finish while watching TV :)

DSC_0010


What I used:

Worsted weight yarn, approx. 700 yards

6mm and 5.5mm hooks

Tapestry needle for sewing.

Pattern:

Note for size modifications: to increase the length from cuff to cuff, i.e. longer sleeves, add multiples of 6 ch to foundation chain. 6 stitches = 1.75″

With larger hook, ch 136.

Begin with row 2 of the ginkgo lace pattern (but slightly modified, because we’re skipping the first row of dc’s in the original pattern) as follows:

Row 2: 2 dc in 4th ch from hook, skip 2 ch, dc in next ch, [skip 2 ch, 5 dc in next ch, skip 2 ch, dc in next ch] across, skip 2 ch, 3 dc in last ch. Turn.

The rest is just the same as the ginkgo lace pattern. To make things easier I’ve pasted it below.

Note: shell = 5 dc in a stitch, or 3 dc in a stitch

Row 3: (WS) ch 5, skip shell in the beginning of row, dc in next dc, [ch 2, dc in 3rd dc of shell, ch 2, skip rest of shell, dc in next dc] across, ch 2, dc in top of turning ch. Turn.

Row 4: (RS) ch 3, 5 dc in next dc, [dc in dc, 5 dc in next dc across], dc in 3rd ch of turning ch. Turn.

Row 5: ch 5, dc in 3rd dc of shell, [skip rest of shell, ch 2, dc in next dc, ch 2, dc in 3rd dc of shell] across, ch 2, dc in top of turning ch. Turn.

Row 6: ch 3, 2 dc in same st, dc in next dc, [5 dc in next dc, dc in next dc] across, 3 dc in 3rd st of turning ch.

Repeat rows 3–6 until piece measures approx. 18″ from beginning, or desired length. Ending with row 4 or 6. Fasten off.

Finishing:

Fold piece in half lengthwise with wrong side facing out. Sew seam together, starting from the cuff edge, along the long side of the piece, sew 5.5″ towards the centre of the piece (about 3 and a half shells). Repeat on the other side. Turn piece right side out.

Edging:

Neckline/front/back: With larger hook and right side facing, attach yarn to any stitch along the last row crocheted, ch 3, dc in each dc except the 3rd dc of each shell. When crocheting along the bottom side of the shrug (i.e. along the foundation ch), work 2 dc in each 2 ch space, and 1 dc in the base of each shell, but skip the ch at the base of a dc. Crochet around until end of round, sl st in top of beginning ch, ch 3. Do not turn, dc in each dc around, sl st in top of beginning ch, fasten off.

Cuffs: With smaller hook and right side facing, attach yarn to any space on cuff edge. The stitches will be crocheted into the side ends of the rows, or “row-ends”. ch 3, 2 dc tog in each row-end around, sl st in top of beginning ch, ch 3. Do not turn, dc in each dc around, fasten off. Repeat on the other cuff.

Weave in ends.

DSC_0007

Happy crocheting! :D


Tweet about this on TwitterShare on FacebookPin on PinterestShare on TumblrPrint this page