12 days of woodland creatures

Introducing!! 12 Days of Woodland Creatures (and Their Favourite Things)!

Hedgehog

You’re invited to a crochet-along! :D

I’ve been planning this for a while now. Every year I try to do a “daily practice” kind of project, where I make something everyday, as a way of keeping creativity flowing, like the square-a-day project. This year I was asked by a good friend to make a forest-themed mobile for the newest member of her family (exciting!!). So, to honour my friend’s generous spirit I thought I would share how I make each creature with everyone on this blog :D

And then I thought this would be a perfect opportunity for a crochet-along! The creatures don’t only belong on a mobile, they can be used for a lot of different things…

Brooches?

Applique?

Ornaments? Maybe for an advent calender like this? Or, by the end of the project you would have a set of woodland ornaments for the Christmas tree, just in time for the holiday season!

Characters for felt storyboards, with velcro on the back?

Carry-along plush toys?

Pocket pets?

Possibilities are endless :)


So! This is how it works: 

Every 2–3 days I will post a pattern for a crochet woodland creature (or its favourite things). And I won’t be pre-announcing what the creatures are, so it will be a surprise every time! At the end there will be 12 patterns. You can crochet along for all of the patterns, or just one, or pick the ones you like. And if you send me pictures or blog posts about what you have created, I will share it here, like our craft-along gallery a couple of years ago (that was lots of fun! :D), then we can see all the different and fun and creative ways that everyone has used for the creatures!

I’d love to know if you’d like to join in the fun, please make a comment below! :D

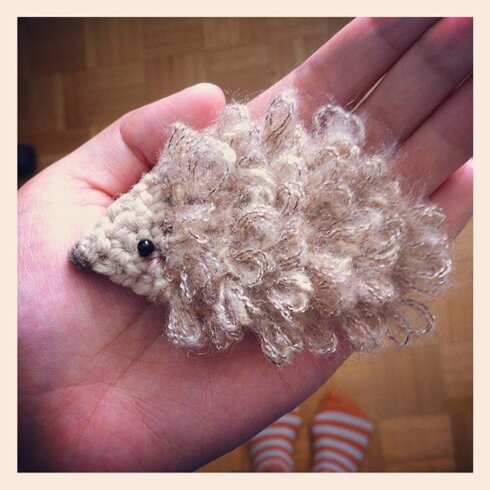
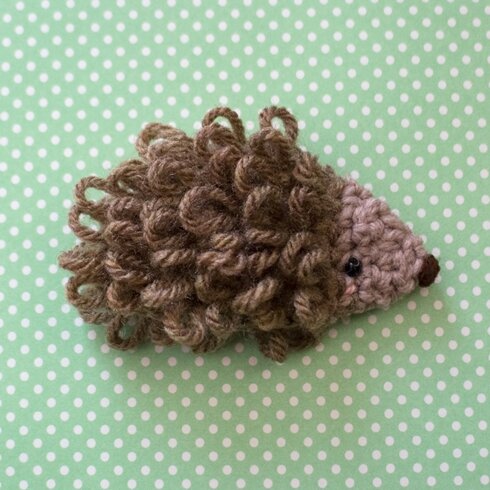
AND!! Today we have our first creature — yup, you guessed it. The hedgehog!

hedgehog fuzzy

Love the fuzzy yarn on this one :)

I also learned the loop stitch in the making of the hedgehog. There’s a great photo tutorial of it if you haven’t made it before.

I used:

Worsted weight yarn — one colour for the body and a contrasting colour for the head.

4 mm hook

2 small black beads for eyes (just one if you’re making a brooch)

Needle and thread for sewing

Pink embroidery thread and brown yarn for embroidering rosy cheeks and nose


Note: the turning ch 1 in this pattern does not count as a stitch. The pattern alternates between loop stitch (lp st) rows and single crochet (sc) rows, with the increases and decreases made in the sc rows and working even in the lp st rows)

Pattern:

With body colour, ch 5

Row 1: sc in 2nd ch from hook, sc in each ch across, turn.

Row 2: ch 1, loop stitch (lp st) in each sc across (4 lp st), turn.

Row 3: ch 1, 1 sc in each of the next 2 lp st, 2 sc in each of the next 2 lp st, turn.

Row 4: ch 1, lp st in each sc across (6 lp st), turn.

Row 5: ch 1, 1 sc in each of the next 4 lp st, 2 sc in each of the remaining 2 lp st, turn.

Row 6: ch 1, lp st in each sc across (8 lp st), turn.

Row 7: ch 1, 1 sc in each lp st across, turn.

Row 8: ch 1, lp st in each sc across (8 lp st), turn.

Row 9 & 10: repeat rows 7 & 8 (8 lp st).

Row 11: ch 1, 1 sc in each of the next 2 lp st, *2 sc tog over next 2 lp st*, repeat from * to * twice, turn.

Row 12: ch 1, lp st in each sc across (5 lp st), turn.

Change to head colour, fasten off body colour.

Row 13: ch 1, sc in each lp st, turn.

Row 14: ch 1, 2 sc tog over first 2 sc, 1 sc in each remaining sc across, turn.

Row 15: ch 1, 1 sc in each of the next 2 sc, 2 sc tog over the remaining 2 sc, turn.

Row 16: 3 sc tog, fasten off.

If you’re making a double-sided hedgehog:

Make a mirror image of the above hedgehog shape by reversing the increases and decrease in the pattern, i.e. if the row ends with increase/decrease stitches in the pattern, start with increase/decrease stitches when making a mirror image, and vice versa. Leave a long tail for sewing when fastening off both the body colour and the head colour. Sew on eyes, embroider nose and rosy cheeks, then sew the two hedgehog shapes together, using the long tail of head colour when sewing the head section and the long tail of body colour when sewing the body section.

If you’re making a single-sided hedgehog, like a brooch:

Make a back piece for the hedgehog using head colour following the pattern above, replacing all lp st rows with sc rows. Sew pin back to the back piece, sew on eye, nose and rosy cheek, then sew the back piece to the hedgehog.

And that’s it! You have a new hedgehog friend :D

Hope you like the pattern, and please drop me a note if you want to join me in crocheting along!


Tweet about this on TwitterShare on FacebookPin on PinterestShare on TumblrPrint this page

weekend quick knit

P1070151

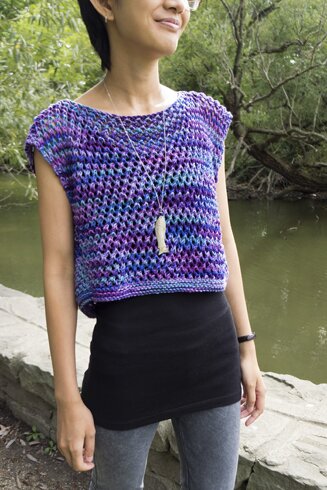
What to do with half a skein of Bernat Handicraft cotton that’s been in my stash since the late 1990s? Make a retro cropped top :D

It’s a cropped top because I don’t have enough yarn to make a full length sweater. And this colour is probably discontinued, so it’s unlikely that I can get more of it. I do really like the colours in this variegated cotton though. It’s just that every time I try to crochet something with it the colours tend to clump together (as I later found out, the proper knitting/crocheting term is “pooling”, as in the colours “pooling” together). So I thought maybe a knit pattern would decrease the pooling a bit.

I adapted the cap sleeve lattice top by The Purl Bee. Made some simple changes to accommodate the heavier yarn (the original pattern uses a sport weight yarn), so I thought I’d share them here in case anyone would like to make a similar top.

I used:

Worsted weight cotton. I’m not sure how many yards I had left in the leftover skein, but I still have quite a bit leftover after the sweater, so I’d say the sweater used about 450–500 yards.

6mm needles

Finished size: Bust 38″, length 15″

What I did:

CO 61 (can adjust for size by casting on more or fewer stitches, just make sure that there is an odd number of stitches)

Work in garter stitch (knit every row) for 5 rows.

Work in lattice pattern (as per The Purl Bee) until piece is 15″ (or as long as you like), end with lattice row 3.

Neck opening row 1 : k 15, BO 31, k 15

Neck opening row 2: work in pattern for first 15 stitches,  CO 31 (see The Purl Bee’s instruction for cable cast on), work in pattern for remaining 15 stitches.

Work in pattern until piece is 14″ from neck opening (or as long as you like, matching length of the the back minus the garter stitch rows).

Work in garter stitch for 5 rows, bind off.

With right sides together, sew sides together, leaving an opening of 7″ from top of shoulder to underarm (or length as you see fit).

And it’s done! :D

P1070142

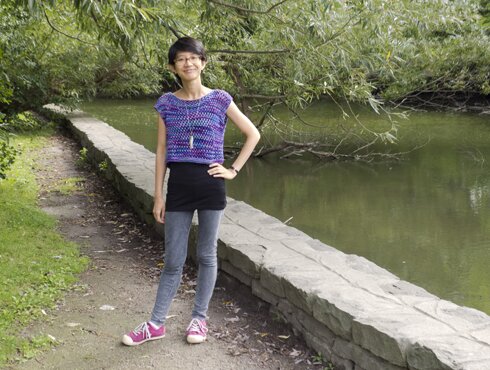
We happened to be at High Park on the weekend so I took some pictures of it by the duck pond :D

I have to say that the pooling was still happening with all the dark purple clumping together in large areas, so I ended up dividing the skein of yarn into two balls, and knitting two rows from each ball alternately, which definitely helped.


Wishing you a fantastic week!


Tweet about this on TwitterShare on FacebookPin on PinterestShare on TumblrPrint this page

public art

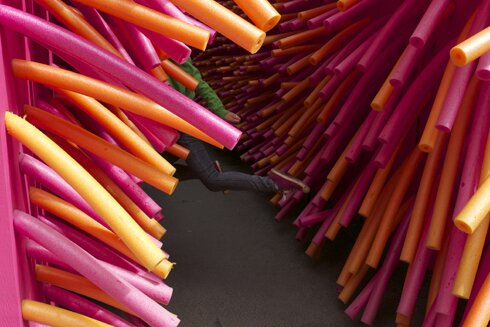
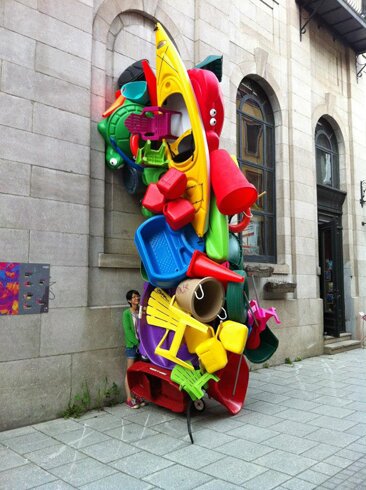
So, in my previous post about our Quebec trip I wrote that there was this amazing public art exhibition happening in old Quebec. It was called Les Passages Insolites (The Unusual Passages — you can read more about each piece and the artists on the exhibition site). And I thought, what’s a better way to appreciate public art than to be part of it? :D

This one I’m most proud of. Delirious Frites (Noodle Delirium).

delirious frites


Attempted to fit into the interlocked pile of stuff. Also, perfect for a game of eye-spy. Stock en Transit (Stock in Transit).

stock en transit

Not intentional, but wearing brightly coloured shoes and cardigan certainly helps me blend in to these particular installations.

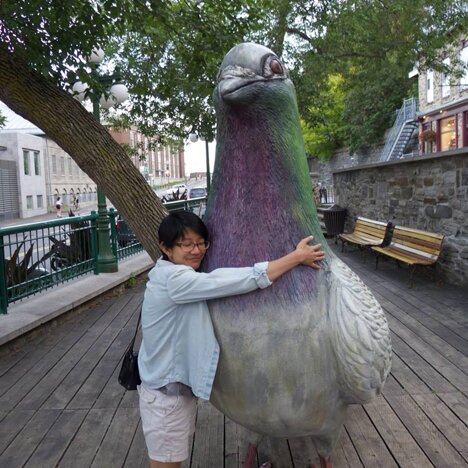
This one was especially delightful :D L’Odyseé (The Odyssey).

l'odyssee

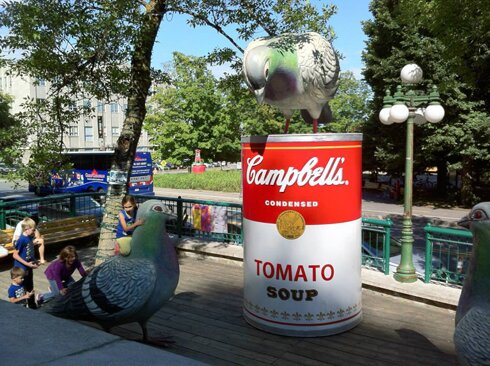
The installation also includes two other pigeons and a Campbell soup can. Here’s the full view of it :D

10629736_10154542737010228_9121230563092853048_n


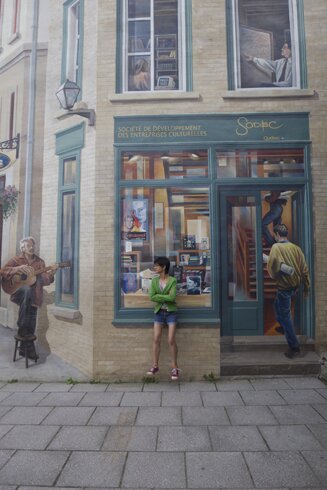
This one isn’t part of the exhibition, but equally fun. The Mural of Qubecers commemorates the histories of lower town.

the mural of quebecers


So here we find ourselves at the end of summer, but more exciting things are afoot! Possibly a crochet-along… stay tuned if you enjoy crafting together :D

Have a wonderful Thursday!


Tweet about this on TwitterShare on FacebookPin on PinterestShare on TumblrPrint this page

yarn blessings

Photo 2014-09-01, 12 08 29 PM

This came to me a while ago and I meant to write about this earlier, but was going through some stuff (more below) and then went on a trip

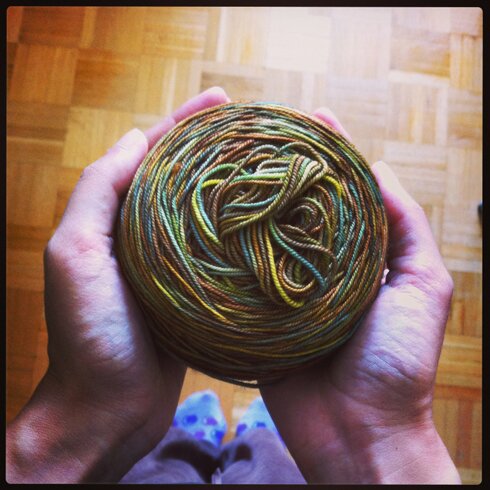
I got yarn in the mail! From my friend Amy :D She has so kindly asked me to try out her pattern and sent me this gorgeous yarn. I absolutely love the forest tones in it, with the yellows and greens and blue. What a treasure. I love working with variegated yarn and seeing how all the different colours blend differently in each stitch. Cannot wait to start making the cowl!

What cowl, you ask? The Love-Me-Knot Cowl!

The love knot (or Solomon’s knot as it is also called) is one of my favourite crochet stitches. Here’s a handy tutorial if you hadn’t used it before. I find it very meditative, and makes a delicate fabric with a nice drape. It also makes very quick projects because of the height of the stitches, perfect for last-minute presents (or, if you’re like me, you might be making Christmas presents already). And cowls are especially great because they’re stylish when worn indoors and they don’t have long ends that get caught in coat zippers while wearing outdoors. It is generously shared by Amy to download for free on Ravelry :D

But this particular skein of yarn is more than just yarn. It actually arrived at a time when I was very much not myself. I had just finished my final semester, feeling lost, purposeless and more than a little afraid after being in school on and off (more on than off) for 10 years, which resulted in four degrees but little job experience. Sent out dozens of job applications and heard nothing in return. And then there was administrative mix-up at school that could quite possibly jeopardize my graduation. My future was looking rather bleak.

And then this yarn came in the mail, with a lovely hand drawn note, and generosity and kindness that expects nothing in return. It reminded me of what I want to be for others and why I took the (long) path to be where I am today, and brought back some sense of purpose. I’m therefore truly blessed by this yarn, and most importantly Amy’s friendship.

(And since then the administrative mix-up has been fixed and I WILL graduate! But I digress…)

Do give Amy’s pattern a try! And for the beginning of fall I would like to pass on an Irish blessing that one of my favourite teachers shared with me:

May the road rise up to meet you.
May the wind always be at your back.

Happy September! May you find joy and new learning in all that you do.


Tweet about this on TwitterShare on FacebookPin on PinterestShare on TumblrPrint this page

greetings from quebec!

As mentioned in my previous post, Mike and I took a short trip to Quebec City a couple of weeks ago. We thought it would be a relaxing trip with fewer things to do than our trip to Chicago last year, but it turned out being quite a busy trip with lots and lots and lots to see!

But it was still relaxing, because we were being tourists and doing fun things, and things seem to move a little slower in Quebec than they are in Toronto. Cars share narrow roads with horse-drawn carriages and indecisive/lost tourists but I never heard anyone honk. And Old Quebec, where we stayed, is a truly beautiful place. It’s impossible to share everything from our 5 fun-packed days, but here are some things that are particularly memorable to me, and great places and wonderful local businesses to visit if you ever consider your taking a trip there :D

The Morrin Centre was one of the first places we wandered in. It’s a library that used to be the only Anglophone university. Look at all the books!

morrin 3

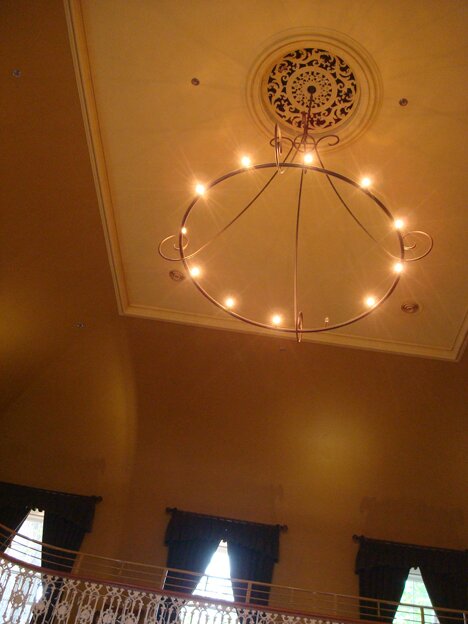
I especially love its elegant light fixtures.

morrin 2


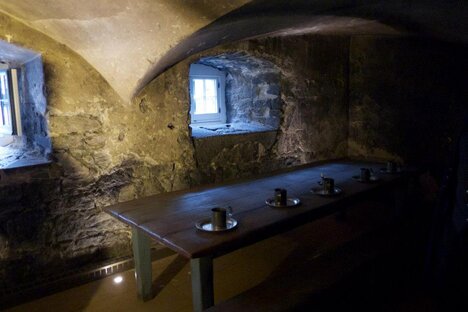
But the basement reveals the building’s former self — a jail! We were able to see it with the guided tour, and the friendly guide has many interesting historical anecdotes and stories to tell. Highly recommend a visit!

morrin

On the same day we visited the Artillery Park, the military quarter that is part of the fortification of Quebec. Note the similar deep windows made by super thick walls.

artillery park


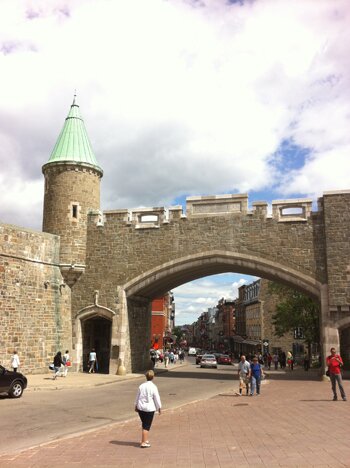
One of the gates into Old Quebec.

port st jean

Switching gears, one day we took the bus to Montmorency Falls. Just 30 minutes away from Old Quebec, on one bus :D (I try to avoid bus transfers even in Toronto :S)

View from the suspension bridge across the falls.

montmorency falls

We took the very long staircase on the right down to the bottom of the falls and back up again. It wasn’t exactly fun, but the cable car was over $10 per person per ride… so, the stairs.

montmorency falls 2

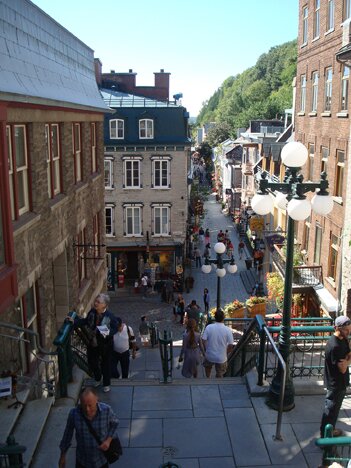
Back in Old Quebec, we visited Quartier Petit Champlain, the lower part of the city. Note the stairs, again. We realized that Quebec is quite a hilly province and there is a lot of stairs climbing involved to get around by foot. These stairs are appropriately called the “Breakneck Steps”, but they’re actually not that bad, compared to the stairs at the falls.

petit champlain

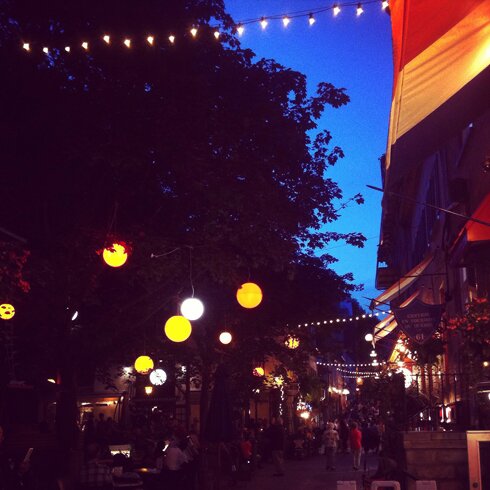
But a trip there at night is totally worth the sore calves!

petit champlain 2

My best attempt at photographing the night scene doesn’t capture the magic that was in the air. There was accordion playing and the warm glow of the lanterns in the trees. I could stay in that moment forever.

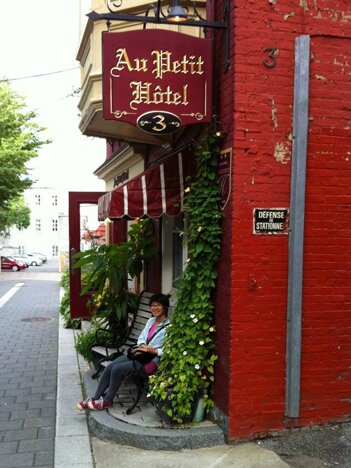
Over the week we stayed at a very quaint hotel, perfectly located near everything from historic cites to touristy shops in Old Quebec AND on a side street so it’s much quieter than the hotels on the main roads.

au petit hotel

And it was very affordable, very clean, run by very friendly and helpful staff. It even has breakfast service for a few dollars extra per night :D It’s a gem. We enthusiastically recommend it if you are visiting Old Quebec!

petit dejeuner


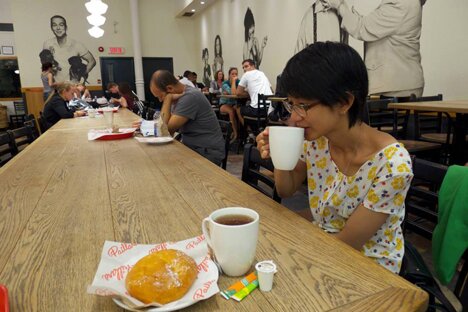
Also enjoyed very much the Paillard bakery. Surprisingly affordable (where else can you find $1 a cup of tea, not just in touristy Old Quebec but anywhere?), very good quality tea and treats. Especially love its communal long tables.

paillard


We had planned on only exploring in Old Quebec because 1. we were on foot, and 2. we are the kind of tourists who prefer spending time to know more about one place than quick visits to lots of places. But we ended up taking a side trip to Lévis, a small city that is just a 10-minute ferry ride from Old Quebec across the St. Lawrence River.

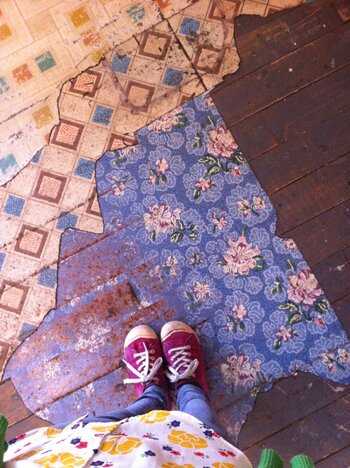
There we visited the old ship repairing yard and house of A. C. Davie. The top level of the house is kept the way it was in the 1950s. The lower levels of the house have already been renovated as offices and museum space. I suppose some demolition work has already started when the last occupants left, so there are floors with layers of laminate peeled back to reveal the different floorings over the years.

AC Davie 2

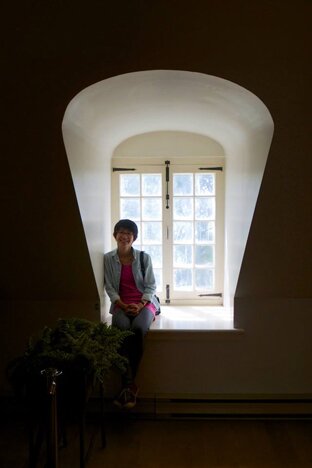
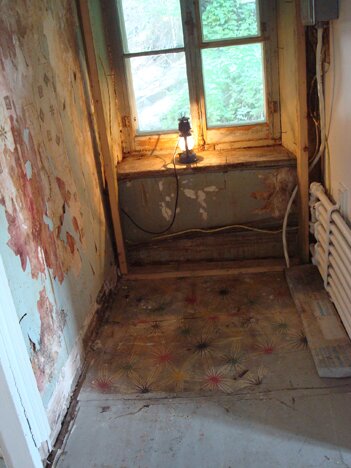
I like windows in nooks.

DSC03641

AC Davie

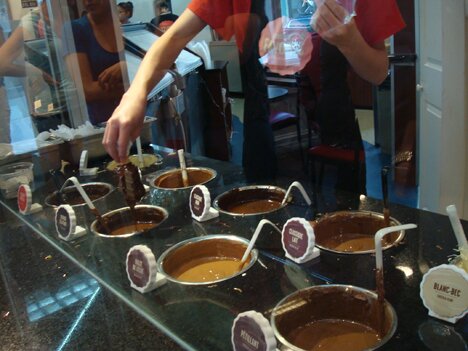
If one is looking to buy souvenirs,  Lévis is actually a much better place than Old Quebec, I think, with shops run by local artists and artisans, and definitely fewer crowds. Unless you find yourself in Chocolats Favoris in the middle of August. But a little crowdedness and a few minutes of line-up is nothing compared to 4 different flavours of soft ice cream and an astonishing 12 flavours of sauces to dip the ice cream in. Here’s dipping in action!

chocolats favoris


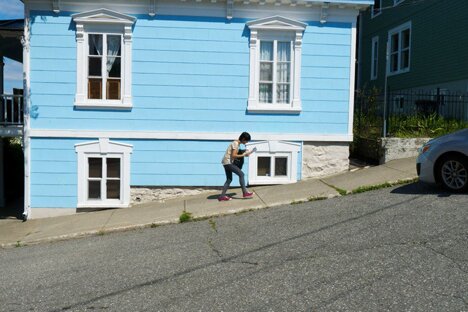
And finally, a photo that sums up our trip: uphill climbing and looking at maps.

levis


While we were in Quebec there also happens to be an exhibition of public art installations called The Unusual Passages. But that deserves its own post — stay tuned! :D

Hope you were able to relax and re-energize over August too. Wishing you a great start to September!


Tweet about this on TwitterShare on FacebookPin on PinterestShare on TumblrPrint this page

aviation

Photo 2014-08-29, 1 14 34 PM

So named because it reminds me of my friend’s flight attendant uniform :D

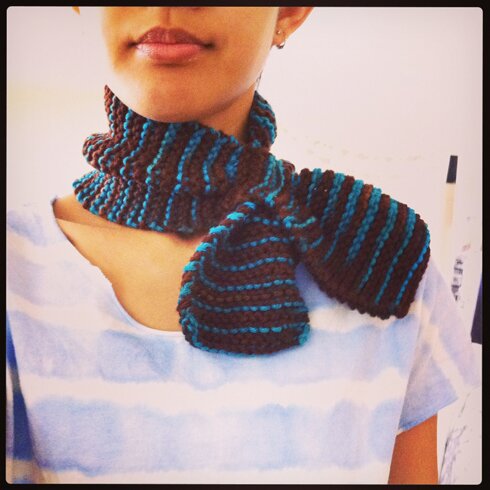
Knitting an ascot neck scarf. I really like them because my mom used to make them for me when I was a child. I still have a tiny red one from my toddler years, my plush llama is now wearing it. I was using this fantastic pattern by Theresa Belville on Ravelry, but then I have this self-striping kind of yarn, which I thought works better with blunt ends rather than petal-shaped ends, so I made some modifications, and they are recorded below, in case I want to make another one (or ten!), or you, too, want to make a blunt-end ascot neck scarf inspired by flight attendant uniform :)

My modifications are made so that the scarf is a bit snug around the neck, but wide enough so it keeps the neck warm. Its length and width can be easily adjusted though.

Again, this is not my original pattern, it is adapted from this pattern. In fact I would have never been able to figure out how to split the piece into two to make the keyhole part if I didn’t practice with the original pattern first.

I used: 5.5mm needles (you’ll need 3), worsted weight yarn.

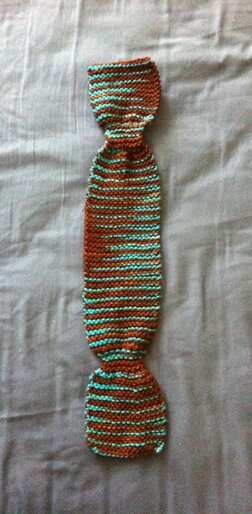
Finished scarf is about 4.5″ wide and 15″ long.

CO 17

Knit every row until piece is 4″ long.
(you can probably make it a tad longer if you want, especially if you’re making the scarf less snug around the neck, I think it would look better if the ends are a bit longer in that case)

Decrease row: k1, then k2tog to end.

Knit every row for 7 rows.

Increase row: k1, then kfb (knit into the front and back) in every stitch to end.

Knit every row until middle section (starting from the increase row) is 12″.
(again, I wanted my scarf to be snug around the neck, as inspired by the flight attendant uniform, and I’ve been told I have a small neck, so it’s probably best to wrap it around your neck as you go, or, the original pattern suggests 16–18″ for adult scarves)

Split row: (here’s where the 3rd needle comes in handy) *k1, slip knit-wise on spare needle* repeat from * to * till end.

Knit 10 rows on stitches on original needle, cut yarn and tie off end.

Attach yarn to first stitch on 3rd needle, knit 10 rows.

Join row: *knit first stitch on original needle, then knit 1 stitch on 3rd needle* repeat from * to * till end.

Knit every row until last section of scarf (starting from the join row) is 4″ long. Bind off, weave in ends.

It’s a very quick project. I like how the blue stripes fade in and out in this particular yarn, though I don’t remember where it’s from, and its label is missing.

Photo 2014-08-29, 1 26 15 PM


Now put it on and take flight! :D

Have a wonderful weekend, everyone!


Tweet about this on TwitterShare on FacebookPin on PinterestShare on TumblrPrint this page

going away outfit

So, when we were planning our wedding 7 years ago I learned of this term, “going away outfit”. It’s supposed to be the outfit that the bride changes into when the couple leaves the reception to go on their honeymoon (at least that’s what I heard).

I never had any dress change during my wedding, let alone a going away outfit. But summer trips are also great opportunities to make new clothes! Last year I made a new shirt for our trip to Chicago.

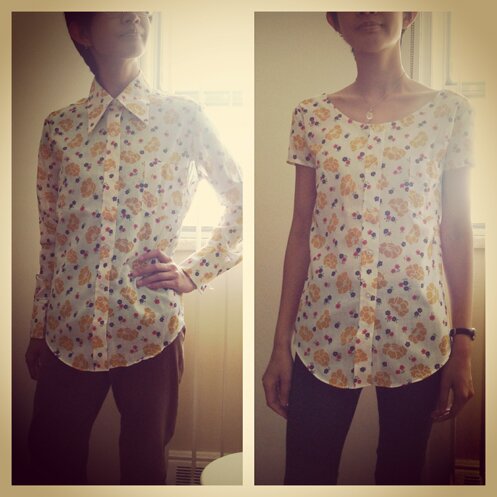
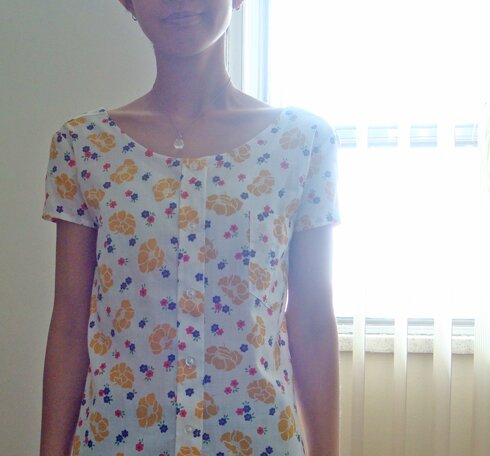
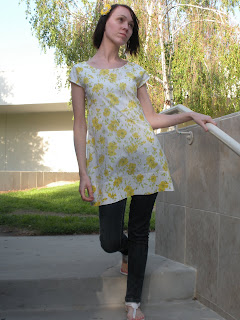
And so this year I thought I’d make a new shirt too. Brings new meaning to the idea of a “going away outfit”. The new shirt is made from a thrifted shirt from Black Market. There was this whole lot of them and they looked brand new. Overstock that’s been sitting in some basement for years, I guess? They all featured exaggerated pointy collar. I think it’s a lovely shirt, the pointy collar is quirky, my friend bought the same shirt and she looks super fabulous in it. It just… didn’t look like something I would wear. But I LOVE the print.

So I removed the collar, cut the sleeves short, took in the sides a bit, and hemmed the neck and sleeve edges. Better, isn’t it?

black market

I’m even able to preserve the pocket! And I love its length. Here’s a closer look at the lovely print.

black market 2

But next time I’ve really got to measure. I cut away too much fabric around the sleeves and it almost didn’t fit, had to reduce the seam allowance to 1/4″ (>_<) I’ve really got to measure from now on…

These shirts were 5 bucks each! Maybe I should get a couple more with different prints…

SO! Where are we going, you ask? Quebec! Haven’t been there since my family took a bus tour there when I was a kid. Can’t wait to see it again with new eyes. Will be posting pictures when we’re back, of course!

Wishing you a fabulous week with fun and inspiring adventures, wherever you are :)


Tweet about this on TwitterShare on FacebookPin on PinterestShare on TumblrPrint this page

tiny owl’s big trip!

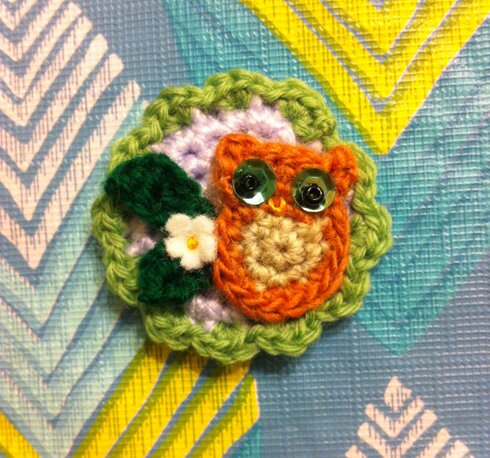
Since I’ve got news that tiny owl has made it safely to its destination, I can show you a picture…

tiny owl

The tiny owl pin is made for a dear friend who lives on the other side of the continent :D Like the amanita brooch, it’s inspired by this button pattern, following the pattern for its base and edging and making up my own owl and leaves. It’s about 1.5 inches across. Very tiny. And I’m quite proud of him! In fact, he’s inspired other animal pin designs that I’ve been working on for the past week, will have to show you those soon :)

I know that tiny owl will enjoy the west coast and my friend’s company very much :D and I hope to visit the west coast one day too!

Have an awesome weekend, everyone!


Tweet about this on TwitterShare on FacebookPin on PinterestShare on TumblrPrint this page

this week’s awesome finds

Weaving is so much fun. Woven necklace from Say Yes.

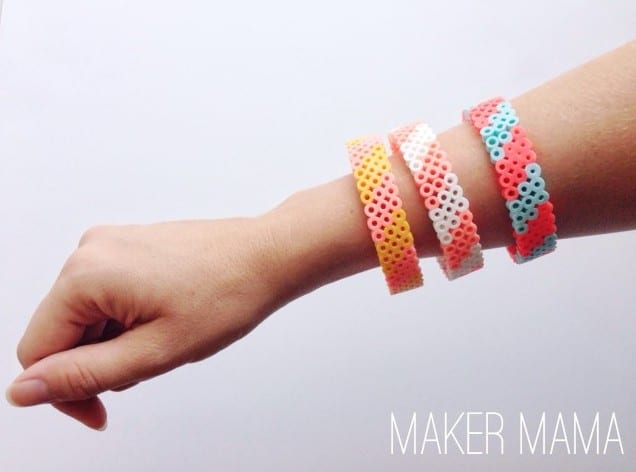
These are stylish. Perler bead bangles, from DIY Candy.

On the to-make list. Crochet tunic from Lion Brand Yarn.

Also from Lion Brand Yarn, perfect crochet piece for fall.

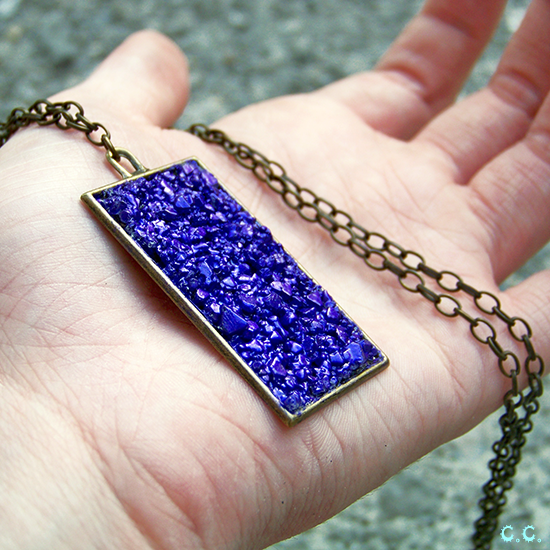
Grow your own crystal necklace — how neat is this? Now I just have to figure out where to buy alum salt… From The Cwafty Blog.

This requires a proper pom pom maker, but it will be worth it. Mushroom pom pom from Small Good Things.

Love the Nyan Cat scarf patterns but thought it would be a bit much to actually wear them… but a bookmark! Everyone can use a bookmark. From Cute & Kaboodle.

The Purl Bee always has boxy blouse patterns that I love.

Love that this is made of stars. Crochet Cowl from Moogly.

Made from a pillowcase! From Lil’ Bit & Nan.

Happy Wednesday!

Tweet about this on TwitterShare on FacebookPin on PinterestShare on TumblrPrint this page

all in a day’s work

We had a very busy Saturday a week ago, but all fun! It was a family friend’s wedding, and so I made an update to this dress I made a couple of years ago with this crochet collar pattern. Was having far too much fun and forgot to take a proper picture of it, good thing there was this fun photo booth at the wedding! This picture captured a pretty good look at the collar, and us with classy glasses.
collar

Can’t see it well in the picture, but I sewed a pearly button in the centre.

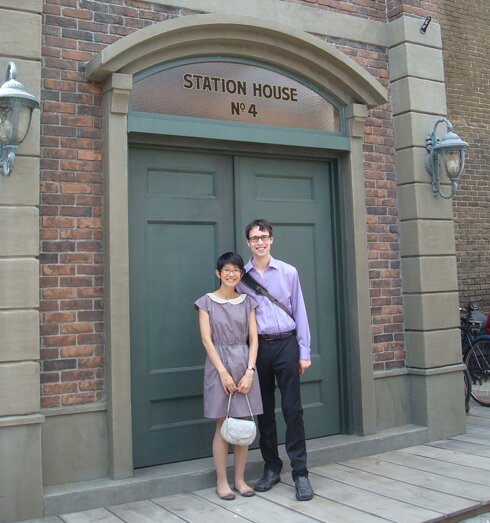
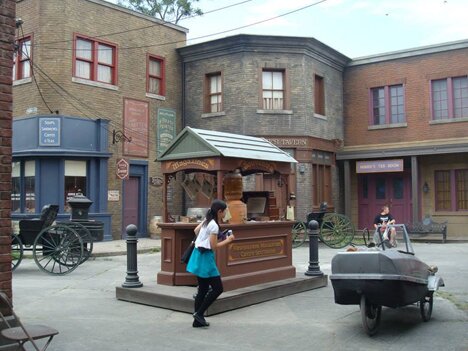
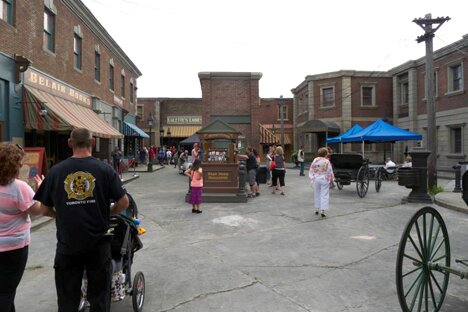
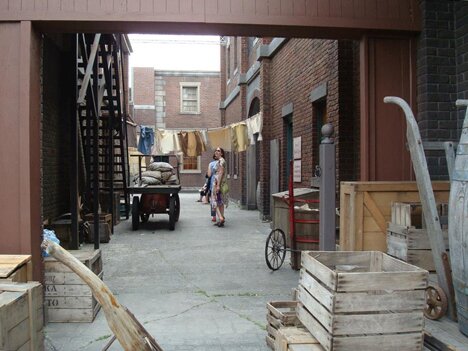
AND! In between ceremony and reception we got to go to the Murdoch Mysteries first ever studio open house!!! It’s an excellent crime mystery show set in turn-of-the-century Toronto, you can watch some of its videos here :D My sister, Mike and I have been fans of the show since its early seasons, so it was a super exciting occasion. And we were already dressed up for the wedding, perfect for picture-taking :D

Here’s a better look at the dress, in front of station house #4, where Detective Murdoch and his awesome colleagues work.

collar 2

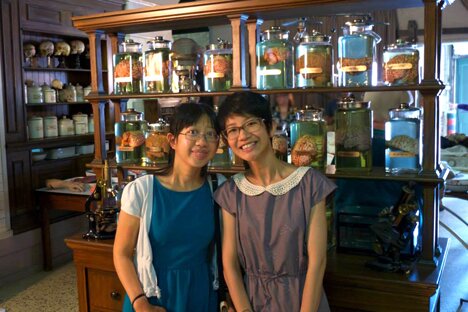
Here we are in the city morgue, putting our brains together, with other brains.

murdoch 3

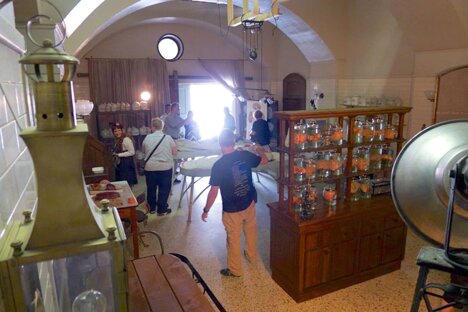
Another look at the morgue…

murdoch 4

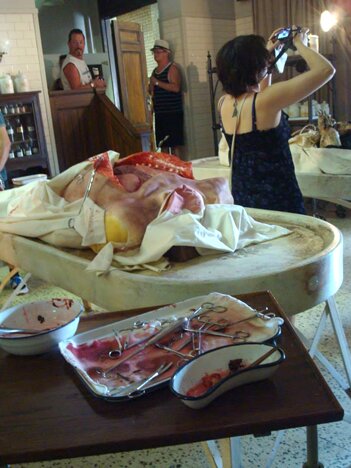
Gruesome props…

murdoch 2

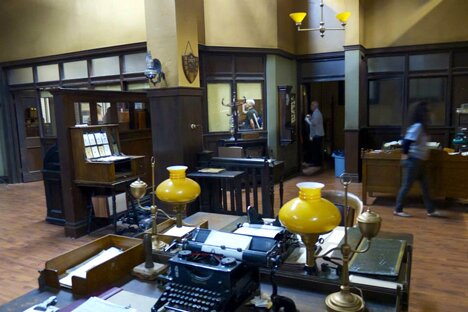
Next, we toured the station house…

murdoch 1

And got an official fancy-hat portrait taken at Detective Murdoch’s desk :D art-directed by the husband of Maureen Jennings, author of Murdoch Mysteries the book series.

murdoch 5

More scenes on the meticulously crafted set, including the electric car, invention of one of the characters in the show.

murdoch 8


murdoch 7

murdoch 6


Solving mysteries! Refashioning dress! Goofing around at wedding! All in a day’s work :D

Wishing you a joy-filled week!


Tweet about this on TwitterShare on FacebookPin on PinterestShare on TumblrPrint this page