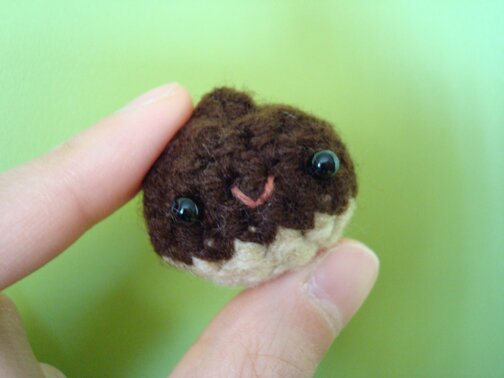
Pattern for a chestnut! Pretty simple and straightforward. I suppose the finished size is about the same size as a typical chestnut. I jotted down this pattern while I was making it, and I’m new to this pattern-writing thing, so I apologize for mistakes if there is any, and please let me know if you spot them. Your feedback/comments are much appreciated!
So, anyways…
To make a chestnut you’ll need:
- Worsted weight yarn in tan and brown (I used Red Heart Super Saver)
- 2 beady eyes (I used 4mm)
- Pink embroidery floss
- 3.5 mm crochet hook
- Tapestry needle, sewing needle
- Stuffing
Note: the chestnut pictured is turned inside out, i.e. wrong side is facing out, because I liked the shape of the wrong side better than the right for the chestnut. It’s different for different yarn and different amigurumi, I think.
Pattern:
Row 1: with tan, ch 3, 4 sc in 3rd st from hook, sl st in top of beginning ch
Row 2: ch 2, sc in same sc, 2 sc in next sc, sc in next sc, 2 sc in each of next two sc, sc in next sc, sl st in top of beginning ch 2.
Row 3: ch 2, sc in same sc, 2 sc in next sc, 1 sc in each of next 3 sc, 2 sc in each of next 2 sc, 1 sc in each of next 3 sc, insert hook in top of beginning ch 2, drop tan yarn and pick up brown yarn, yo and pull through loop to complete sl st. Fasten off tan yarn.
Row 4 — 5: ch 2, 1 sc in each sc around, sl st in top of beginning ch 2.
Row 6: ch 2, 2 sc tog 3 times, 1 sc in each of next 2 sc, 2 sc tog 3 times, 1 sc in each of next 2 sc, sl st in beginning ch 2.
Stuff chestnut. You might also want to sew on the eyes and mouth at this point (before stuffing it), but I prefer deciding the placement for eyes and mouth after the amigurumi is stuffed and shaped. I usually make magnets or pin, so I hide the thread ends at the back where I would attach magnets or pin.
Row 7: ch 2, 4 sc tog twice, 2 sc tog over last sc and top of beginning ch 2. Fasten off, weave in end.
Sew on eyes and mouth if you haven’t already.
And there you have it, a chestnut! I made mine into a fridge magnet by attaching magnets to the back…
… and it makes sure I don’t lose the recipes I’d like to try but haven’t gotten around to make (like this pancake cake I picked up at Ikea!)…
I used those very strong magnets that look like watch batteries, and by putting an extra magnet behind the fabric I can wear it as a pin! Here it is “pinned” on my shower curtain…
Oooh, or it can be made into a key chain or cellphone charm… strung together with crocheted fall leaves perhaps? Here’s a lovely free pattern of fall leaves on CraftStylish)
Or it might just sit on your desk and smile at you while you work…
Anyways, happy crocheting!


I WANT ONE!