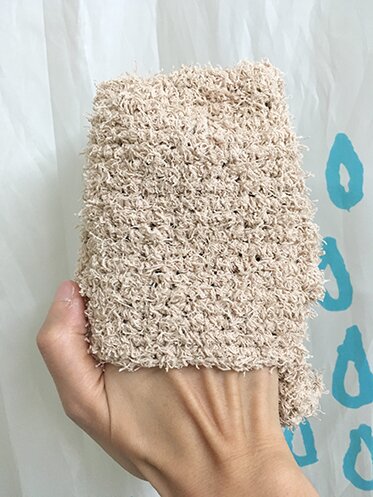
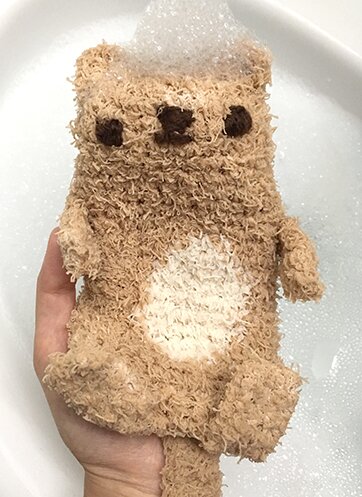
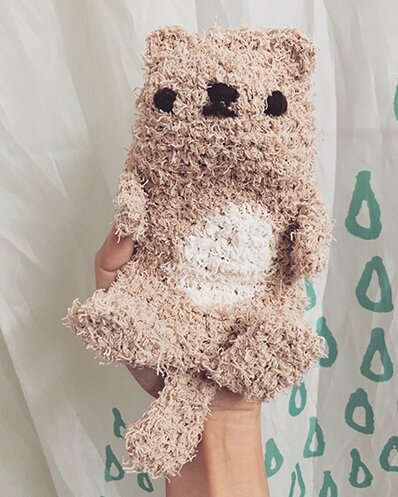
make a bath otter!

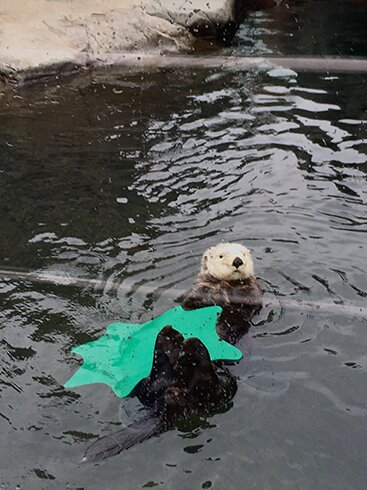
When we went to Van­cou­ver a cou­ple of months ago one of the most mem­o­rable things was see­ing the adorable sea otters.

*heart eyes x1000*

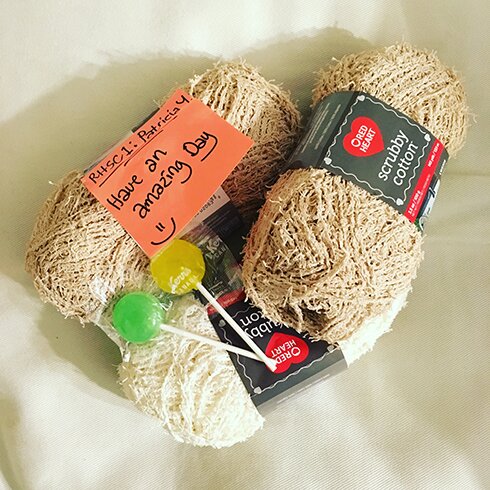
So when the nice folks at Yarn Cana­da sent me some Red Heart Scrub­by Cot­ton to try out and write a blog post about (they even sent can­dy and a nice note, aren’t they awe­some?), I knew exact­ly what to make :)

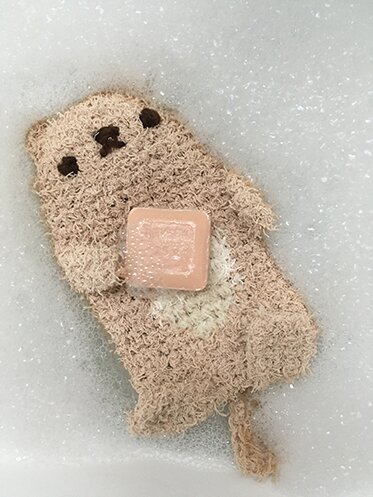
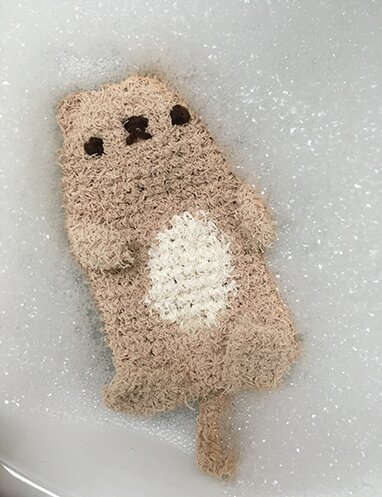
A bath otter, float­ing on its back, hold­ing your soap! XD

Actu­al­ly, our test shows that the otter sinks after the hold­ing the soap for a while… but still, it’s fun to see it float­ing on its back.

It makes a great bath toy, and a soap saver. If you have a tiny bit of soap left just stick it in it’s back pock­et and scrub away :D

This cot­ton yarn is super absorbent and soft­er than reg­u­lar poly­ester scrub­by yarn, so it makes a great wash cloth. 


One skein of scrub­by makes 2 otters with plen­ty left­over for a knit wash cloth, which is quite eco­nom­i­cal for hol­i­day gift-making. 

If you make it with reg­u­lar wool or acrylic, the pat­tern would also make a cute hand pup­pet! :D

I used:

One skein each of Red Heart Scrub­by Cot­ton in tan and loofa

A bit of brown acrylic yarn for embroi­der­ing facial features

5.5 mm hook

Tapes­try needle

Note:

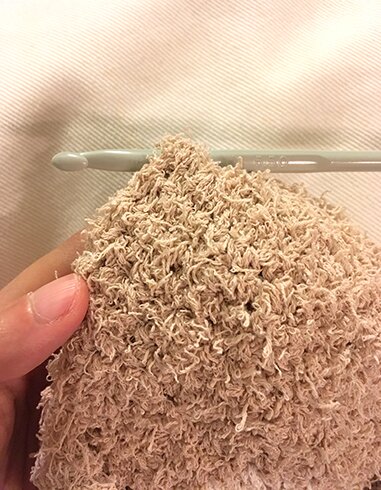
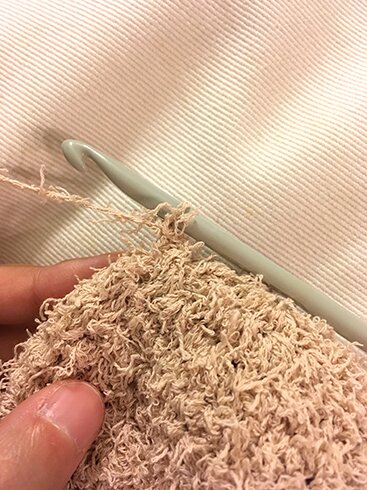
The otter is worked from top down in the round in the top part, then worked back and forth in the low­er part and seamed at the sides in order to cre­ate an open­ing in the back. Then arms and legs are cro­cheted sep­a­rate­ly and sewn on. Ears are cro­cheted direct­ly onto the head. The tex­ture of the yarn makes it a bit chal­leng­ing to see the stitch­es, and it is some­times a bit dif­fi­cult to undo stitch­es, but it’s great for blend­ing in yarn ends and sewn seams. This pat­tern is writ­ten with this in mind and the struc­ture is made as sim­ple as possible. 

This pat­tern requires know­ing how to do colour change in mid row. If you’re not famil­iar, please check out this handy tuto­r­i­al by Moo­gly :) 

Pat­tern:

Head & upper body:

Round 1: with tan, 10 sc in mag­ic ring, don’t join in the round.

Round 2: 2 sc in each sc (20 sc).

Round 3: [1 sc in next sc, 2 sc in next sc] around (30 sc).

Round 4: 1 sc in each sc around.

Repeat round 4 until piece is 3.5″ tall.

Mid-sec­tion area:

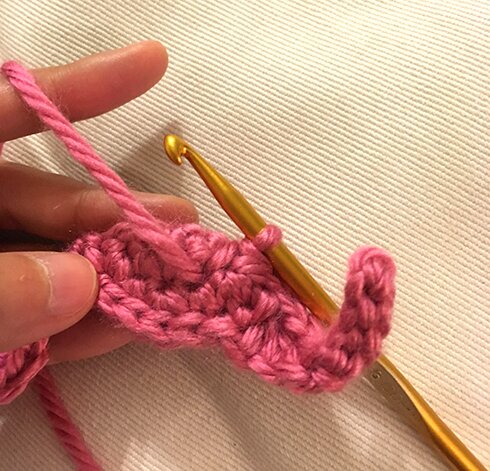
6 sc, attach loofa (white), 3 sc in white, switch back to tan.

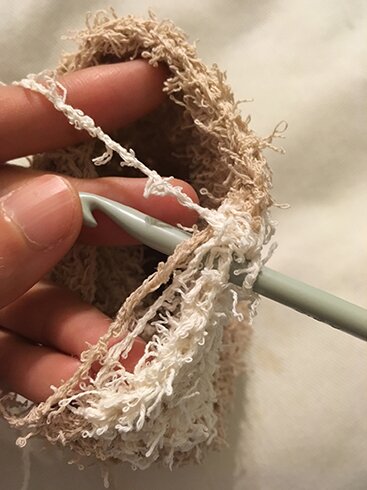
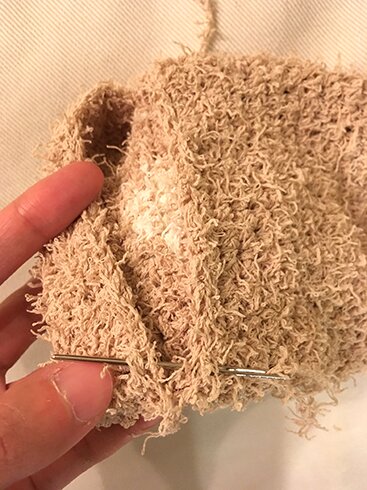
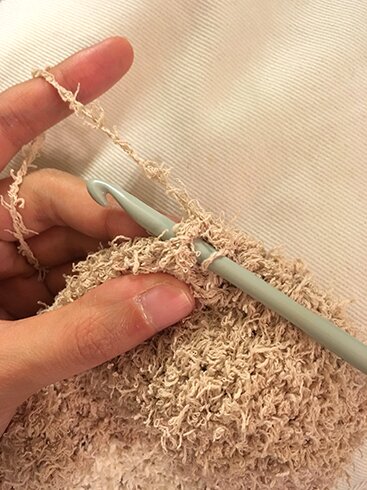
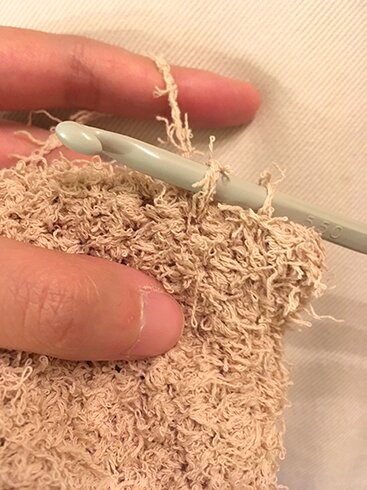
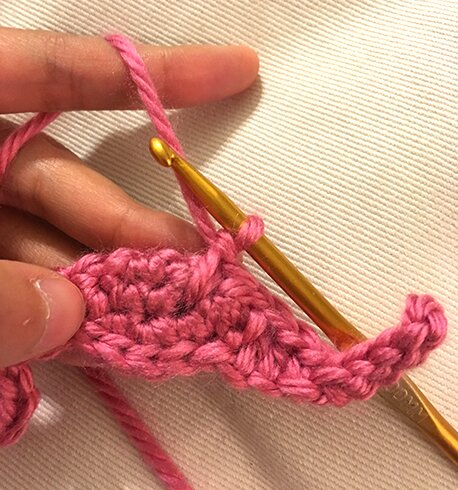
sc in each sc around using tan, until the sc before the first white stitch in the row below, switch to white, sc in the next 5 sc using white, wrap the white strand and the work­ing tan yarn in the stitch­es as you go, like so…

Switch back to tan and 1 sc in each sc using tan, until the stitch before the first white stitch in the row below, switch to white, sc in next 7 sc using white, switch back to tan.

Con­tin­ue cro­chet­ing in the round, using tan in tan stitch­es and white in white stitch­es until there are 4 more rows with white stitches.

Then, sc in each sc around using tan until the first white stitch in the row below, sc with tan in first white stitch, switch to white, sc with white in next 5 sc, switch back to tan.

sc in each sc around around using tan until first white stitch in the row below, sc with tan in the first white stitch, switch to white, sc with white in the next 3 sc, switch back to tan, fas­ten off white. sc in next 6 sc using tan, turn, leave remain­ing stitch­es unworked.

Low­er body:

Low­er body is worked back and forth in rows over 15 stitches.

Row 1: ch 1 (does not count as sc), sc in next 15 sc, turn.

Rows 2–8: repeat row 1, leave a long tail for sewing, fas­ten off.

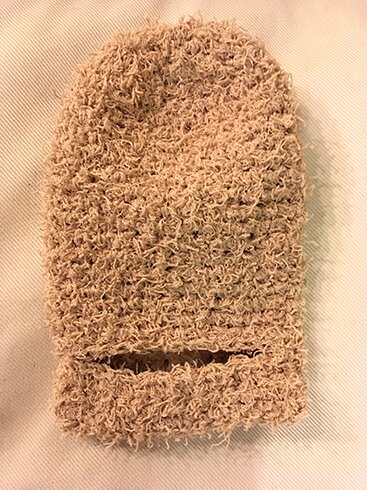
With right side fac­ing, fold low­er body piece up in half, sew side seams together.

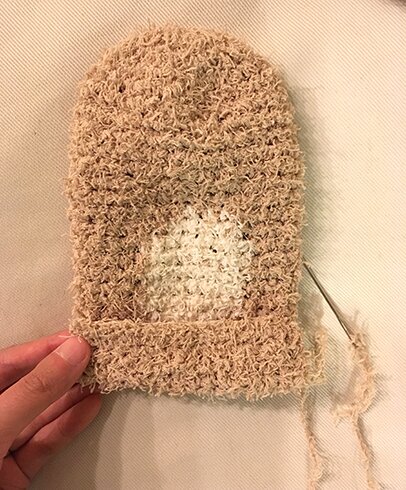
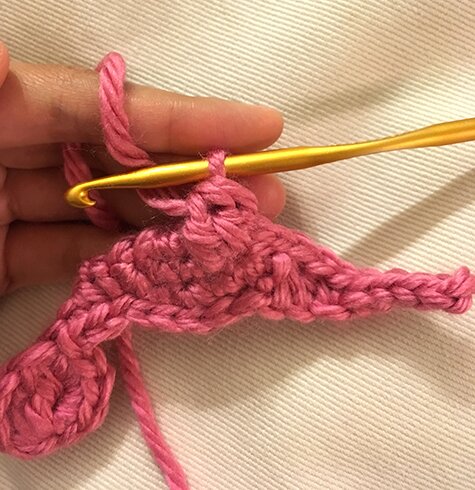
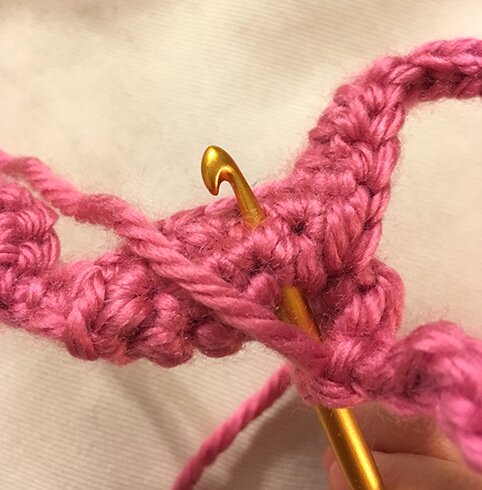
Turn low­er body piece right side out. At the back open­ing, sew togeth­er the top and bot­tom stitch­es clos­est to the seam on each side, like the pic­ture below. To sew the oth­er stitch­es clos­est to the oth­er seam, I did­n’t fas­ten off, I just wove the work­ing yarn through the top edge of the bot­tom part of the open­ing, and actu­al­ly cinched / gath­ered the stitch­es a bit to make the open­ing more sturdy.

Fas­ten off and weave in ends. The back would look like this…

Arms (make 2):

Row 1: Using tan, ch 6, sc in 2nd ch from hook, sc in next 4 ch, turn.

Row 2: ch 1 (does not count as sc), sc in next 5 sc, turn.

Rows 3–5: repeat row 2, leav­ing a long tail for sewing, fas­ten off.

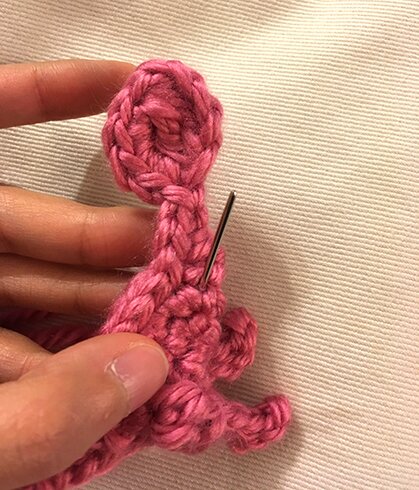
Fold arm in half so the first row meets the last row, using the yarn tail, sew along side and top of arm using whip stitch, then sew arm to body along the side, also using whip stitch.

Legs (make 2):

Row 1: Using tan, ch 6, sc in 2nd ch from hook, sc in next 4 ch, turn.

Row 2: ch 1 (does not count as sc), sc in next 5 sc, turn.

Rows 3–7: repeat row 2, leav­ing a long tail for sewing, fas­ten off.

Fold leg in half so the first row meets the last row, using the yarn tail, sew along side and top of arm using whip stitch, then sew arm to body along the bot­tom of body, also using whip stitch.

Tail:

Row 1: ch 12, hdc in 3rd ch from hook, hdc in next 2 ch, sc to end of row, turn.

Row 2: ch 1 (does not count as sc), sc in each sc, hdc in each hdc, turn.

Row 3: ch 2 (counts as hdc), hdc in next 2 hdc, sc in each sc, leav­ing a tail for sewing, fas­ten off.

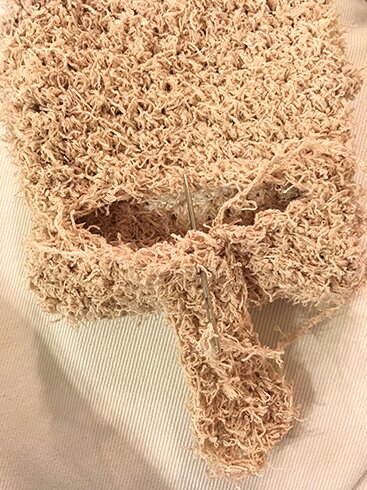
Sew tail to edge of bot­tom park of open­ing on back using whip stitch, like so.

Ears:

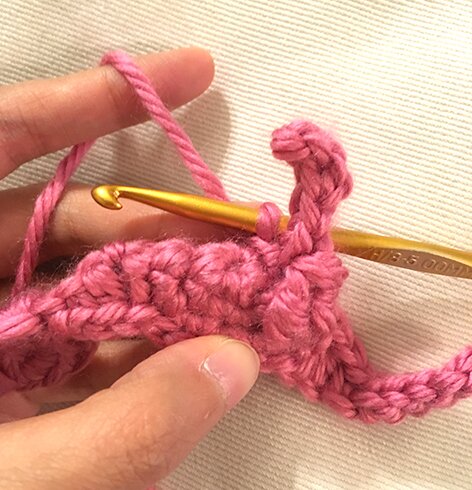
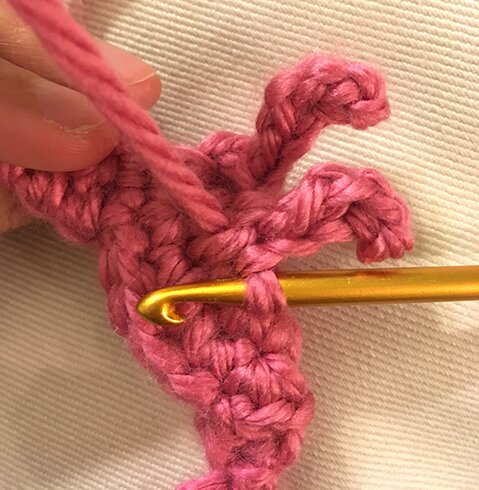
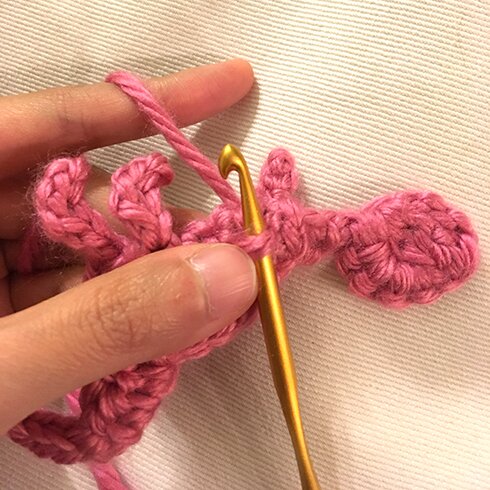
Insert hook through a stitch on the side of the head.

Pull up a loop of yarn and secure yarn.

Insert hook in a stitch to the left.

Pull up a loop, then yo and pull through both loops on hook, thus mak­ing an sc. Make 4 more sc in the same stitch, then sl st in a stitch to the left in head.

Repeat for the oth­er ear on the oth­er side of head.

Embroi­der eyes, nose and mouth with acrylic yarn. Fas­ten off and weave in ends.

Ta-da!

As usu­al, let me know if you have any ques­tions about the pattern! 

Spe­cial thanks to the nice peo­ple at Yarn Cana­da for think­ing of me and send­ing the yarn :) Please do check out their web­site if you live in Cana­da, free ship­ping for orders over $45, or flat rate of $5!

Hap­py crafting!
 

this week’s awesome finds

Time to start the Christ­mas elf­ing (i.e. gift-mak­ing)! :D

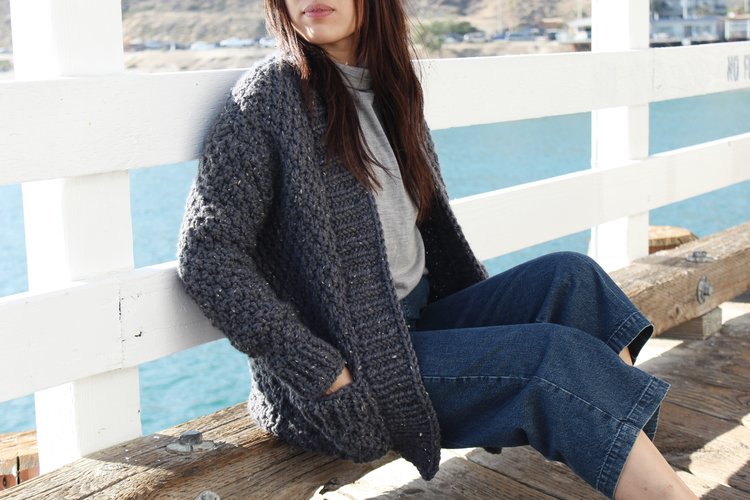
With the bulky yarn and large nee­dles there’s a good chance that it can be done by Christ­mas. Moss stitch is my favourite, and it has pock­ets. Pat­tern by Two of Wands.


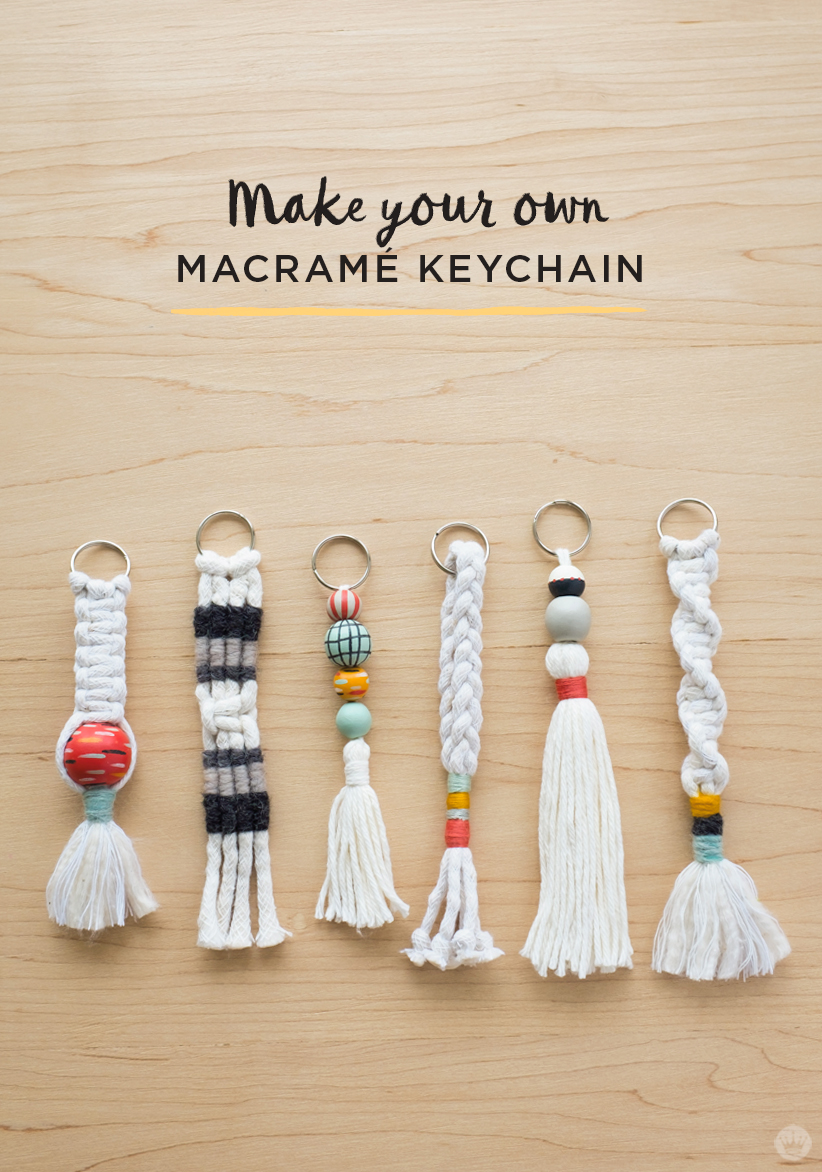
Very prac­ti­cal and very cute. From Think Make Share.


Very sweet cro­chet cable bracelets, great alter­na­tive to leather ones. From Let’s Yarni­fy! (scroll down for English!)


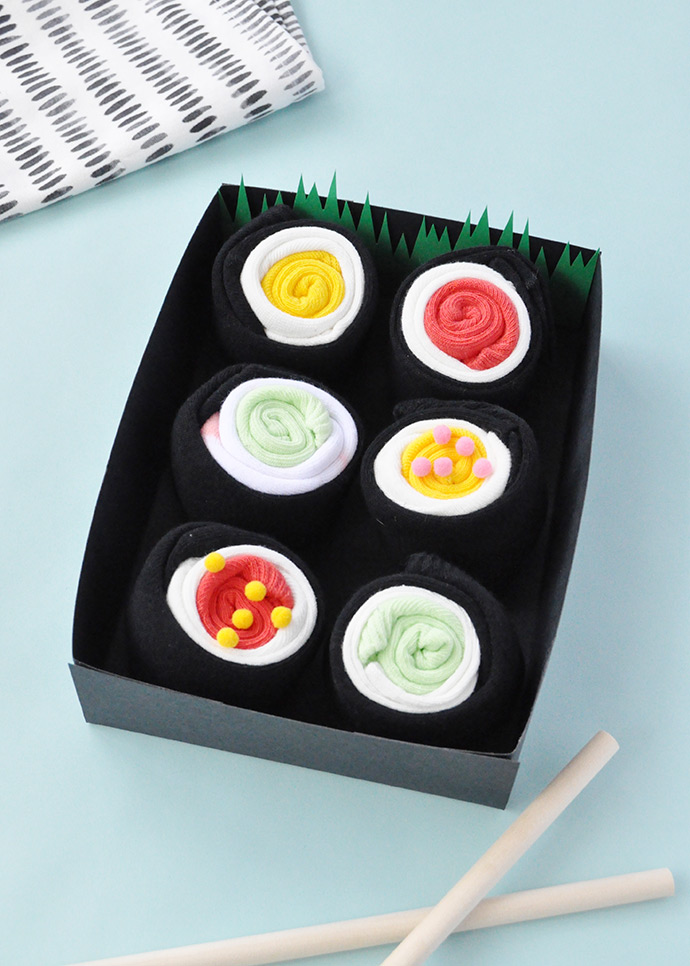
For those who have every­thing — who would­n’t need more spare pairs of socks? From Hand­made Char­lotte. (If you’re look­ing for dessert after those sushi, check out my cup­cake socks tuto­r­i­al! :D)


Also a quick knit and very styl­ish. From Mol­lie Makes.


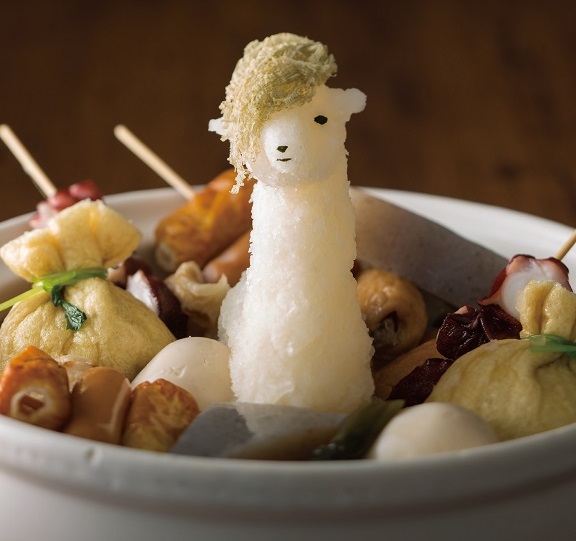
And final­ly, not a gift that I would have the skills to make but heart­warm­ing nonethe­less — daikon ani­mals in soup! :D

I love this daikon lla­ma. Hope it brings a smile to your face :)

Have a love­ly week­end, everyone!


ode to drumheller: albertosaurus!

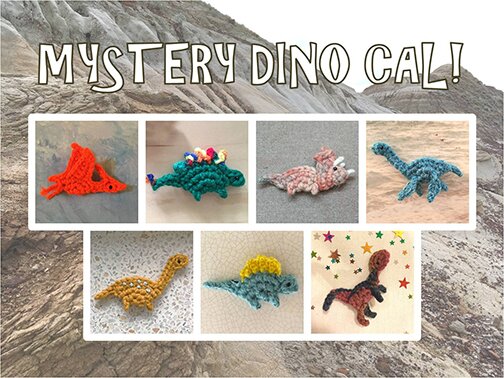
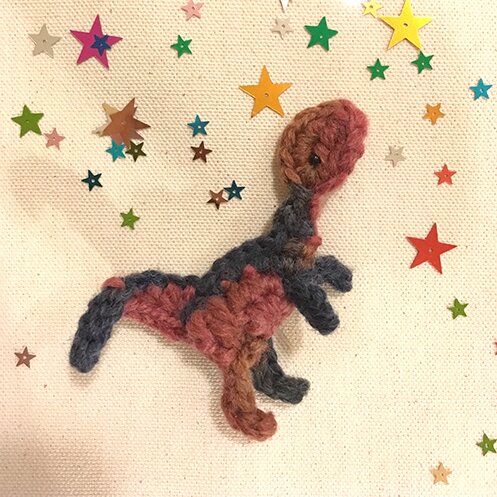
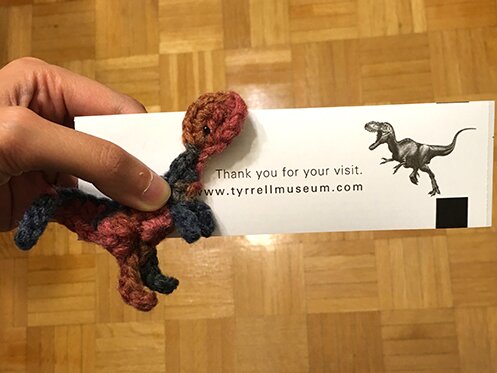
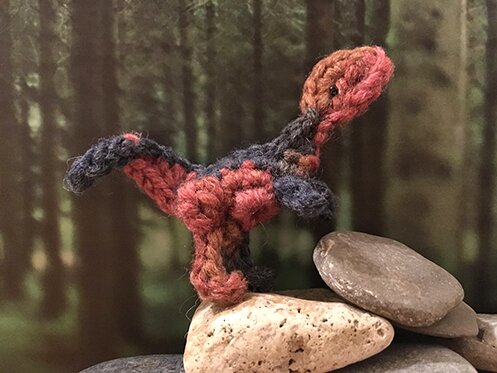
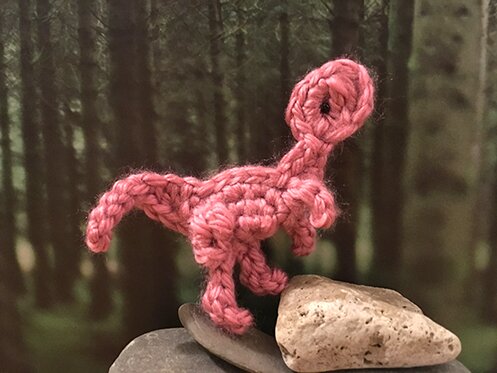
*Drum roll* the final dinosaur to be unearthed is Alber­to the albertosaurus! 

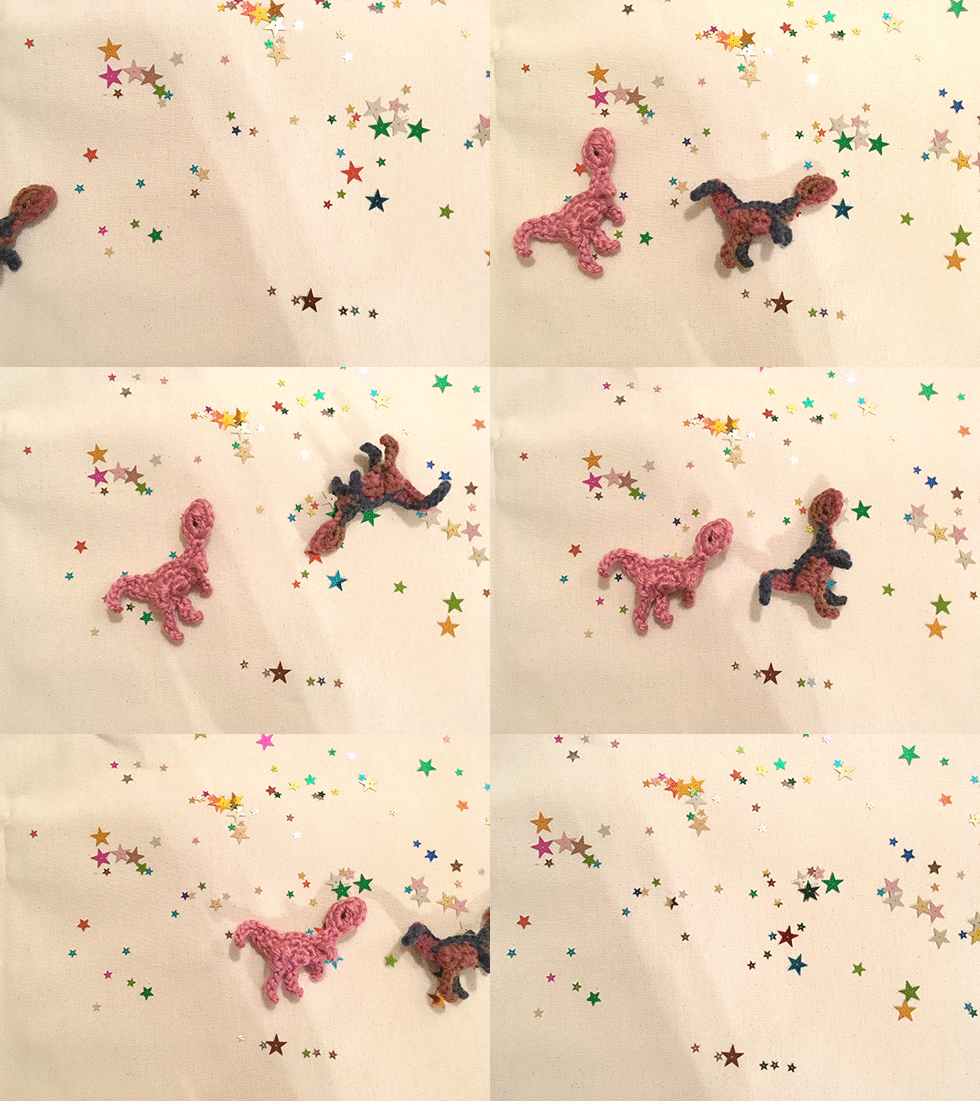
This calls for a dinosaur dance :D

The name Alber­tosaurus hon­ours Alber­ta, the Cana­di­an province in which the first fos­sils of this dinosaur was found the same year that the province was estab­lished, in 1905! (source) This whole series of mys­tery tiny dinosaurs is also inspired by our trip to Drumheller, Alber­ta, so I thought it’d be fit­ting to wrap up the series with the Albertosaurus.

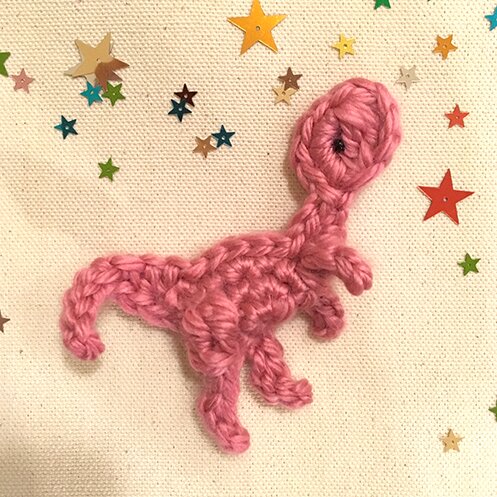
I made them with bulky yarn and 4 mm hook. I have this var­ie­gat­ed yarn that I thought would be per­fect, and then thought it would also look rad in bright pink :D

While the Alber­tosaurus looks very much like Tyran­nosaurus Rex, it is about half the size of T‑Rex. Nev­er­the­less, it was a fear­some dinosaur that hunt­ed in packs. (source)

Unlike oth­er dinosaurs in the series, which have the same fea­tures on both sides, Alber­to is a one-sided dinosaur, because of the way the legs are made, so it won’t look quite right on the back side, but it would make a nice brooch or ornament.

The design is based on the Alber­tosaurus on the back of the tick­et for Tyrrell Muse­um :D

This dinosaur is prob­a­bly the most com­pli­cat­ed of all in the series because of the legs. But there are lots of process pho­tos so I hope that helps! If you need any clar­i­fi­ca­tions please feel free to leave a comment!

You’ll need:

  • Small amount of Bulky weight yarn
  • 4 mm hook
  • Tapes­try needle
  • Black seed bead, black sewing thread and sewing needle

(You can also use worsted weight yarn and 3.5 mm hook for a small­er dinosaur)

Pat­tern:

The body begins as a circle.

Round 1: ch 2, 6 sc in 2nd sc from hook, don’t join in round.

Round 2: 2 sc in each sc around (12 sc around).

Round 3: [2 sc in next sc, sc in next sc] five times, 2 sc in next sc, sl st in next sc (17 sc and 1 sl st around).

Head/neck:

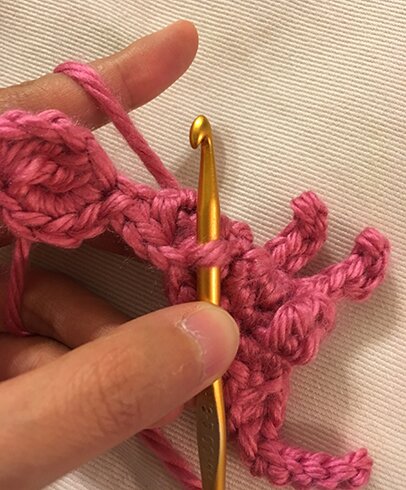
ch 7, [yo twice, pull up a loop] three times in 4th ch from hook, yo and pull through 4 loops on hook, yo and pull through the rest of the loops on hook (4 tr tog com­plet­ed), ch 1, 4 sc around last tr made, it will look like this…

sl st in next ch in neck, sc in next ch, hdc in next ch, hold body in half, sk next sc in body, sl st in next 6 sc in body/back of the dinosaur through both loops and both lay­ers of the body piece, don’t fas­ten off and con­tin­ue on to tail.

Tail: ch 8, sl st in 2nd ch from hook, sl st in next 2 ch, sc in next 2 ch, hdc in next ch, dc in next ch, sl st in a stitch at the tip of the fold­ed body piece, like so…

Don’t fas­ten off, con­tin­ue on to make legs.

Front leg:

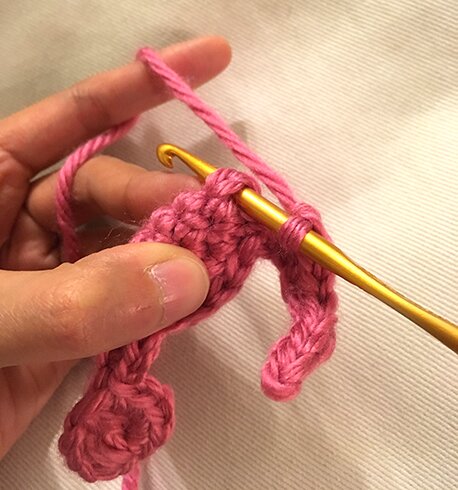
Hold­ing the dinosaur bel­ly side up, insert hook into a stitch in round 2 of body, next to where the last sl st was made, and bring the hook out 2 stitch­es from where the hook was insert­ed in round 2 of body, like so…

yo and pull through loop on hook. It will look like this.

yo and pull through loop on hook again, so it looks like this…

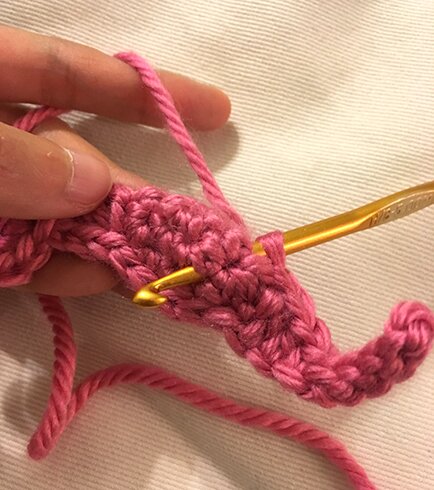
See there’s a long ver­ti­cal strand of yarn made, essen­tial­ly a very elon­gat­ed sc. Work 2 dc tog around this ver­ti­cal strand, like so…

This makes the thigh! :D

ch 6, sl st in 2nd ch from hook, pull up a loop in next 2 ch, then pull the last loop on hook through the oth­er 2 loops on hook, sl st in next 2 ch, ch 1, don’t fas­ten off and con­tin­ue on to back leg.

Back leg:

Insert hook from the bot­tom (a stitch in round 1) of body to a stitch in round 2 of body in the back, like so…

yo and pull through loop on hook. There will be a ver­ti­cal strand of yarn made like the one in front leg. sl st around the ver­ti­cal strand in back, then con­tin­ue to make the leg with the front fac­ing you. It will look like this from the front.

ch 5, sl st in 2nd ch from hook, pull up a loop in next 2 ch, pull last loop on hook through the oth­er 2 loops on hook, sl st in next ch, sl st in the ver­ti­cal strand…

ch 1, pull out a 20″ length of yarn, cut yarn.

Arms:

Thread yarn tail in tapes­try nee­dle, insert nee­dle in the under­side of body, and out in the front of body where the arm would be, like so…

Remove the nee­dle. From the front of the body, insert hook where the yarn tail came out and draw up a loop. It will look like this.

ch 4, sl st in 2nd ch from hook, sc in next ch, sl st in next ch, remove hook and pull out the yarn tail.

Using the hook, pull the yarn tail to the back of body where the oth­er yarn would be, insert hook where the yarn tail came out, draw up a loop, like so…

ch 4, sl st in 2nd ch, pull up a loop in next 2 ch, pull last loop on hook through the 2 oth­er loops on hook, remove hook and pull out yarn tail.

Thread yarn tail through tapes­try nee­dle, insert nee­dle at the begin­ning of the back arm and come out through a stitch at the top in the back, fas­ten off, weave in end. Sew on eye. Rawr.

I hope you enjoyed this series! Don’t for­get to share your dino pics by:


  • Blog­gers: leav­ing a com­ment on any of the Mys­tery Dino CAL posts with a link to your blog post with the picture.
  • Insta­gram­mers: tag me @genuinemudpie and use the hash­tag #mys­tery­dinocal
  • Rav­ellers: join­ing the Rav­el­ry group and post­ing your FOs to my Rav­el­ry dino project pages!

There will be a vir­tu­al dino par­ty with all your pic­tures in the near future, stay tuned! :D


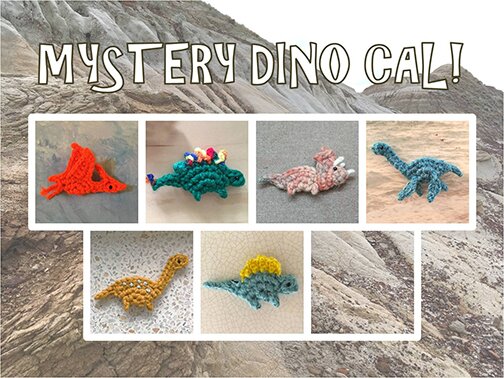
You can find all the oth­er mys­tery dino CAL posts here:

Mys­tery dino CAL intro post

Stu the Stegosaurus

Dmitri the Dimetrodon

Trix­ie the Triceratops

Bron­wyn the Brontosaurus

Nessie the Plesiosaurus

Kin­taro the Pterosaur


Have a rawring week, every­one! :D


mystery dino CAL: pterosaur!

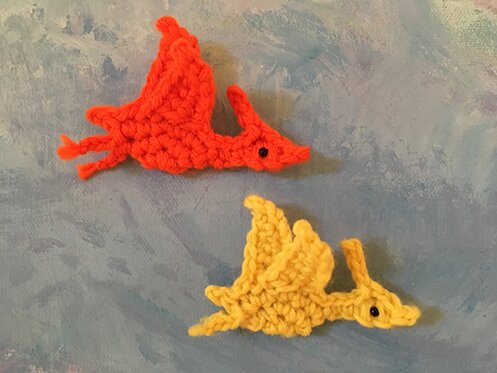
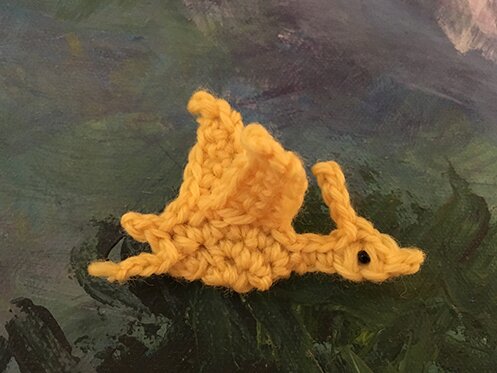
Can’t believe we’re at the sec­ond last episode of mys­tery dino CAL already! This week’s dinosaur is Kin­taro the pterosaur!

Pterosaur is tech­ni­cal­ly a fly­ing rep­tile and not a dinosaur, but that does­n’t make it any less icon­ic in our col­lec­tive imag­i­na­tion of the pre­his­toric world! The word pterosaur lit­er­al­ly means “winged-lizard”, the largest of this species had a wingspan as wide as a small plane. It is believed that they could fly as soon as they are hatched, and ate small fish and could fil­ter small fish from water with teeth like those of whales. (source)

Kin­taro, on the oth­er hand, means “gold­en boy” in Japan­ese, and is a hero of extra­or­di­nary strengths and friends of ani­mals in Japan­ese folk­lore :) (source)

The con­struc­tion for Kin­taro is a bit more com­pli­cat­ed than oth­er dinosaurs because of the wings, it’s a good next step in lev­el of cro­chet chal­lenge if you have been cro­chet­ing along! If you are new to the series, this is still not too dif­fi­cult and there are some pho­tos to guide you along, and you can find all the oth­er dinosaurs here.
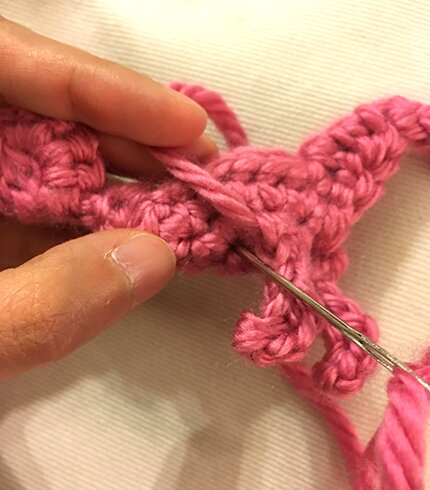
You’ll need:

  • A bit of worsted weight yarn
  • 3.5 mm hook
  • Tapes­try needle
  • Black thread, sewing nee­dle, and seed beads for eyes

Pat­tern:

The body begins as a circle.

Round 1: ch 2, 6 sc in 2nd sc from hook, don’t join in round.

Round 2: 2 sc in each sc around (12 sc around).

Round 3: [2 sc in next sc, sc in next sc] five times, 2 sc in next sc, sl st in next sc (17 sc and 1 sl st around).

Neck and head:

ch 6, sl st in 2nd ch, [yo, pull up a loop] twice in next ch, [yo, pull up a loop] twice in next ch, pull through all loops on hook (head made), ch 6, sl st in 2nd ch from hook and next 3 ch, hdc in the same ch as sec­ond half of the head (skull crest made), sc in next 2 ch of neck, con­tin­ue on to wings…

Wings, tail and leg:

The rows of the wings run per­pen­dic­u­lar to the body.

With body piece fold­ed in half, sl st in first 2 sc of back after the neck through both lay­ers of body. 

Then, ch 7, sl st in 2nd ch from hook, sc in next 5 ch, skip next sc in body, work­ing in the front loops of the front lay­er of body only, sl st in next 2 sc in body, turn.

sc in next 4 sc of wing, sl st in next sc, turn.

Skip first sc, sl st in next sc, sc in next 3 sc, sl st in next sc in body through front loops only, pull up a very long loop of yarn — I used 1.5 of a human wingspan’s length — and cut yarn.

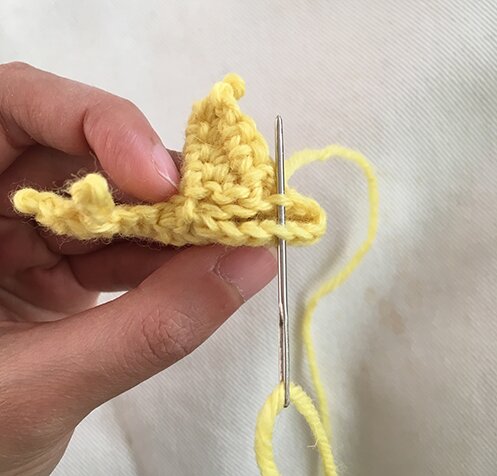
Using tapes­try nee­dle and the long yarn tail, sew togeth­er the back towards the neck, through the remain­ing back loops of the front piece of body, and the back loops of the back piece of body, like so…

Remove the nee­dle and using the long yarn tail, pull up a loop in the stitch to the right of the sec­ond sl st on body after the neck, like so…

Repeat pat­tern for wing.

sl st through both loops and both lay­ers of body in next sc in body after the sec­ond wing, sl st in the last sc in body, ch 2, sl st in 2nd ch from hook, sl st in the last sc in body (tail made), sl st in a stitch between the 2nd and 3rd round of body towards the under­side of the body, ch 4, fas­ten off (one leg made).

Oth­er leg:

Attach yarn to back of the body in the stitch between the 2nd and 3rd round, same as where the first leg is attached. ch 4, fas­ten off.

Weave in ends. Trim the yarn tails on the end of the legs and fray them a bit so they look like claws. Sew on eyes. And it’s done!
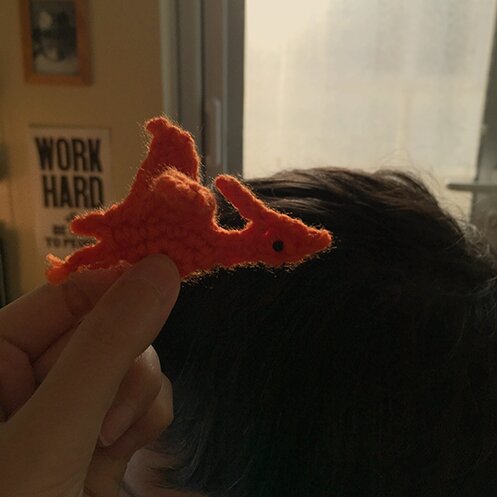
Here’s Kin­taro fly­ing over Mike’s head remind­ing him to work hard ^_^; 


To recap, here are the mys­tery dino CAL posts so far:

Mys­tery dino CAL intro post

Stu the Stegosaurus

Dmitri the Dimetrodon

Trix­ie the Triceratops

Bron­wyn the Brontosaurus

Nessie the Plesiosaurus


Share your dinosaur pics by:

  • Blog­gers: leav­ing a com­ment on any of the Mys­tery Dino CAL posts with a link to your blog post with the picture.
  • Insta­gram­mers: tag me @genuinemudpie and use the hash­tag #mys­tery­dinocal
  • Rav­ellers: join­ing the Rav­el­ry group and post­ing your FOs to my Rav­el­ry dino project pages!


Stay tuned for the grand finale of the mys­tery dino CAL! :D Hap­py week­end everyone!