When this pattern goes online I should be arriving in Drumheller, Alberta — dinosaur capital of the world! I’ve been looking forward to this trip for ages, and stegosaurus is my all-time favourite dinosaur since childhood, so I thought I’d share a pattern to mark the occasion :D
It’s been a while since I wrote an amigurumi pattern, hope I’m not too rusty! This stegosaurus actually evolved from the dumpling pattern I wrote a long time ago. I wonder what the stegosaurus would think about that, evolving from a dumpling…
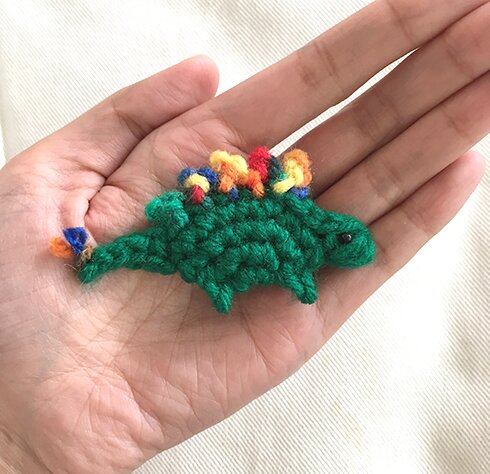
Anyway, here he is sitting on my hand for scale. Probably makes a nice pin/brooch or magnet!
This pattern is super easy and takes very little time and yarn. To make your own tiny stegosaurus, you’ll need:
- A bit of worsted weight yarn for main colour for body, and contrasting colour for spikes
- 3.5 mm and 3 mm crochet hooks (if you only have either size, that’s fine too)
- Tapestry needle (very important! You’ll see in the pictures)
- Black seed beads
- Black thread and sewing needle
Pattern:
The body begins as a circle, and with larger hook.
Round 1: ch 2, 6 sc in 2nd sc from hook, don’t join in round.
Round 2: 2 sc in each sc around (12 sc).
Round 3: [sc in next sc, 2 sc in next sc] six times (18 sc).
Round 4: sc in each sc around (18 sc), don’t fasten off.
Next, we make the head: in the same sc where last sc was made, [yo, pull up a loop] three times, pull through all loops on hook, ch 1 (cluster made), sc in same sc as cluster. Don’t fasten off.
We now fold the piece in half, and from here on crochet through both layers across the back of the dinosaur.
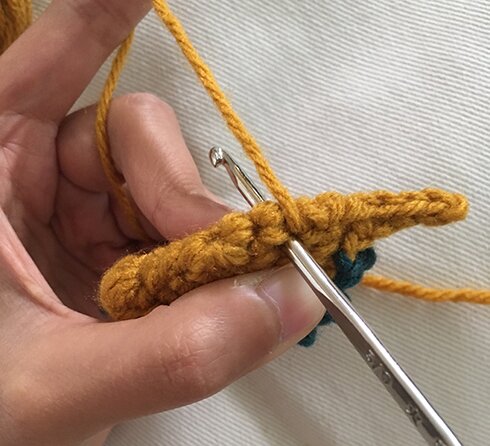
Back: sl st in next sc on body through both layers, like so…
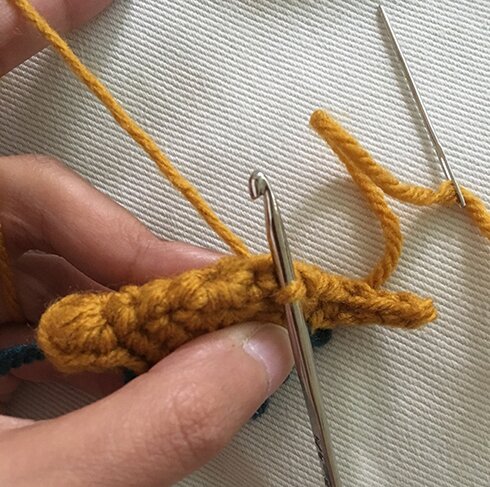
sl st in next sc — attach contrasting colour yarn when pulling up loop to finish the sl st, like so…
Carry the main colour as you work across back with contrasting colour.
Spikes: with contrasting colour, [ch 3, sl st in 2nd ch from hook, sl st in next sc in body (working through both layers)] five times.
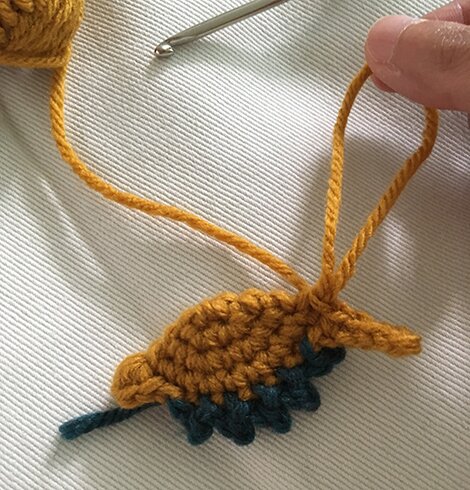
Here is a picture of the spikes in progress, notice that the main colour is being carried and wrapped in the stitches across back.
In the last sl st of spike, pull up loop using main colour, thereby switching back to main colour. Fasten off contrasting colour.
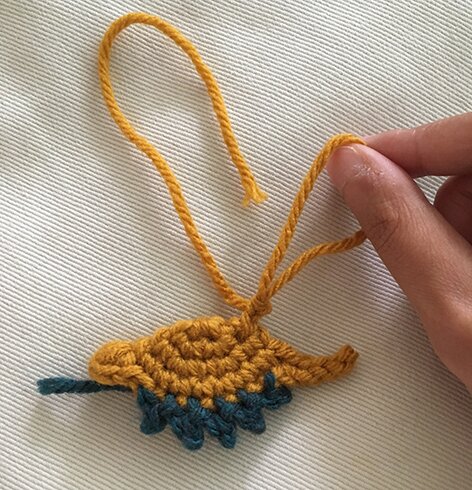
Tail: with main colour, sl st in last st through both layers on back, ch 5, sl st in 2nd ch from hook, sl st in next ch, sc in last 2 ch of tail, sl st in a space between the 3rd and 4th round in the body (belly part of the dinosaur). Remove hook and pull out the loop, as shown in the picture. Pull through enough yarn so that you have a 12″ tail. Cut yarn.
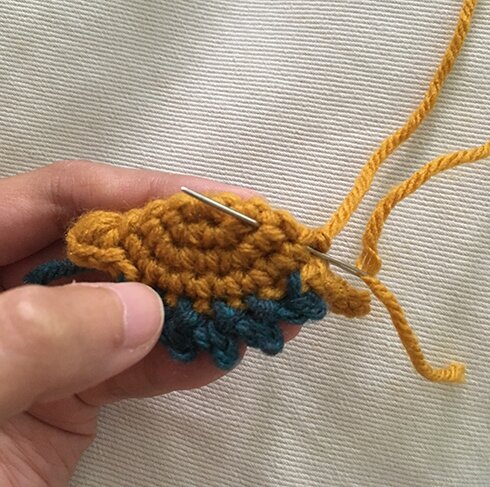
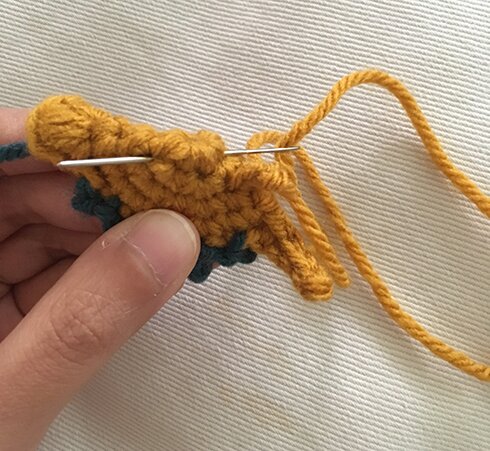
Hind leg: Thread the yarn tail through the tapestry needle, weave the needle through the belly of the dinosaur so that the needle comes out through the 2nd and 3rd rounds of body in the front, like so…
Pull the yarn tail through, remove the needle. Insert smaller hook (if you have it) through the stitch where the yarn tail came through…
Pull up a loop using the yarn tail…
ch 3, sl st in 2nd ch from hook, remove hook and pull the yarn tail out, like so…
Thread the yarn tail through the tapestry needle again, insert needle in a stitch between 1st and 2nd round in body, then come out in a stitch between 1st and 2nd round in body in the front on the opposite side, like so…
Front leg: Work as the same as hind leg, as follows: remove needle, insert hook through the stitch where the yarn tail came through, pull up a loop with the yarn tail. ch 3, sl st in 2nd ch from hook, pull out yarn tail, thread yarn tail back in tapestry needle, insert needle through a stitch between 2nd and 3rd round of body, then come out near the top on the back of the piece, fasten off.
Weave in all the ends. Pull the long yarn tail into the body of the dinosaur to fill it out a bit :)
Tail spikes: Cut a length of contrasting colour yarn about 3 inches long. With wrong side facing, pull up a loop through a stitch at the end of the tail with the short length of yarn, then pull the two short yarn tail through the loop just made. Pull tight carefully. Trim spikes. Apply a bit of fabric glue at the base of the spikes.
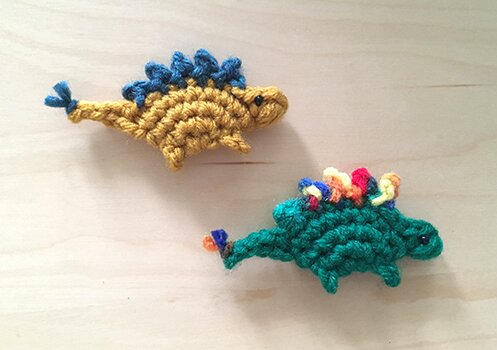
And it’s done!
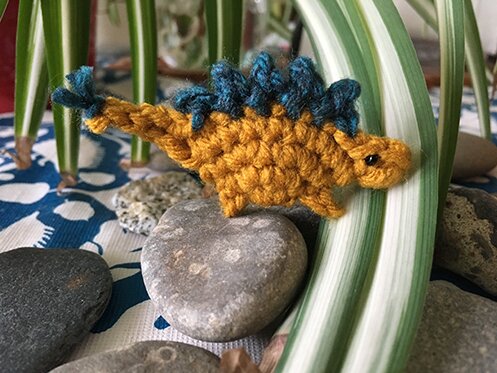
Stegosaurus in its natural habitat…
Let me know if you do make your own tiny stegosaurus, I’d love to see it! If there are enough pictures we’ll have a virtual stegosaurus party and it will be fun, so please share! :D
Happy crocheting!


Love this little adorable dino!!!!! Thank you for the pattern!!! Enjoy your trip!! =)
Very cute! A perfect tutorial!
thank you! glad you like the dino! :D
thank you Darlene! :D
dinoriffic. great pattern. thank you for sharing. if you ever come up with other dino’s please let me know.
thanks so much Dianna! glad you like the pattern! stay tuned for more dino crochet fun! :D
So cute!. I belong to an art abandonment group.…and this little guy is going to be abandoned in the park
Thank you so much for visiting! The idea of an art abandonment group is so cool, I bet your stegosaurus will be found and brighten someone’s day! :D
So cute!
I made a ton ( a dozen, really) of your dinos and made it into brooches for my daughter’s birthday giveaway.
Thank you very much.
So glad you like the pattern and that the dinos are enjoyed by many at the birthday party!