totoro sweater!

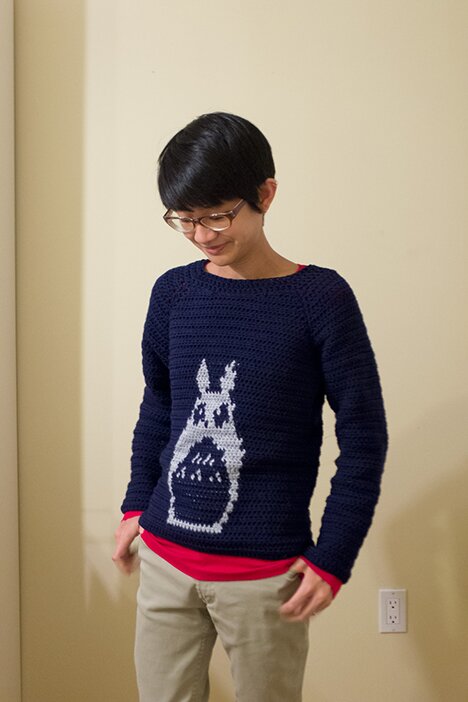
My very own Totoro sweater! :D

Totoro sweater


I made up my own basic raglan sweater pattern and then adapted the knit Totoro chart from this beautiful mitten pattern. I had to take out a few rows in the chart because the hdc’s are taller than knit stitches.

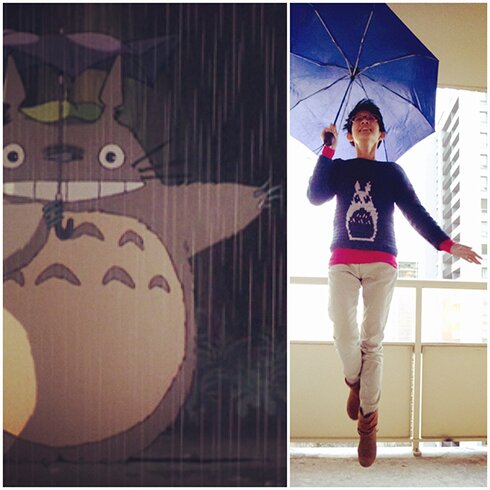
Of course I had to do a levitating shoot for this! (If you hadn’t seen the film My Neighbour Totoro, you can catch a glimpse of Totoro flying in this lovely montage)

Photo


I’m making another one for my sister, so that will give me a chance to write down and test out the pattern for the raglan sweater. One can then incorporate any knit, crochet or cross stitch chart, like this owl chart.

Have a happy Friday and weekend! And happy thanksgiving! I’m grateful for your visit today — thank you for journeying with me on my crafty adventures!

Tweet about this on TwitterShare on FacebookPin on PinterestShare on TumblrPrint this page

’tis the season to be cozy

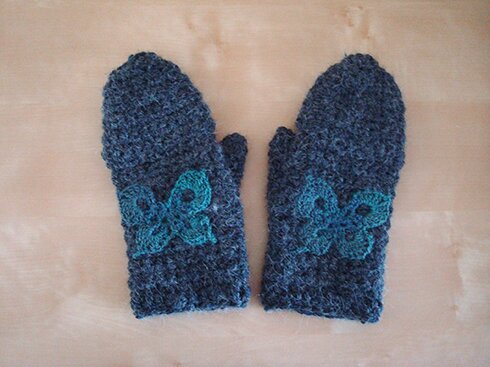
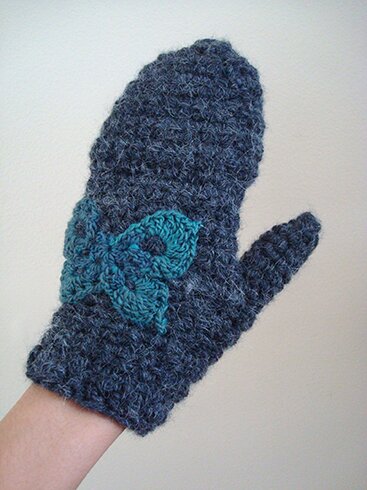
I made a pair of mittens for a friend :D

cozy 1

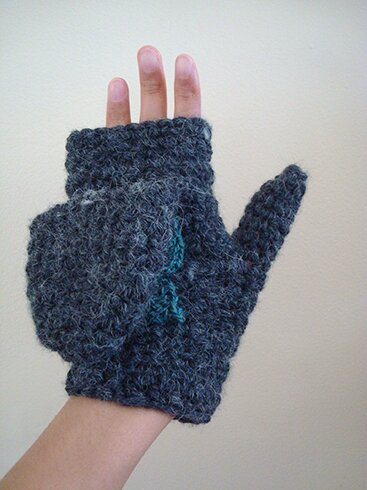
They’re convertible! :D

cozy 2

Great for using the phone while outdoors :)

I’m sharing my pattern here so you can make a pair too if you like, and so I can return to this pattern when I need to make another pair :P

They’re very quick to make, because the yarn is thick. Each took me a couple of hours in front of the TV.

The pattern is for the mittens only. The butterfly applique is made following this beautiful pattern. I thought they look nice without being too flashy with the subtle blue/grey/teal tones. The yarn I used for the butterflies is a discontinued sock yarn by Mary Maxim.

I used:

Bulky weight yarn (I used Bernat Alpaca in “Ebony”, it’s very soft)

6.5 mm and 6 mm hook

Size:

It fits my hand, which has an 8″ circumference at the widest part of my palm (including thumb)

Note:

Mitten is crocheted in the round, but turning at the end of every round, except when working on the thumb.

Pattern is written for the right mitt. Pattern for the left mitt is the same as the right one except for rows 11 and 18, instruction for these rows are in (parenthesis).

Pattern:

With larger hook, ch 23, sl st in first ch to form a ring, being careful not to twist the chain.

Row 1: ch 1 (does not count as a st), sc in each ch around, sl st in first sc, ch 1, turn (23 sc).

Row 2 — 10: sc in each sc around, sl st in first sc, ch 1, turn.

Row 11 (thumb opening): sc in first sc, ch 4, skip 4 sc, sc in next sc, sc in each sc around, sl st in first sc, ch 1, turn.

(Left mitt, row 11: sc in each sc until there are 5 sc left in the round, ch 4, skip 4 sc, sc in last sc, sl st in first sc, ch 1, turn.)

Row 12: sc in each sc until 4 ch space, sc in each of the 4 ch, sc in last sc, sl st in first sc, ch 1, turn.

Row 13 — 17: sc in each sc around, sl st in first sc, ch 1, turn.

Row 18 (begin mitten top): sc in first sc, sc in each of next 9 sc in the back loop only, sc in next sc, ch 12, sl st in first sc, ch 1, turn.

(Left mitt, row 18: sc in first sc, sc in each of the next 9 sc in the front loop only, sc in next sc, ch 12, sl st in first sc, ch 1, turn.)

Row 19: sc in each of the next 12 ch, sc in each sc across, sl st in first sc, ch 1, turn (23 sc).

Row 20 — 26: sc in each sc around, sl st in first sc, ch 1, turn.

Row 27: sc in first sc, 2 sc tog, *sc in next 4 sc, 2 sc tog*, repeat from * to * around until there are fewer than 4 sc left in round, sc in remaining stitches, sl st in first sc, ch 1, turn.

Row 28: repeat row 20 (work even)

Row 29: sc in first sc, 2 sc tog, *sc in next 3 sc, 2 sc tog*, repeat from * to * around until there are fewer than 3 sc left in round, sc in remaining stitches, sl st in first sc, ch 1, turn.

Row 30: sc in first sc, 2 sc tog, *sc in next 2 sc, 2 sc tog*, repeat from * to * around, sc in last 2 sc, sl st in first sc, ch 1, turn.

Row 31: sc in first sc, 2 sc tog around, sl st in first sc. Press mitten top flat so that the working loop is in the top right corner. Crocheting through both layers of work, sl st across the last row of mitten top. Fasten off.

Reattach yarn to the stitch next to the beginning ch for mitten top.

Next row: ch 1, 2 sc tog, sc in each sc until stitch just before the beginning ch for the mitten top, 2 sc tog, sc in the remaining loop of each sc (the other loop of each sc in this part is attached to the mitten top) to end, sl st in first 2 sc tog, ch 1, turn (21 sc).

Next 6 rows: repeat row 20 (work even for 6 rows). (In retrospect I thought maybe I made this part a bit too tall. Maybe 5 rows are enough.)

Fasten off.

Thumb

Attach yarn to a stitch in thumb opening.

Row 1: ch 1, sc in each sc. When you come across the side of the row on either side of the thumb opening, insert hook into the side of the row, draw up a loop, insert hook into next sc, draw up a loop, yo and pull through all loops on hook. There are 8 sc around the thumb. ch 1, do not turn.

Row 2–6: work even for 5 rows.

Row 7: 2 sc tog 4 times. Press thumb flat so that the working loop on hook is on the top right corner of thumb. Working through both layers of thumb, sl st in next 2 sc, fasten off.

Cuff

Attach yarn at the bottom of the mitt.

With smaller hook, ch 3, dc in next st, dc in each st around, sl st in top of beginning ch 3, fasten off.

Weave in all ends.

Ta-da!

cozy 3

I hope the pattern is clear! If there’s anything unclear please feel free to post a comment, your question(s) will probably be helpful to others too!

Bye for now :) Stay cozy!


Tweet about this on TwitterShare on FacebookPin on PinterestShare on TumblrPrint this page

12 Days of Woodland Creatures gallery!

I’ve finally put up all the pictures that fellow crocheters have shared for the 12 Days of Woodland Creatures project! :D

You can see everyone’s delightful creatures here :D It’s under the “craft-along gallery” tap at the top of this blog.

Thank you so much everyone for crocheting along! It’s made the whole project a lot more fun. Really appreciate you sharing photos of your lovely creatures too! I’m looking forward to hosting more CALs in the future!

You can still find all of the creature patterns in the “tutorials” tap at the top of this blog.

Have a happy Friday and weekend, everyone! And to everyone who’s experiencing winter (to the extreme in some areas), sending you all my best wishes for warmth and safety!

IMG_2385


Tweet about this on TwitterShare on FacebookPin on PinterestShare on TumblrPrint this page

analogue

A while ago a dear friend gave me Diana Mini as a gift (yes, lucky me! :D) for taking pictures at her wedding. I haven’t used a film camera in ages, maybe since I was 16. I thought I would get impatient or even frustrated with not being able to seeing results immediately like with digital cameras, but it was actually a lot of fun! I currently have a roll in the camera that I started on the night of Nuit Blanche, which was in early October, and I’m still waiting to finish it, but it almost feel joyful to wait to see the results. It makes the pictures and the moments they capture feel more special.

Also! The Diana was actually first made in Hong Kong in the 60s, which was where I was born (but not in the 60s :P) and makes me love it more :D I had some trouble with loading and winding the film in the beginning (actually, I still have some trouble loading, it’s not made of very sturdy plastic and I’m always worried that I would snap something if I press too hard on any part). Parts of my first roll was ripped maybe because it wasn’t loaded properly, but somehow it’s working better.

So, anyway, here are a few that I think are particularly cool :D

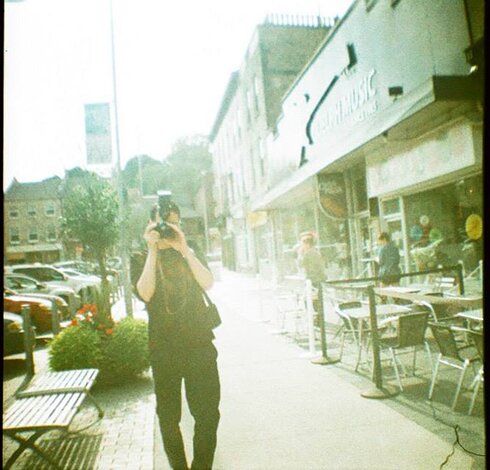
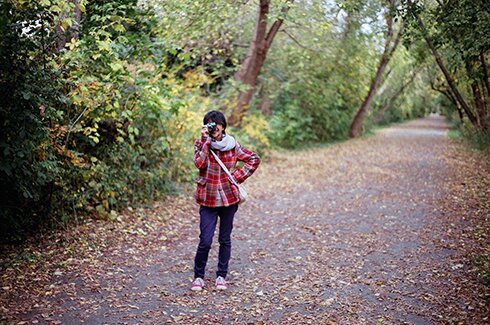
analogue1Picture of Mike taking a picture. Actually, when I’m walking around with the Diana I find that I often get asked by strangers to take a picture of me taking a picture, it’s kind of funny.

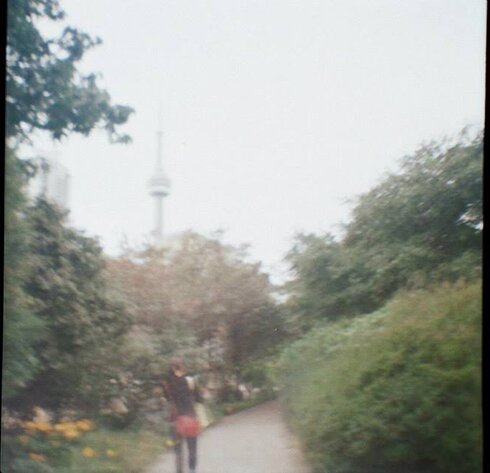
cnI think I had the camera on “bulb” mode or long exposure by mistake. Kind of a dizzying dream world, with the CN Tower in the background! :D The biggest part of the fun with a “toy” camera like the Diana is the surprise I think, the happy accidents.

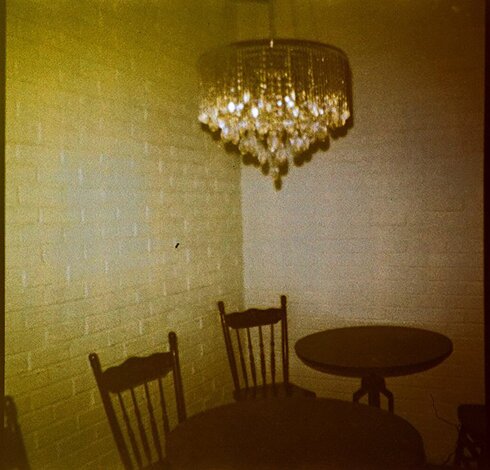
analogue2This was actually taken on a kind of film for slides, which I didn’t know at the time. The friendly staff at the photography shop said it required “cross processing” to develop, and the results were AMAZING. I wish I can show you more pictures of it, but then it would be a total photo overload and you would probably get bored. So here’s one that I really like, a corner in a very quaint cafe.

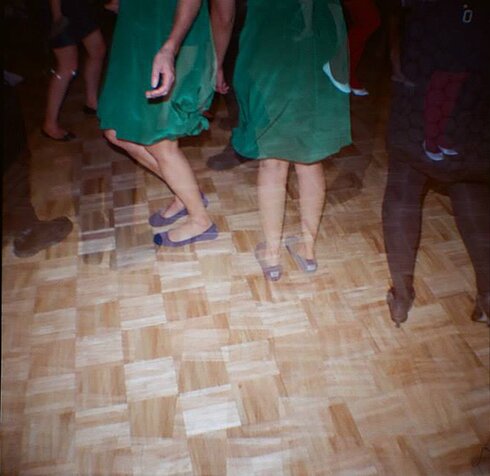
dance floorThis one was probably my favourite of all the Diana pictures I have taken so far. One very neat thing one can do with the camera is multiple exposures!

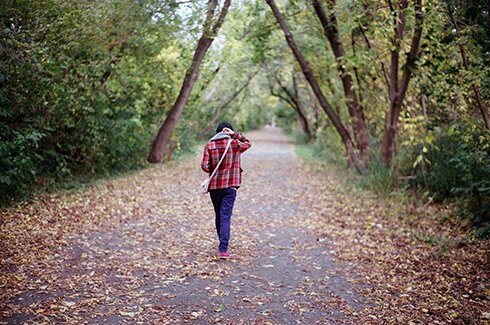
And now these ones are taken by Mike with a Minolta that he’s inherited from his uncle. It was a beautiful fall day at a nearby trail — look at the tree-lined path! I love the pictures that the Diana takes, but this is clearly a camera of a much better quality. I really like how they turned out :)

fall

diana


So, Mike had this brilliant idea of one day taking a trip in which we only take analogue photos, without constantly taking pictures with our phones and posting them on Instagram and such. Cannot wait until that happens! :D

Will share more pictures when my current roll in the camera is developed! Have a happy Thursday, everyone!


Tweet about this on TwitterShare on FacebookPin on PinterestShare on TumblrPrint this page

space

10251915

Oh my, it’s been 10 days since I last wrote >_< I must say, it’s been very busy since the beginning of November. I started a new job, and then our apartment building started undergoing some renovations, which required us to pack away and seal everything in plastic sheets and tape so that they don’t get covered in renovation dust. So then we thought, we might as well rearrange our apartment!

I like rearranging the apartment once in a while, it’s like moving into a new apartment! It’s just a lot of work that has to be done over several weeks because we’ve got jobs to go to during the day (or night) and other things to do and people to see…

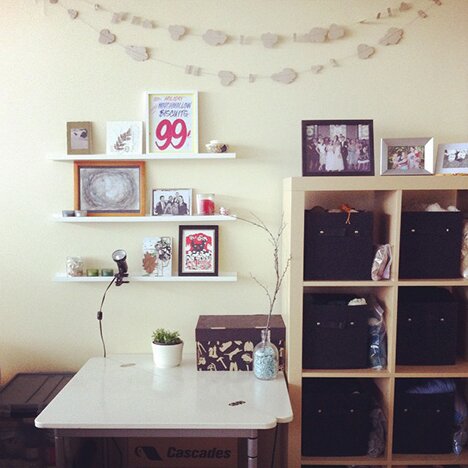
But look! We were able to carve out a new work space for me over the weekend! I love the shelves above it. And I get to display one of the hand painted signs from Honest Ed’s (for 99 cents “Holiday Marshmallow Biscuits”), which commemorates not only the iconic Toronto landmark but also the day in which my dear friend and I lined up for 7 hours to buy these signs (I also have an “Acrylic Ladies Sweater” one and an “Instant Noodles” one, but I don’t have frames for them yet. I think my friend got “Fleece Shorts” and “Ankle Weights”). It was probably the most ridiculous thing I’ve done (and the whole time we were like, “oh, it looks like it’s just another hour of wait, we’ve been here for 3 (or 4, or 5) hours already, what’s another hour, we’ve spent too much time on this to turn back empty handed…” and poor Mike was waiting for us outside Honest Ed’s to go to dinner), but now we have “a piece of history of Toronto” displayed on our shelves and great stories to tell :P

And all my yarn colour-sorted and neatly tucked away in bins! For the past few years I’ve had the yarn just sitting in the shelving unit like in a yarn store (see this post about the “wall of yarn” and my initial excitement). It was nice to look at for the first month or so, but before long I had yarn spilling all over the place from the front AND the back of the shelves. So, now we don’t get to see the pretty colours of the yarn on the shelves, but they are much easier to manage.

In the meanwhile, I’m working on a sweater project that I can’t wait to finish and show you, and new items for my shop :D Stay tuned! I’ve been feeling a bit sluggish over the summer and into the fall, so I’m grateful for the energy that November brings.

Have a fabulous, energized week, everyone!


p.s. And if you have creature photos for the 12 Days of Woodland Creatures project, please feel free to send them my way before Wednesday, Nov. 12! I will put together a celebration post with everyone’s photos shortly after that :D

Tweet about this on TwitterShare on FacebookPin on PinterestShare on TumblrPrint this page

all together now :D

All together now, plus bonus pattern!

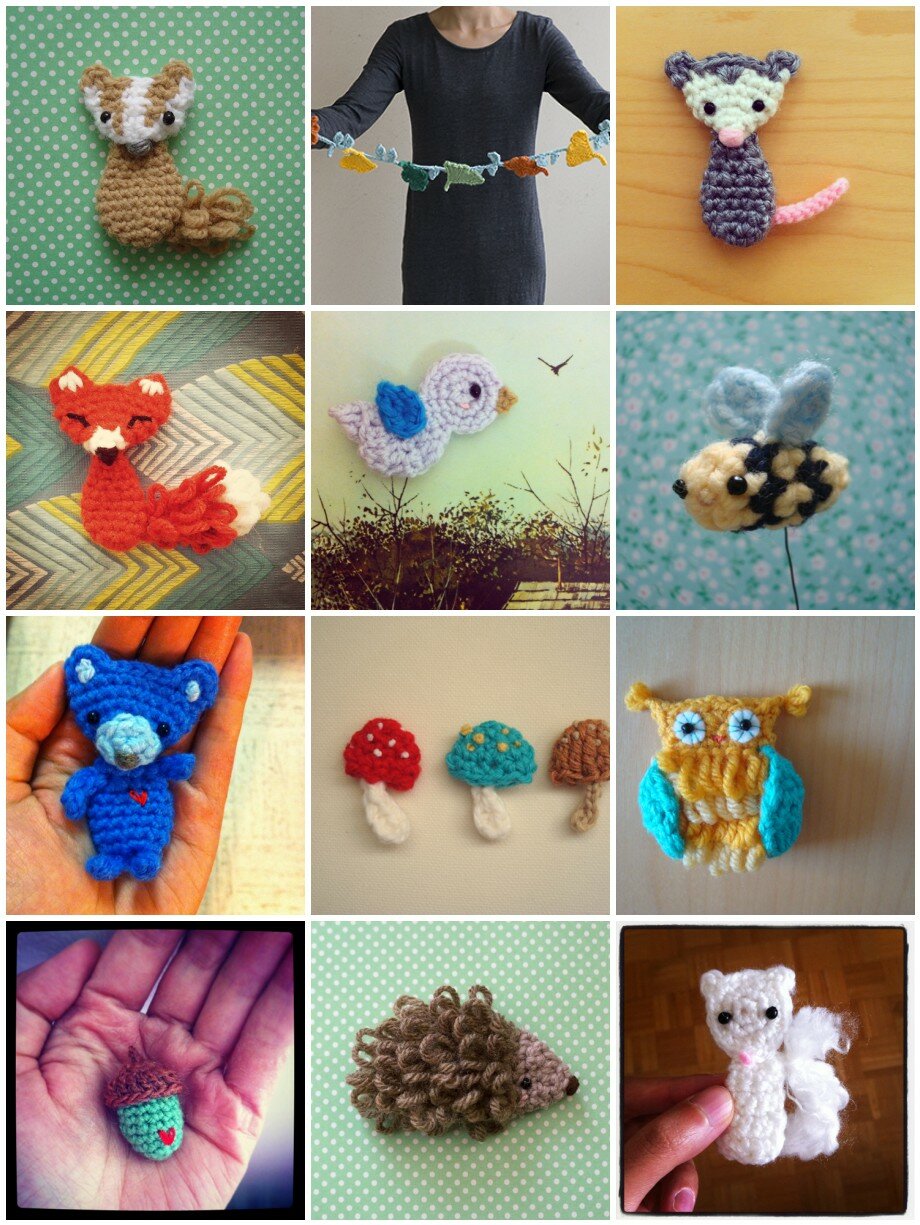
A mosaic of the 12 Days of Woodland Creatures (and Their Favourite Things) project :D

mosaic2801f409d21bbbac7e2df2662857552e912b8a98


Don’t they look so festive together?

Actually, I’d like to feature your creations on this blog! Much like the photo gallery we created before with the weekend craft-along party. Feel free to send me pictures of everything you made from this project or just your favourites :) If you just found out about this project and want your picture to be featured, no worries about making the whole series — make your favourite creature and send me a picture :D

Many of us have shared pictures in the Ravelry group, but if you’re not on Ravelry or in the group you can also send me a link to pictures of your creations (if it’s posted online) in the comments below, or email pictures to me at genuinemudpie[at]gmail[dot]com. I will link your picture to your website or blog as well if you send me the URLs to them.

Please send links or pictures to me by November 12 :)

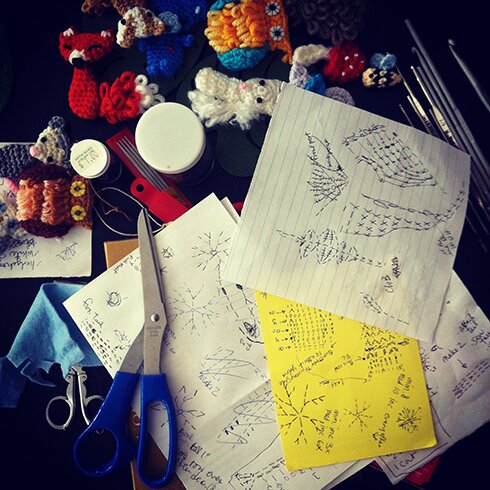
And I thought it would be fun to show you the “behind the scene” of all the written patterns — jumbled diagrams and notes on scrap pieces of paper on the coffee table. Not sure why I never use a proper piece of paper or a notebook. I always jot down ideas and stitch patterns on random pieces of paper I find around the house. So, sharing pattern here is also beneficial for me, because these scrap pieces of paper get thrown out. I just go back to my own blog posts to follow the patterns if I need to remake something.

Photo 2014-10-23, 4 29 38 PM

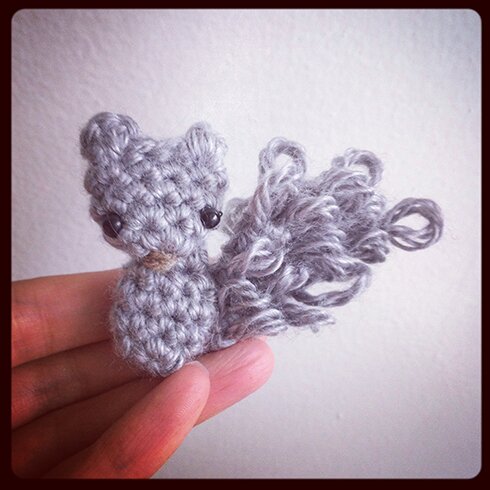
And finally, bonus pattern — a new and improved squirrel pattern :)

The white squirrel was one of the first creatures I made for this project, and since then I’ve developed a slightly different way to make animals, which makes the animal looks a bit more plump. And of course, the tail with loop stitch!

Photo 2014-10-29, 4 44 20 PM

I used:

Worsted weight yarn in grey and brown

Small black beads for eyes

Needle and thread for sewing and embroidering

3.5 mm hook

Pattern:

Head

Round 1: 5 sc in magic ring, sl st in first sc to join.

Round 2: ch 1, *sc in next sc, 2 sc in next sc*, repeat from * to * once more, 2 sc in next sc, sl st in first sc to join (8 sc).

Round 3–4: ch 1, 1 sc in each sc around, sl st in first sc to join (8 sc).

Row 5 (ears): press head flat, with stitch on hook at the right top corner, crochet through both layers of head. ch 1, sc in same sc, ch 1, sl st in same sc, sl st in next 3 sc, ch 1, sc in same sc where last sl st was made, ch 1, sl st in same sc, fasten off, weave in ends.

Body

Round 1: 4 sc in magic ring, don’t join.

Round 2: 2 sc in each sc around, don’t join (8 sc).

1 sc in each sc around until piece is 3/4″ inches tall.

Decrease round: *sc in next sc, 2 sc tog in next sc* repeat from * to * two more times

1 sc in each sc around (6 sc), fasten off, leaving a tail for sewing.

Tail

The tail has quite a bit of shaping using increases (2 loop stitches in one stitch) and decreases (2 loop stitches together over 2 stitches).

This is what I mean by 2 loop stitch togeter (2 lp st tog): insert hook in next st, draw up a loop, insert hook in following stitch, make loop stitch as usual, and pull through all loops on the hook as you finish off the loop stitch.

Row 1: leaving a long tail for sewing, ch 2, 2 sc in second ch from hook, turn.

Row 2: ch 1, sk first sc, 2 lp st (loop stitch) in next sc, turn.

Row 3: ch 1, 2 lp st in first st, lp st in next st, turn.

Row 4: ch 1, 2 lp st in each of next 2 st, turn.

Row 5: ch 1, 2 lp in first st, lp st in next st, 2 lp st tog in next st, turn.

Row 6: ch 1, 2 lp st tog over next 2 st, lp st in 2nd st in the 2 lp st tog just made, 2 lp st tog over next 2 st, turn.

Row 7: ch 1, 2 lp st tog over next 2 st, 2 lp st in next st, turn.

Row 8: ch 1, lp st in first st, 2 lp st tog over next 2 st, turn.

Row 9: ch 1, 2 lp st tog over next 2 st, fasten off, weave in end.

Assembly

Sew on eyes and embroider nose with brown yarn. Sew head to body. Sew tail to body.


Wishing you a happy weekend! Looking forward to seeing creature pics from you! :D


Tweet about this on TwitterShare on FacebookPin on PinterestShare on TumblrPrint this page

this week’s awesome finds

Aren’t these the most huggable cats? Pattern on Mishto.

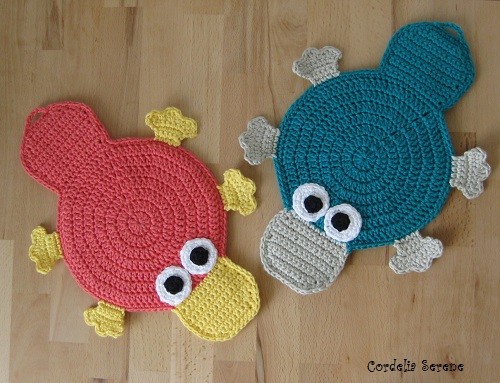
Who knew platypuses would make such awesome potholders? Pattern at Patalappumania.

And these giant leaves! I’m thinking coasters, garland, wreath, elbow patch? Pattern on Messyla.

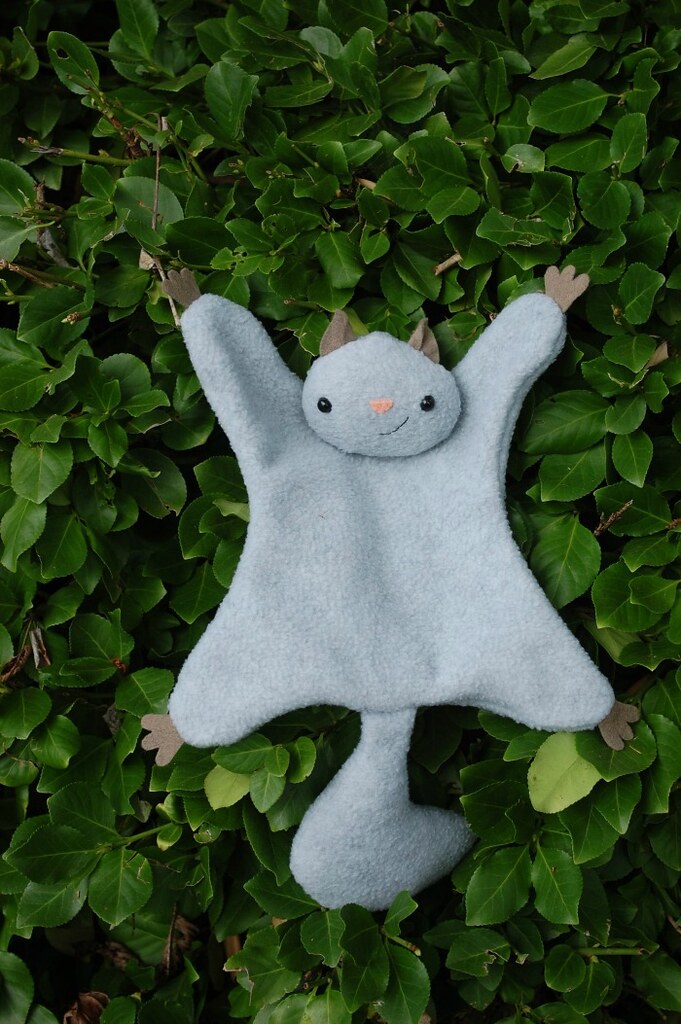
Flying squirrels are the coolest! Also a great way to upcycle an fleece blanket or sweater! Pattern on Wild Olive.

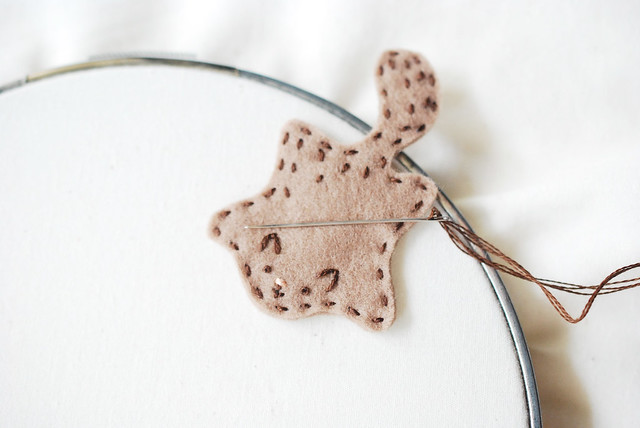
Another flying squirrel, this time a very helpful needle-minder. I don’t embroider very much, but I imagine it would be a lot of fun making the squirrel fly across the fabric by moving the magnet on the back :D Also from Wild Olive.

Speaking of embroidery, love these embroidered plastic canvas earrings. From Emuse.

I don’t have a food dehydrator, but if I do I would definitely give this a try — it is fascinating! I would never think of turning watermelon into jerky. Very curious about how it would taste… Spotted on Instructables.

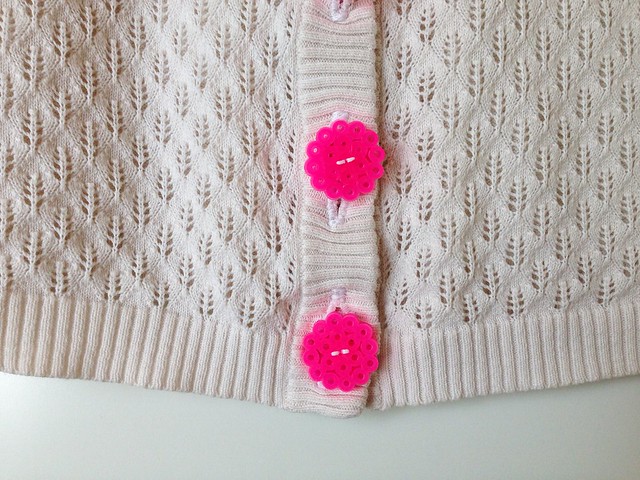
Fun and funky Perler bead buttons! From Maker Mama.

Looks super awesome and very easy to make! Burger balloons from Studio DIY.

Have fantastic Wednesday, everyone! :D


Tweet about this on TwitterShare on FacebookPin on PinterestShare on TumblrPrint this page

other fun things

I’ve been only posting about the 12 Days of Woodland Creatures for the past month! But you know me, that wouldn’t be the only project I’ve been working on — here are some of the other fun things that have been keeping my hands busy :D

Photo 2014-09-19, 6 47 03 PM

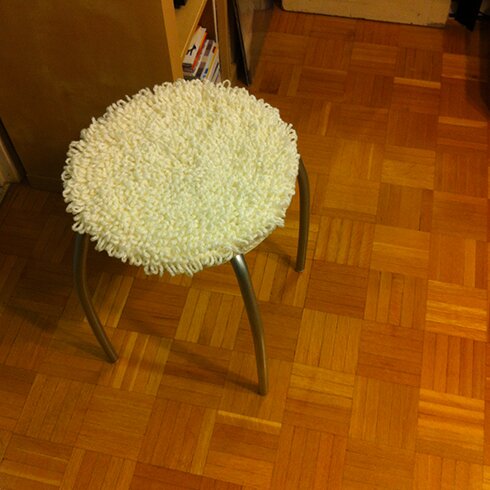
About a month ago I made a couple of stool covers for my awesome friends as a wedding gift, following this pattern by We are Knitters. Yes! The loop stitch! It’s just so fun to make! But after making hundreds, possibly thousands of loop stitches to make the 2 covers I think I will give it a rest for now… I think the covers will also make nice padding for regular chairs or extra floor seatings!

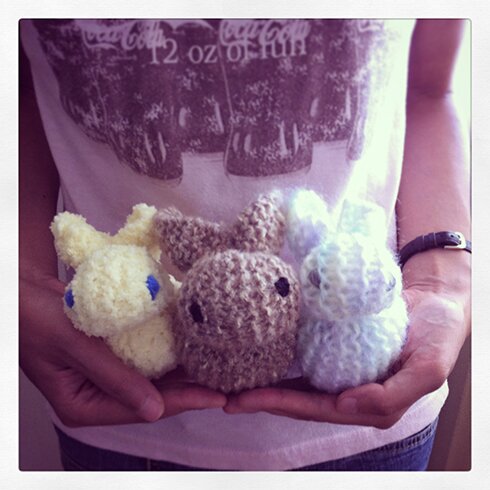
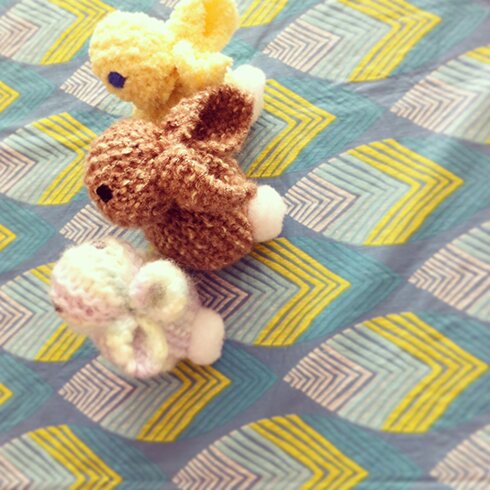
I also made these very cute (and very easy! Instant plush!) knit square rabbits following this patter from Lebenslustiger, for my niece and nephews to celebrate the arrival of the new baby brother :D

square rabbits

They have white pom poms for tails.

square rabbits 2

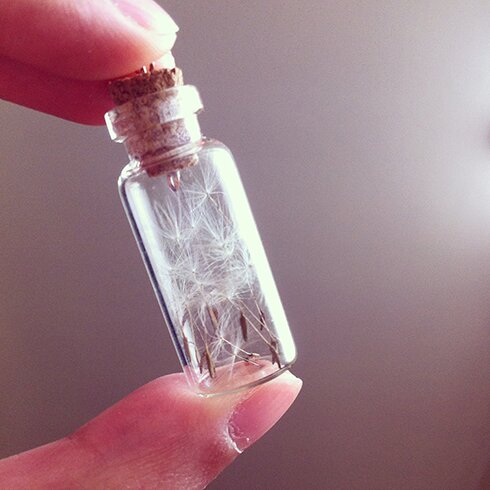
One day I went out to gather the last few dandelions and filled a few small bottles with the seeds.

wishes

As you can see I’ve attached a head pin to the cork — they turned into necklaces and are now in my friend’s shop, amongst other things…

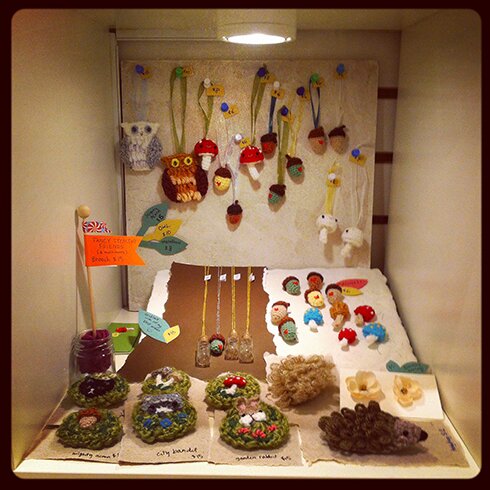
new shopThat’s right! I’ve joined my friend Jessica’s shop again this month :D It’s a shop in downtown Toronto that rents out spaces to local artists/artisans. Please visit if you’re in the neighbourhood :D You might recognize some of the pins that I made earlier (see better pictures of them in this post) for an outdoor craft show (which was unfortunately cancelled due to bad weather), and the hedgehogs and owls!

AND! As you may have noticed on the right sidebar of this blog I’ve also reopened my Etsy shop. I took a break from both the physical shop and the Etsy shop last year because of a very packed schedule of school and work. But since I’ve graduated (yay!) I’ve got more time on my hands :D

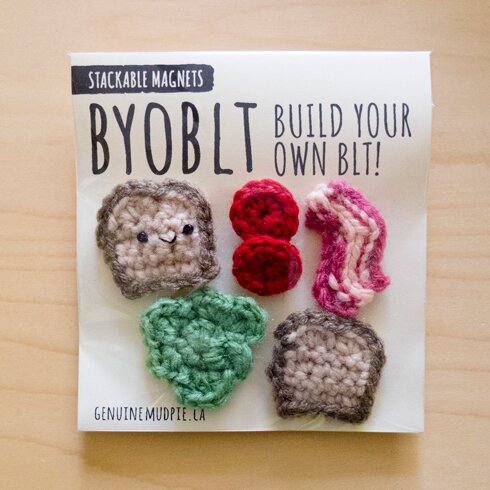
So one item I recently listed — and I’m quite proud of it — is the BYOBLT stackable magnet set!

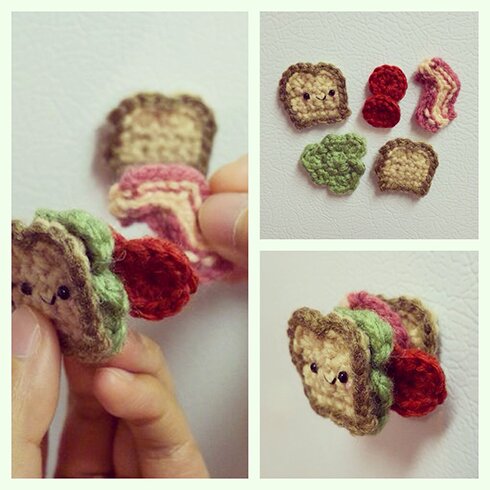
BYOBLTMike designed the packaging for it — isn’t it so professional-looking? Here it is in action!

BYOBLT (2)

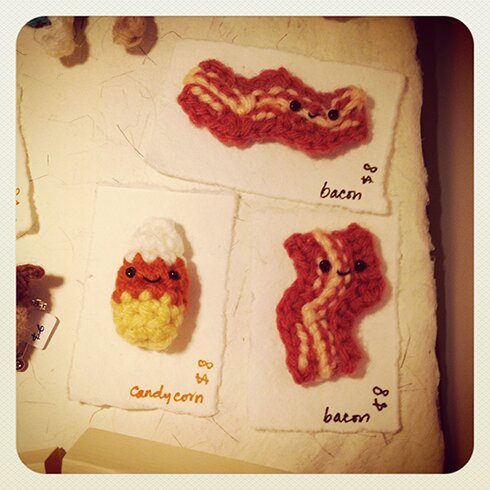
And because the bacon was a lot of fun to make, I made a few smiling bacon magnets for the physical shop as well (plus some very festive candy corns for the season!). Maybe I will list them on Etsy too.

bacon

I have definitely been enjoying more time to craft and be creative!

Wishing you a wonderful Friday and weekend!


Tweet about this on TwitterShare on FacebookPin on PinterestShare on TumblrPrint this page

badger badger badger

DSC03826

The final pattern in our 12 Days of Woodland Creatures (and Their Favourite Things) project!

Badger’s favourite thing might be mushrooms! According to this (ridiculous and kind of hilarious) video.

I googled “badger” and quickly learned that it’s got grey fur. But I’ve always imagined it having brown or tan colour fur. Maybe I’ve been confusing it with gophers :S But anyway, this is why my badger is tan-coloured. Strangely, it doesn’t look right to me in grey. But of course you can make yours in grey or any other colour you like :)

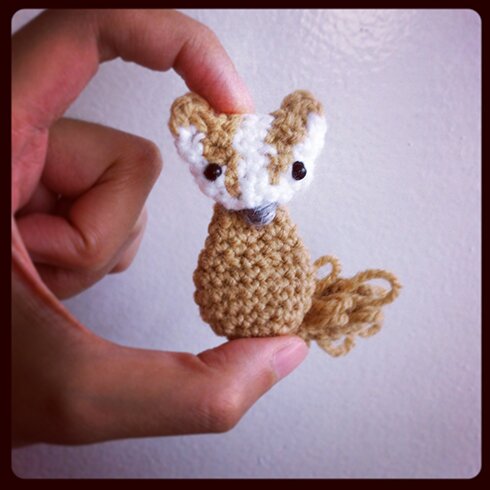
Badger has a chubbier body than the fox and the opossum (so I have been told by Wikipedia). It also has a tail made of loop stitch but less fluffy and shorter than the fox’s.

I used:

Worsted weight yarn in white, tan and grey (for nose)

3.5 mm hook

Small beads for eyes

Needle and thread for sewing

Pattern:

Head

Head is worked in rounds and also back and forth, i.e. turn at the end of each round, so that the stripe pattern on the badger’s face doesn’t start to slant.

*IMPORTANT*

*To switch colours in an sc row: in the stitch before colour change, insert hook and draw up a loop, then drop the current colour of yarn you’re using, attach or pick up the new colour of yarn, yo and pull through both loops on hook to complete the sc, then make the next stitch in the new colour.

*When switching colours on the wrong side (WS), move the strand of yarn currently in use to the front of the work (the side facing you) before making the next stitch with the new colour.

*Carry the strand of colour not in use with you as you crochet the front of the head, wrapping the strand not in use in the stitches you make, but drop the strand of tan colour yarn when you crochet the back of the head in white.

Round 1 (right side): with white, ch 2, 4 sc in 2nd ch from hook, sl st in first sc to join, turn.

Round 2 (wrong side): ch 1 (does not count as a stitch), 2 sc in each sc around, sl st in first sc to join, turn.

Round 3 (RS): ch 1, sc in first sc, attach tan yarn, sc in next sc with tan, sc in same sc with white, sc in next sc with white, sc in next sc with tan, sc in same sc with white, *sc in next sc with white, 2 sc in next sc with white*, repeat from * to * once more, sl st in first sc to join, turn.

Round 4 (WS): continuing with white, ch 1, sc in first sc, sc in next sc with tan, sc in next 2 sc with white, sc in next sc with tan, sc in each sc with white till end of round, sl st in first sc to join, turn.

Round 5 (RS): ch 1, sc in first sc with white, 2 sc in next sc with tan, sc in next 2 sc with white, 2 sc in next sc with tan, sc in each sc with white until end of round, sl st in first sc to join, turn.

Round 6 (WS): ch 1, sc in first sc with white, sc in next 2 sc with tan, sc in next 2 sc with white, sc in next 2 sc with tan, sc in each sc with white until end of round, sl st in first sc to join, turn.

Round 7 (ears): press head flat with working loop in the right top corner of head. Crocheting through both front and back layers of head, ch 1, sc in next sc with white, switch to tan, ch 1, dc in next sc, ch 1, sl st in same st as last dc just made, sl st in next sc, switch to white, sl st in next 2 sc, switch to tan, sl st in next 2 sc, ch 1, dc in same st as last sl st just made, ch 1, fasten off tan, switch to white, sc in last sc, sl st in same sc, fasten off, weave in ends.

Body

Round 1: with tan, 6 sc in magic ring, do not join.

Round 2: 2 sc in each sc around, do not join (12 sc).

Round 3: *2 sc in next sc, sc in next sc*, repeat from * to * around, do not join (18 sc).

Continue with 1 sc in each sc around until piece is 3/4″ tall.

Decrease round: *sc in next sc, 2-sc-tog over next 2 sc*, repeat from * to * around, do not join (12 sc).

Continue with 1 sc in each sc around for 2 more rounds of 12 sc in each round.

Last round: *2-sc-tog over next 2 sc* 6 times. Leaving a tail for sewing, fasten off.

Tail

Row 1: with tan and leaving a tail for sewing, ch 3, sc in 2nd ch from hook, sc in next ch, turn.

Row 2: ch 1 (does not count as a st), 2 loop stitches (lp st) in first sc, lp st in next sc, turn.

Row 3: ch 1, lp st in each st across, turn.

Row 4: ch 1, lp st in first st, skip next st, sp st in last st, turn.

Row 5: ch 1, lp st in each st across, fasten off, weave in end.

Assembly:

Sew on eyes and embroider nose. *Tip: when sewing on eyes, insert sewing needle and tie off thread in the bottom part of the head where it will be covered by the neck part of the body when attaching the head and body together.

Sew head on body, sew tail on body. Weave in ends.


The badger is feeling very honoured to conclude our 12 Days of Woodland Creatures (and Their Favourite Things) project :D

Photo 2014-10-20, 2 20 26 PM

Thanks so much for journeying along, everyone! I think I will make a photo collage of all the creatures and things in this project, and will post a call for photos so there can be a photo collage of your creations as well. Stay tuned! Have a great start to the week!


Tweet about this on TwitterShare on FacebookPin on PinterestShare on TumblrPrint this page

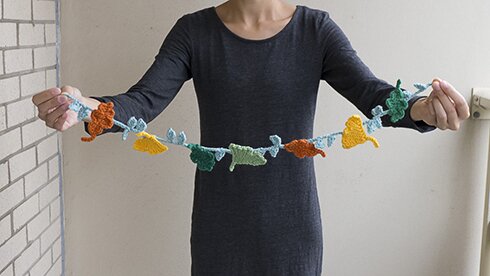
foliage garland

P1070428

We’re at the 11th pattern for the 12 Days of Woodland Creatures (and Their Favourite Things) project! :D

But first, apologies for the recent delays of posting these patterns! My computer had died a week ago, so it’s been challenging to re-size and upload photos for the blog. As Mike is helping me set up a replacement computer hopefully there won’t be as long of a wait for the last pattern of the series!

As mentioned in my first post for this project, I’m making all these creatures and their favourite things for a baby mobile. And I heard through the Ravelry CAL group that there are others who are interested in making mobiles too! That’s awesome!

For the foliage, I chose oak for strength, ginkgo for peace and wisdom, and vine for the resilience and tenacity to overcome the challenges that comes his way. All my best wishes for the young one.

SO! My plan for this garland is to attach it around the wooden hoop that the other creatures and things will dangle from. (I might use an embroider hoop if I can’t find a plain wooden hoop or ring, I envision it to be about 6–7″ in diameter.)

But it can also be a regular garland for decorating the walls. And it can have other creatures added to it, like this adorable bat by Lucy Ravenscar that I just spotted today :D And again I spaced the leaves rather closely in preparation for the mobile, but you can adjust the lengths in between leaves in any way you like.

The construction involves crocheting the oak and ginkgo leaves separately, and then making a chain of vine and smaller leaves, and attaching the oak and ginkgo leaves as you crochet the vine. You can attach other creatures to it in the same way.

I used:

Worsted weight yarn in orange, yellow, dark green, bright green, and blue-green (but I’m sure other colour combinations will look fabulous too!)

3.5 mm hook

Pattern:
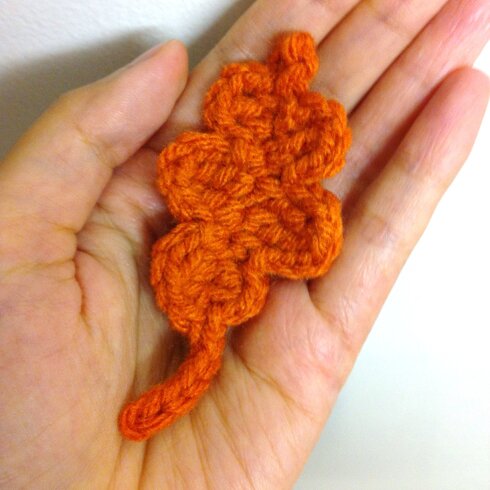
Photo 2014-10-15, 5 51 14 PM

Oak (make as many as you’d like)

The oak leaf is created by first crocheting half the leaf down the middle chain, then making the stem, then crocheting the other half of the leaf, going up the same middle chain.

First half: ch 12, sc in 5th ch from hook, ch 2, dc in next ch, ch 2, sc in next ch, ch 3, 2-tr-tog over next 2 ch, ch 3, sc in next ch, ch 2, dc-sc-tog* over next 2 ch, ch 1, sl st in last ch, do not fasten off.

*dc-sc-tog: yo, insert hook in next ch, draw up a loop, yo and pull through 2 loops on hook, insert hook in next ch, draw up a loop, yo and pull through all loops on hook.

Stem: ch 4, sl st in 2nd ch from hook, sl st in next 2 ch, do not fasten off.

*you can make the stem longer or shorter by making more or fewer ch.

Second half: crocheting in the remaining loop of the middle chain, sl st in first ch of middle chain, ch 1, sc-dc-tog* over next 2 ch, ch 2, sc in next ch, ch 3, 2-tr-tog over next 2 ch, ch 3, sc in next ch, ch 2, dc in next ch, ch 2, sl st in next ch, fasten off, weave in ends.

*sc-dc-tog: insert hook in next ch, draw up a loop, yo, insert hook in next ch, draw up a loop, yo and pull through 2 loops on hook, yo and pull through all remaining loops on hook.

Ginkgo (make as many as you’d like)
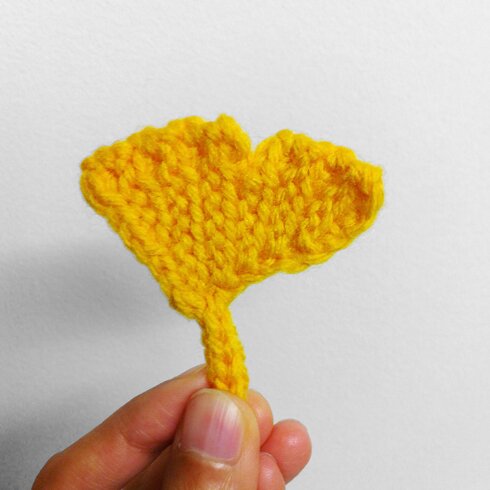
Photo 2014-10-15, 5 53 40 PM

For the ginkgo leaf we are crocheting in the front loop only.

ch 9.

Row 1: sc in second ch from hook, sc in next 3 ch, turn.

Row 2: sl st in first sc, sl st in next 2 sc, sc in last sc, ch 1, turn.

Row 3: sc in first sc, sl st in next 3 st, sl st in next ch in the beginning chain, turn.

Row 4: sl st in first st, sl st in each st across until last st, sc in last sc, ch 1, turn.

Row 5: sc in first sc, sl st in each st across, sl st in next ch in the beginning chain, turn.

Row 6: sl st in first st, sl st in next 3 st, ch 3, turn.

Row 7: sc in second ch from hook, sl st in next ch, sl st in each st across, sl st in next ch in the beginning chain, turn.

Row 8–10: repeat rows 4–5, then row 4 once more.

Row 11: sc in first sc, sl st in next 4 st, turn.

Row 12: skip first st, sl st in next st, sl st in next 2 st, sc in last st, ch 1, turn.

Row 13: sc in first sc, sl st in next 3 st, sl st in skipped st in the row below, sl st in remaining unworked st in 2 rows below, sl st in the first ch of the beginning ch (the ch 9 in the very beginning), don’t fasten off.

Stem: ch 7, sl st in second ch from hoo, sl st in each ch across, sl st in the first ch of the beginning ch (the ch 9 in the very beginning). Fasten off, weave in ends.

Vine

The vine is made of chains, and you can crochet the leaves as frequently as you like between chains.

Small leaf: ch 4, dc in 3rd ch from hook, ch 1, sl st in top of dc just made, ch 3, sl st in same ch where dc was made. Continue ch for vine.

When you want to attach an oak or ginkgo leaf, make sl st across the back of the leaf. Here’s a back view of the garland to show how the leaves are attached.
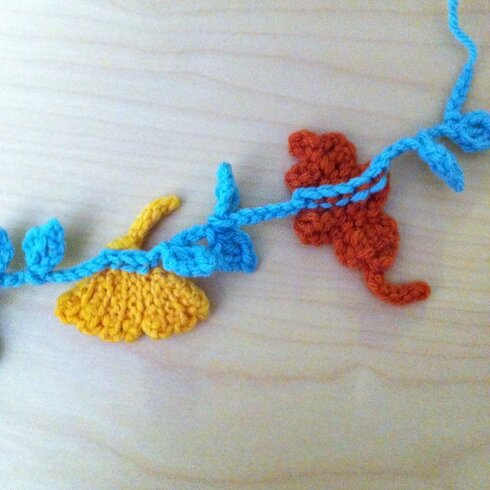
Photo 2014-10-17, 1 23 35 PM

It might even make a nice leaf crown :D (silliness is absolutely necessary)
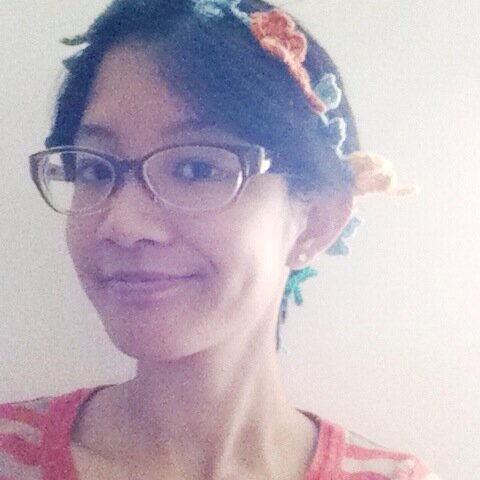
Photo 2014-10-17, 1 22 24 PM


Have a lovely weekend, everyone!


Tweet about this on TwitterShare on FacebookPin on PinterestShare on TumblrPrint this page