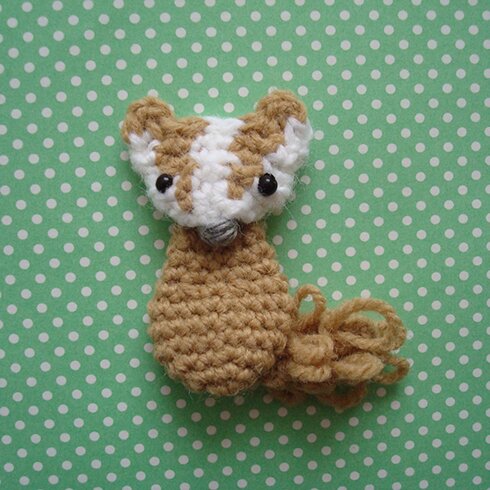
The final pattern in our 12 Days of Woodland Creatures (and Their Favourite Things) project!
Badger’s favourite thing might be mushrooms! According to this (ridiculous and kind of hilarious) video.
I googled “badger” and quickly learned that it’s got grey fur. But I’ve always imagined it having brown or tan colour fur. Maybe I’ve been confusing it with gophers :S But anyway, this is why my badger is tan-coloured. Strangely, it doesn’t look right to me in grey. But of course you can make yours in grey or any other colour you like :)
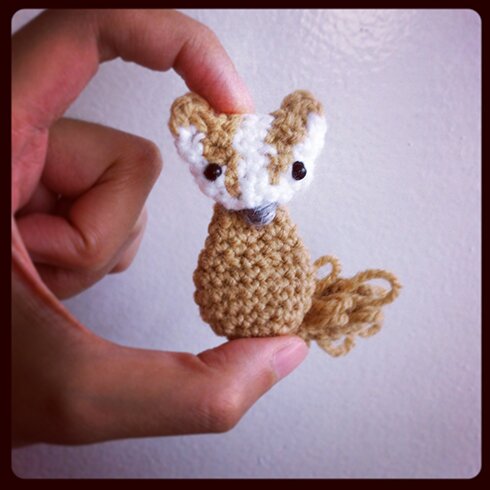
Badger has a chubbier body than the fox and the opossum (so I have been told by Wikipedia). It also has a tail made of loop stitch but less fluffy and shorter than the fox’s.
I used:
Worsted weight yarn in white, tan and grey (for nose)
3.5 mm hook
Small beads for eyes
Needle and thread for sewing
Pattern:
Head
Head is worked in rounds and also back and forth, i.e. turn at the end of each round, so that the stripe pattern on the badger’s face doesn’t start to slant.
*IMPORTANT*
*To switch colours in an sc row: in the stitch before colour change, insert hook and draw up a loop, then drop the current colour of yarn you’re using, attach or pick up the new colour of yarn, yo and pull through both loops on hook to complete the sc, then make the next stitch in the new colour.
*When switching colours on the wrong side (WS), move the strand of yarn currently in use to the front of the work (the side facing you) before making the next stitch with the new colour.
*Carry the strand of colour not in use with you as you crochet the front of the head, wrapping the strand not in use in the stitches you make, but drop the strand of tan colour yarn when you crochet the back of the head in white.
Round 1 (right side): with white, ch 2, 4 sc in 2nd ch from hook, sl st in first sc to join, turn.
Round 2 (wrong side): ch 1 (does not count as a stitch), 2 sc in each sc around, sl st in first sc to join, turn.
Round 3 (RS): ch 1, sc in first sc, attach tan yarn, sc in next sc with tan, sc in same sc with white, sc in next sc with white, sc in next sc with tan, sc in same sc with white, *sc in next sc with white, 2 sc in next sc with white*, repeat from * to * once more, sl st in first sc to join, turn.
Round 4 (WS): continuing with white, ch 1, sc in first sc, sc in next sc with tan, sc in next 2 sc with white, sc in next sc with tan, sc in each sc with white till end of round, sl st in first sc to join, turn.
Round 5 (RS): ch 1, sc in first sc with white, 2 sc in next sc with tan, sc in next 2 sc with white, 2 sc in next sc with tan, sc in each sc with white until end of round, sl st in first sc to join, turn.
Round 6 (WS): ch 1, sc in first sc with white, sc in next 2 sc with tan, sc in next 2 sc with white, sc in next 2 sc with tan, sc in each sc with white until end of round, sl st in first sc to join, turn.
Round 7 (ears): press head flat with working loop in the right top corner of head. Crocheting through both front and back layers of head, ch 1, sc in next sc with white, switch to tan, ch 1, dc in next sc, ch 1, sl st in same st as last dc just made, sl st in next sc, switch to white, sl st in next 2 sc, switch to tan, sl st in next 2 sc, ch 1, dc in same st as last sl st just made, ch 1, fasten off tan, switch to white, sc in last sc, sl st in same sc, fasten off, weave in ends.
Body
Round 1: with tan, 6 sc in magic ring, do not join.
Round 2: 2 sc in each sc around, do not join (12 sc).
Round 3: *2 sc in next sc, sc in next sc*, repeat from * to * around, do not join (18 sc).
Continue with 1 sc in each sc around until piece is 3/4″ tall.
Decrease round: *sc in next sc, 2‑sc-tog over next 2 sc*, repeat from * to * around, do not join (12 sc).
Continue with 1 sc in each sc around for 2 more rounds of 12 sc in each round.
Last round: *2‑sc-tog over next 2 sc* 6 times. Leaving a tail for sewing, fasten off.
Tail
Row 1: with tan and leaving a tail for sewing, ch 3, sc in 2nd ch from hook, sc in next ch, turn.
Row 2: ch 1 (does not count as a st), 2 loop stitches (lp st) in first sc, lp st in next sc, turn.
Row 3: ch 1, lp st in each st across, turn.
Row 4: ch 1, lp st in first st, skip next st, sp st in last st, turn.
Row 5: ch 1, lp st in each st across, fasten off, weave in end.
Assembly:
Sew on eyes and embroider nose. *Tip: when sewing on eyes, insert sewing needle and tie off thread in the bottom part of the head where it will be covered by the neck part of the body when attaching the head and body together.
Sew head on body, sew tail on body. Weave in ends.
The badger is feeling very honoured to conclude our 12 Days of Woodland Creatures (and Their Favourite Things) project :D
Thanks so much for journeying along, everyone! I think I will make a photo collage of all the creatures and things in this project, and will post a call for photos so there can be a photo collage of your creations as well. Stay tuned! Have a great start to the week!
These have all been fabulous! :-)
thanks Amy!! :D
Your little animals are so cute! I’m going to be sad when October ends.
Wait, wait! I finally thought of a great response!
Stop “badgering” me to make all the cute things!
LOL LOL LOL LOL
hahaha… XD
thanks so much! the 12 patterns have all been posted, but there will be a bonus pattern coming soon :D