hiatus

For folks who’s been vis­it­ing this blog over the past decade since it start­ed in 2010, thank you very much for jour­ney­ing with me. For a long time, this was my home, where I could feel safe by return­ing to some­thing I love that is dif­fer­ent from what I do for a liv­ing. I’ve met some very car­ing peo­ple and made friends through this blog. The crochet/knitting com­mu­ni­ty was kind to me.

I under­stand that the pan­dem­ic has been weigh­ing on every­one, and craft­ing is per­haps some­thing that peo­ple are try­ing to use to de-stress, and per­haps peo­ple are try­ing to use my pat­tern for that purpose. 

Late­ly I have been receiv­ing an increas­ing­ly num­ber of com­ments that are esca­lat­ing in the lev­el of frus­tra­tion, blame, and aggres­sion. This place is becom­ing a source of stress and is no longer safe.

I’m impact­ed by this pan­dem­ic too. I work in the men­tal health sec­tor, I teach, and I’m a full-time stu­dent. I have been putting out pat­terns entire­ly for free for the past 10 years. I’m how­ev­er not a pro­fes­sion­al design­er. I will not have the time or ener­gy to share any more pat­tern in the fore­see­able future. I tried to be respon­sive and help peo­ple with my old pat­terns, but I no longer have the capac­i­ty to do so. I cer­tain­ly am not able to con­tin­ue receiv­ing aggres­sive messages.

In order to make this place safe for me, I’m leav­ing the pat­terns on the blog for now, but I’ve turned off the com­ments on all of my posts. If folks can­not under­stand or fol­low my pat­terns, I sug­gest vis­it­ing Rav­el­ry, where there are thou­sands of oth­er won­der­ful pat­terns made by help­ful design­ers who are much, much more skill­ful than me. 

In the mean­time, I con­tin­ue to craft. If you’d like to take a look at what I’m mak­ing with oth­er design­ers’ won­der­ful pat­terns, please feel free to find me on Insta­gram.

Take care, everyone.


fall

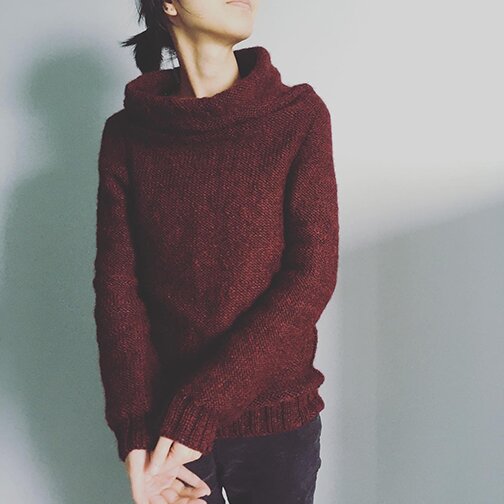
This sweater has been in the mak­ing since May. The Redy sweater by ANKESTRiCK, knit­ted with one giant ball of Lion Brand Pound of Love that was frogged from Mike’s aban­doned project. I used 5mm and 4.5mm nee­dles to account for the heav­ier yarn. 

I like all the dif­fer­ent parts of it: the reversed stock­inette stitch, the dis­tinct seam­lines (made with purl stitch­es, not seamed), the com­plete­ly seam­less con­struc­tion, the fun­nel neck that is not very close to the neck, keeps warm but does­n’t scratch. 

The only thing I did­n’t like too much was the rolling of the stock­inette stitch at the col­lar, so I fold­ed the edge over about 2 inch­es and stitched around.

Unre­lat­ed note: I’ve also not had a hair­cut since Feb­ru­ary, because I don’t have a car and can’t jus­ti­fy tak­ing pub­lic tran­sit to the hair dress­er. But here’s a recent pic­ture of me depict­ing my cur­rent hair­style, and smug­ly mod­el­ing a knit sweater.

Ani­mal Cross­ing saves my mind. Any­one else play?

May every­one be well, and safe, and keep­ing good com­pa­ny with an abun­dance of yarn as we ven­ture into sweater season. 

confetti

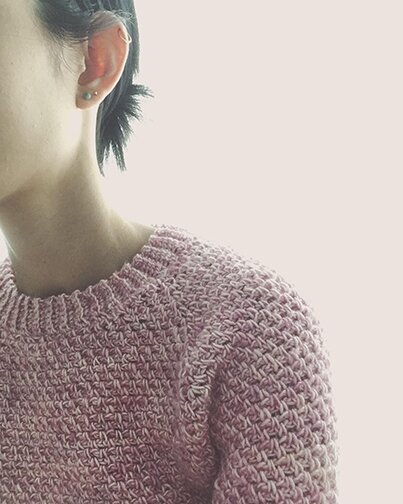
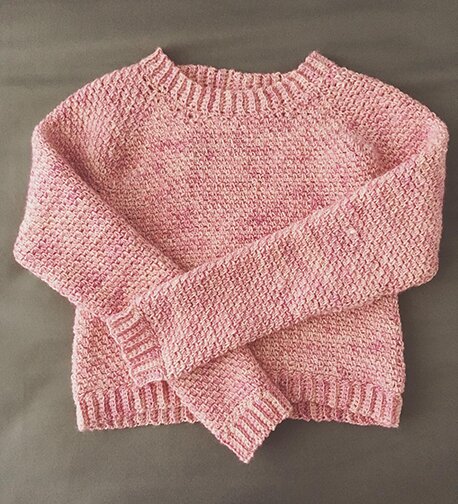
This yarn was a raf­fle win from a yarn hop / fundrais­ing event in 2015. I don’t usu­al­ly use or wear the colour pink, so it’s tak­en me quite a few years, as you can see, to find a project for it. 

The yarn is sin­gle ply meri­no DK by Mineville Wool Project. It’s quite com­fort­able to wear. The pat­tern is Con­fet­ti DK Pullover by Nomad Stitch­es.

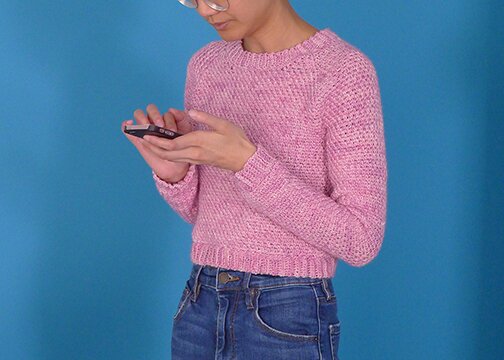
I like that spe­cial care is tak­en to add short rows to the shoul­ders and back so it fits bet­ter. (Was try­ing to get a full length pic­ture of me wear­ing it but the most suc­cess­ful was one of me not being aware of pic­ture being taken.)

I hope that sum­mer is going alright for every­one so far, with much craft­ing in the sun.

Icarus

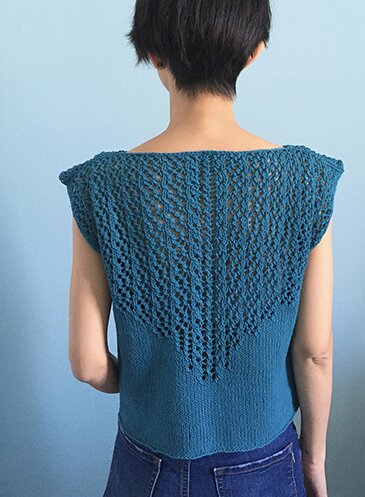
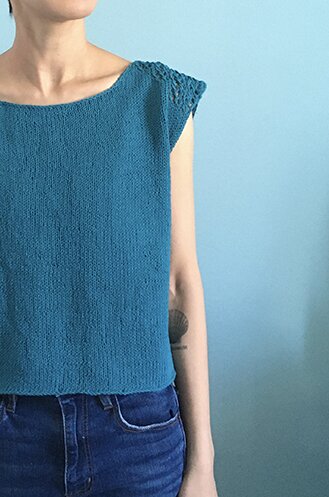
Fol­low­ing the failed attempt at mak­ing this sum­mer top, I frogged the project and used the yarn (Patons Hemp­ster) to make the Icarus tank from Knit­ty issue 47. 

I bought this yarn at my local yarn shop, The Yarn Guy, last sum­mer, and had since frogged twice, but it’s hard­ly split­ting, so it’s a nice a durable one. The Yarn Guy is def­i­nite­ly oper­at­ing online and has a huge amount of stock, real­ly friend­ly and help­ful folks, so please check them out if you’re look­ing to sup­port inde­pen­dent yarn shops in the Toron­to area.

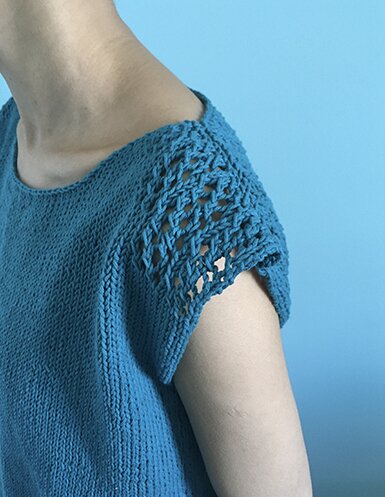
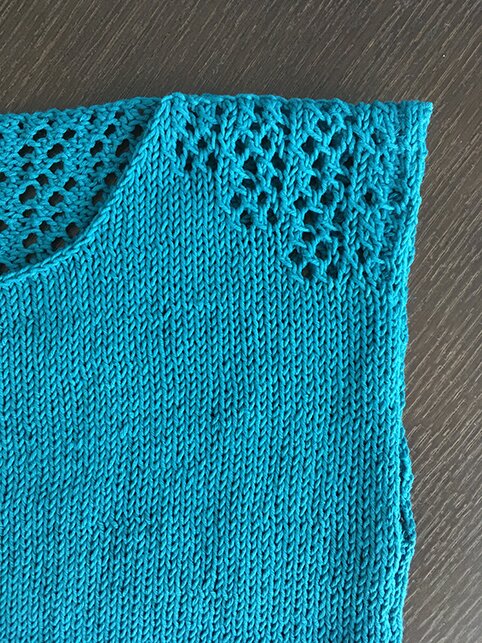
I made some mod­i­fi­ca­tions so that it was knit­ted flat in two pieces, with lace pat­tern on the shoul­ders. Not that I did­n’t have the cir­cu­lars to knit in the round, but knit­ting flat just feels more straight­for­ward to me at the moment, some­thing I have the men­tal capac­i­ty to handle.

The rolling of stock­inette stitch at the hems blocked out sur­pris­ing­ly well. I’m hop­ing it won’t roll back much after wear­ing and washing. 

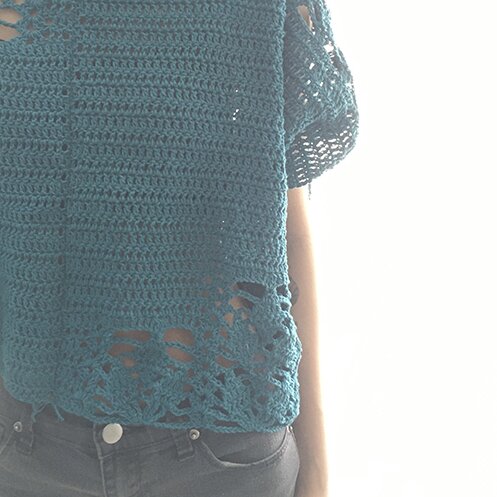
The mod­i­fi­ca­tions I made is for a boxy-shape top that is cropped length. It is worked flat and seamed at the shoul­ders and sides. It mea­sures 36″ around. The yarn is DK weight and I used 4.5 mm needles.

Back:

CO 86. 

Knit in stock­inette for 4 inch­es, then begin lace pat­ter as indi­cat­ed in the Icarus tank pat­tern for work­ing flat.

(It may be help­ful to note that it’s actu­al­ly eas­i­er to read from the chart than the writ­ten pat­tern, as there are a few errors in the writ­ten one and can cause some confusion.)

Repeat lace pat­tern until piece is 18″, BO.

Front:

CO 86.

Knit in stock­inette until piece is 15.25″. 

Work lace pat­tern row 14–19, but reversed and split up over the two shoul­ders, as follows.

On row 14, p 6, pm, p 5, pm, p till there are 11 stitch­es left, pm, p 5, pm, p 6.

On row 15, begin with the 10th stitch in the chart, and k both the 10th and 11th stitch­es (i.e. omit the cable twist on this row and row 18), then fol­low the rest of the chart. k till mark­er, then work stitch­es 1–11 of lace chart (omit­ting the cable twist in stitch­es 10 and 11).

Work the rest of the lace pat­tern as above rearrange­ment of stitches.

In the sec­ond repeat of the lace pat­tern, start shap­ing neck at the same time.

On row 14, p 28, BO 30, place the 28 stitch­es on spare cable nee­dle, then p the remain­ing 28 stitches.

While fol­low­ing the lace pat­tern (and incor­po­rat­ing 5 more stitch­es toward the cen­tre every time the pat­tern repeats), k2tog on the neck edge of each RS row sev­en times. The last RS row will be row 15. BO 21 stitches.

With RS fac­ing, attach yarn to the oth­er neck edge. ssk, then work the rest of the row with lace pat­tern row 15. 

While fol­low­ing the lace pat­tern, ssk on the neck edge of each RS row six more times. The last RS row will be row 15. BO 21 stitches. 

Block the pieces. Sew togeth­er shoul­der and side seams.

Hope every­one is keep­ing well, and find­ing some knitting/crocheting/creative projects that sus­tain a sense of well-being at the moment.

reusable mask pattern

Had a vir­tu­al hang­out with my fam­i­ly fol­low­ing the pub­lic health announce­ment rec­om­mend­ing the wear­ing of home­made face masks when in sit­u­a­tions where prop­er dis­tanc­ing can’t be eas­i­ly followed. 

My mom said, why don’t you keep your­self busy and make some masks?

When we moved last spring I donat­ed all of my fab­ric stash to the art ther­a­py school for their pup­petry course, because I was try­ing to min­i­mize the amount of things we had to move. I kept, how­ev­er, a piece of fab­ric that was gift­ed to me along with some tobac­co from a woman who was part of an expres­sive arts group that I co-facil­i­tat­ed 7 or 8 years ago. Over the years I nev­er found a project that was worth using this gift. I also had anoth­er piece of vin­tage flo­ral cot­ton that I bought from Etsy and was sav­ing for mak­ing a dress (that I would nev­er wear any­way). So, mirac­u­lous­ly, I had fab­ric to work with.

Mike found this video tuto­r­i­al, which is by far the best one I’ve seen. It’s straight­for­ward, easy, and has fil­ter pocket.

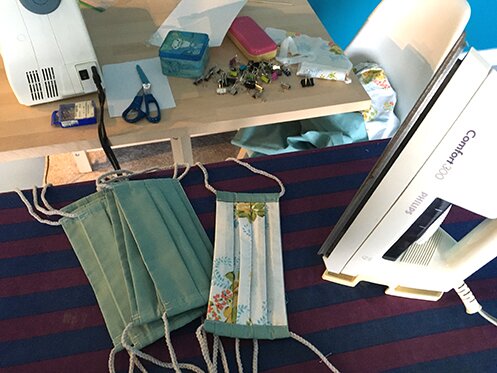
The liv­ing room/corner now a mask-mak­ing station.

So I’ve been mak­ing them for friends and fam­i­ly, espe­cial­ly those who are still work­ing in essen­tial ser­vice roles. The gift that keeps on giv­ing. Final­ly a project worth using the fab­ric for.

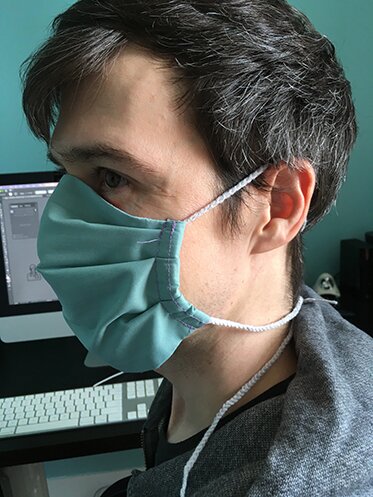
It’s a good pat­tern that works well, form-fit­ting to the face.

I did­n’t use elas­tics for the ears because I don’t have enough of it, and I was read­ing that elas­tics irri­tate the ears any­way. So I cro­cheted the ties.

Run­ning out of fab­ric soon, ordered some from a local yarn store, eweknit. If you’re in the Toron­to area and want to buy fab­rics, please con­sid­er sup­port­ing them — they’re offer­ing 20% off till end of April and free ship­ping over $75.

If you don’t have a sewing machine, the CDC also has how-to’s for no-sew ver­sions using a t‑shirt or a ban­dan­na and some hair elastics. 

If you do sew and want to sup­port front­line work­ers in Ontario, masks can be donat­ed to the Michael Gar­ron Hos­pi­tal, Tril­li­um Health Part­ners, this Face­book group that coor­di­nates mask orders and dis­tri­b­u­tion, Sew for TO, and The Sewing Army. (There may be oth­ers, these are the ones I know of.) 

Hope you’re stay­ing well as you’re read­ing this, and please wear a mask if you must go out so as many peo­ple as pos­si­ble can stay well too.


stay home project

I’m still here. Things have slowed down a lot more for me. That is a sign of privilege.  I work at home, with flex­i­ble sched­ule, unstruc­tured time, gen­er­ous dead­lines. To me that’s a lot more dif­fi­cult than hav­ing a fast-paced job and mul­ti­ple projects at once because now my mind has too much space to think. But I don’t have to work in the front­line, my work isn’t essen­tial, I don’t have to risk expo­sure, so I can’t complain.  

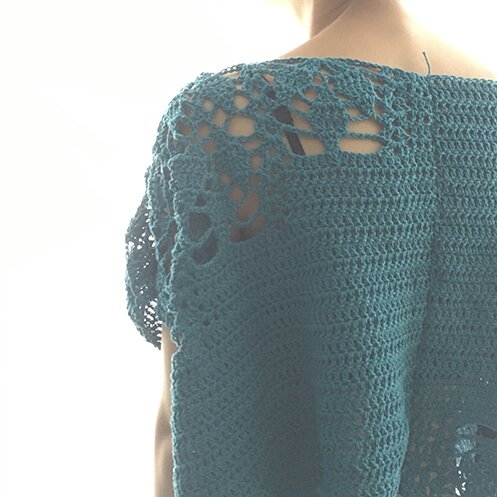
I kept see­ing the cov­er of Inside Cro­chet issue 123 on my Insta­gram feed. I was real­ly intrigued by the lace pat­tern jux­ta­posed to rows of dou­ble-cro­chet stitch­es. And I had skeins of Patons Hemp­ster that I frogged from anoth­er project. So I down­loaded the mag­a­zine and made an effort to work on it every day.

I knew from the mea­sure­ments that it was going to be a very over-sized fit. But I could­n’t tell until I put it together –

It was REALLY big on me. Like I made a table cloth and wore it.

I even went down a hook size (4 mm hook instead of 4.5 mm as called for in the pat­tern). I’m on the small scale of humans but I sure­ly am not that small. I don’t know if I messed up the gauge or if the mod­el on the cov­er is a lot taller or wider in the shoul­ders? I still real­ly like the way the lace pat­tern is incor­po­rat­ed. So I’m going to scale down on both the yarn weight and the hook size and see if it helps. Cur­rent­ly wait­ing for more yarn to arrive in the mail so, to be continued.

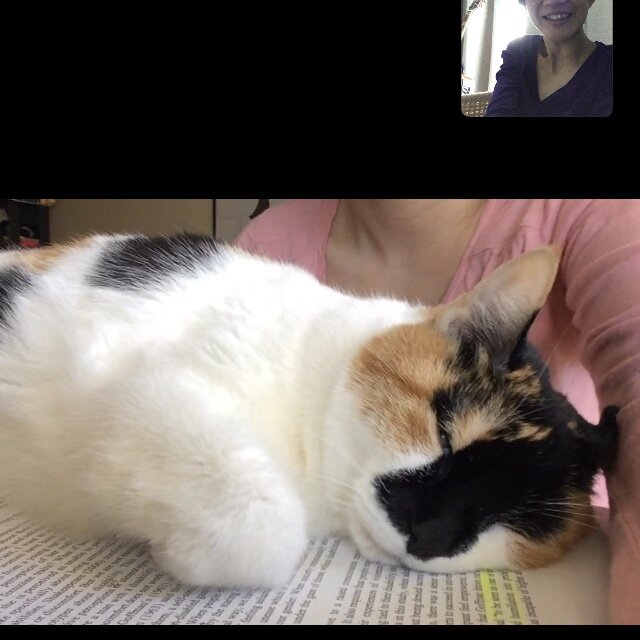
In the mean­while, pass­ing on some cat love from a friend who made sure I got lots of screen time with her cat.

That look says, “no work, all cat today.”

Wish­ing you good health, safe­ty, and peace of mind today. Take good care.


slow: hats

Update Nov. 30/2020: I’ve received quite a few com­ments and ques­tions regard­ing this pat­tern since it’s been pub­lished. It is not a begin­ner’s pat­tern. A few folks are fine with the writ­ten pat­tern and few pho­tos, and some folks request­ed more clar­i­fi­ca­tions. I apol­o­gize that I’m not a pro­fes­sion­al pat­tern design­er, my pat­terns have not been test­ed by oth­ers (though this one was repeat­ed­ly test­ed by me), I don’t have the time or know-how to make videos, I write pat­tern and instruc­tion to the best of my abil­i­ty in the clear­est way in my under­stand­ing and offer them for free. I do acknowl­edge that the pho­tos in this par­tic­u­lar pat­tern is admit­ted­ly lack­ing. I’m sor­ry about this, and if I do make anoth­er hat this win­ter, I will retake/replace the pho­tos. Work­ing and study­ing full-time cur­rent­ly means that at this point I don’t have the time nor capac­i­ty to respond exten­sive­ly to inquiries about how to make this hat. And a lot of times I can­not deci­pher what is going wrong in the ways that peo­ple describe them with­out see­ing the pieces and show­ing peo­ple what to do in per­son. So it means that at times it is sim­ply impos­si­ble for me to help peo­ple out. Going for­ward I will sup­port and clar­i­fy to the best of my abil­i­ty, but my respons­es may be delayed. I con­tem­plat­ed tak­ing this pat­tern down alto­geth­er because it sounds like it’s been caus­ing a lot of frus­tra­tion for peo­ple. But I thought I’d still leave it up for folks who find it use­ful. Thank you for visiting.   

I’ve made quite a few of these hats with cro­chet slip stitch. I like that they’re made slowly. 

I’m going to attempt to write the pat­tern for 3 dif­fer­ent yarn weights, so it’s ver­sa­tile for what­ev­er yarn you have on hand. They all make a hat that is 19″ around and 11″ in length (with brim unfold­ed). The stitch is quit stretchy so it will fit most I think. Here’s the worsted weight ver­sion on me.

And the worsted weight ver­sion on Mike (I have a small­er head than he does).

This is the sport weight version.
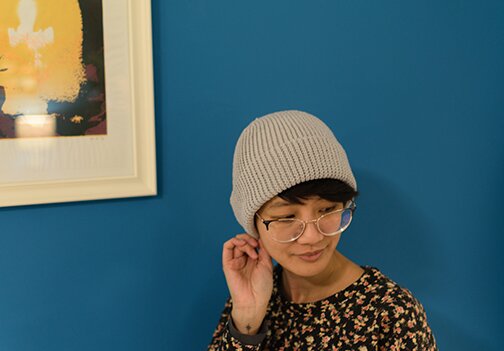
After test­ing the sport weight ver­sion with a left­over skein of acrylic yarn, I treat­ed myself to a skein of meri­no hand-dyed by Toron­to Yarn Hop co-orga­niz­er Emi­ly Gillies. She has a range of beau­ti­ful colours, and one skein of meri­no sport is per­fect for mak­ing one hat. 

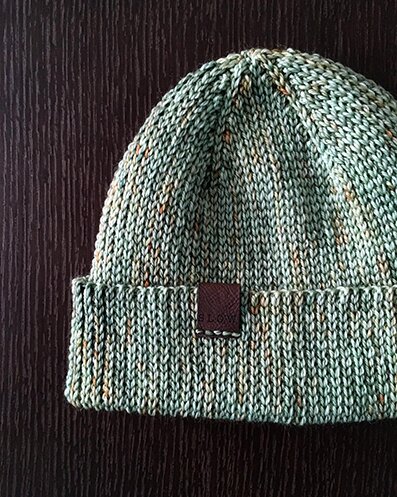
I made the hat in blue spruce (pic­tured here, in first pho­to, and in process pho­tos below). The won­der­ful cus­tom veg­an tag is by Mil­lie Mar­ty Co. in Belleville, ON.

The hat can also be made more quick­ly in bulky yarn. I test­ed it while attend­ing the Warm­ing Toron­to event (an after­noon of hang­ing out with great folks at a local pub while mak­ing hats, scarfs and mit­tens for dis­tri­b­u­tion at emer­gency shel­ters in the win­ter). And this hat took about 3.5 hours to make.
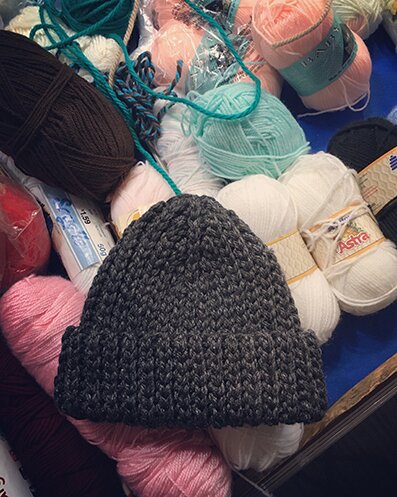
Dimen­sion of all three ver­sions (sport, worsted, bulky): 19″ around, 11″ in length with brim unfolded. 

Sug­gest­ed yarn:

Sport — Meri­no Sport by Emi­ly Gillies, 1 skein, 282 yards

Worsted — Patons Clas­sic Wool Worsted, 2 skeins, 210 yards each

Bulky — Patons Shet­land Chunky, 2 skeins, 148 yards each

Pat­tern:

Instruc­tions are for sport weight (worsted and bulky in parenthesis).

The turn­ing ch does not count as a stitch.

The hats are made with slip stitch in black loop only (BLO), made side­ways with short rows for crown shap­ing, then seamed at the back with slip stitch (or sewing).

Cro­chet loose­ly, oth­er­wise it can be dif­fi­cult to get the hook into the slip stitches.

The hat can be made wider with one or two addi­tion­al short rows, and longer with addi­tion­al stitch­es in the begin­ning chain (makes for a wider brim).

Hooks: 
Sport — 5.5 mm
Worsted — 6.5 mm
Bulky — 10 mm

Row 1 (set­up row): ch 55 (40, 33), sl st in sec­ond ch from hook, sl st in each ch to end.

First set of short rows:

Row 2: ch 1, sl st in each st until there is one st left, skip remain­ing st, turn.

Row 3: ch 1, skip first st, sl st in each st to end. 

Repeat rows 2 and 3 six (four, three) more times.

Next row: ch 1, sl st in each st. At this point the piece will look like this.
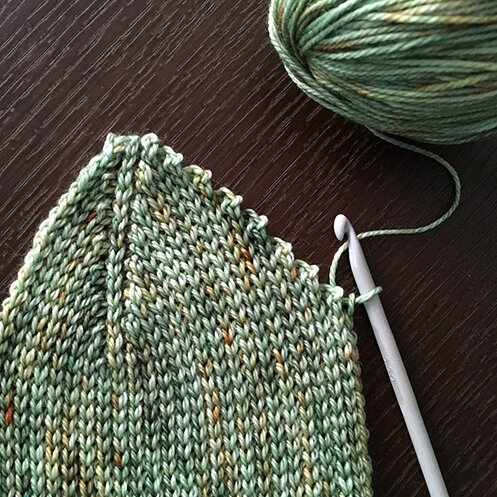
Con­tin­ue on and sl st into each end of the short row and the space in between each row — 14 (10, 8) stitch­es across the short rows, then sl st in the remain­ing last stitch from row 2. The piece will now look like this.
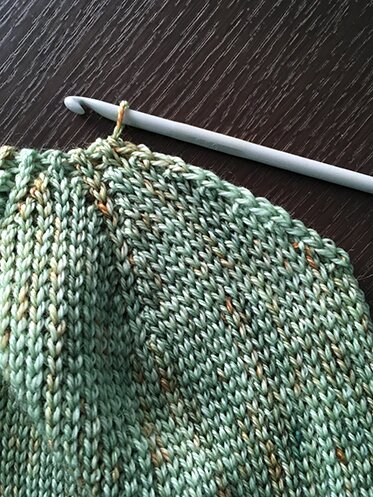
Next row*: ch 1, sl st in each st to end.

Sec­ond set of short rows:

Row 1: ch 1, sl st in each st until there are 14 (10, 8) stitch­es left in the row, turn.

Row 2: ch 1, sl st in every st to end.

Row 3: ch 1, sl st in every st, then sl st in the next two st in the row marked with * (the row made before row 1 of the sec­ond set of short rows), turn.

Repeat rows 2 and 3 six (four, three) more times.

Next row: ch 1, sl st in every st to end.

Repeat first and sec­ond sets of short rows four more times. Don’t fas­ten off.

Cro­chet seam togeth­er right side out. Turn inside out. Weave yarn through each stitch in crown open­ing, cinch and tied off. Weave in ends. Turn right side out. Fold up brim. Â 
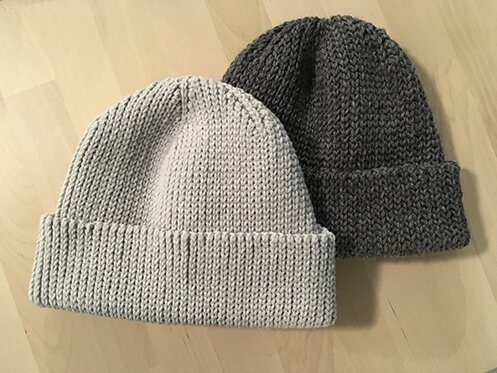
Hap­py crocheting!


Note: No incen­tive or com­mis­sion was received for this post. Sim­ply thought it was neat that I could find local arti­sans for both the yarn and cus­tom tags, and want to sup­port indie businesses :)


slow: mitts

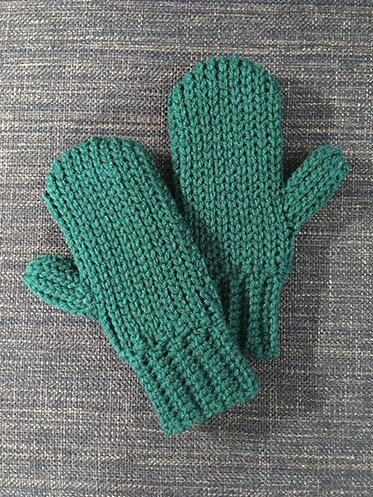
Real­ly enjoy­ing work­ing with slip stitch after mak­ing the lunar new year bam­boo. I like the slow­er pace of work­ing up the fab­ric with this stitch. And I fig­ured it would be a dense enough stitch to make a warm pair of mittens.

I used:

Worsted weight yarn

5.5 mm hook, and a small­er hook for weav­ing in ends

Tapes­try needle

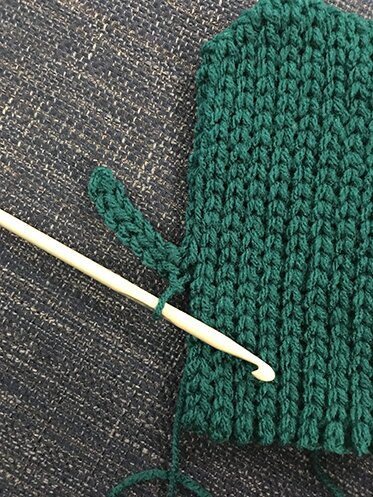
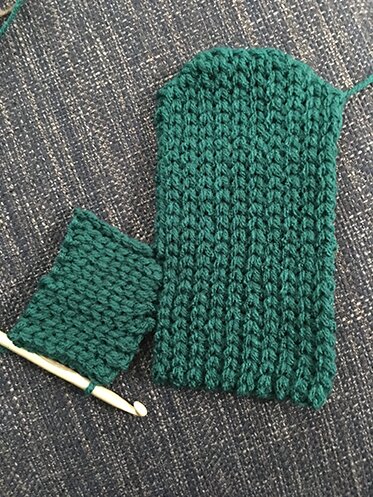
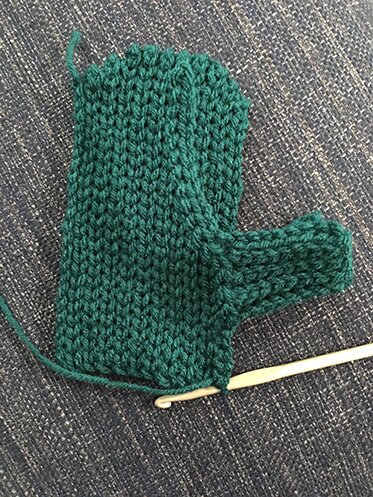
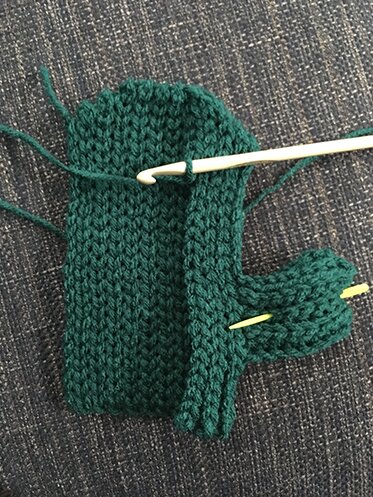
The mit­ten is cro­cheted flat in one piece, fold­ed in half at the thumb, and seamed togeth­er from the tip of the thumb to the cuff edge. The pho­tos that fol­low will help make sense of the construction.

All sl st worked through back loop only (BLO).

Mit­ten mea­sures 9″ long, 4″ across palm, 3″ across wrist, 2″ length of thumb. I have rel­a­tive­ly small hands. The mit­tens can be made larg­er with addi­tion­al ch in the begin­ning and begin­ning ch of thumb, and addi­tion­al rows between rows 7 and 15 

Pat­tern:

Row 1: ch 23, sl st in sec­ond ch from hook, sl st in every ch to end, ch 2 (these two extra ch increase the length by 1 st). 

Row 2: sl st in 2nd ch from hook, sl st in every st BLO (back loop only) to end.

Row 3: ch 1 (does not count as a stitch), sl st in every st to end, ch 2.

Row 4: repeat row 2.

Row 5: repeat row 3.

Row 6: repeat row 2 (25 st altogether).

Row 7–15: ch 1, sl st in ever st BLO to end.  

Row 16: ch 1, sk first st, sl st in next st and every st to end (skip­ping the first st decreas­es 1 st).

Row 17: ch 1, sl st in every st to end.

Row 18: repeat row 16.

Row 19: repeat row 17.

Row 20: repeat row 16.

Row 21: repeat row 17 (22 st altogether). 

Row 22 (thumb begins): ch 1, sl st in the first 12 st, ch 7, sl st in sec­ond ch from hook, sl st in every ch BLO, sl st in next st on the side of mitten.

Thumb row 1: ch 1, sl st in every st on thumb to end (8 st on thumb)

Thumb row 2: ch 1, sl st in every st on thumb, sl st in next st on the side of mitten.

Repeat thumb rows 1 and 2 three more times. 

Con­tin­ue work­ing 10 rows on thumb, with­out attach­ing the end of the row to the side of the mitten.

Don’t fas­ten off. ch 13, sl st in sec­ond ch on hook, sl st in every ch, work 5 sl st across the base of the 10 rows of them that are not attached to the body of the mit­ten, work 5 sl st into the remain­ing 5 st in the side of the mit­ten. It will end up look­ing like this with the thumb fold­ed in half.

Repeat rows 2 to 21 of mit­ten. I found that it was eas­i­er to fold the thumb in half and pin it togeth­er as I worked along so I don’t get con­fused about which direc­tion I was going.

Fas­ten off. 

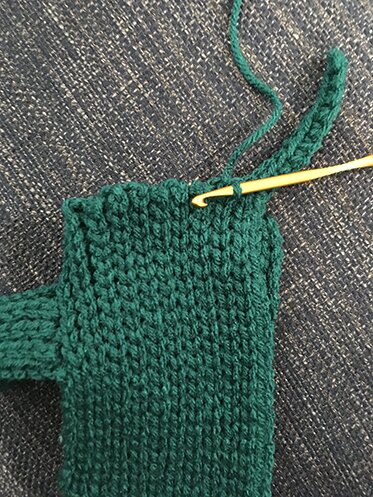
Cuff: Attach yarn to edge of cuff (direct­ly oppo­site of where last row end­ed), ch 11, sc in sec­ond ch from hook to end of ch, sl st in next stitch in the mit­ten that looks like a “v”, sl st in next st that looks like a “v”, sc BLO in every sc to end. The mit­ten here is pic­tured upside down with the first cuff row started. 

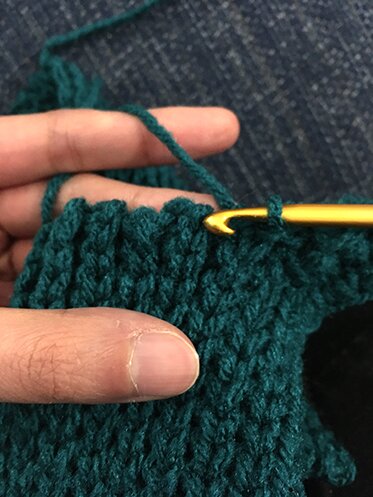
Con­tin­ue across the edge of the cuff. Here is a close up of the hook point­ing at the mid­dle of the stitch that looks like a “v”.

Attach yarn at the top of thumb. Weave yarn through all the stitch­es in top of thumb, cinch and tie off. Con­tin­ue seam­ing down the thumb and around the mit­ten to edge of cuff. Fas­ten off and weave in ends. 

The mit­tens are actu­al­ly fair­ly quick to work up. If you’re in/near Toron­to, con­sid­er join­ing us in the annu­al Warm­ing Toron­to event on Sun­day, Feb­ru­ary 9. We spend an after­noon at at a pub down­town, knit, cro­chet, loom, have a pint, share snacks, chat­ter, and make hats, mitts, scarfs, cowls, etc. for dis­tri­b­u­tion at emer­gency shel­ters over the win­ter months. If one mit­ten is fin­ished at home first, one can def­i­nite­ly fin­ish the pair while hang­ing out for a few hours at the event.  

Stay warm! ❄

renew

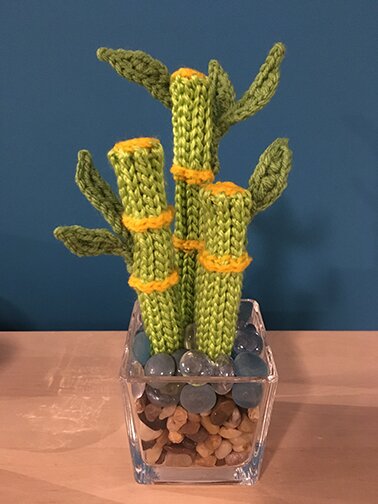
Today is the first day of Chi­nese new year. I made this bam­boo as a gift. Pret­ty hap­py with how it turned out. 

I thought bam­boo gen­er­al­ly sym­bol­izes good luck because it’s sold in every Chi­nese shop that sells plants. But with a quick search on the inter­net I learned that it also rep­re­sents renew­al (because of how quick­ly it grows), flexibility/strength, and longevi­ty — so, resilience, tenaciousness. 

“Tena­cious” is a word that I’d like to be described by. I don’t give up, or per­haps more truth­ful­ly I find it hard giv­ing up on things or peo­ple. Some would say that I’m not very good at let­ting go. Oth­er have said I’m stub­born. I’d like to think that I’m tena­cious. But I guess a way for­ward would be to cul­ti­vate flex­i­bil­i­ty, to renew or reori­ent my approach to how I’m tena­cious­ly con­nect­ing to some things. 

Any­way, I’d also say that the cro­chet slip stitch is a very bam­boo-like stitch, because it makes a firm fab­ric and there­fore tena­cious, it is how­ev­er also very flex­i­ble and stretch­able, almost like a knit­ted rib.

Here I’d like to share a loose­ly formed recipe for mak­ing the bam­boo. It’s kind of like free-formed cro­chet­ing, and how tall the plant is depends on the vase you’re using, but there are some basics to it, in case any­one would like to give it a try.

I used:

Caron Sim­ply Soft for the bam­boo stalk because of its sheen

Patons Astra for the yel­low rings and caps

Bernat Super Val­ue for the leaves

5.5 mm hook for the stalk

3.5 mm hook for the rings and caps

Tapes­try needle

Pop­si­cle sticks

Vase with pebbles

Stalks are made with back loop slip stitch (tuto­r­i­al).
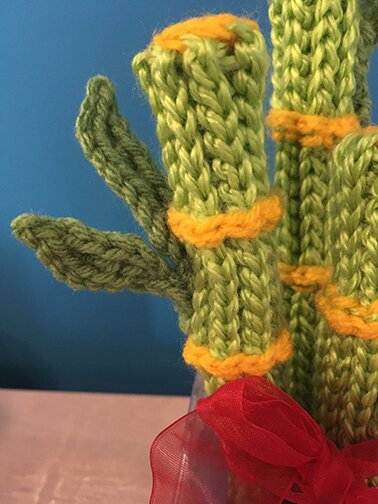
With larg­er hook and lighter green, make a chain of desired length. I start­ed with 25 ch for the tallest, and 21 and 15 for the oth­er two. Then sl st BLO until piece is about 1.5″ wide. With­out fas­ten­ing off, sl st to join the seams togeth­er length­wise, mak­ing a long tube (the sl st seam will be on the out­side; the piece won’t be turned inside out after seam­ing). Fas­ten off. 

Rings are made around the stalks with sur­face slip stitch (tuto­r­i­al).
With small­er hook and yel­low, attach yarn where you want the ring to be at the back seam of the stalk. sl st in every stitch in the rows cross­wise (not just the stitch that appears as a “v”, but also the stitch in between the “v“s, so that the rings would pro­trude a bit). Fas­ten off after every ring made and pull the tails inside the stalk.

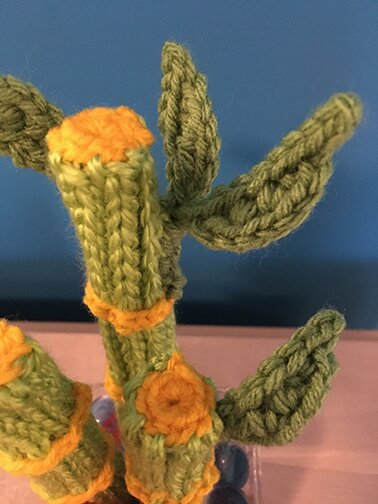
Caps are made with mag­ic ring (tuto­r­i­al) with 8 sc inside the ring, sl st to join with first sc, then fas­ten off and leave a long tail for sewing. Attach ring to the top of the stalk. 

Leaves may be a lit­tle tricky to explain… I regret not tak­ing progress pho­tos, very sor­ry. It took quite a bit of exper­i­men­ta­tion but I set­tled on this method and I think the results are quite live­ly look­ing. I hope this makes sense.

With small­er hook and dark­er green, ch 5 to 7 (this is the stem you’re sewing to the stalk, so its length depends on how you want to posi­tion the sprig of leaves on the bam­boo), dc in sec­ond ch from hook, *[ch 1, dc in ch just made] two or three times (depend­ing on how long you want the leaf to be), ch 2, sl st in 2nd ch from hook, sl st even­ly into the dc’s made ear­li­er (rough­ly 2 sl st per dc), sl st into the last ch of the stem*. At this point you can sl st down every ch of the stem then fas­ten off with tail for sewing, or you can make anoth­er leave by sl st down just a cou­ple of ch on the stem, then repeat * to *, and sl st down every ch of the stem, fas­ten off and leave a tail for sewing.

Sew the leaves to the stalks as desired.

Assem­bly:

The bam­boo stalks are sup­port­ed by pop­si­cle sticks on the inside. I used pop­si­cle sticks because it’s the only thing I can find to use at home. The width of it and the thick­ness of the cro­chet fab­ric takes up the inte­ri­or of the stalks so they don’t need more stuff­ing. I’ve had to con­nect a cou­ple of pop­si­cle sticks togeth­er for the taller two stalks by sim­ply over­lap­ping the ends of the sticks and glu­ing them togeth­er with white glue (hot glue would be a bet­ter choice). 

To deter­mine the lengths of pop­si­cle sticks you need, mea­sure how deeply you want the sticks to extend toward the base of the vase. I would want the sticks to actu­al­ly touch the base of the vase to make sure the sticks don’t wob­ble too eas­i­ly. Deter­mine the length of stick that is stick­ing out of the end of the stalk. It would be the same for all the stalks. Then mea­sure how tall each stick will need to be accord­ing to the length of the stalk. 

Pour a lay­er of peb­bles into the vase. I think small­er stone chips at least for the bot­tom lay­er are bet­ter for sta­bil­i­ty. Insert the stalks and arrange as desired, then pour on more peb­bles. I used dif­fer­ent glass ones on top for interest.

I lat­er added a red rib­bon around the stalk for gift-giv­ing that is not pic­tured because it blocked the bam­boo too much. But that also helps with the stability.

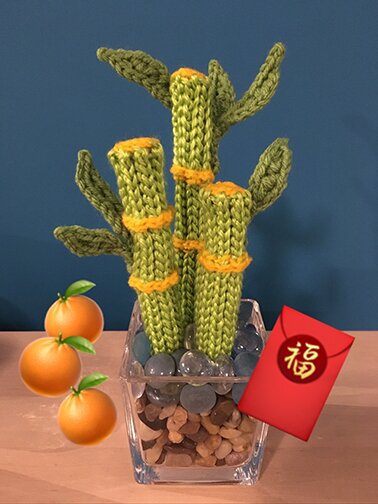
I did­n’t have any oth­er new year dec­o­ra­tions but thank­ful­ly there are emojis 😊🎋

Wish­ing every­one good health and hap­pi­ness in the year of the 🐀

new year sweater

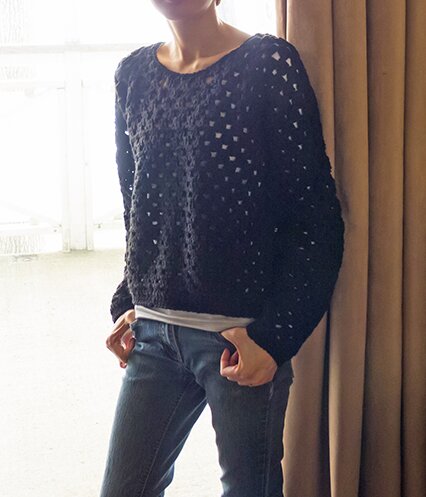
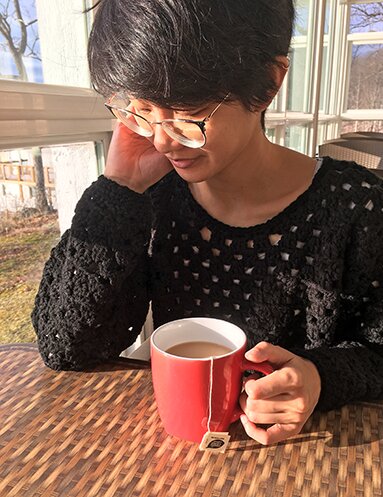
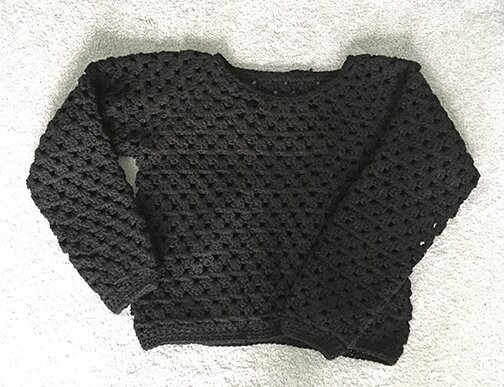
I’ve always want­ed to make a granny stitch sweater. I wear the side­ways sweater a lot in the fall and win­ter for lay­er­ing. The open stitch pat­tern makes it not too warm for indoor heat­ing but the thick­ness of cro­chet makes it warm enough for the amount of time I spend out­doors in pub­lic tran­sit or walk­ing from one place to anoth­er in the city. So I want­ed a sim­i­lar sweater but dif­fer­ent, and granny stitch would have the sim­i­lar effects.

The pat­terns I came across are usu­al­ly worked flat with the front, back, and sleeve pieces seamed togeth­er, like this one, and this one, which look fab­u­lous. But I want­ed to make one that is cro­cheted top-down and in the round so that it incor­po­rates the granny cor­ner stitch­es in the yoke as raglan increases.  

I found this video tuto­r­i­al on Oana’s cro­chet chan­nel, which is bril­liant, espe­cial­ly the way it start­ed with the foun­da­tion “arch­es” made of ch’s and dc’s. There’s no writ­ten pat­tern; it’s more of a for­mu­la to make what fits and try on as you go. I’ve made some mod­i­fi­ca­tions for worsted weight yarn and larg­er hooks. If you’d like to try doing some­thing sim­i­lar, you’d have to watch Oana’s video first for the fol­low­ing to make sense.

The fin­ished mea­sure­ments of my sweater:

Bust: 36″ around
Arm open­ing: 14″ around
Sleeve length: 17.5″ from under­arm
Length: 18.5“
Neck width: 8.5“
Neck depth: 3″ 

I used about 1200 yards of worsted weight yarn and an 8 mm hook, as well as 6.5 mm hook for edgings. 

My mod­i­fi­ca­tions:

Yoke foun­da­tion chain (with larg­er hook): The sweater begins with a foun­da­tion chain of “arch­es” or loops made of ch’s and dc’s. I made 6 arch­es for the back of neck, 2 for each of the sleeves, and 4 for the raglan increas­es, and omit­ted ones in the front, so it’d make a smoother neck­line. So alto­geth­er I start­ed with 14 arches.

Note 1: I had to take away some stitch­es in the raglan increase, so that it is [2 dc, ch 1, 2 dc], because it was start­ing to buck­le with the orig­i­nal [3 dc, ch 1, 3 dc] combination.

Note 2: I turn at the end of each round.

Row 1: first raglan increase (ch 3, 2 dc, ch 1, 2 dc), 3 dc in next 2 arch­es, raglan increase (2 dc, ch 1, 2 dc), 3 dc in next 6 arch­es, raglan increase (as pre­vi­ous one), 3 dc in next 2 arch­es, last raglan increase (2 dc, ch 1, 3 dc).

Rows 2–3: increase at the start of the row as per the video (ch 3, 3 dc between first and sec­ond dc of the row), then work raglan increas­es in ch 1 spaces, and granny stitch­es across, then increase at the end of the row (4 dc between last dc and begin­ning ch 3 chain of last row).

Row 4: increase at the start of the row (ch 3, 2 dc between first and sec­ond dc of the row), then work raglan increas­es in ch 1 spaces, and granny stitch­es across, then increase at the end of the row (3 dc between last dc and begin­ning ch 3 chain of last row).

I then join the front with 3 arch­es, so that now the yoke is joined in the round.

I worked 5 more rounds around the yoke, then joined the front and back at the under­arm. Then worked until the piece is 18″ in length from shoulder.

For the sleeves, I start­ed with join­ing yarn in the stitch at under­arm (where the front and back joined), then worked 2 rounds even, then worked a decrease round.

For the decrease round, I did­n’t fol­low Oana’s video for sleeves, which involves a decrease row of sc stitch­es. I want­ed the entire sweater to be granny stitch­es, so here’s what I did.

Sleeve decrease round: ch 3, 2 dc in same space, [2 dc in next sp, 2 dc in next sp], work granny stitch around, sl st in top of begin­ning ch to join.

Round after decrease: ch 3, 2 dc in same space, work granny stitch around, until the group of stitch­es in [] of pre­vi­ous row, skip the 4 dc in [] (i.e. treat it as one group of granny stitch), work granny stitch in next sp to end, sl st in top of begin­ning ch to join. 

After the first decrease round, I worked decrease round every 6th row three times, then worked 3 rounds even, then worked anoth­er decrease round, and a final round.

For all the edg­ing I switched to a 6.5 mm hook and worked 3 rounds of sc stitch­es around the neck open­ing, cuffs and bot­tom of the sweater. Gen­er­al­ly I work 3 sc in each ch 3 space, and one sc in each dc around the cuffs. 

And that’s it, no seam­ing. And It’s a very quick make, I fin­ished it in a few days. I’d like to try mak­ing anoth­er one with dif­fer­ent colours in the yoke so the raglan increase stitch­es stand out more. 

Hope 2020 brings you many good things ♥