Start the new year right! Use up those scrap yarn to make room for new ones! :D
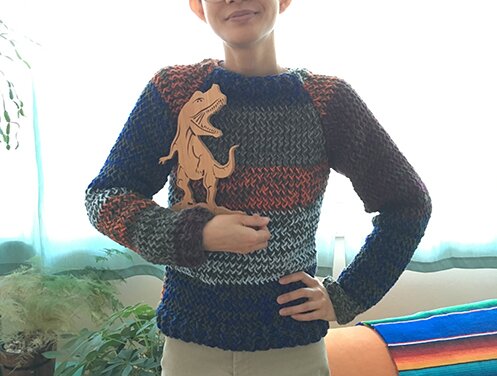
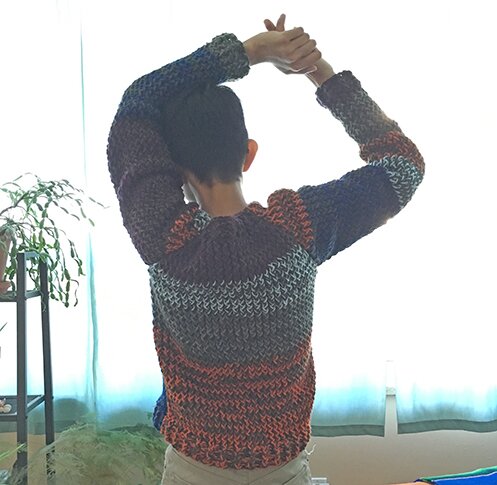
And get some knitting looms! So you can make this happy scrappy loom-knitting sweater! :D
*Disclaimer: I have not received compensations for any knitting loom manufacturers* (but maybe I should…)
I just… love the simplicity, the rustic fisherman look, the double thick, super warm fabric.
So! If you have a knitting loom, or if you’d like to get one and try your hands on loom knitting, here’s how this raglan sweater was made.
(Haven’t tried loom knitting much but want to tackle a sweater project? No fear! I’ll have video tutorials throughout to show you different stitches. I did start with making hats and headbands first but the sweater really isn’t much harder.)
I used:
A 41-peg round loom (the largest in the set). I got mine in a set by Loops & Threads at Michaels (for medium to bulky yarn). It was about $20 and I had a 55% off coupon so it ended up being quite affordable.
Worsted weight yarn. I knitted with 2 strands of yarn held together throughout. I had a large ball of over 1000 yards of forest green (I can’t remember what brand and lost the label) that I used throughout, then just added different colours of scrap yarn as I went.
6 mm crochet hook for casting on. Smaller hook for weaving in ends.
Yarn needle (that came with the loom set).
Sizing:
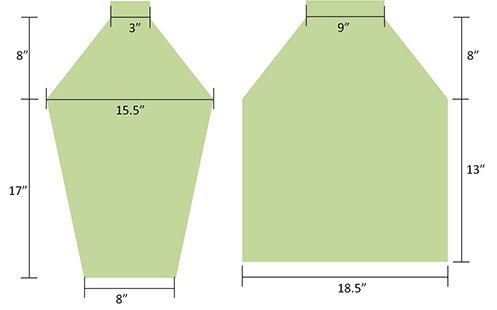
The size I made was 33″ around. I would have liked it larger. Given that I’m on the small scale of humans, I’m going to write the pattern for 37″ so it might work for more people. 37″ is the largest size the loom can make, for this pattern. Below are the approximate measurements, with 2 stitches = 1″ and 3 rows = 1″. The actual measurements for your sweater may vary depending on the kind of yarn you use.
Pattern:
Notes:
Knit with 2 strands of yarn held together throughout. I used one colour consistently and just added different colours of scrap yarn. To change colour, I simply cut the working yarn and tie on a different colour. Very high-tech ;)
The pattern consists of 4 pieces: front, back, 2 sleeves. They’re sewn together in the 4 diagonal seams from under arm to collar, then sleeves are sewn together under the arm, and the sides are sewn together.
Wherever “knit” or “k” is indicated in the pattern, it means the e‑wrap stitch.
Front/Back (make 2):
Cast on all the pegs around the loom using this chain cast on method with a crochet hook, but don’t join in the round. I tend to cast on quite tightly so that the edges are as neat as possible (41 sts.)
Work k1 p1 rib for 6 rows. (video tutorial for k1 p1 rib here)
Continue knitting using the e‑wrap stitch (e‑wrap video here) until piece reach 13″.
Now we begin decreasing towards the collar (yoke).
Yoke row 1: In the next row, decrease 1 by moving the loop on the last peg to the one next to it, e‑wrap and knit off the 2 bottom loops on peg. Continue knitting until 2 stitches remain. Move the loop on the last peg to the second last peg, e‑wrap and knit off the 2 bottom loops on peg. Decrease done! Simple, right? (Here’s a decrease video to summarize the action)
Yoke rows 2–3: Knit 2 rows even.
Repeat yoke rows 1–3 eight more times, then work yoke row 1 (decrease row) once more. 28 rows in yoke altogether, 21 stitches remain.
Work k1 p1 rib for 5 rows.
Bind off (bind off video here).
Sleeves (make 2):
Chain cast on (same as front/back) 19 sts.
Work k1 p1 rib for 5 rows.
Sleeve row 1–7: Knit 7 rows even.
Sleeve row 8 (increase): knit 2, make 1 (m1), knit until 2 stitches remain, m1, knit 2. (make 1 video here — the person in the video uses a different knit stitch method but you can continue using the e‑wrap for this)
Repeat sleeve rows 1–8 seven more times — 64 rows altogether, increased to 35 sts.
Now we decrease for shoulder.
Shoulder row 1: knit 1 row even.
Shoulder row 2: decrease 1, knit till 2 stitches remain, decrease (see yoke row 1 above).
Repeat shoulder rows 1–2 thirteen more times, 28 rows altogether in shoulder, 7 stitches remain.
Work k1 p1 rib for 5 rows. Bind off.
Assembly:
With wrong side facing, and using one strand of yarn only (to reduce bulk), sew raglan seams together connecting sleeve pieces to front and back pieces. Sew sleeve together under the arm and continue sewing together the sides. Repeat with other sleeve/side.
Voilà !
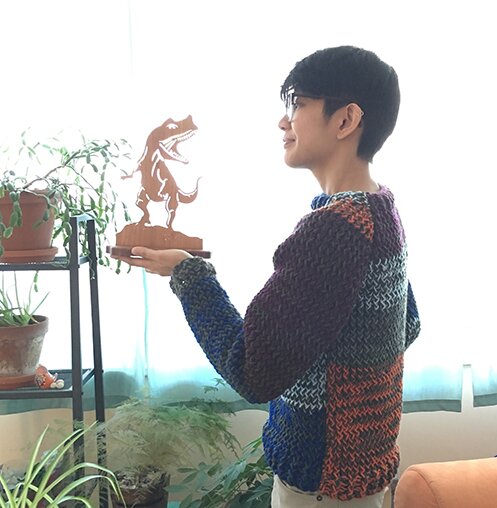
And! I got this incredible t‑rex wooden sculpture from a dear friend :D Isn’t it the most awesome thing?
If you do give it a try do drop me a line! Cheers to a fantastic roaring year!


Il est bien joli ce pull et il semble bien chaud et confortable. Je ne pensais pas que l’on pouvait réaliser un pull avec ce métier circulaire! j’avais , en revanche, vu récemment sur Ravelry un très beau châle, mais le métier utilisé était droit (ou rectangulaire).
It is indeed very warm and thick! I have seen shawls made with long or rectangular looms before but have no idea how it’s done… I just got a long loom for Christmas so it’s time to investigate! :D
I’m new to looming things outside of scarves, so I’m sad to say I don’t quite know what you mean when you say, “Sleeve row 1–7: Knit 5 rows even.”
Does it mean knit only 5 rows and mentally call it 7 or do you knit 35 rows (5 rows for every 1 of 7 rows)?
Hi Tom! I’m so sorry, this was an error! Sorry about the confusion and thank you for pointing this out! I must have been thinking about 5 but it’s actually 7. So you would just knit the first 7 rows of sleeve even (without increasing or decreasing). Happy loom knitting!