may the porg be with you

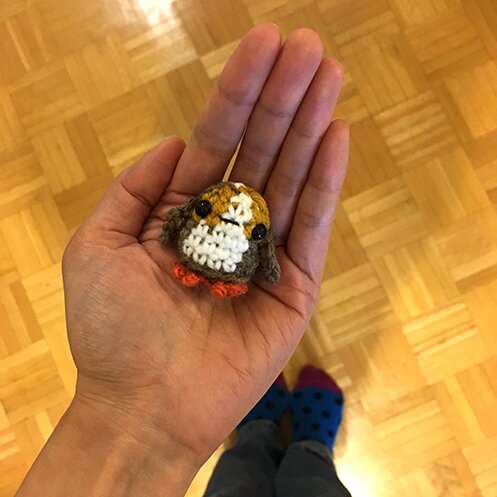
I made a tiny porg!

Fan opin­ions about them seem to polar­ize. I hap­pen to love them like I love all fuzzy round-shaped crea­tures. Its shape is so amigu­ru­mi-ready, and it remind­ed me of my pen­guin tots. I could­n’t help but had to make one. 

If you’ve made the pen­guin tots before, the porg is not dif­fer­ent struc­tural­ly but a bit more com­pli­cat­ed with the colour changes.

It’s very car­ry-able and rides well in pock­et, so it can always be with you :)

The upturned mouth of the actu­al porg makes my tiny ver­sion look sad, so I opt­ed for a reg­u­lar mouth instead. 

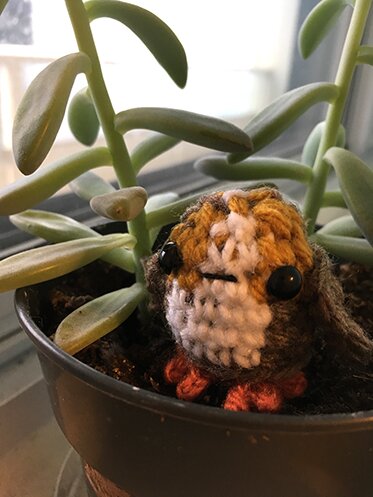
Here it is con­tem­plat­ing life, or decid­ing what to eat for lunch, by the jade plant.

To make your own tiny porg, you’ll need:

Small amount of mus­tard, white, brown and orange yarn in worsted weight

3.5 mm hook 

2.5 mm hook (for feet and weav­ing in ends)

2 black safe­ty eyes (3mm), or round black beads

Black thread and sewing needle

Yarn nee­dle

Yarn ends (for stuff­ing), or poly­ester stuffing

Pat­tern:

Body:

Note: begin­ning ch 1 does not count as a stitch throughout.

Round 1: With brown, ch 4, 2 sc in 2nd ch from hook, sc in next ch, 3 sc in last ch, sc in the remain­ing loop of the next ch (the ch that has only 1 sc in it), sc in the next ch (the ch with the begin­ning 2 sc in it), sl st in first sc of round.

Round 2: ch 1, 2 sc in first sc, sc in next 3 sc, 3 sc in next sc, sc in next 3 sc, sc in next sc (the sc with the begin­ning 2 sc in it), sl st in first sc of round.

In the next round we begin to incor­po­rate oth­er colours. Here’s a tuto­r­i­al on how to change colours seam­less­ly, in case it’s helpful.

Round 3: ch 1, in back loop only, sc in next 7 sc. When com­plet­ing the 7th sc, attach and change to white. Car­ry­ing the brown yarn (i.e. wrap it in your stitch) as you cro­chet with white, sc in the next 4 sc. When com­plet­ing the 4th sc, change back to brown, sc in last sc, sl st in first sc.

Round 4: With brown, ch 1, sc in next 7 sc, change to white, car­ry­ing the brown as you go, sc in next 4 sc, change to brown, sc in last sc, sl st in first sc.

Round 5: Repeat round 4.

Round 6: With brown, ch 1, sc in next 6 sc. Change to yel­low and car­ry­ing brown as you go, sc in next 2 sc, change to white and car­ry the brown and yel­low as you go, sc in next 2 sc, change to yel­low and car­ry the brown as you go, sc in next 2 sc, change to brown, sl st in first sc.

Round 7: Repeat around 6.

After round 7, install safe­ty eyes (or sew on beads for eyes) in between the 2 yel­low stitch­es between rounds 6 and 7. Sew on mouth. Stuff with yarn ends or stuffing.

Round 8: With brown, ch 1, 2 sc tog three times, change to yel­low and fas­ten off brown, 2 sc tog with yel­low, change to white and car­ry the yel­low as you go, 2 sc tog with white, change to yel­low and fas­ten off white, 2 sc tog with yel­low, sl st in first sc of round, fas­ten off, leave a long tail. Weave the tail in the remain­ing stitch­es around and cinch the open­ing close, secure and fas­ten off, weave in ends.

Wings (make 2): With brown, ch 2, 5 sc in 2nd ch from hook, ch 2, sl st in 2nd ch from hook (form­ing a point), sc in ch with the 5 sc in it, sl st in first sc of round, leave a tail for sewing, fas­ten off. (I only leave a tail for sewing on one wing, not both.

Sew on wings: Posi­tion the wing with the yarn tail for sewing on the side of the body, thread the yarn nee­dle in the yarn tail, insert nee­dle where you want the first wing, pull the nee­dle through the body so the nee­dle comes out on the oth­er side where you want the oth­er wing to be. Thread the oth­er wing through the nee­dle, and sew back and forth through the body to secure both wings at the same time. Fas­ten off, weave in ends.

Feet:

Feet are made linked togeth­er with a few ch in between.

With orange, *ch 3, sl st in 2nd ch from hook, sl st in next ch, ch 2, sl st in 2nd ch from hook, sl st in very first ch made, ch 3, sl st in 2nd ch from hook, sl st in next ch, sl st in very first ch made*, ch 2 (link between feet), then repeat from * to * once more. Fas­ten off and leave a long tail for sewing.

Posi­tion feet under body and sew on with yarn tail, fas­ten off and weave in ends.

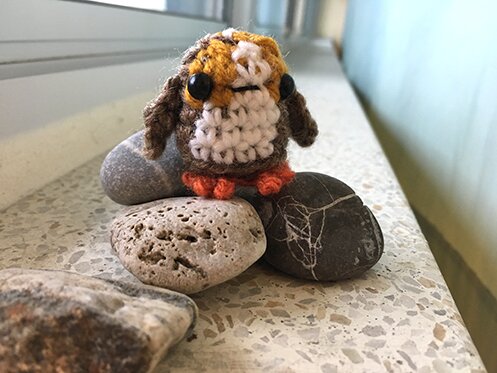
The porg is ready for adventures!

Tiny porg wish­es every­one an awe­some week!


this week’s awesome finds

Just because the hol­i­days are over does­n’t mean the home can’t smell fes­tive! Easy to make wax sachets from Hel­lo Glow.


This cozy cardi­gan was made with a round knit­ting loom! Must try. From Good Knit Kiss­es.


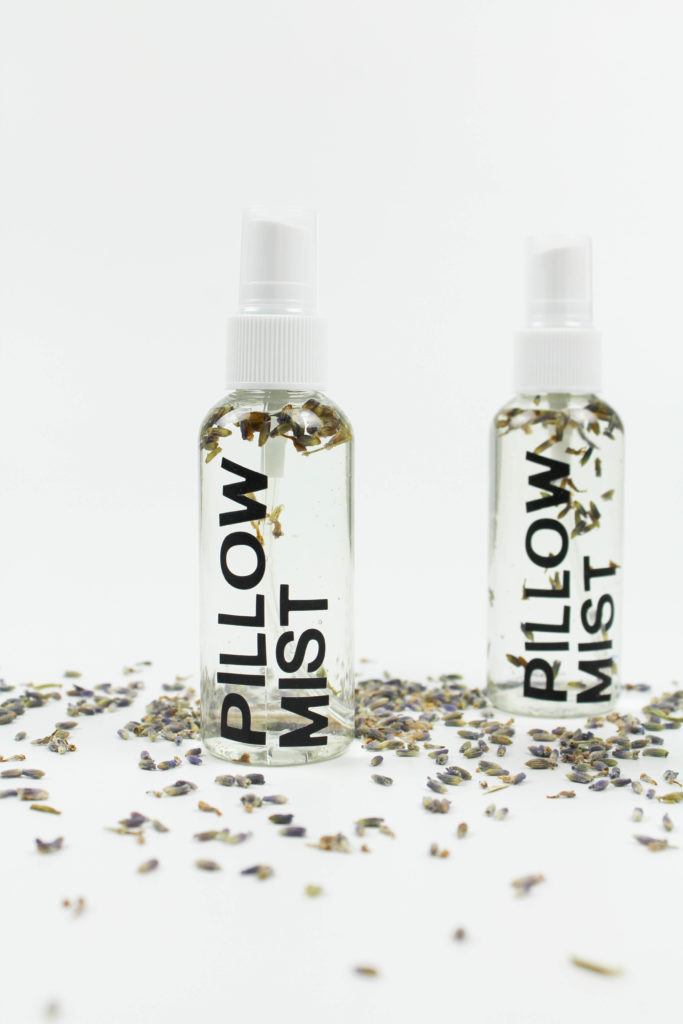
Good night’s sleep and relax­ation in a bot­tle makes a great home­made gift :) Pil­low mist from Let’s Min­gle.


Oh my good­ness, a gor­geous cable sweater and it’s free! Cro­chet pat­tern by Sewrel­la.


Lion Brand Yarn has come up with some designs that I real­ly like late­ly, such as this sim­ple, relaxed-look­ing cardigan.


And this nice cowl — per­fect for prac­tic­ing cables and I like it’s clever construction.


These felt­ed cats! Made using a cook­ie cut­ter! Bril­liant! Tuto­r­i­al from Cat at Roof.


One of my favourite things from the Last Jedi :D Pat­tern by The Geeky Hook­er on Rav­el­ry.


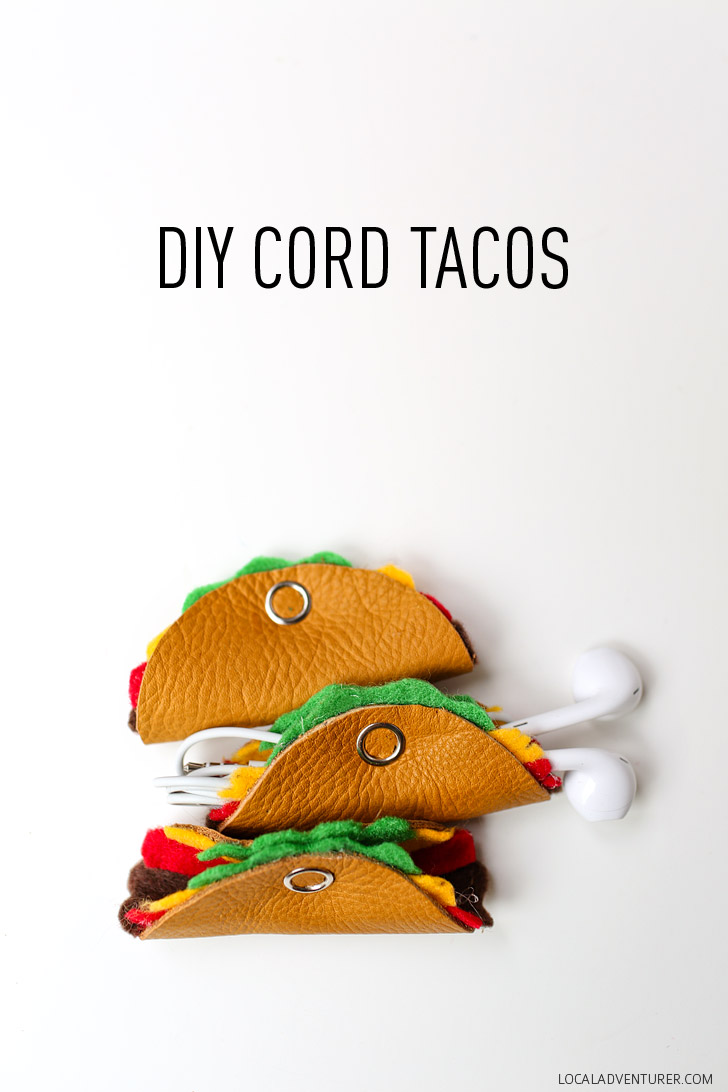
I think I’ve prob­a­bly post­ed this before but it’s so awe­some, no one would mind if I post it again! Cord tacos as easy to make as real tacos :D From Local Adven­tur­er


Hope every­one’s hav­ing an awe­some week­end! Stay crafty :D


happy scrappy sweater

Start the new year right! Use up those scrap yarn to make room for new ones! :D

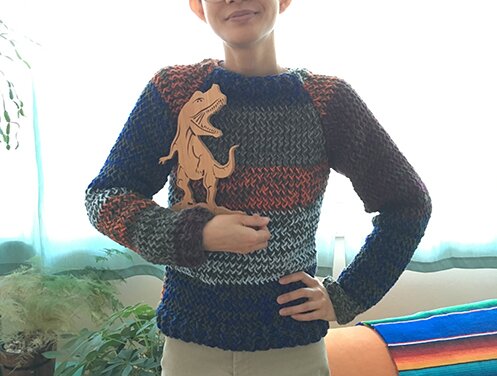
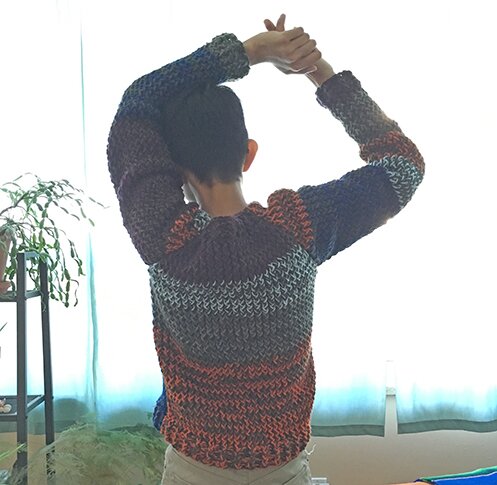
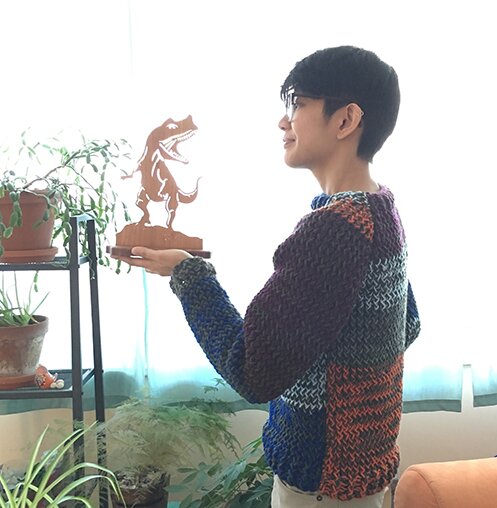
And get some knit­ting looms! So you can make this hap­py scrap­py loom-knit­ting sweater! :D

*Dis­claimer: I have not received com­pen­sa­tions for any knit­ting loom man­u­fac­tur­ers* (but maybe I should…)

I just… love the sim­plic­i­ty, the rus­tic fish­er­man look, the dou­ble thick, super warm fabric.

So! If you have a knit­ting loom, or if you’d like to get one and try your hands on loom knit­ting, here’s how this raglan sweater was made. 

(Haven’t tried loom knit­ting much but want to tack­le a sweater project? No fear! I’ll have video tuto­ri­als through­out to show you dif­fer­ent stitch­es. I did start with mak­ing hats and head­bands first but the sweater real­ly isn’t much harder.)

I used:

A 41-peg round loom (the largest in the set). I got mine in a set by Loops & Threads at Michaels (for medi­um to bulky yarn). It was about $20 and I had a 55% off coupon so it end­ed up being quite affordable.

Worsted weight yarn. I knit­ted with 2 strands of yarn held togeth­er through­out. I had a large ball of over 1000 yards of for­est green (I can’t remem­ber what brand and lost the label) that I used through­out, then just added dif­fer­ent colours of scrap yarn as I went. 

6 mm cro­chet hook for cast­ing on. Small­er hook for weav­ing in ends.

Yarn nee­dle (that came with the loom set).

Siz­ing:

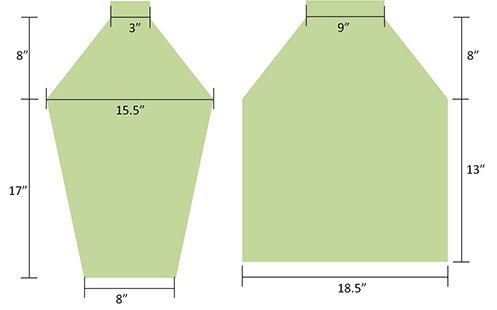
The size I made was 33″ around. I would have liked it larg­er. Giv­en that I’m on the small scale of humans, I’m going to write the pat­tern for 37″ so it might work for more peo­ple. 37″ is the largest size the loom can make, for this pat­tern. Below are the approx­i­mate mea­sure­ments, with 2 stitch­es = 1″ and 3 rows = 1″. The actu­al mea­sure­ments for your sweater may vary depend­ing on the kind of yarn you use.

Pat­tern:

Notes: 

Knit with 2 strands of yarn held togeth­er through­out. I used one colour con­sis­tent­ly and just added dif­fer­ent colours of scrap yarn. To change colour, I sim­ply cut the work­ing yarn and tie on a dif­fer­ent colour. Very high-tech ;)

The pat­tern con­sists of 4 pieces: front, back, 2 sleeves. They’re sewn togeth­er in the 4 diag­o­nal seams from under arm to col­lar, then sleeves are sewn togeth­er under the arm, and the sides are sewn together. 

Wher­ev­er “knit” or “k” is indi­cat­ed in the pat­tern, it means the e‑wrap stitch.

Front/Back (make 2):

Cast on all the pegs around the loom using this chain cast on method with a cro­chet hook, but don’t join in the round. I tend to cast on quite tight­ly so that the edges are as neat as pos­si­ble (41 sts.)

Work k1 p1 rib for 6 rows. (video tuto­r­i­al for k1 p1 rib here)

Con­tin­ue knit­ting using the e‑wrap stitch (e‑wrap video here) until piece reach 13″. 

Now we begin decreas­ing towards the col­lar (yoke).

Yoke row 1: In the next row, decrease 1 by mov­ing the loop on the last peg to the one next to it, e‑wrap and knit off the 2 bot­tom loops on peg. Con­tin­ue knit­ting until 2 stitch­es remain. Move the loop on the last peg to the sec­ond last peg, e‑wrap and knit off the 2 bot­tom loops on peg. Decrease done! Sim­ple, right? (Here’s a decrease video to sum­ma­rize the action)

Yoke rows 2–3: Knit 2 rows even.

Repeat yoke rows 1–3 eight more times, then work yoke row 1 (decrease row) once more. 28 rows in yoke alto­geth­er, 21 stitch­es remain.

Work k1 p1 rib for 5 rows. 

Bind off (bind off video here).

Sleeves (make 2):

Chain cast on (same as front/back) 19 sts. 

Work k1 p1 rib for 5 rows.

Sleeve row 1–7: Knit 7 rows even.

Sleeve row 8 (increase): knit 2, make 1 (m1), knit until 2 stitch­es remain, m1, knit 2. (make 1 video here — the per­son in the video uses a dif­fer­ent knit stitch method but you can con­tin­ue using the e‑wrap for this)

Repeat sleeve rows 1–8 sev­en more times — 64 rows alto­geth­er, increased to 35 sts.

Now we decrease for shoul­der.

Shoul­der row 1: knit 1 row even.

Shoul­der row 2: decrease 1, knit till 2 stitch­es remain, decrease (see yoke row 1 above).

Repeat shoul­der rows 1–2 thir­teen more times, 28 rows alto­geth­er in shoul­der, 7 stitch­es remain.

Work k1 p1 rib for 5 rows. Bind off.

Assem­bly:

With wrong side fac­ing, and using one strand of yarn only (to reduce bulk), sew raglan seams togeth­er con­nect­ing sleeve pieces to front and back pieces. Sew sleeve togeth­er under the arm and con­tin­ue sewing togeth­er the sides. Repeat with oth­er sleeve/side.

Voilà!

And! I got this incred­i­ble t‑rex wood­en sculp­ture from a dear friend :D Isn’t it the most awe­some thing?

If you do give it a try do drop me a line! Cheers to a fan­tas­tic roar­ing year!